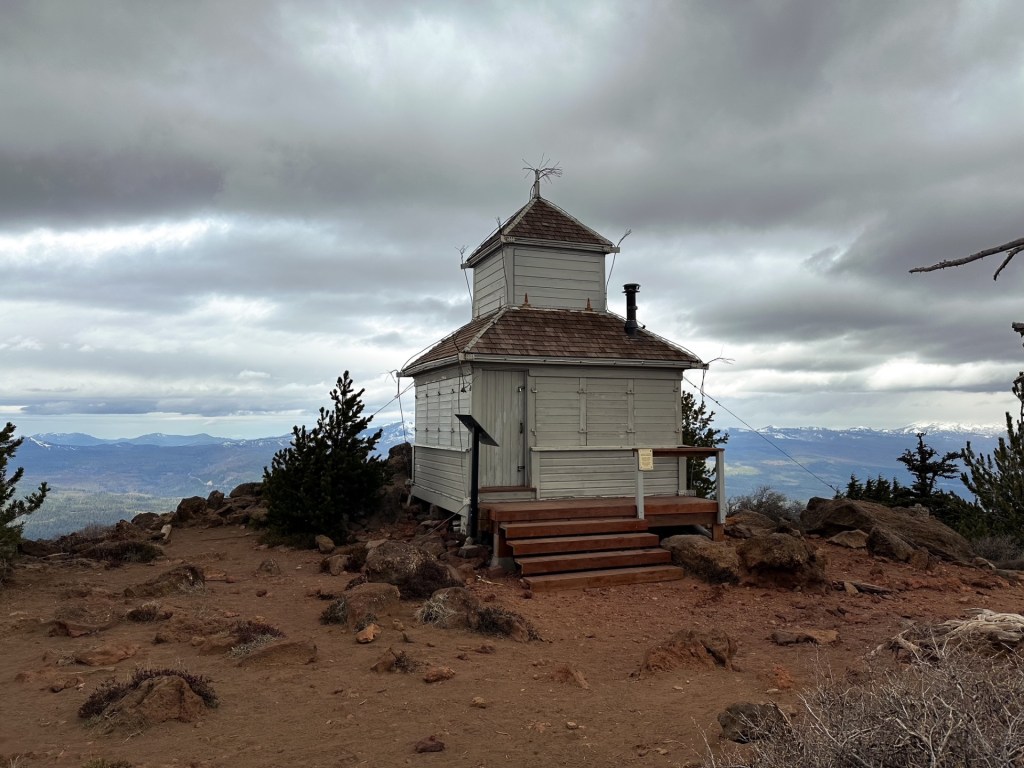
Please reference our original trip report on Black Butte L.O. for information on the history of the lookout, status, our initial site visit, and directions (post).
Date Revisited: March 29, 2026
Trip Report.
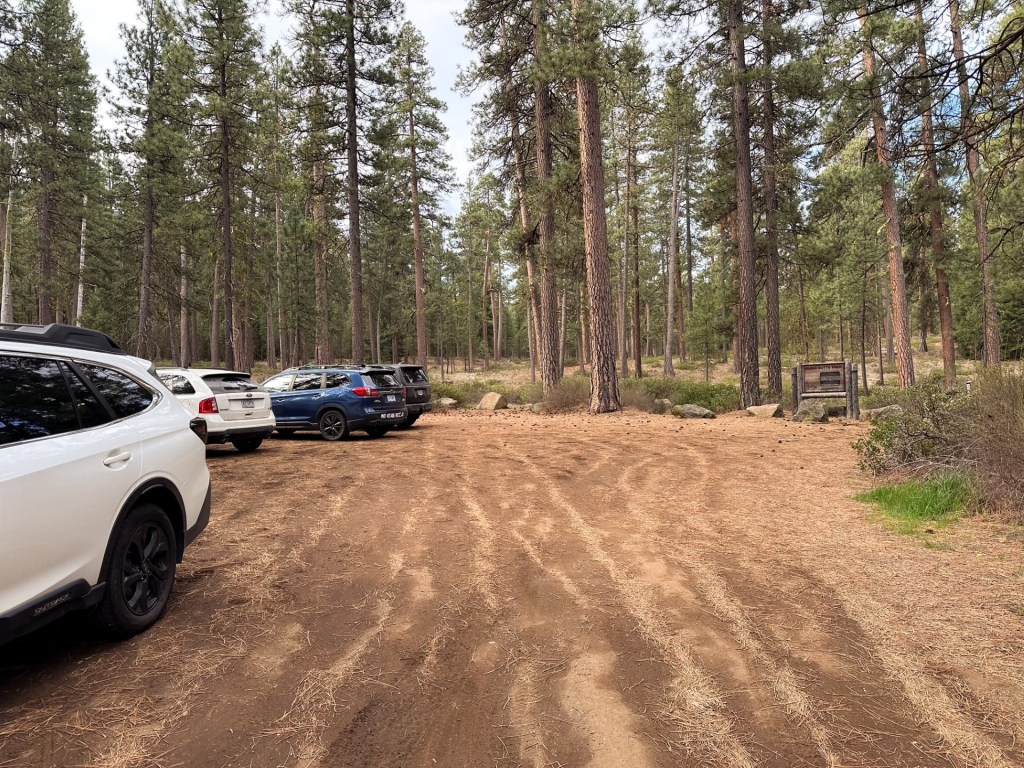
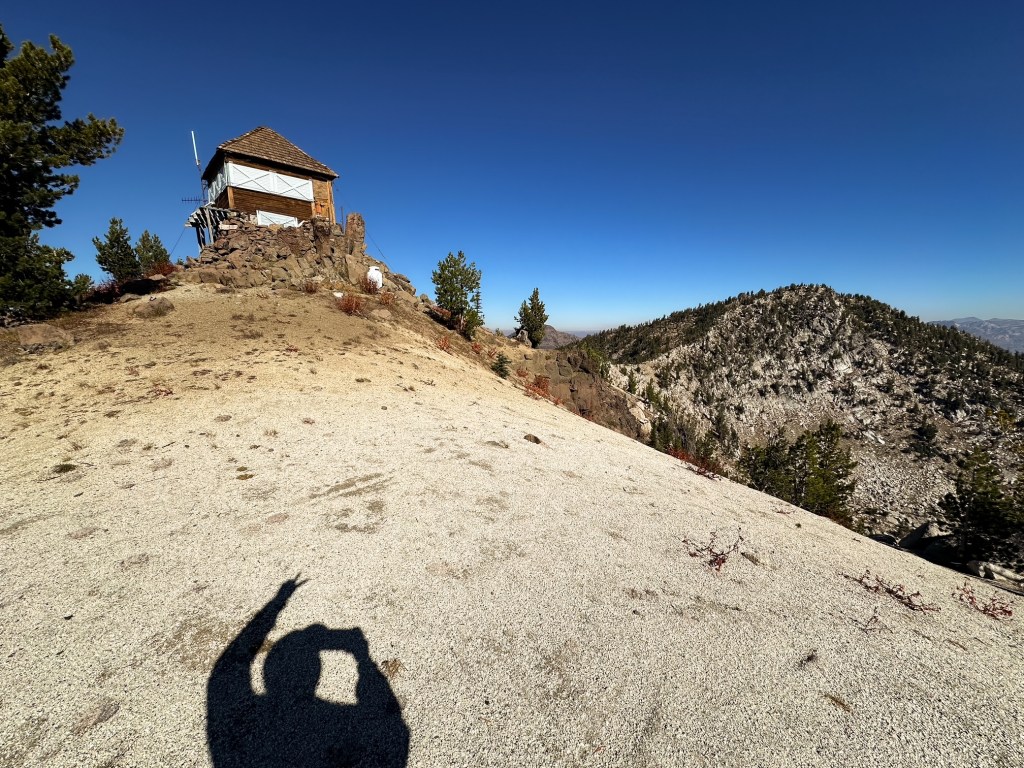
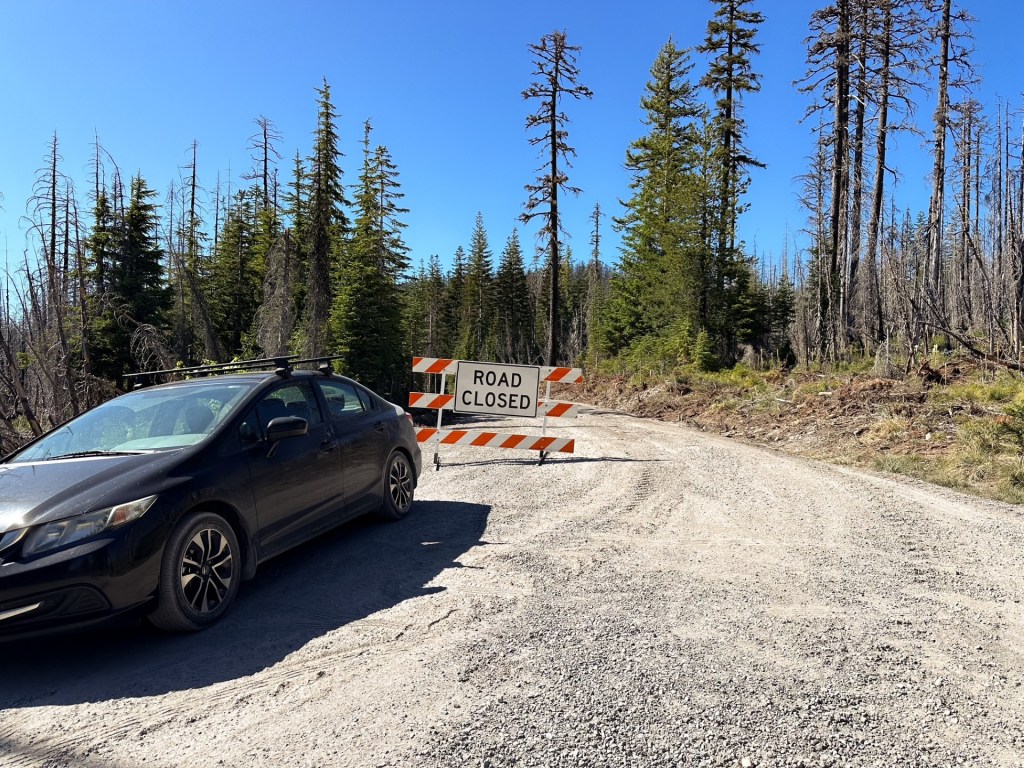
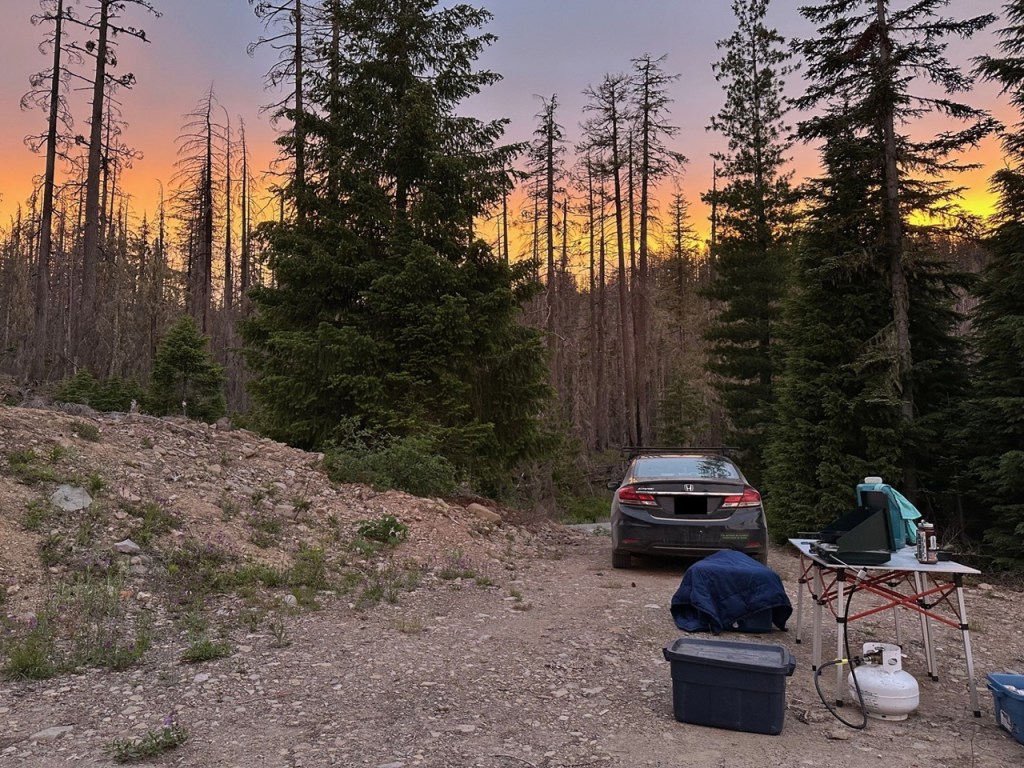
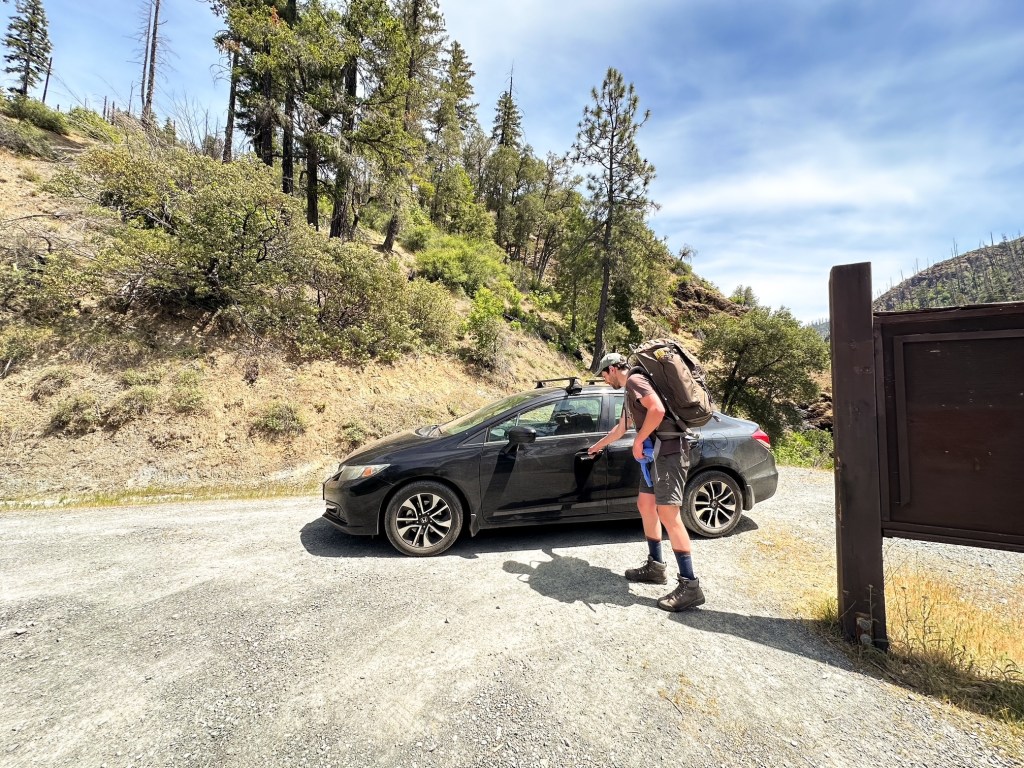
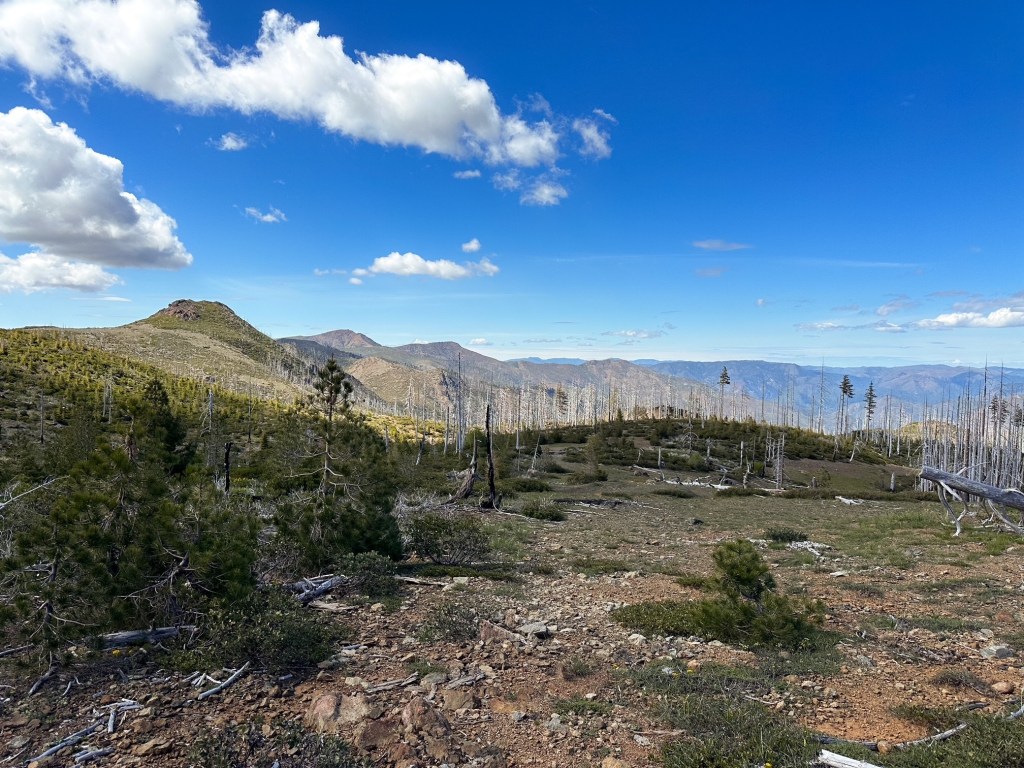
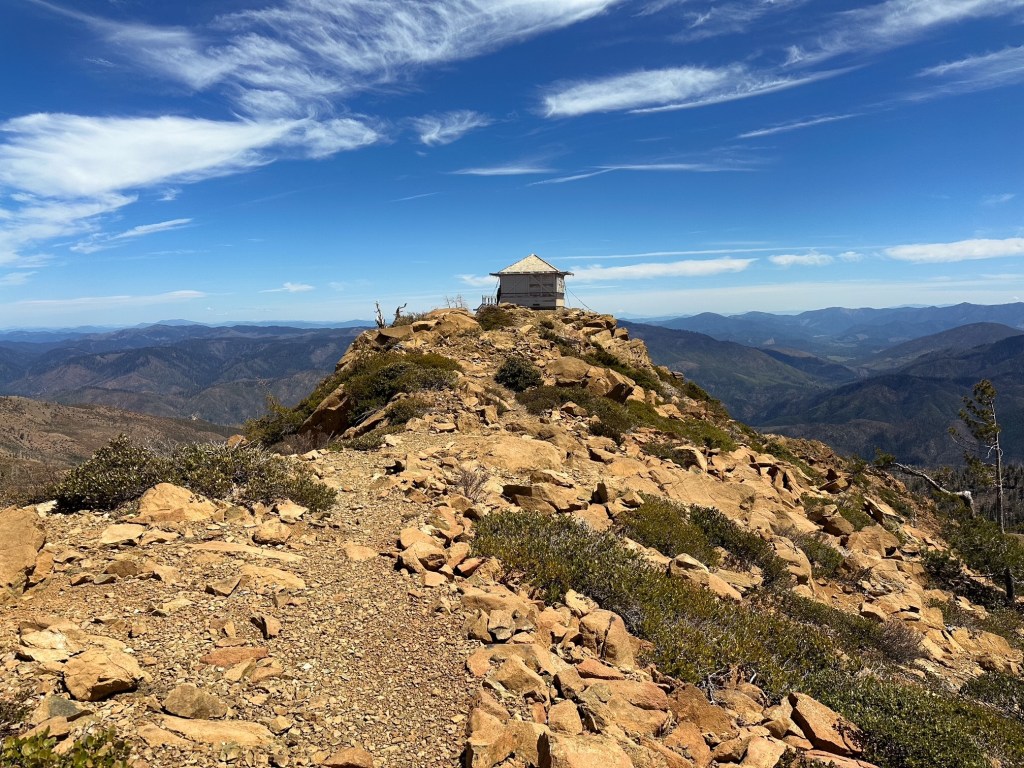
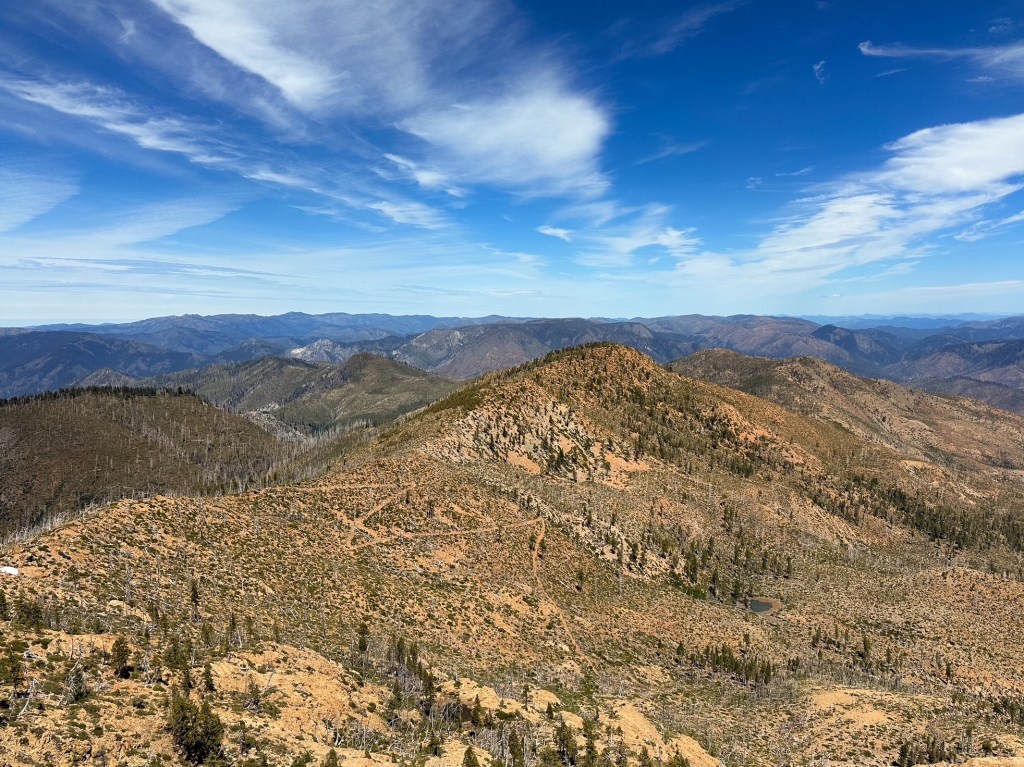
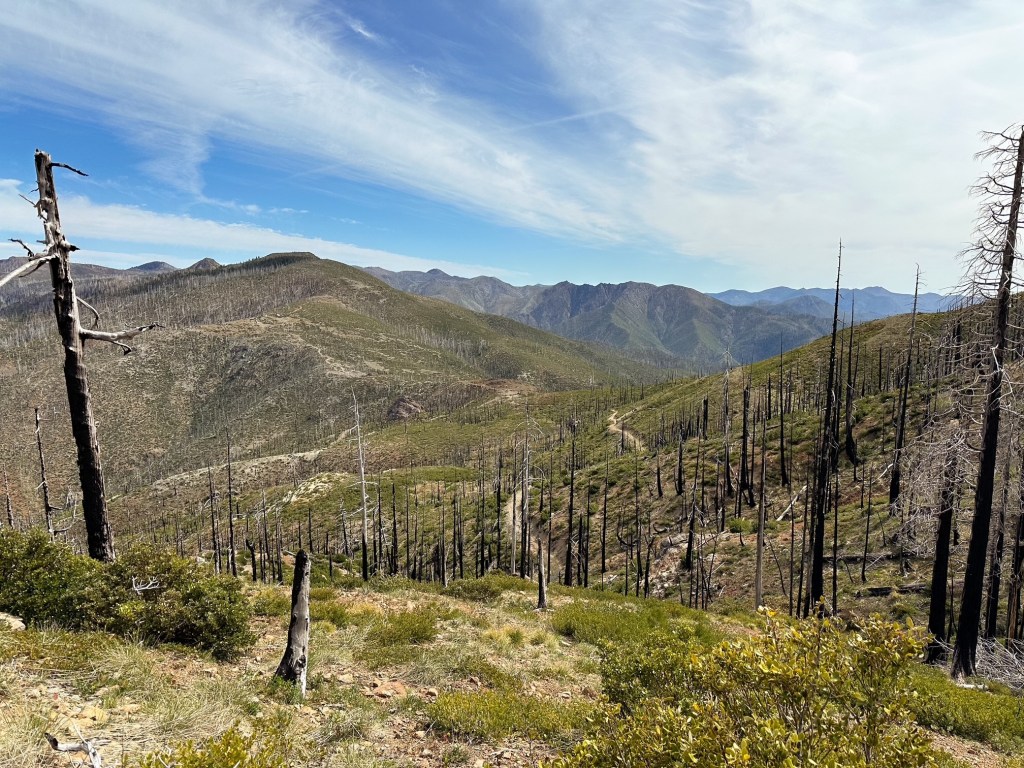
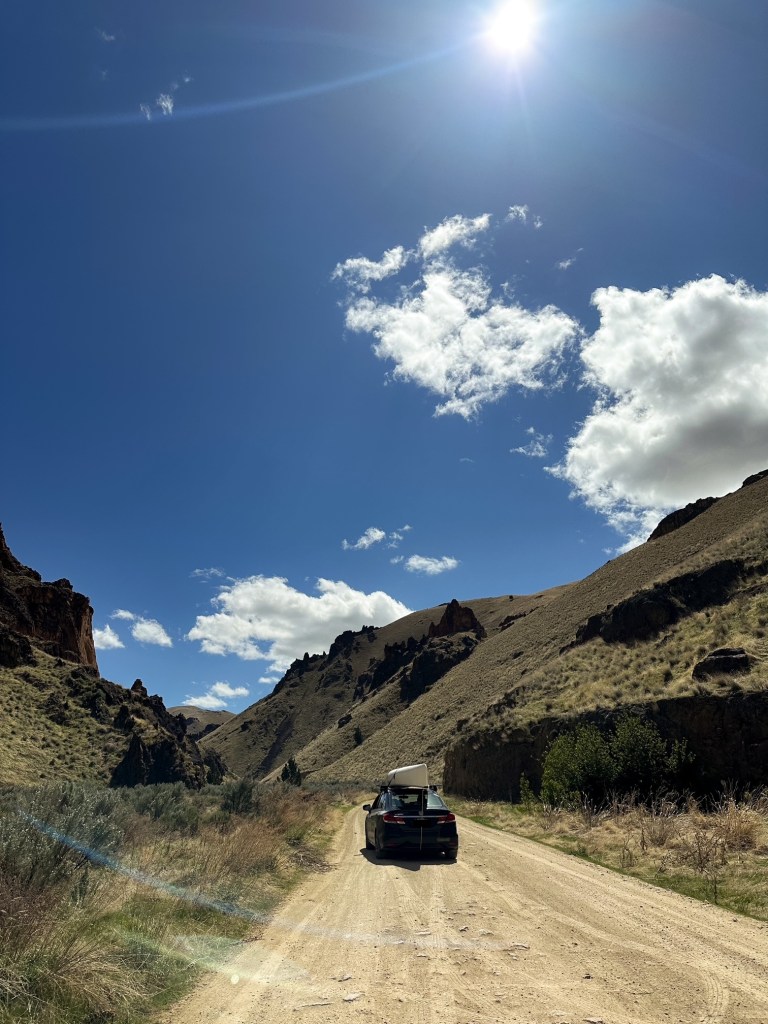
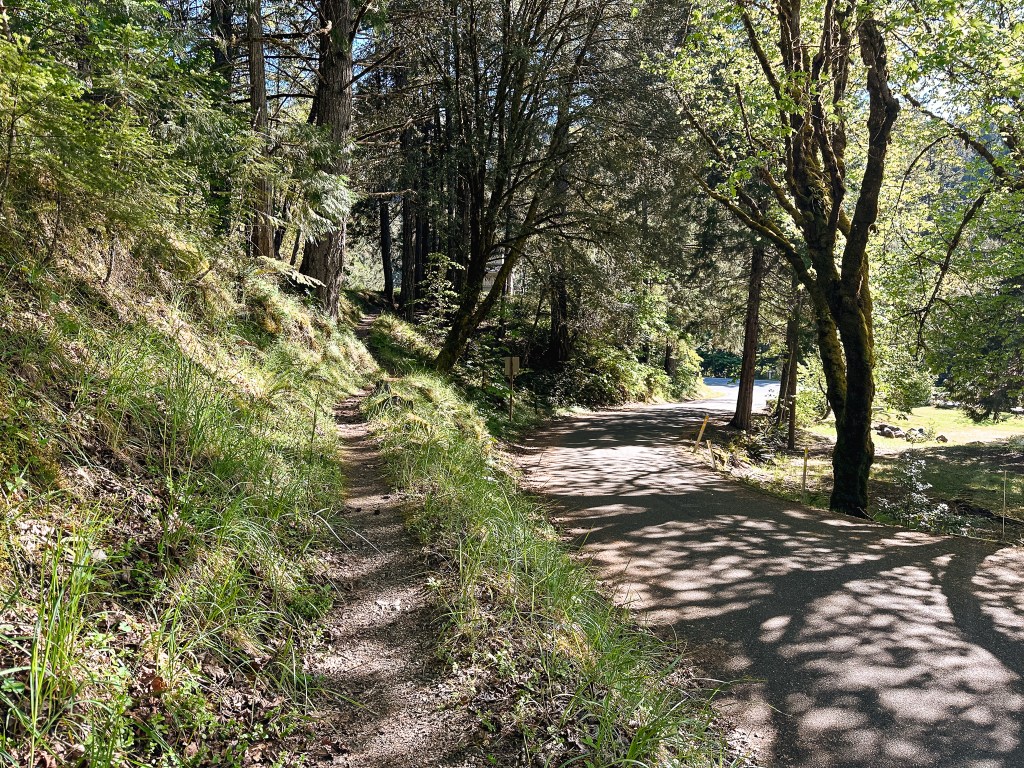
Black Butte L.O. was one of the first few fire lookouts I had visited prior to meeting Garnet. It was on our list to return since he had never been, but was a lower priority for him due to the popularity of the hike. This winter has been unseasonably dry which won’t bode well for the upcoming fire season. Though it has been beneficial for early access to some areas such as this. We decided to kick off our camping season early for a quick one night when the weather conditions looked favorable. This led us to dispersed camping for a night near Black Butte so we could hike to the summit before driving back home. I wasn’t confident in how my car would fair on the road to the upper trailhead and only have a vague memory of the conditions from 2018. We opted to take the longer route from the lower trailhead that I knew would be accessible for us. This is located on the opposite side of the butte from the upper trailhead access. From HWY-20, we turned on to the paved Camp Sherman road and followed this to the fork where it breaks off between the resort and campgrounds. We stayed right towards the campgrounds where the road turns to NF-14. The trailhead was the next immediate right turn off of NF-1430. If you reach the Head of the Metolious River you have gone too far. The NF-1430 road turned to cinder with some rocks and potholes to avoid. It is only a short distance from the pavement to the trailhead though and we had no issues finding a spot to park at 9AM.
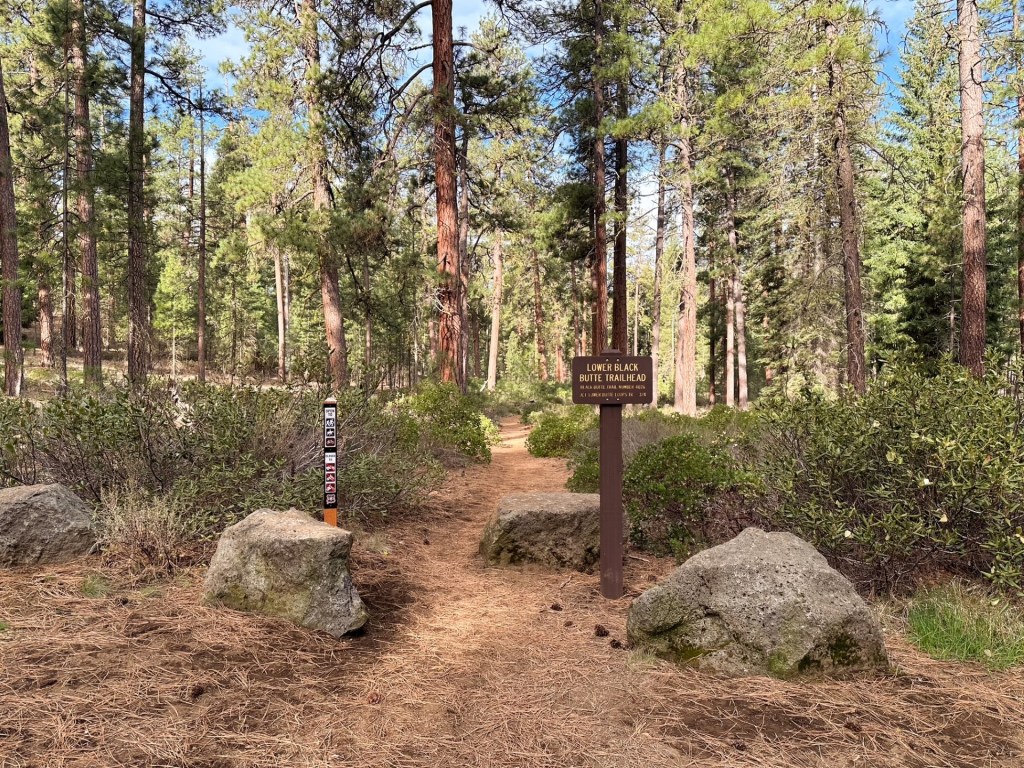
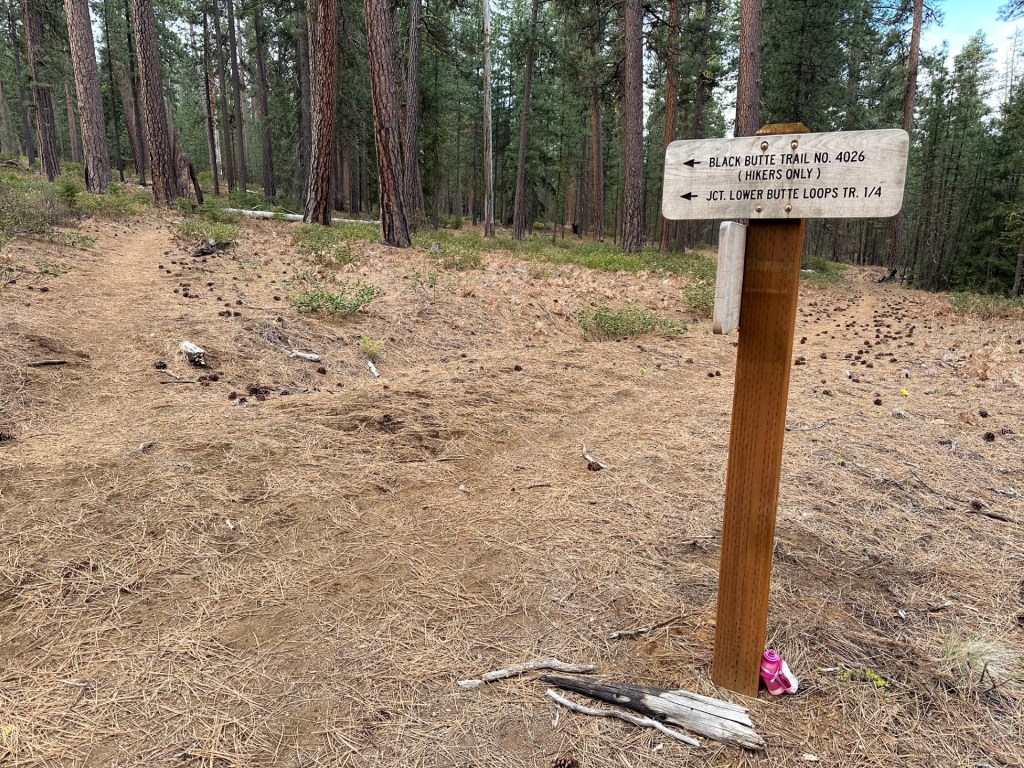
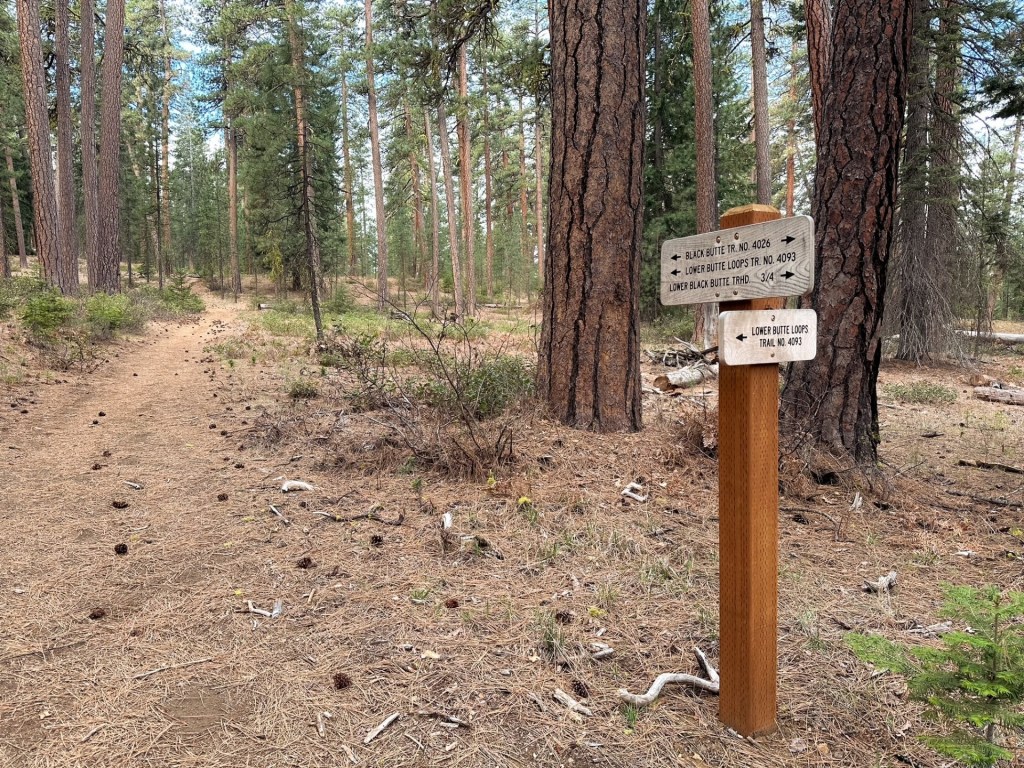
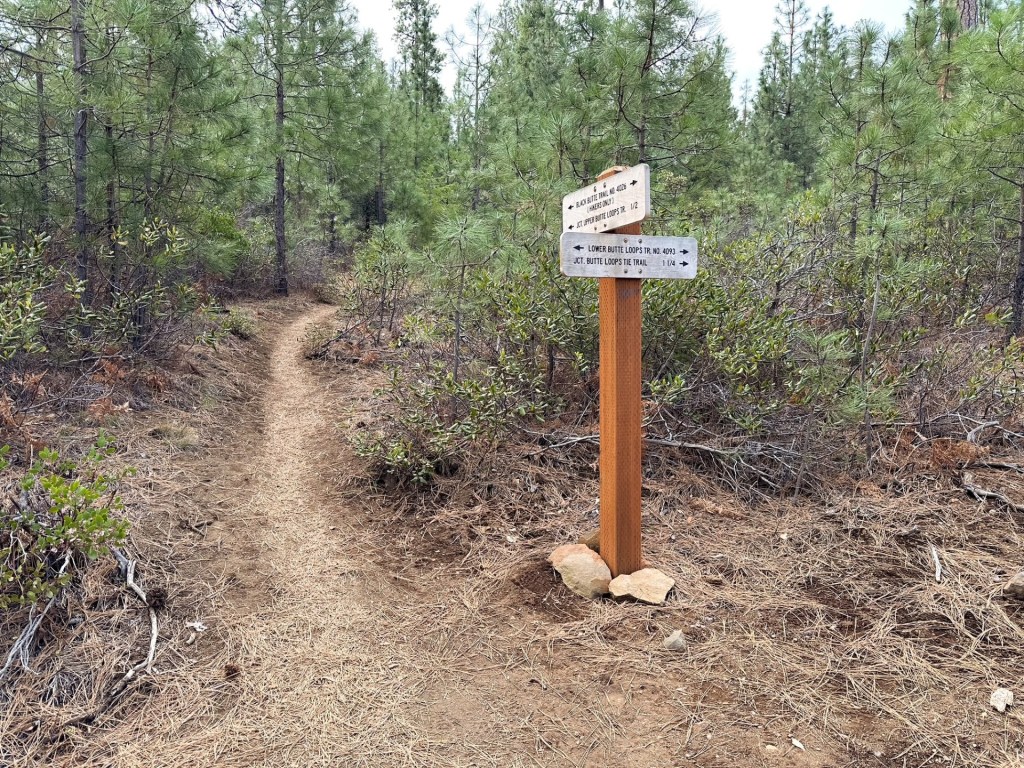
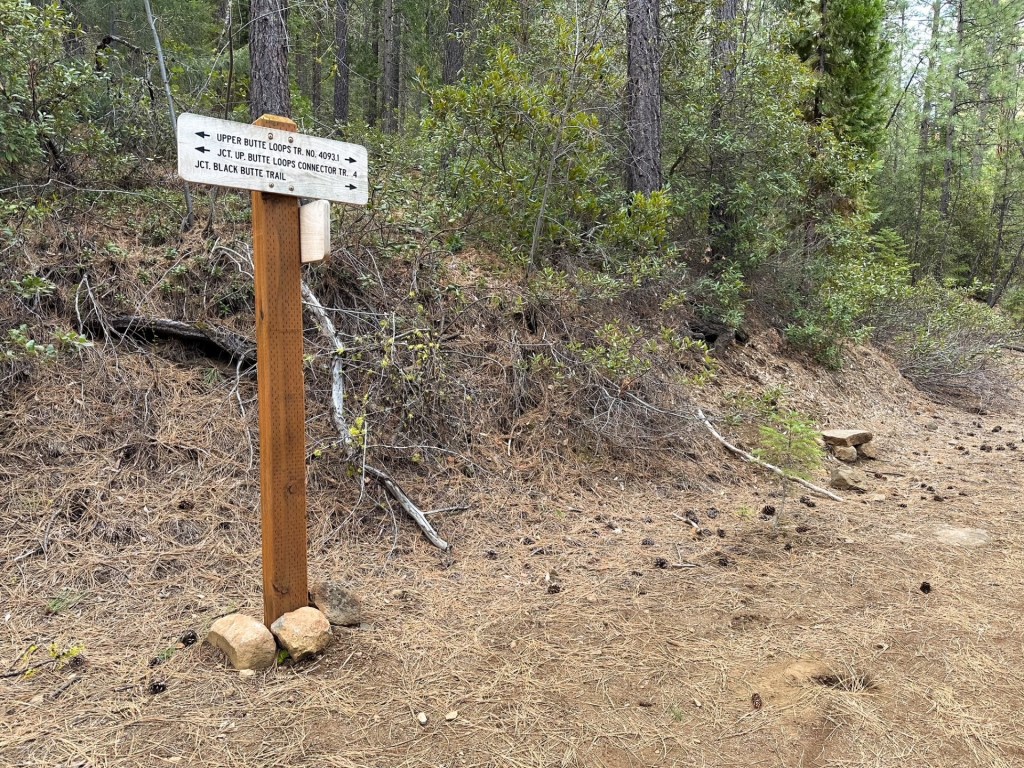
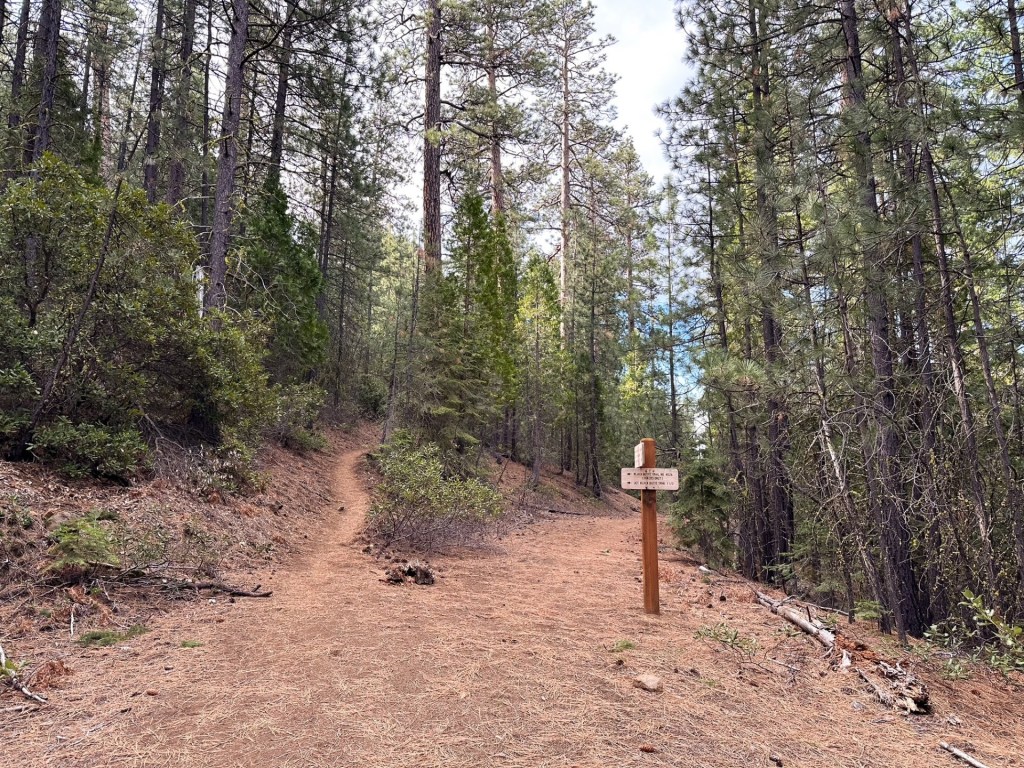
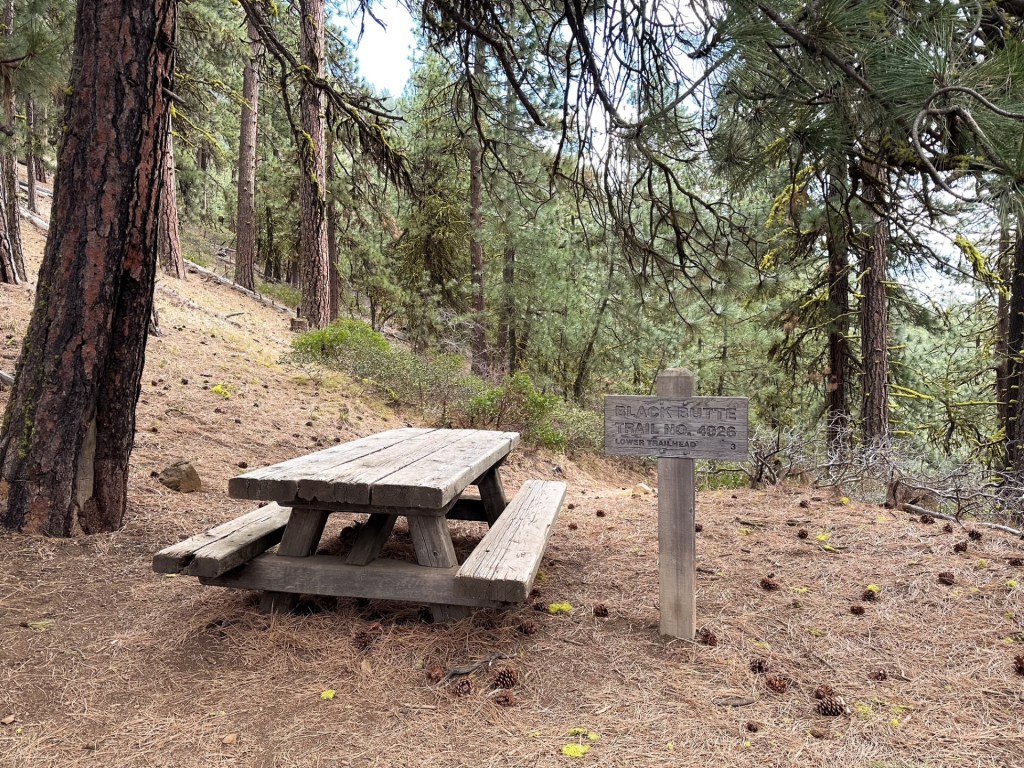
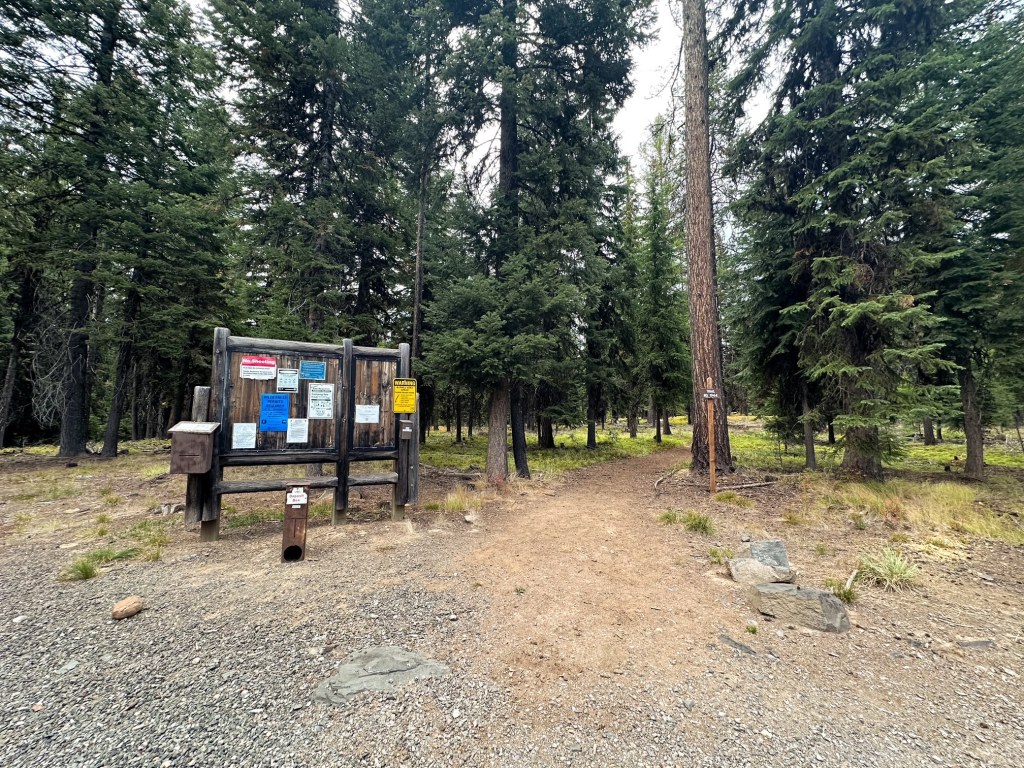
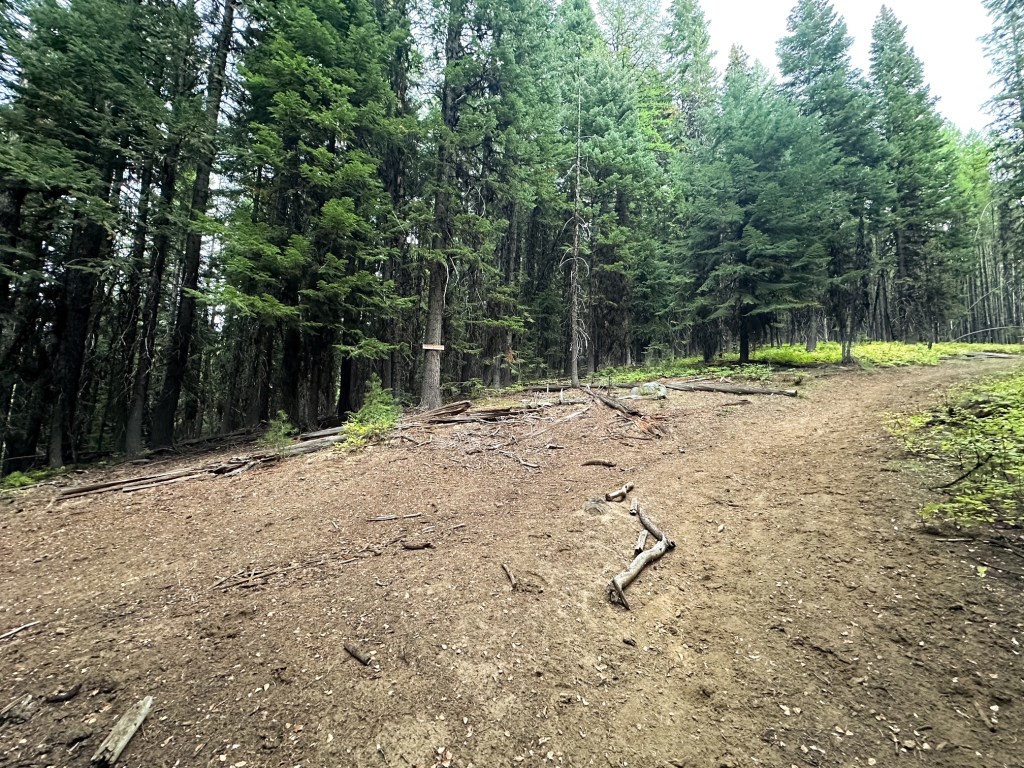
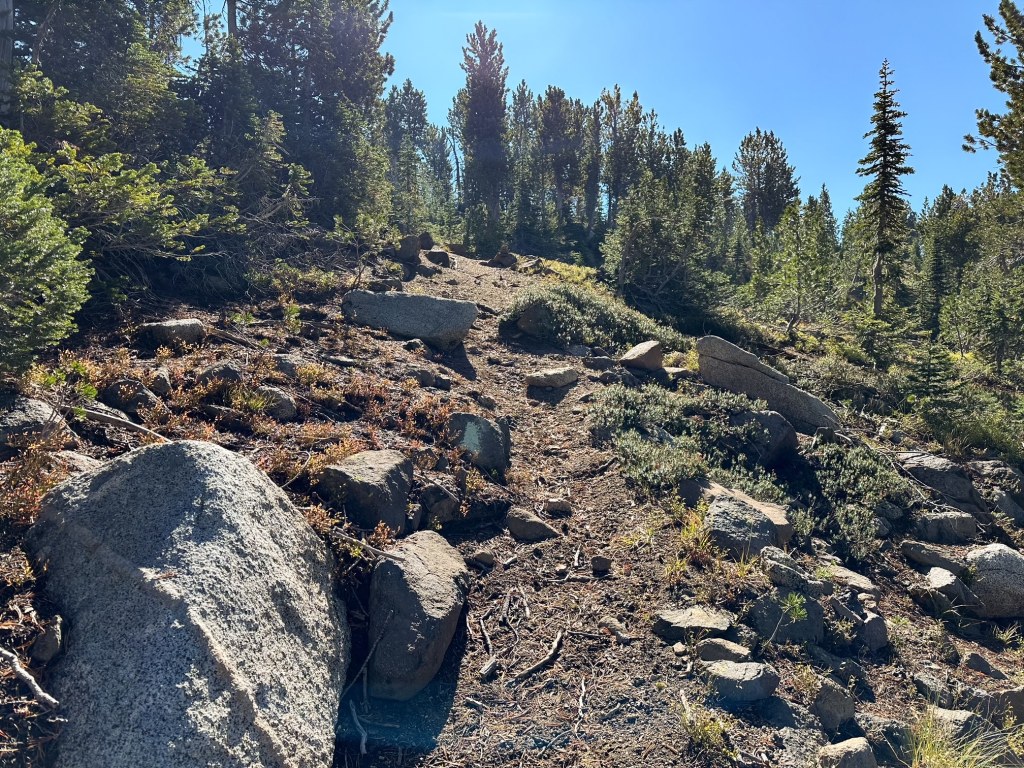
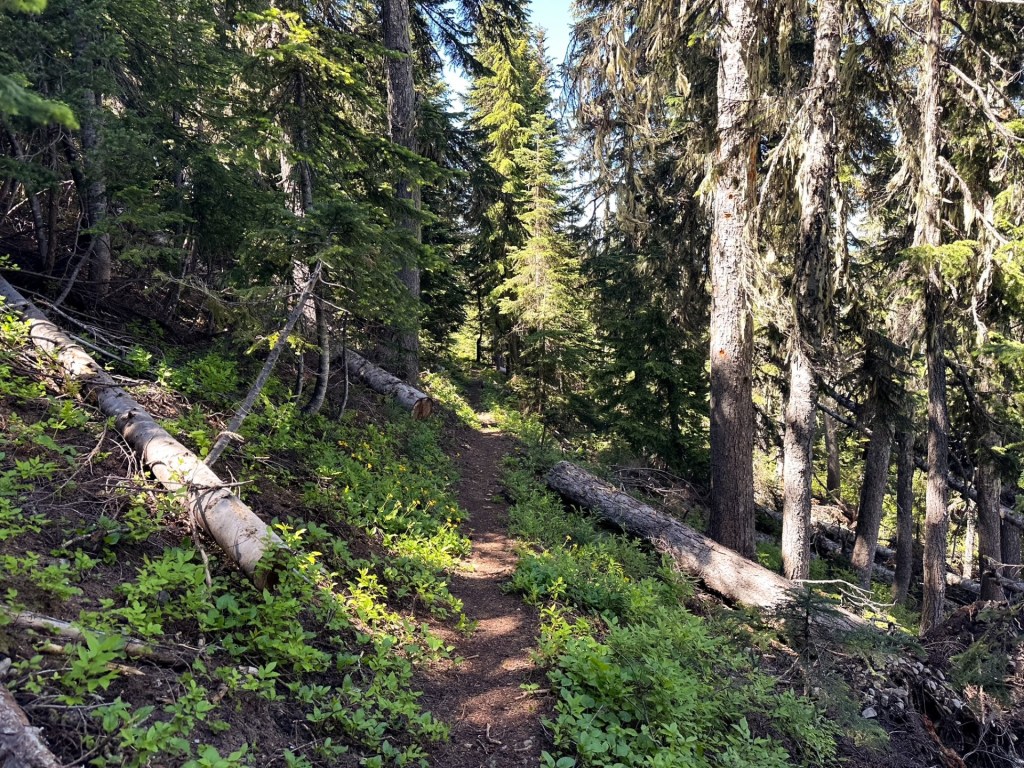
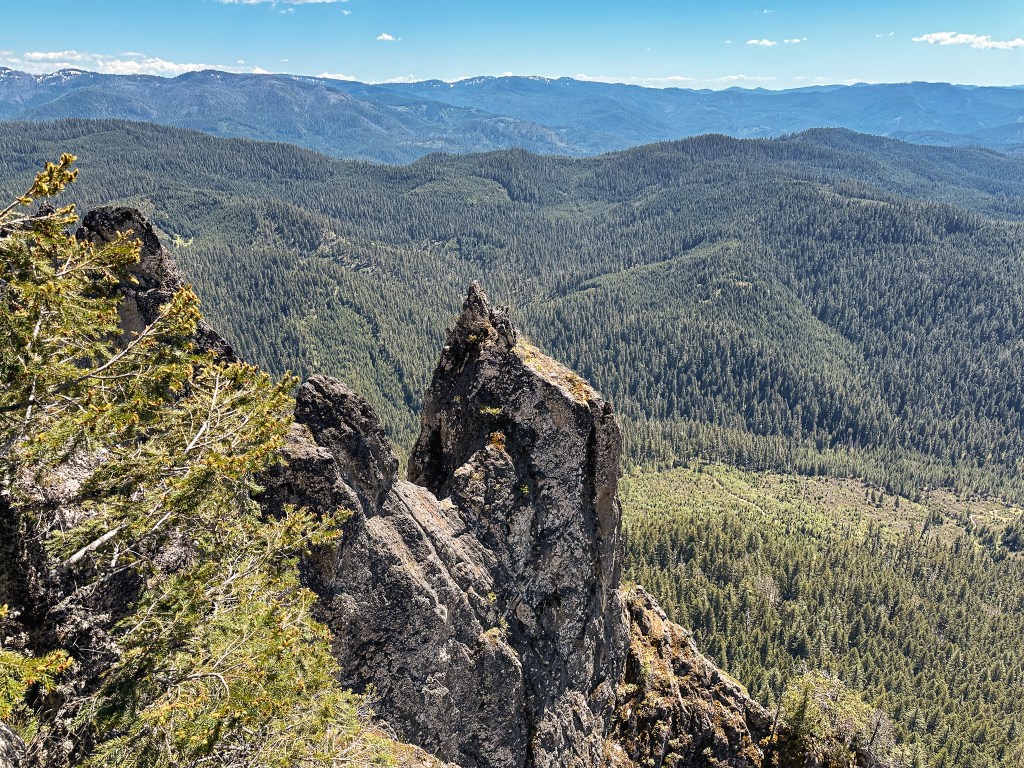
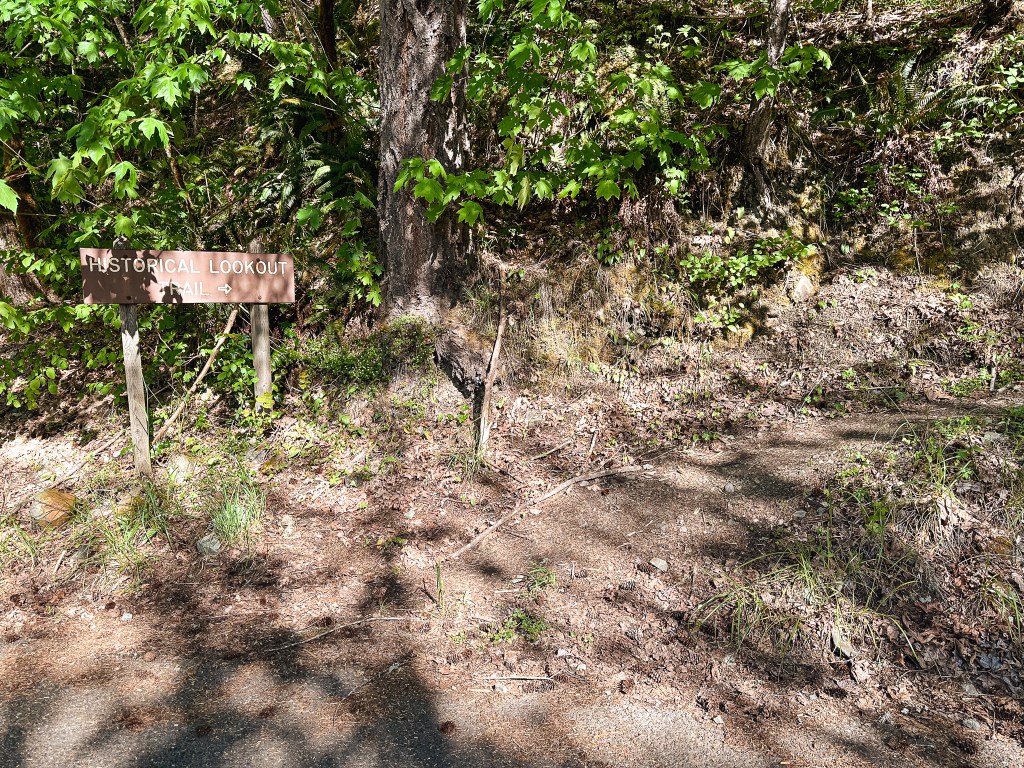
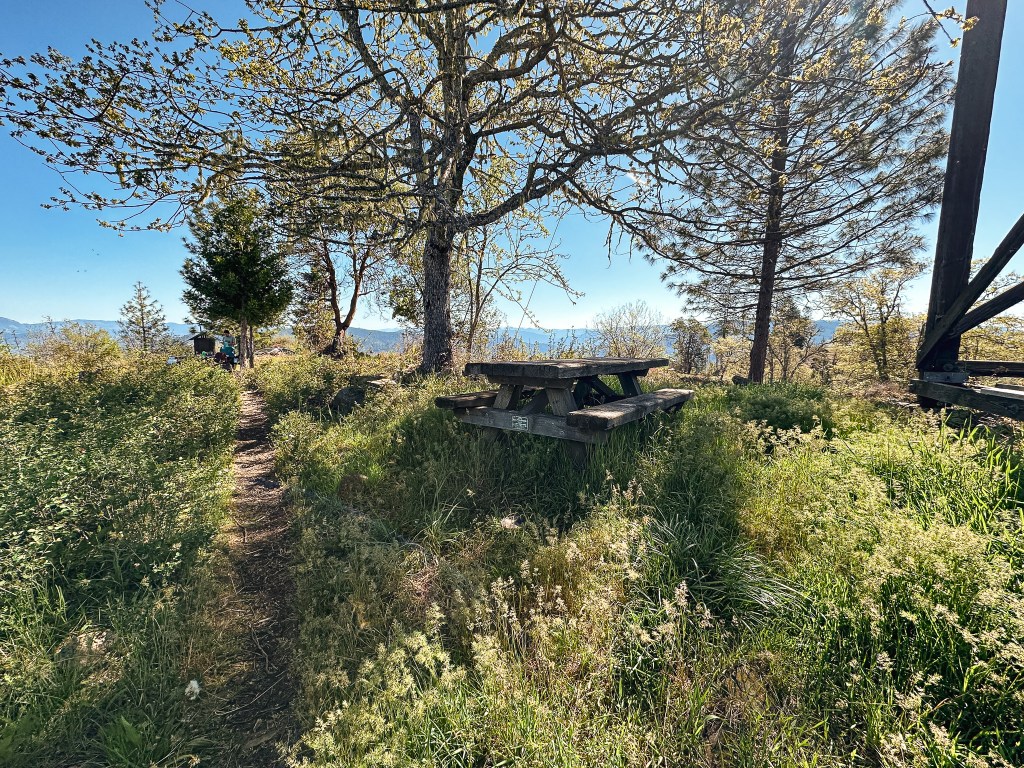
There are a maze of roads and trails that interconnect around the base of Black Butte, we stayed on trail #4026 the entire way to the summit. This area is well signed and we found it easy to navigate. The trail starts out fairly flat on an old road bed that parallels the paved road around the butte. After 3/4 of a mile, we started to reach the first of the signed junctions. We stayed straight at the first one and turned left at the second to start our climb. The trail becomes hiker only from here. Some of the other trails within this area are considered multi-use. We didn’t see any mountain bikers on the multi-use sections until we were almost back to the car at the end of our hike. We crossed the Lower Butte Loop trail #4093, Upper Butte Loop trail #4093.1, and an unmarked old road before reaching the Upper Black Butte trailhead. There was around 3 miles with ~1,800′ of gain between the Lower and Upper trailhead. This section had a continuous gradual climb and was mostly forested. We entered the upper trailhead from behind the picnic table near the sign board. There was a fancy new pay station that even takes card since a NW Forest Pass is required to park here. The lower trailhead did not have any notices about needing this pass for parking, but we hung ours up just in case. The upper trailhead also has pit toilets while the lower does not.
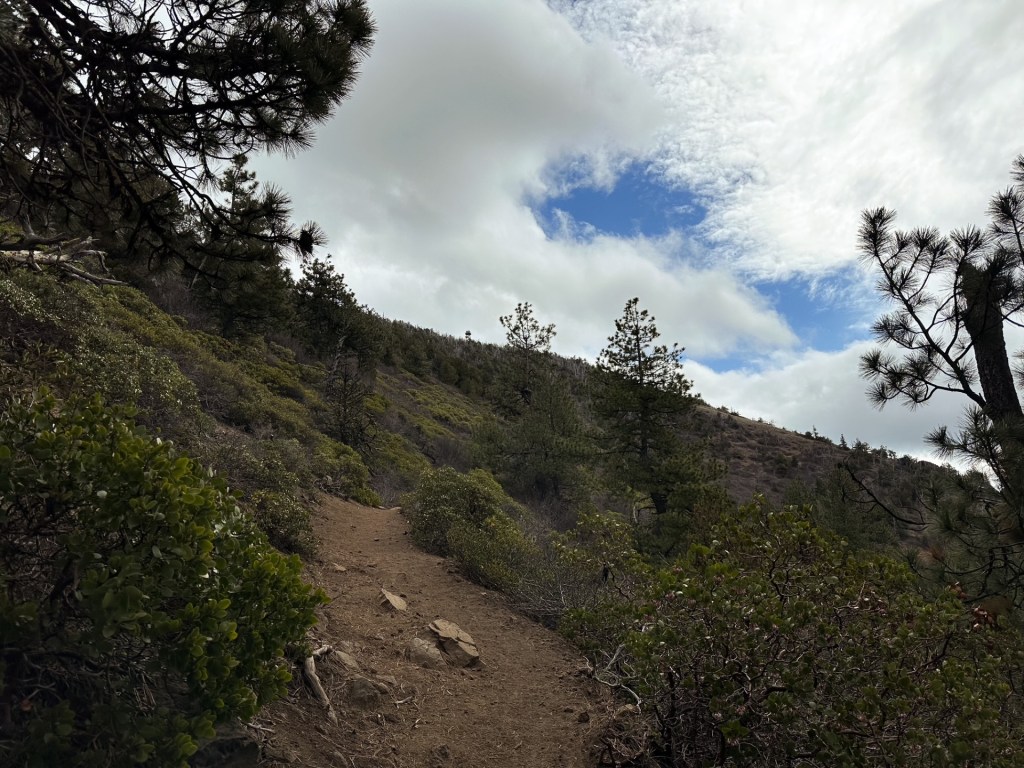
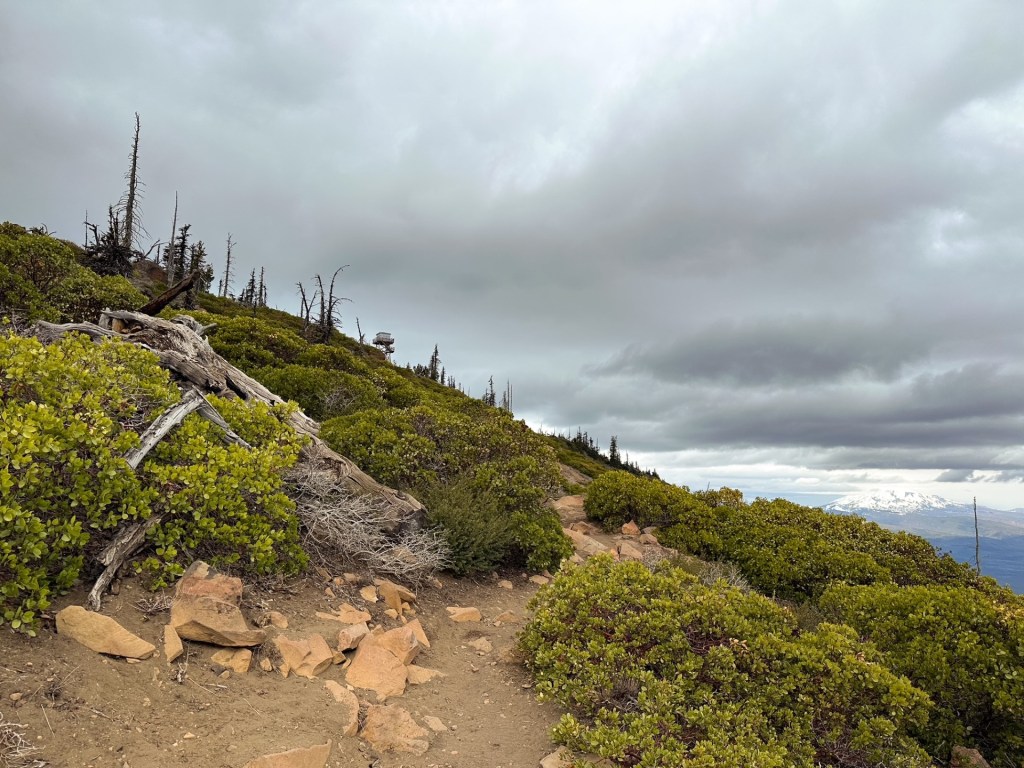
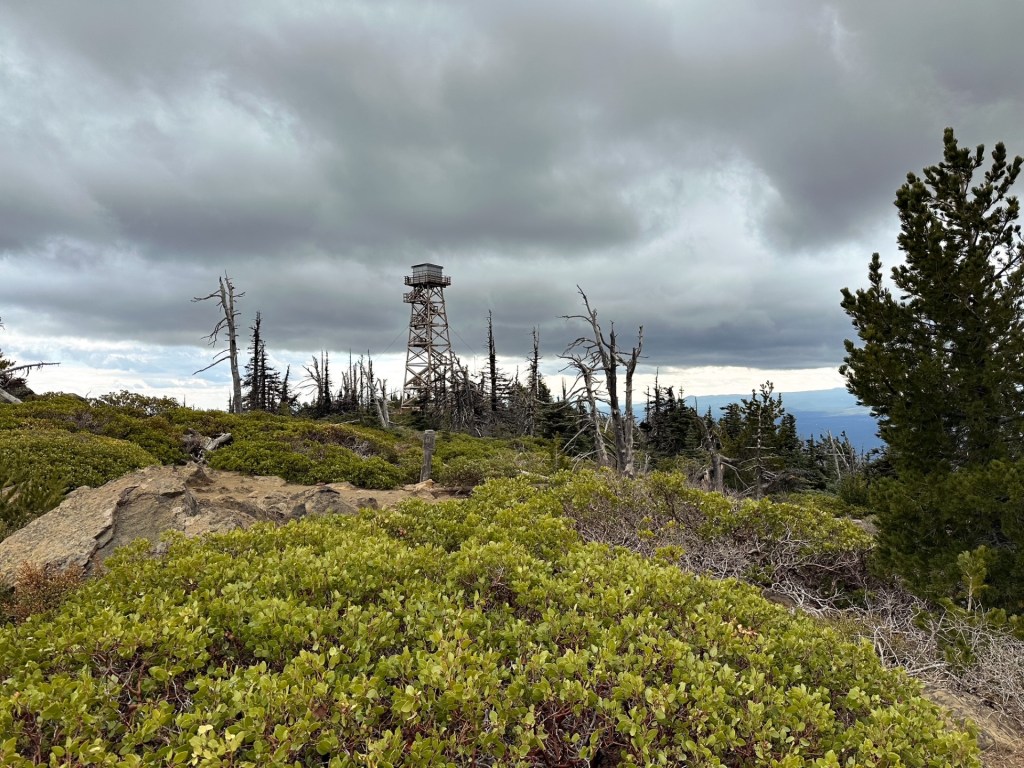
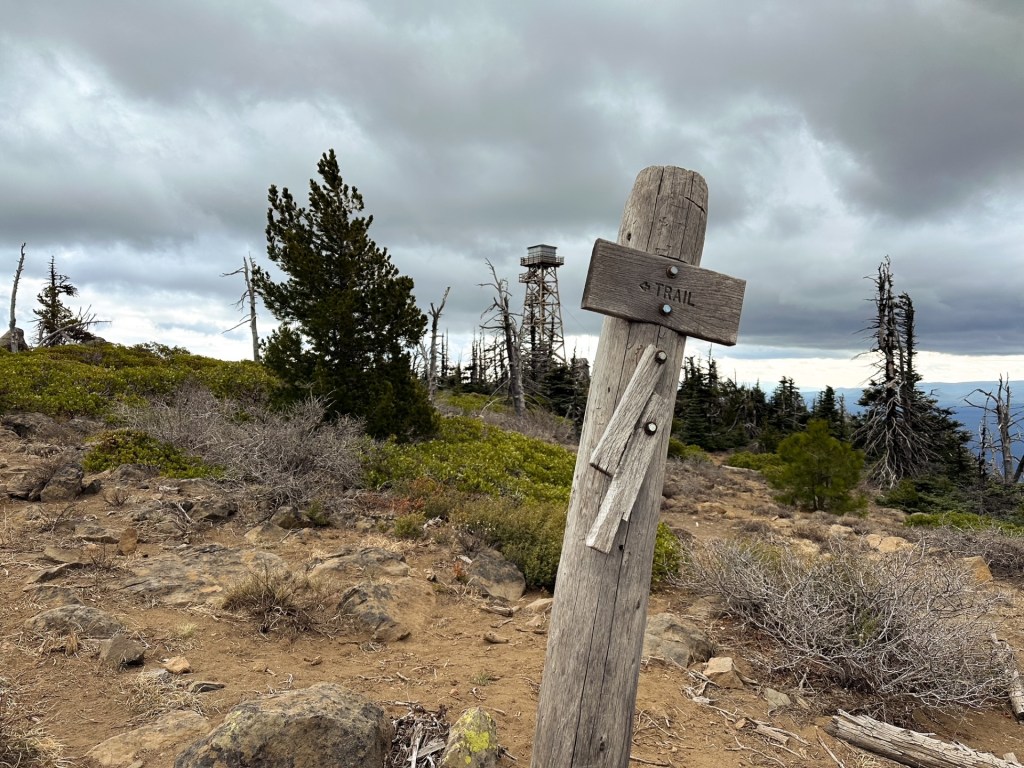
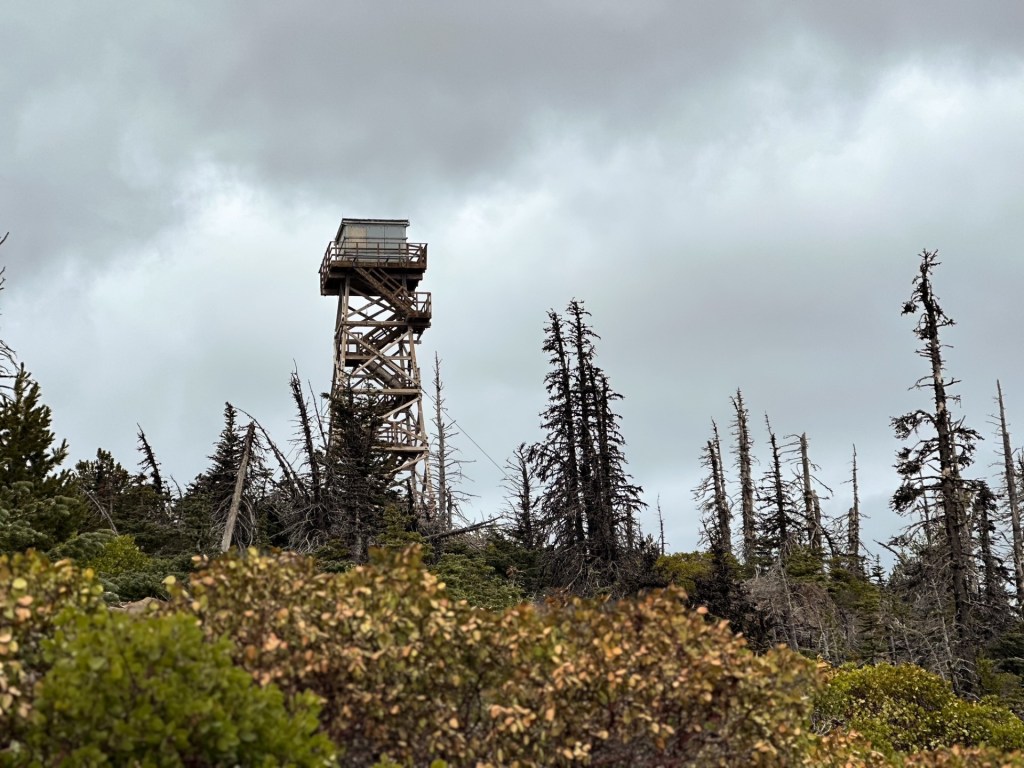
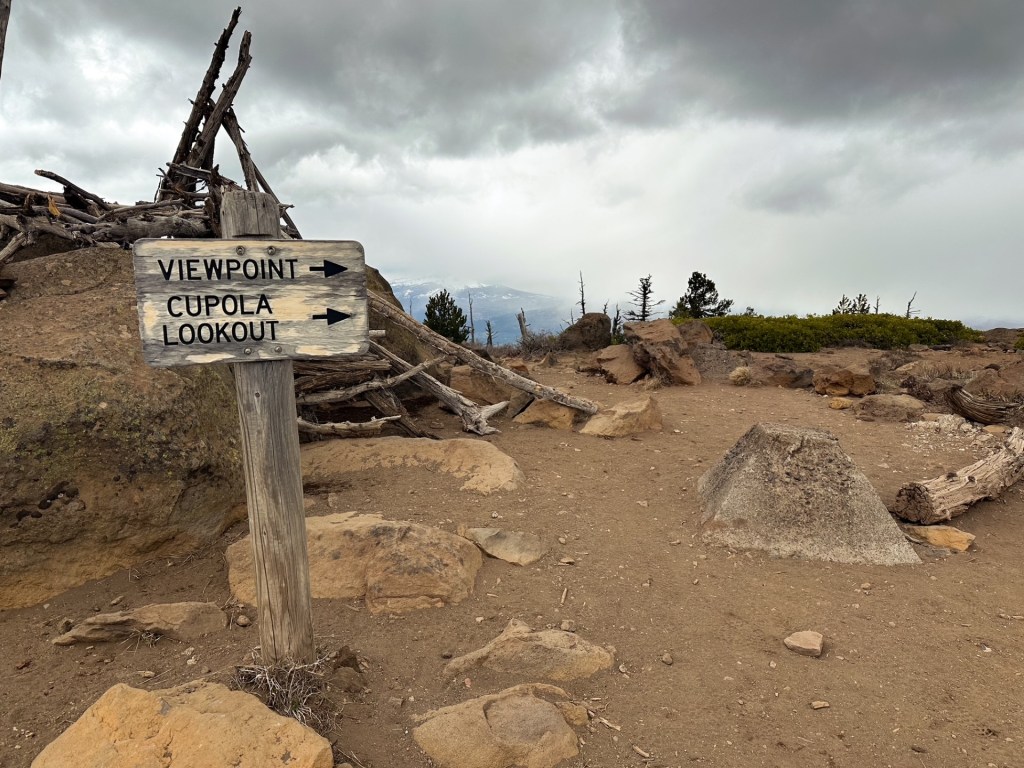
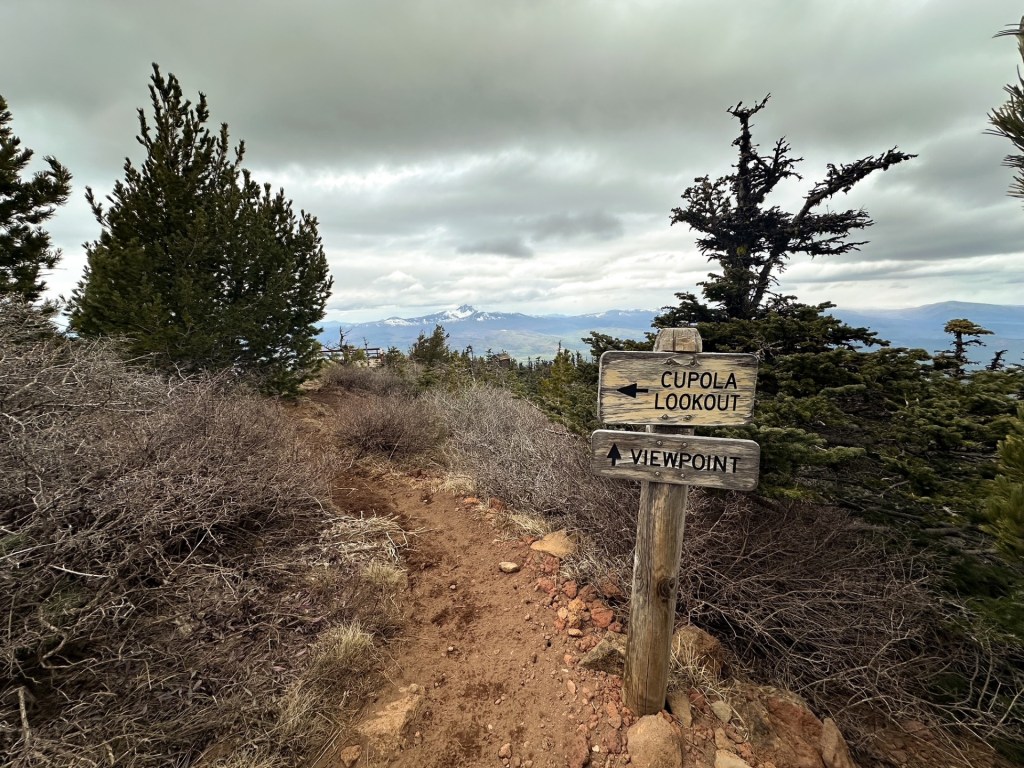
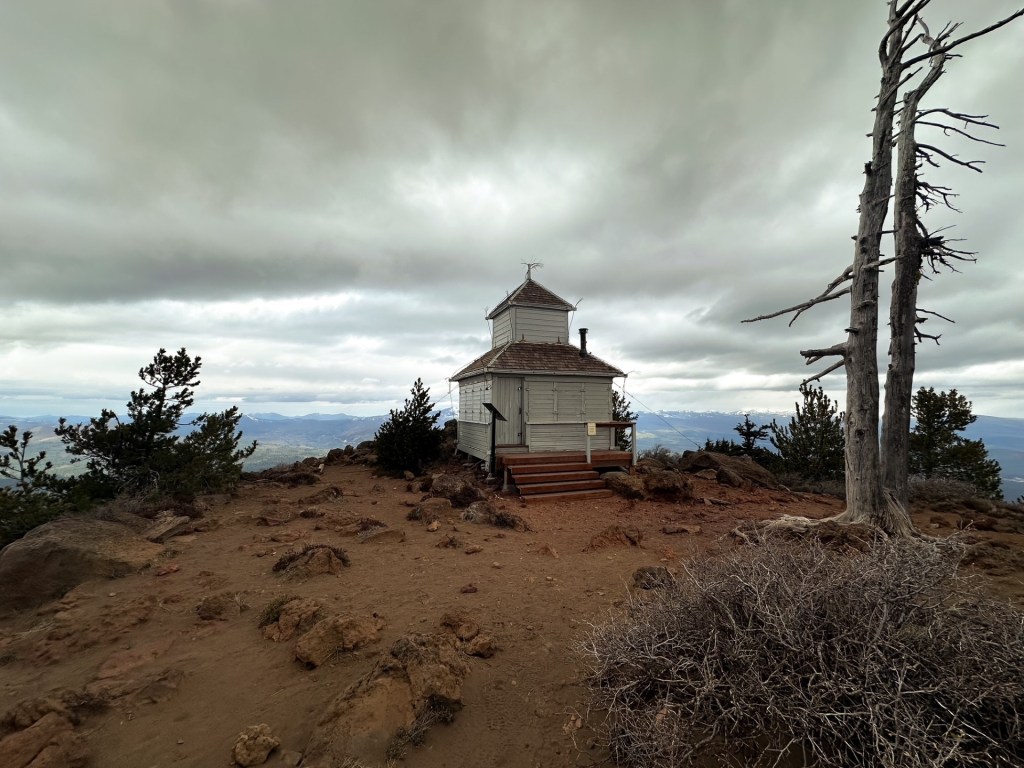
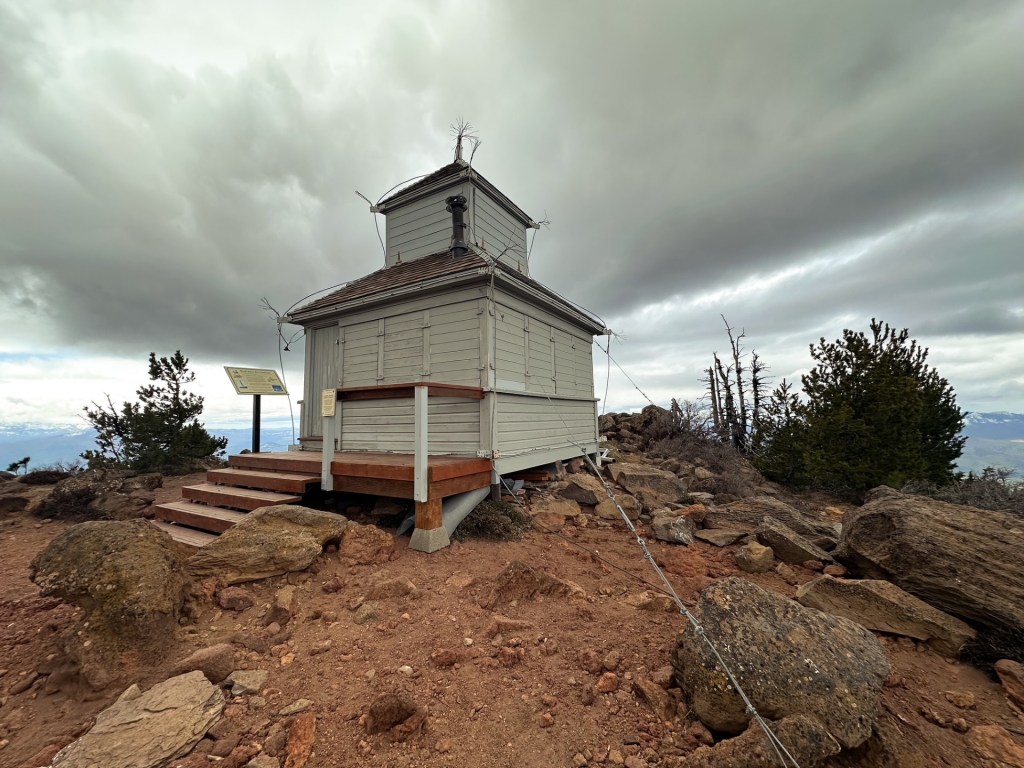
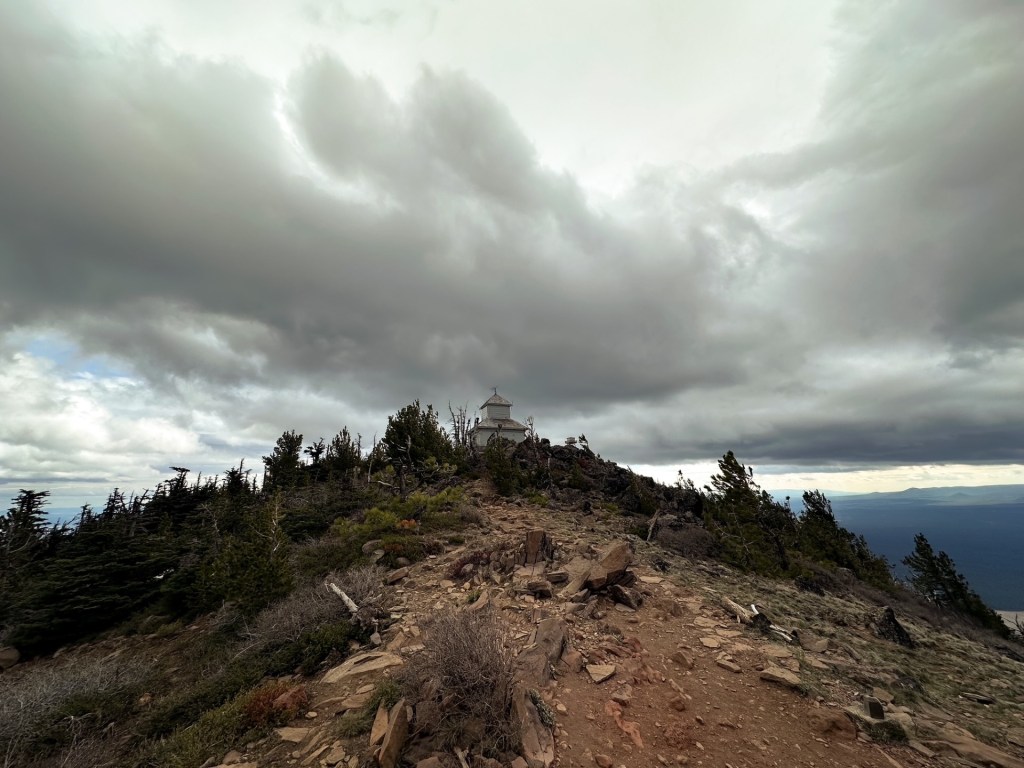
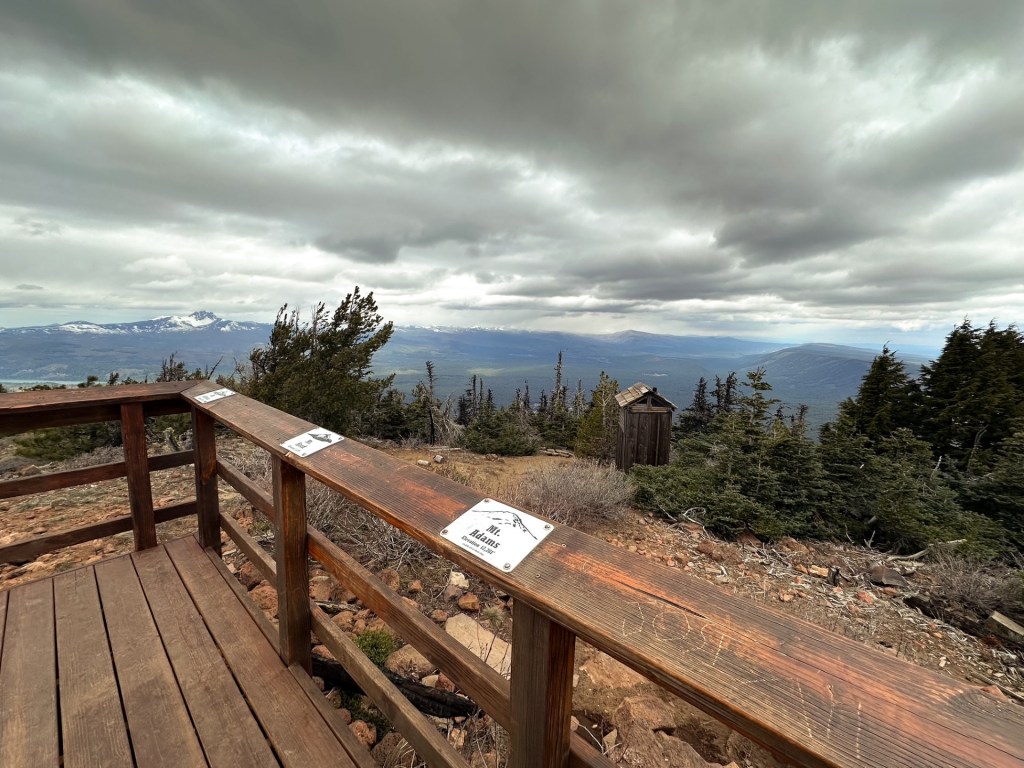
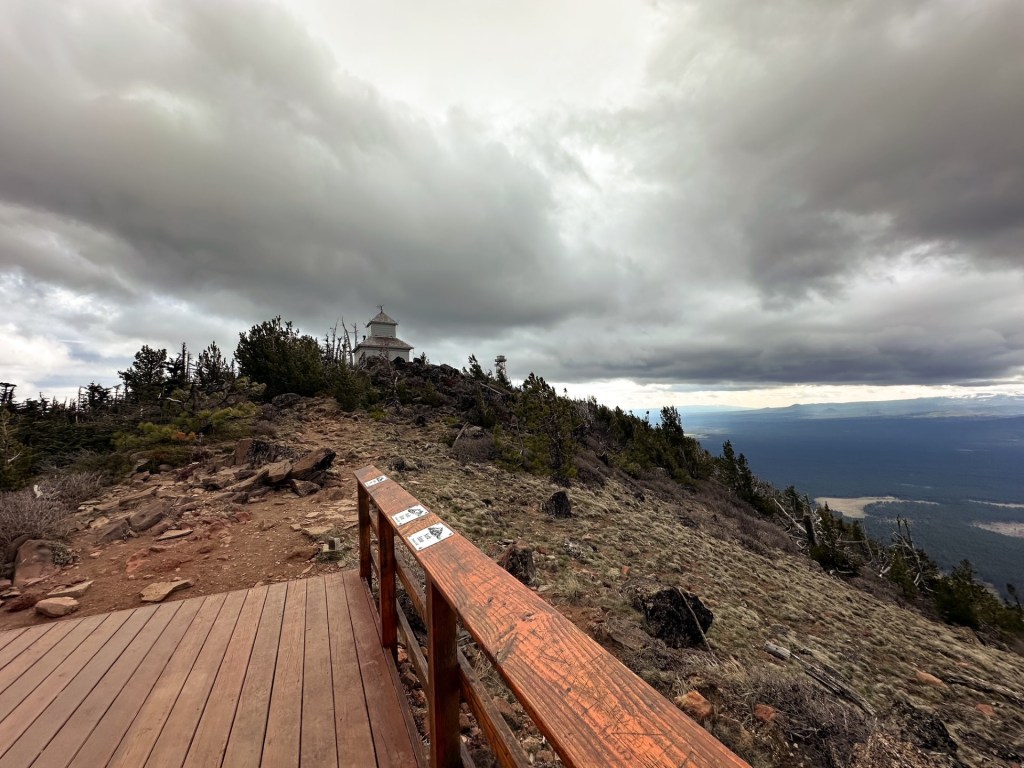
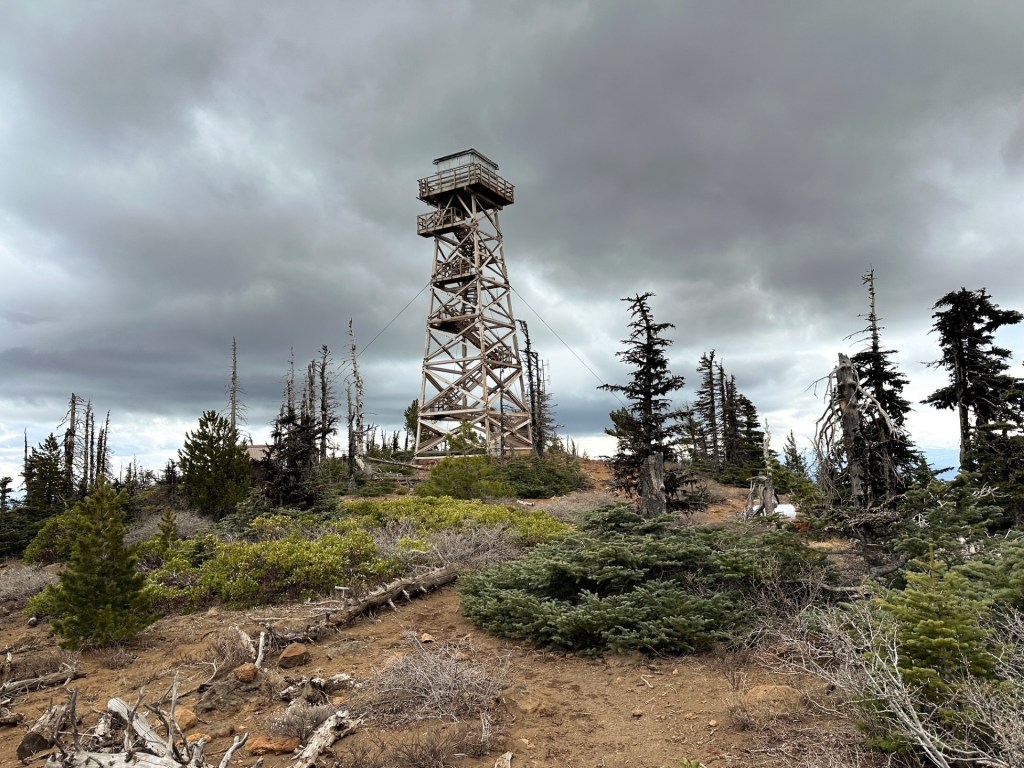
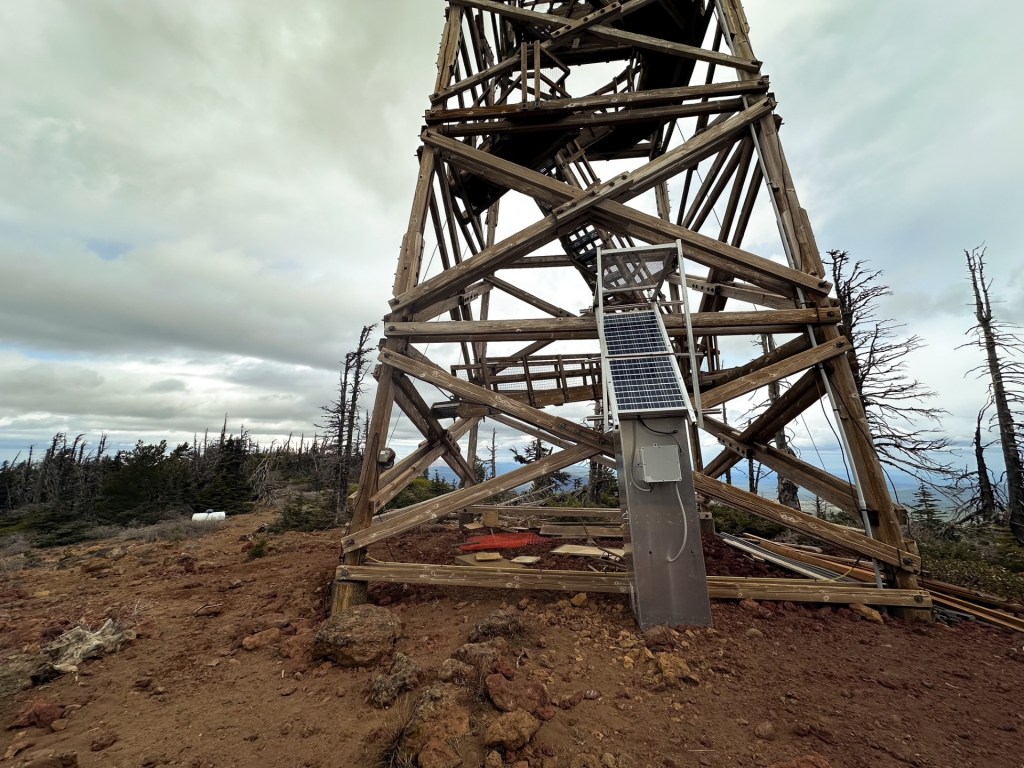
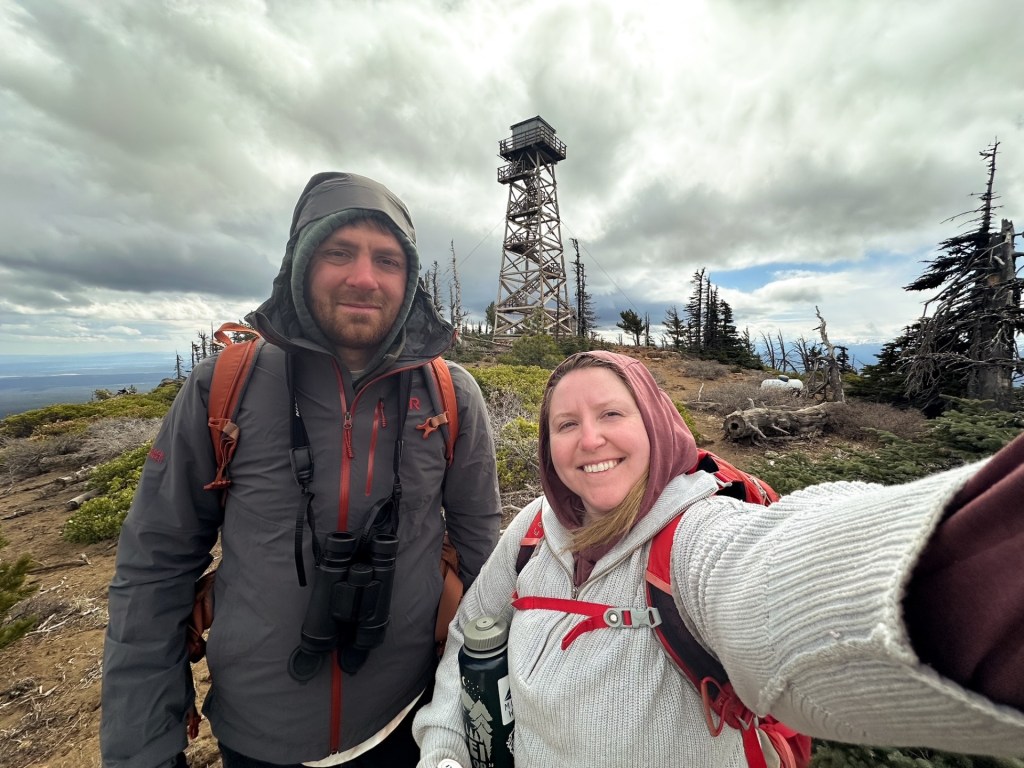
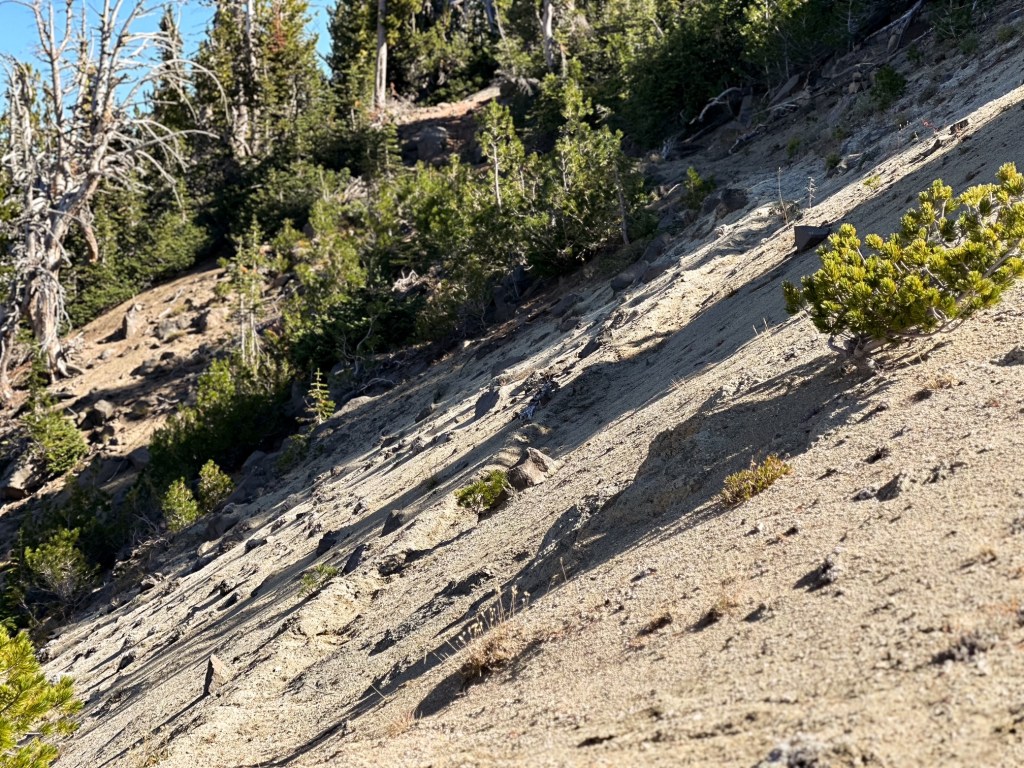
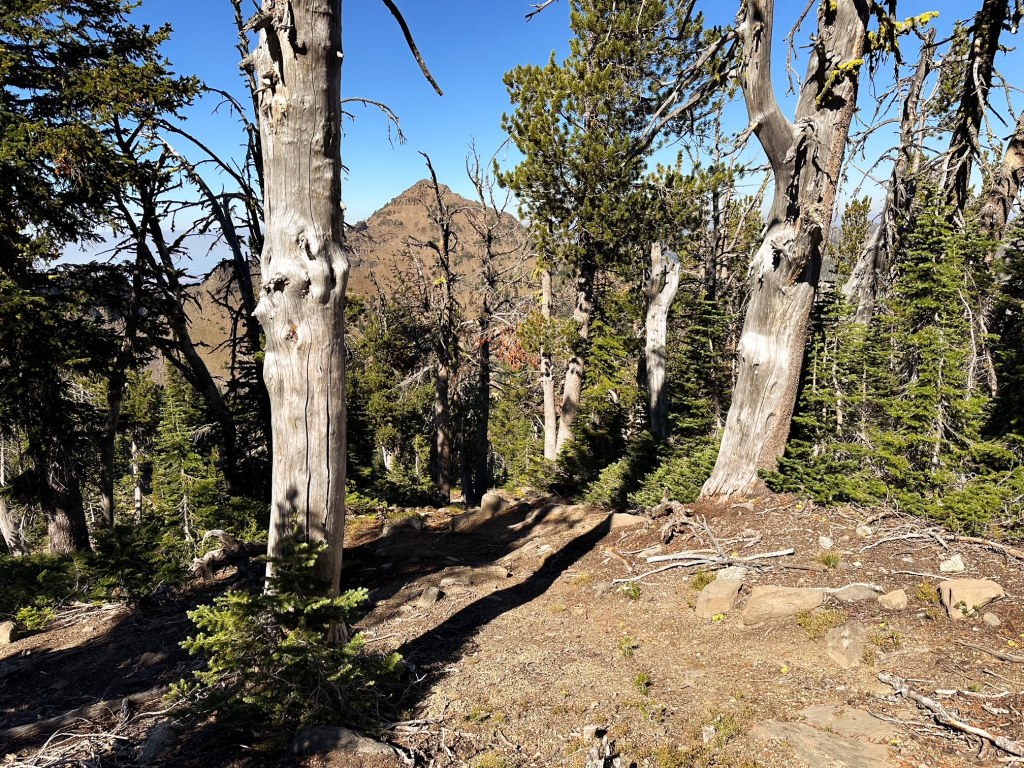
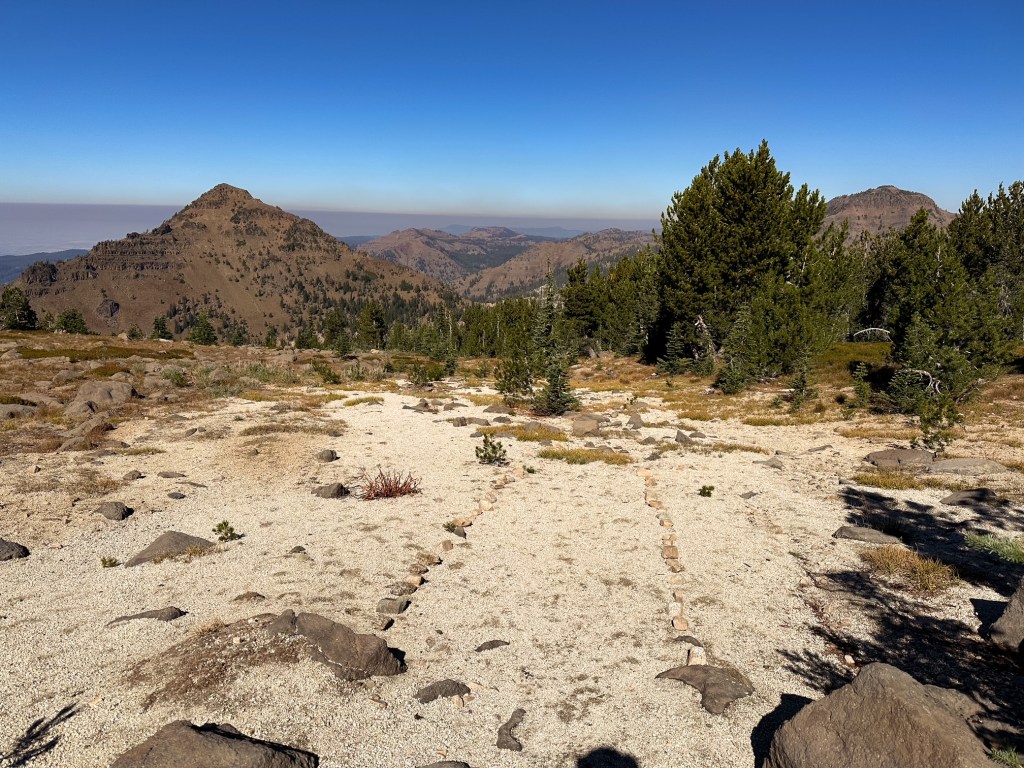
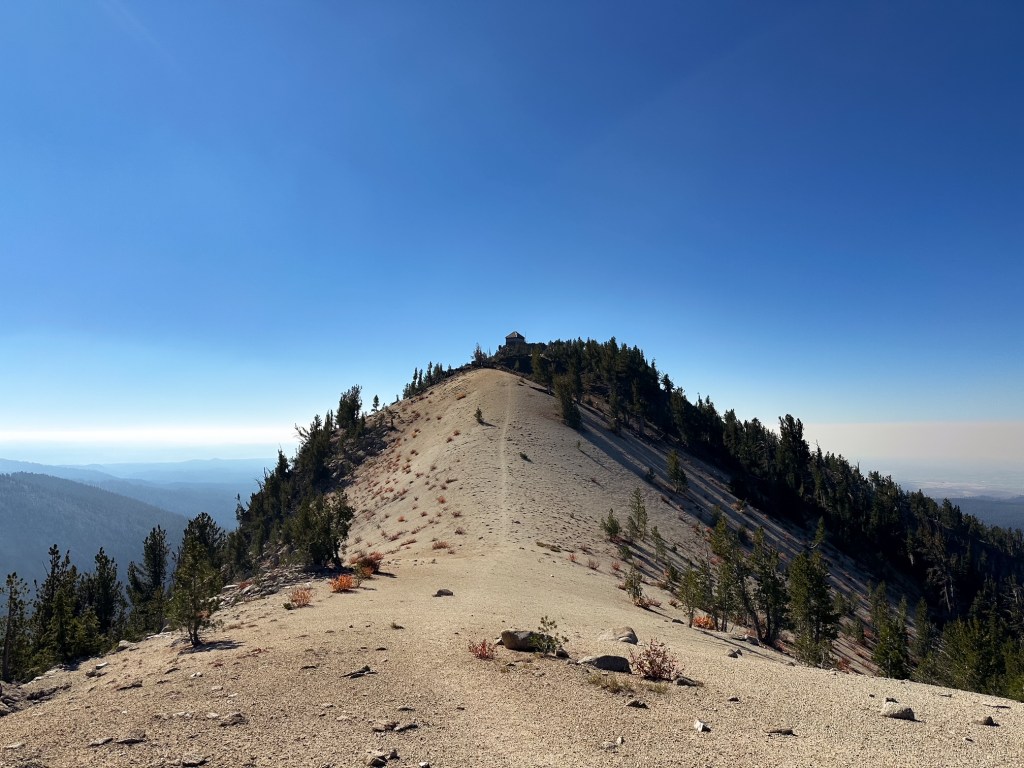
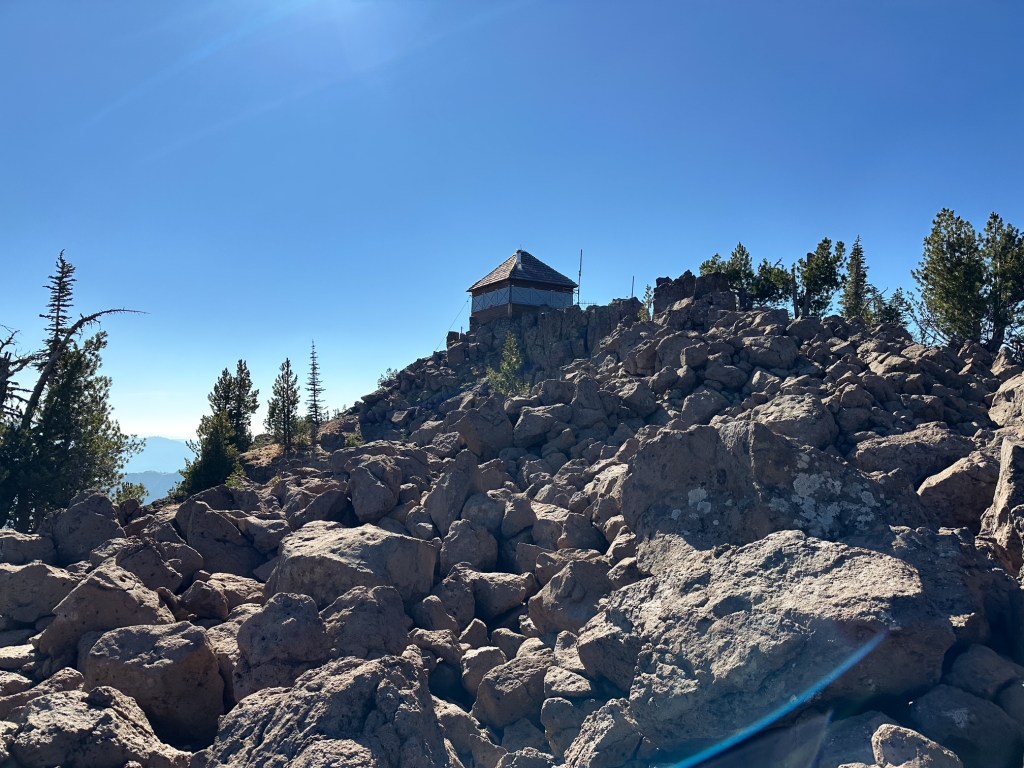
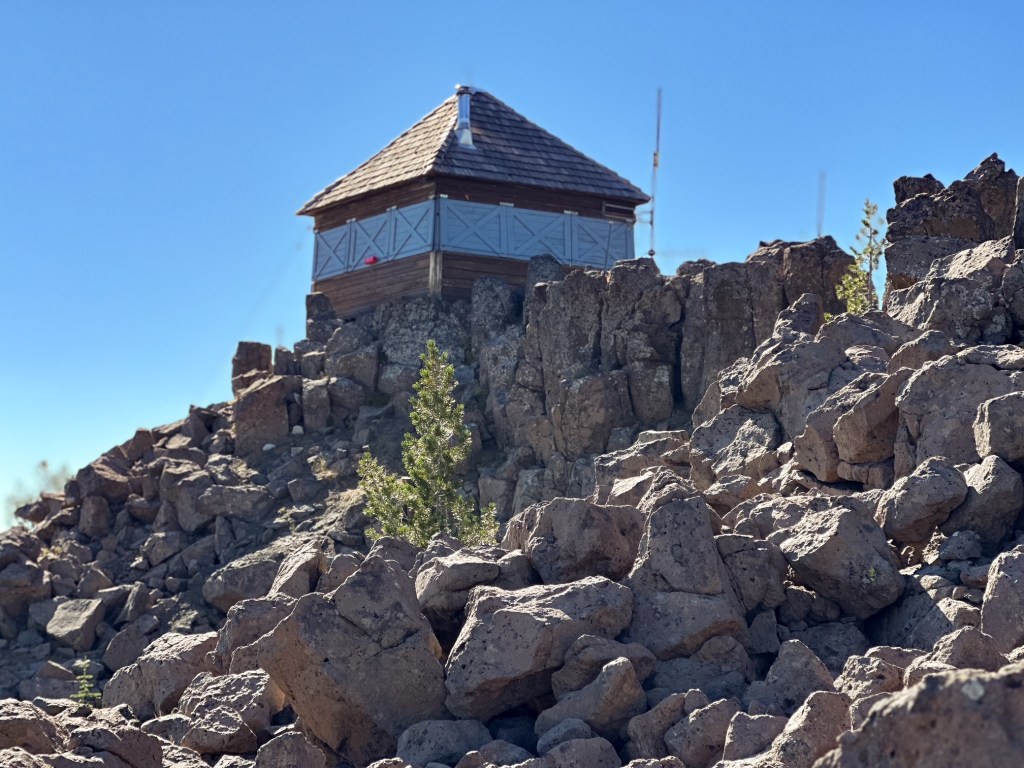
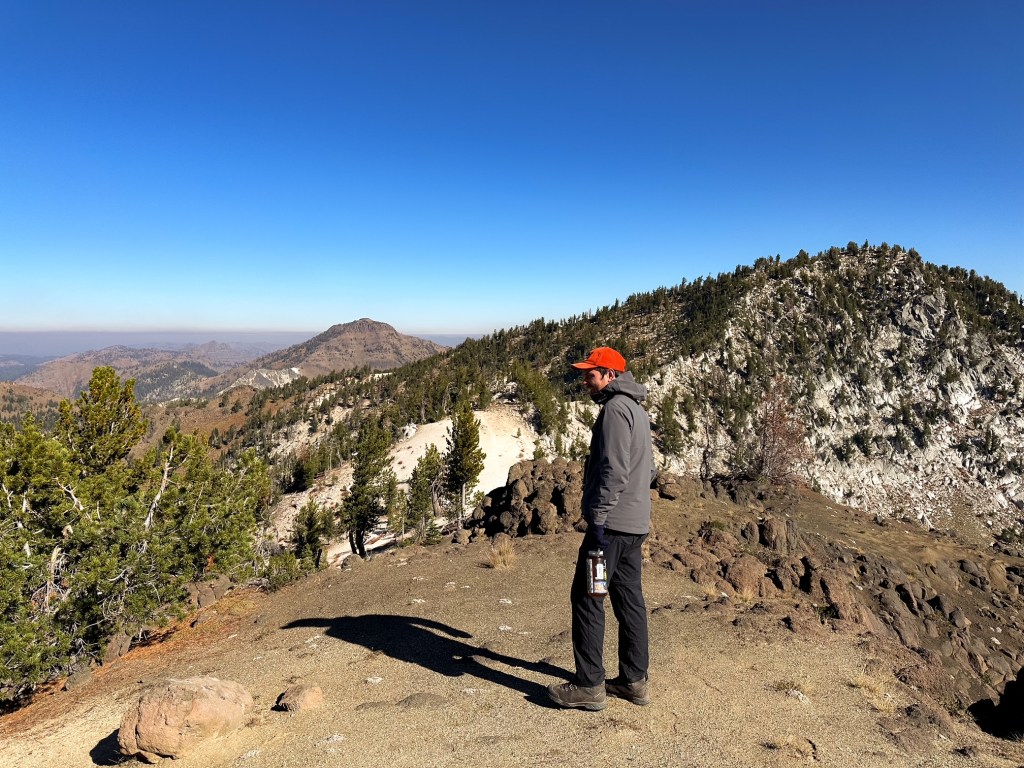
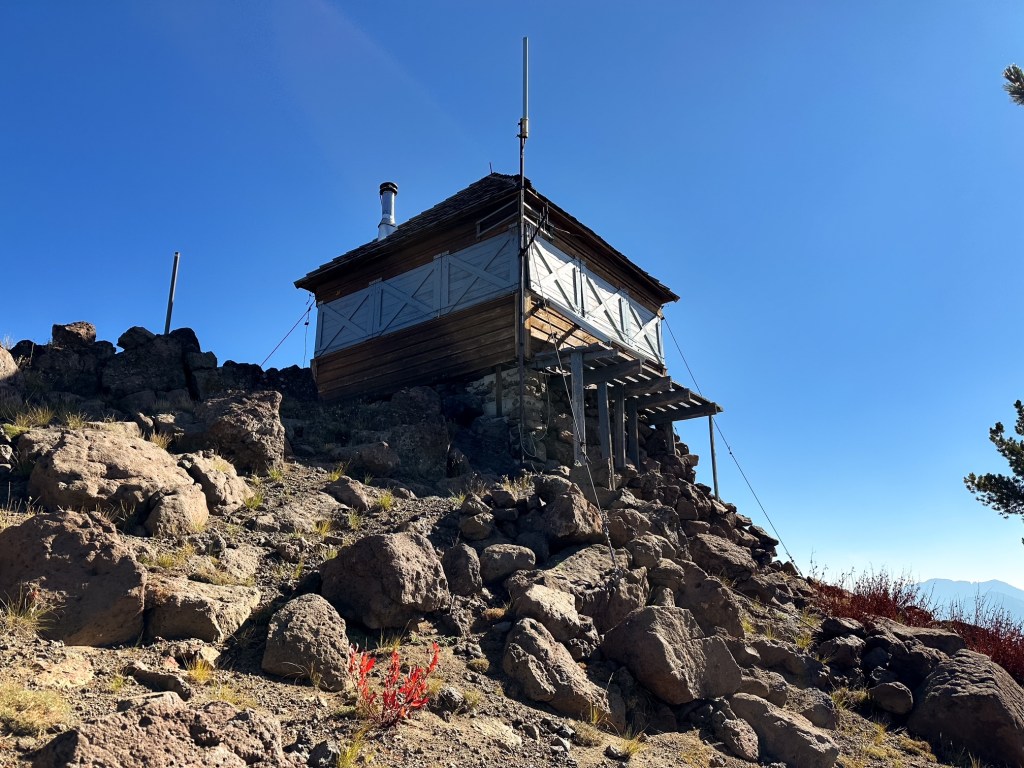
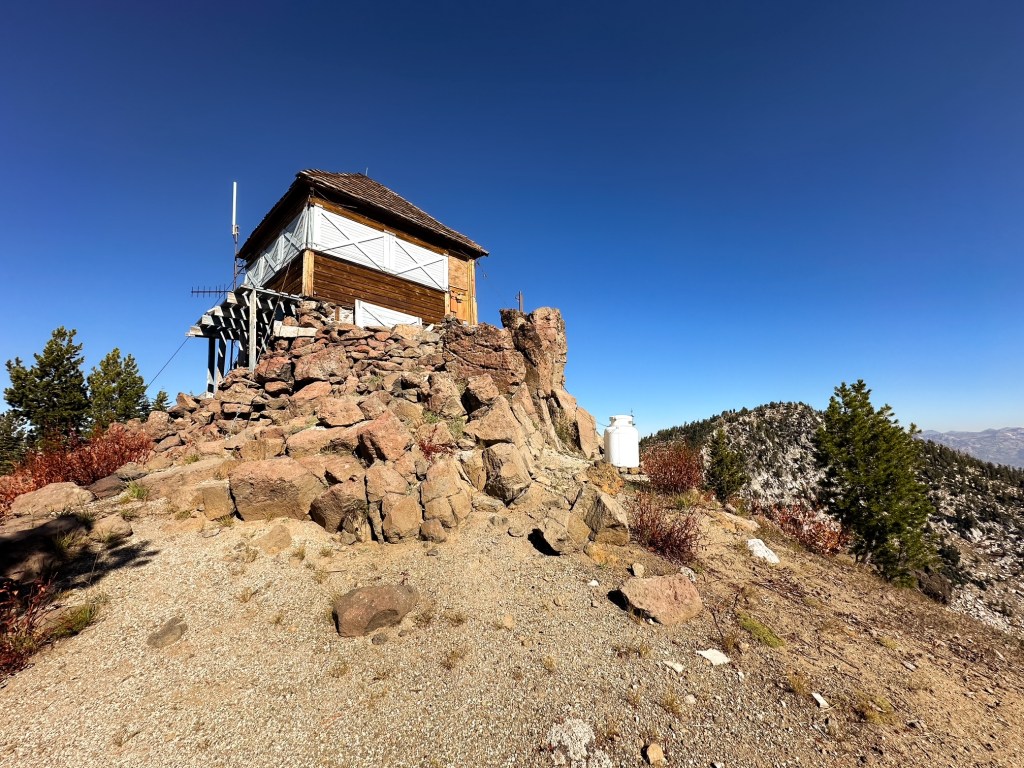
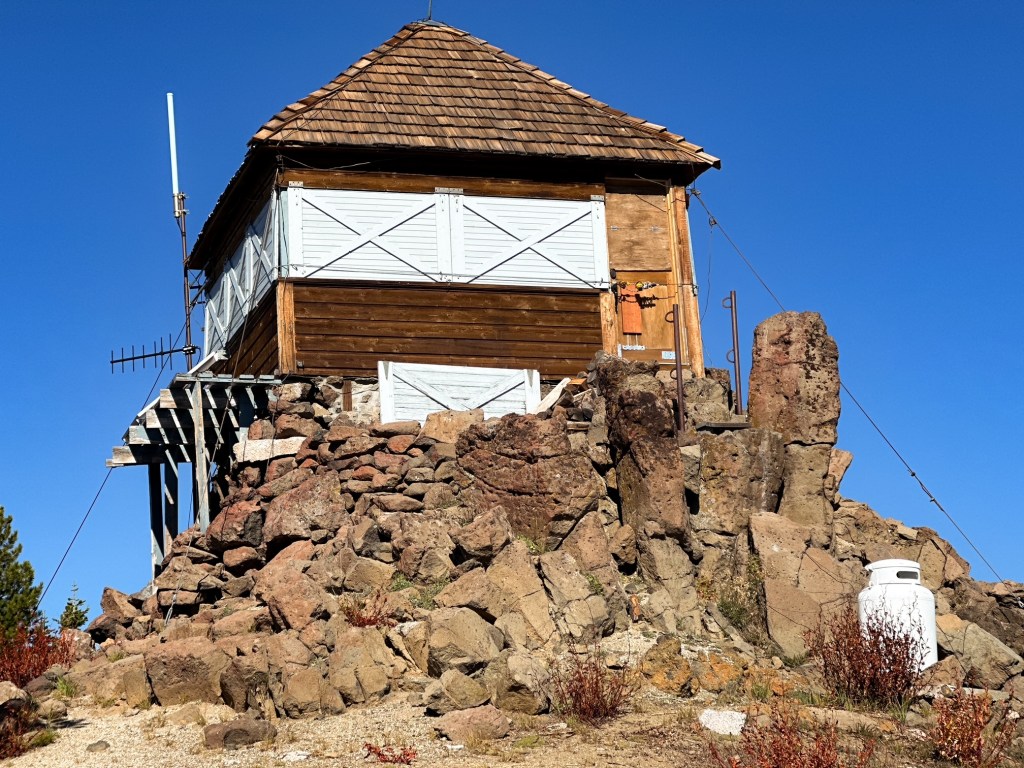
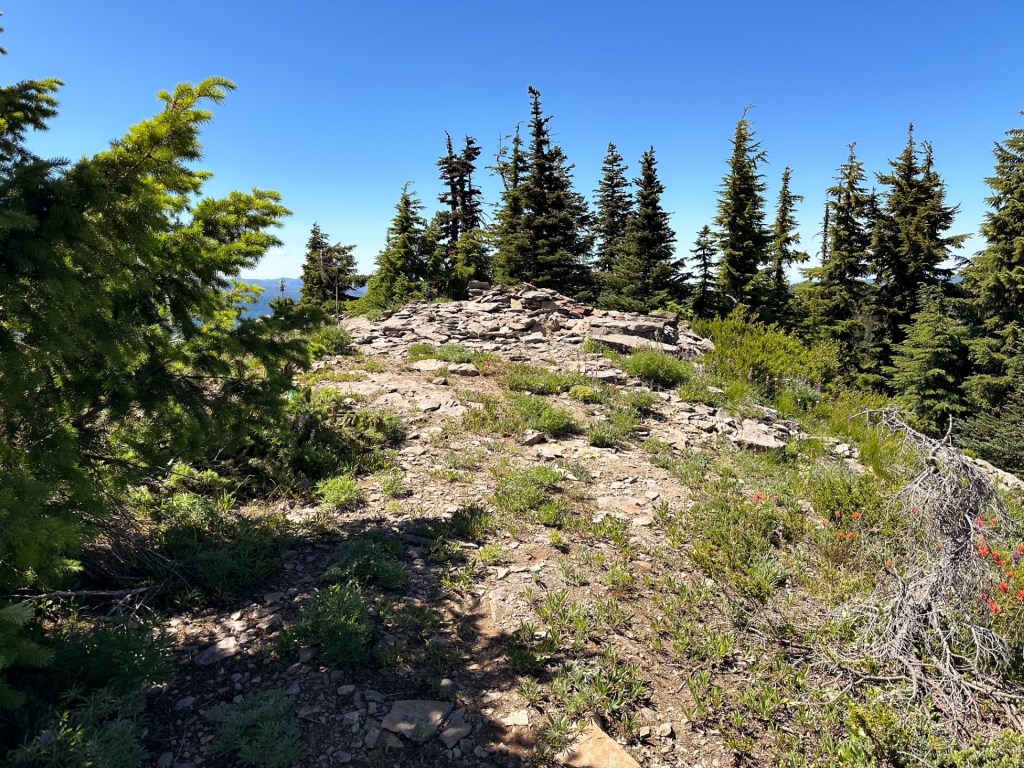
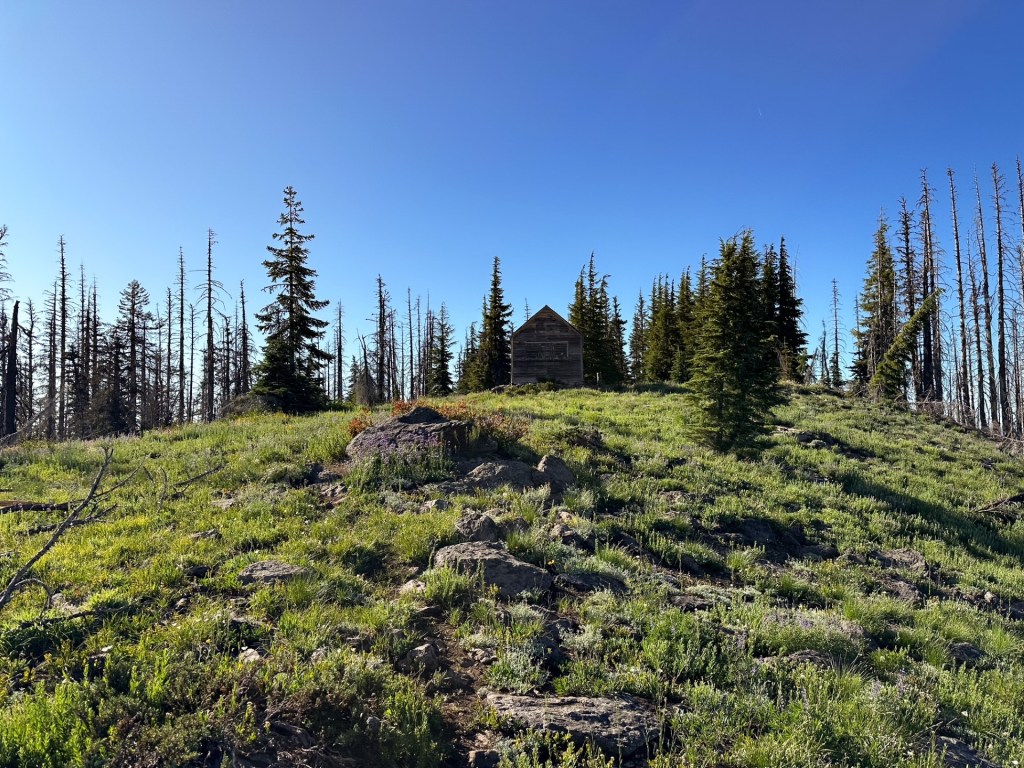
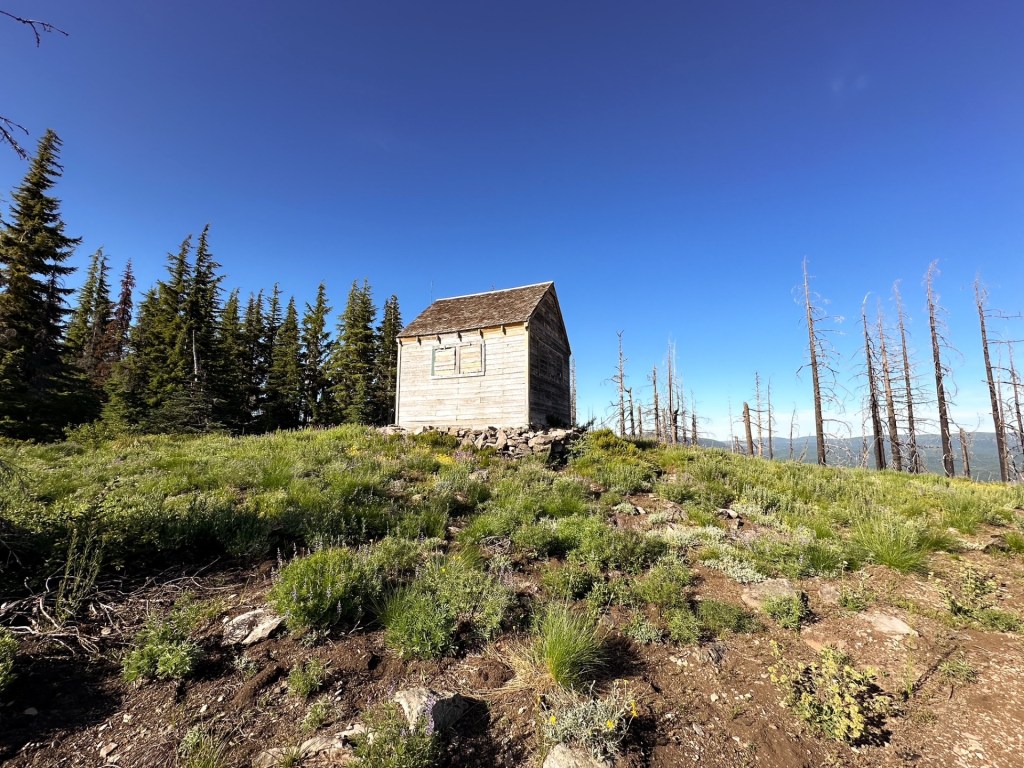
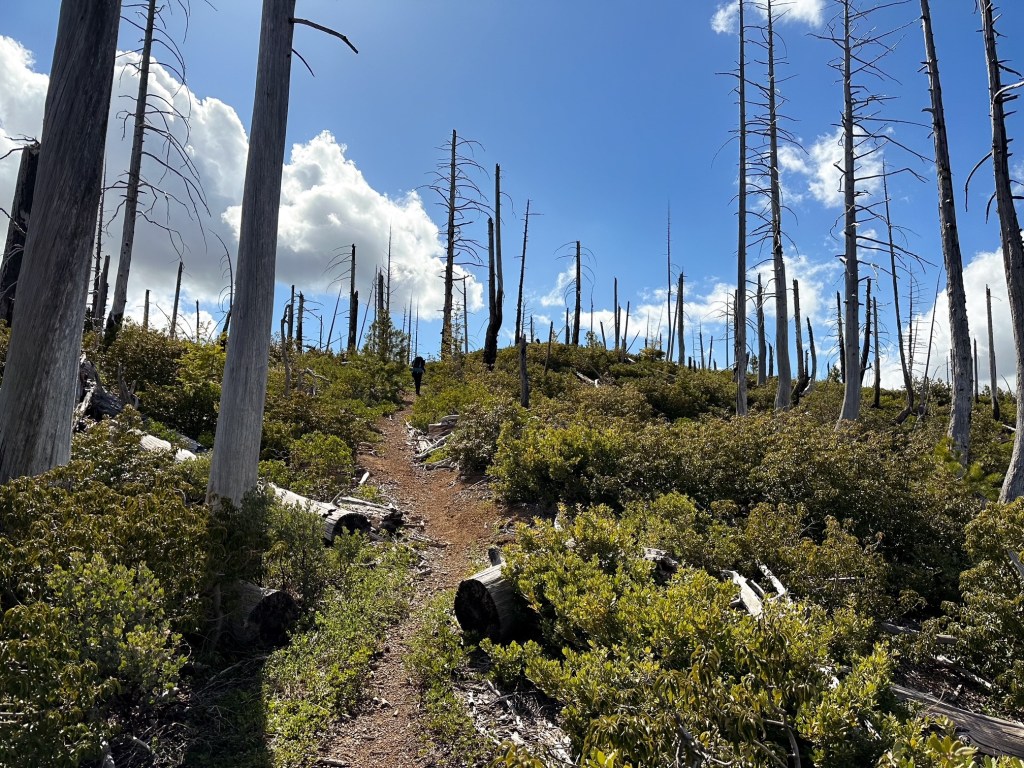
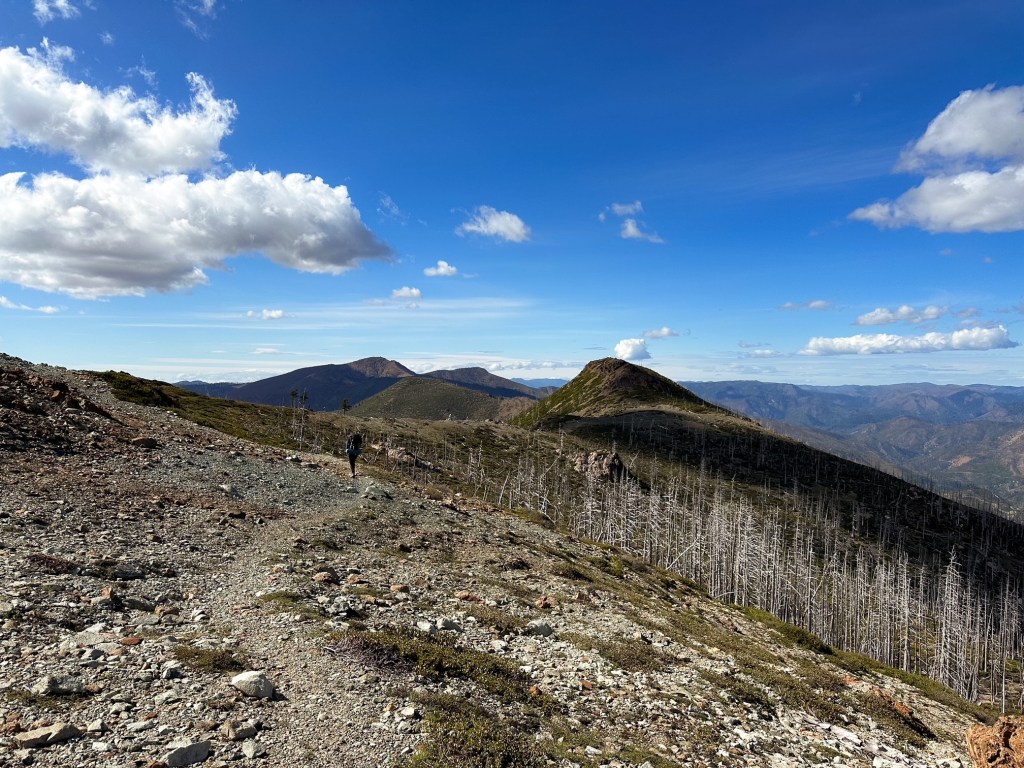
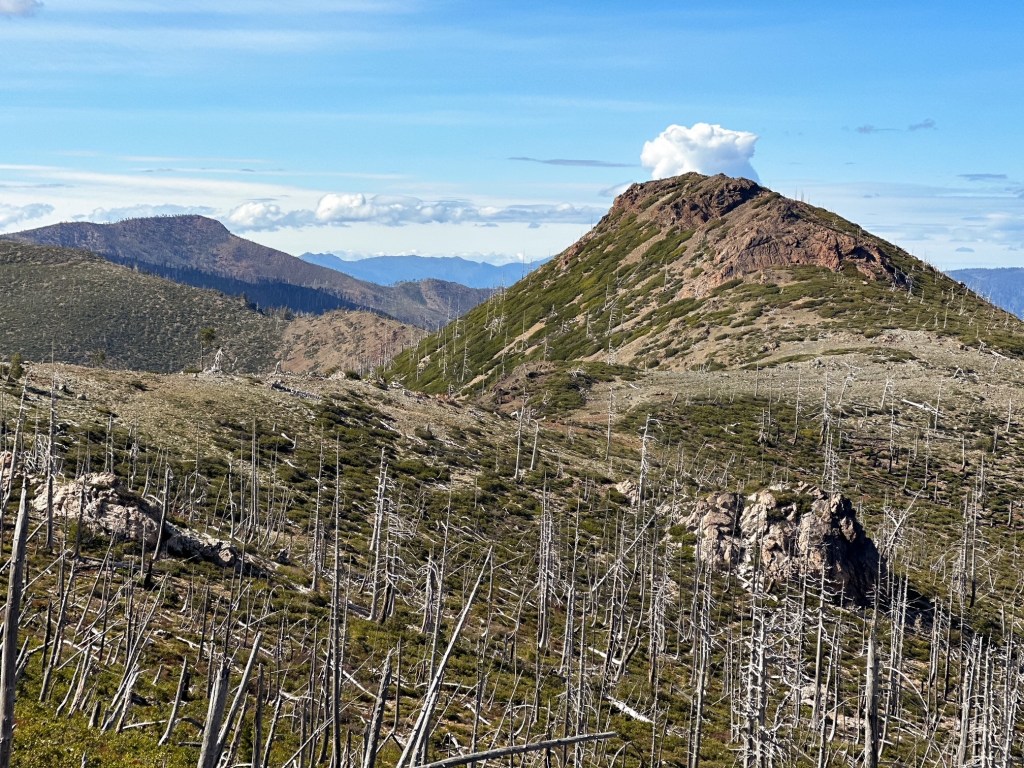
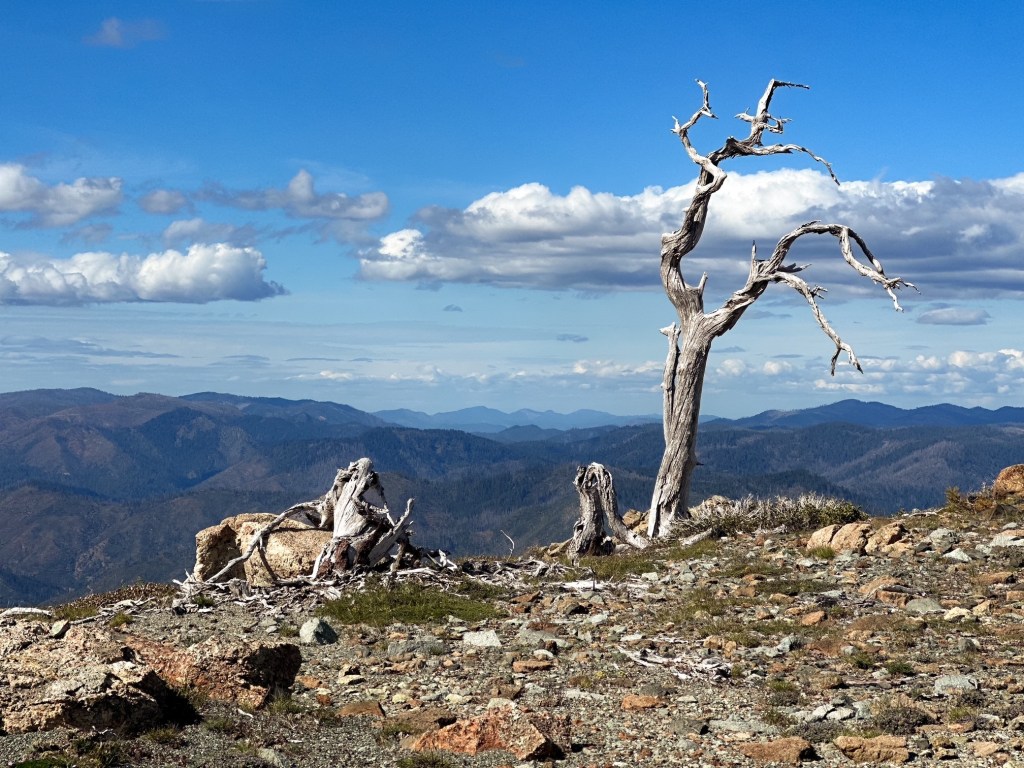
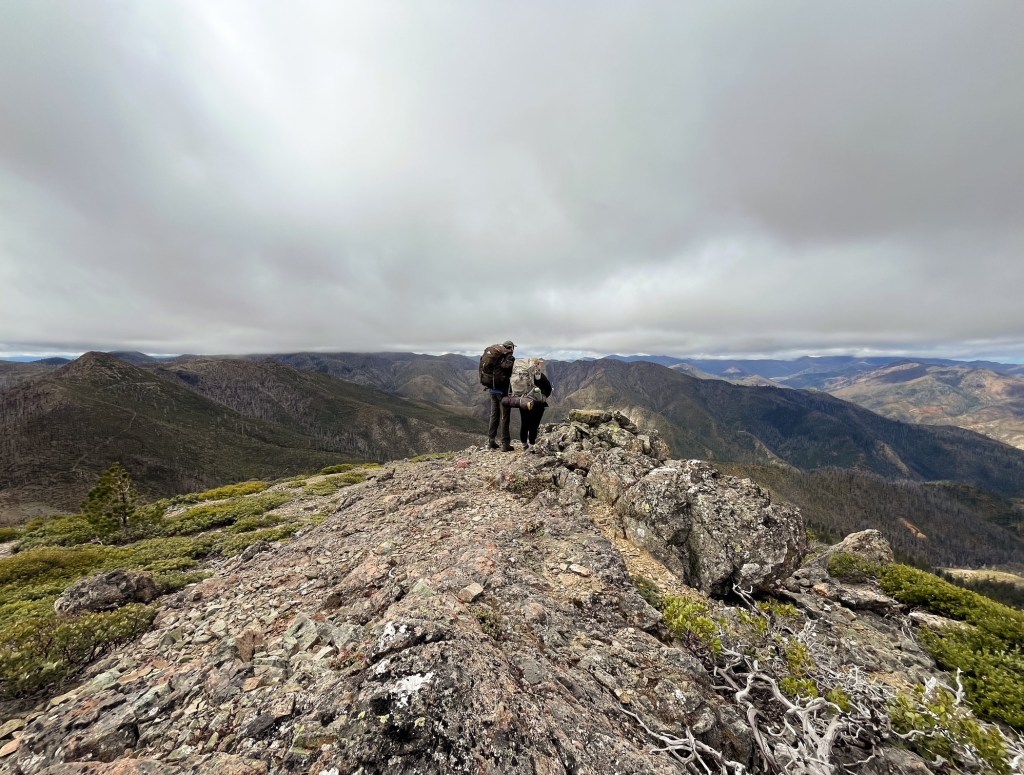
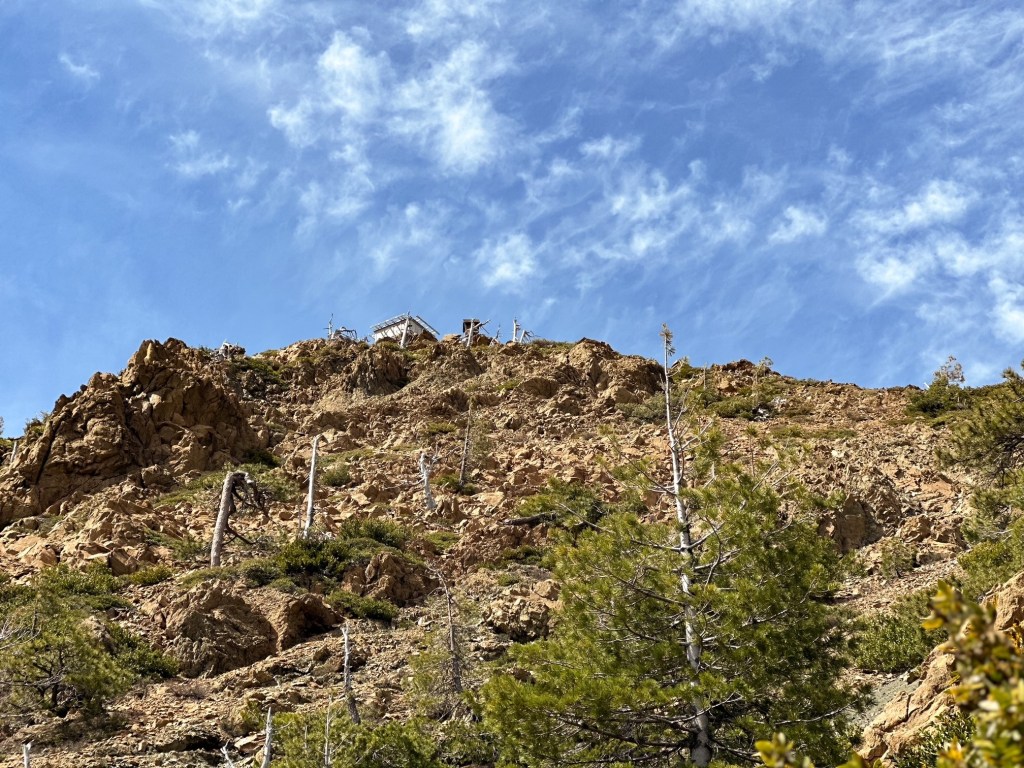
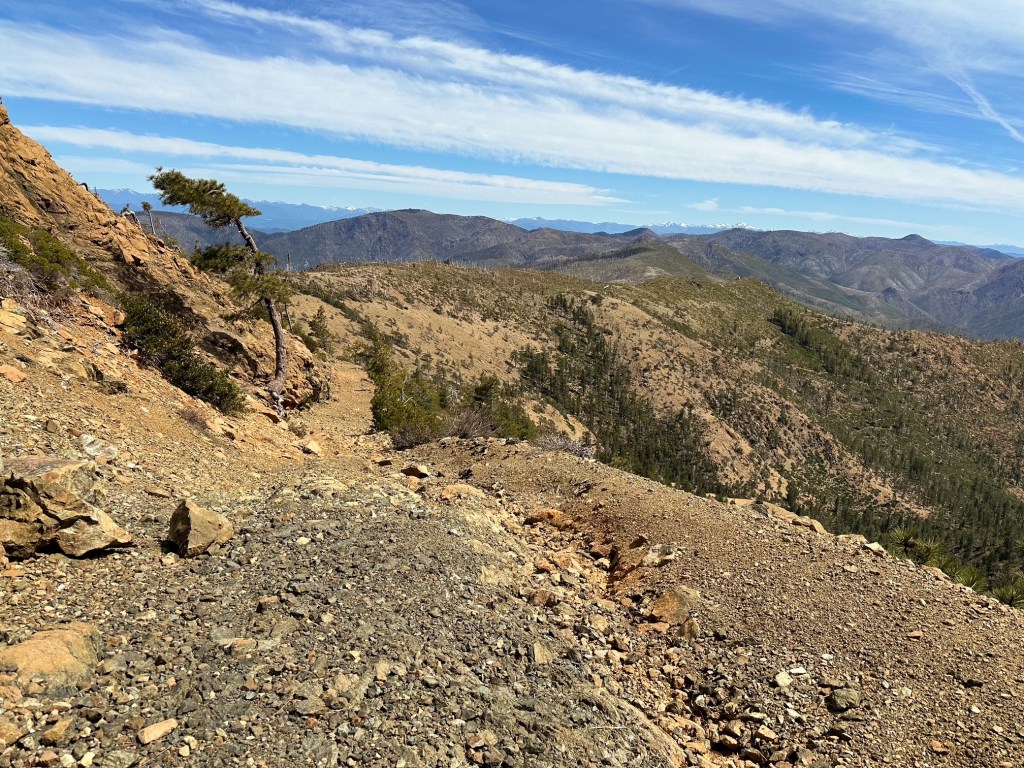
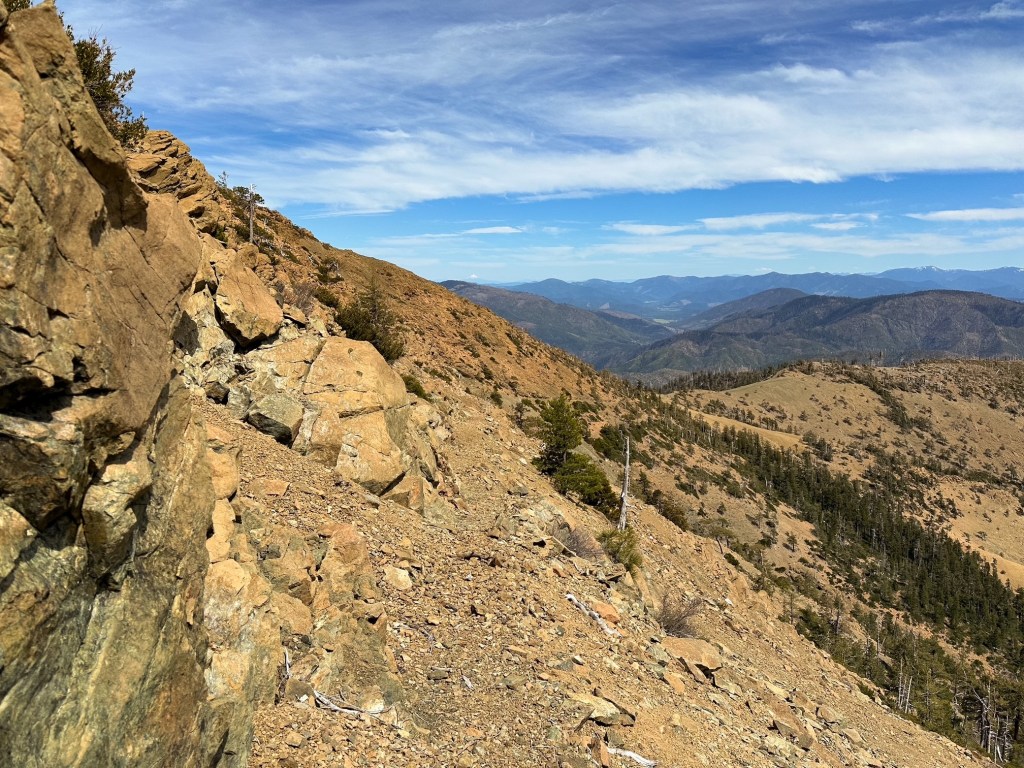
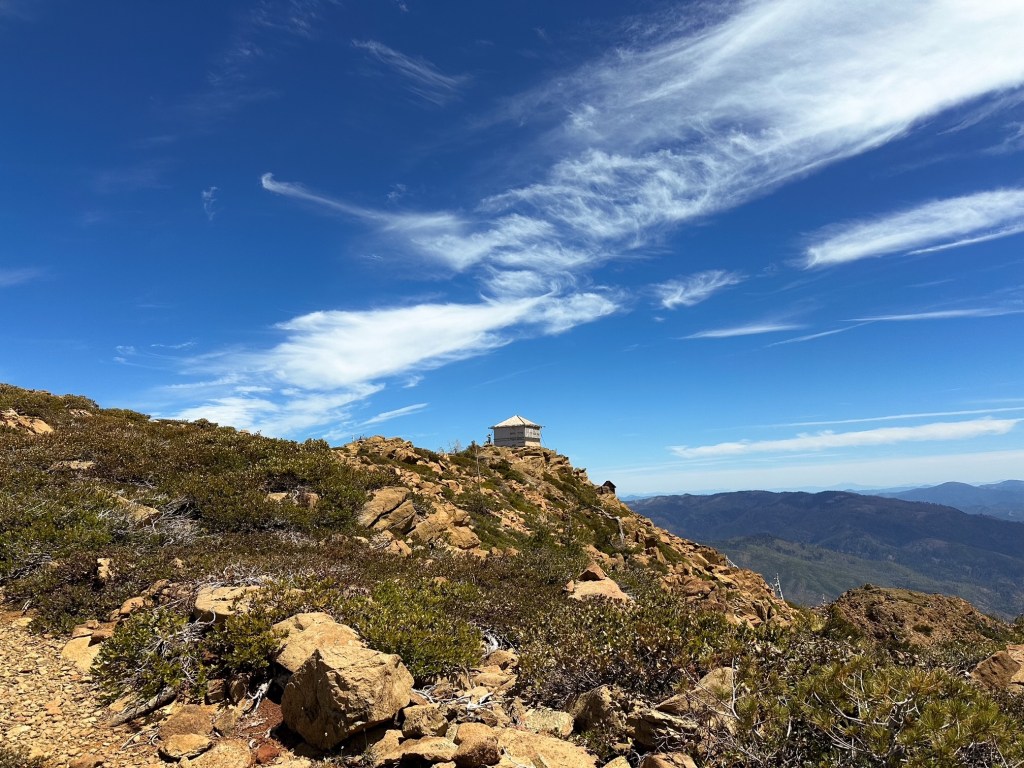
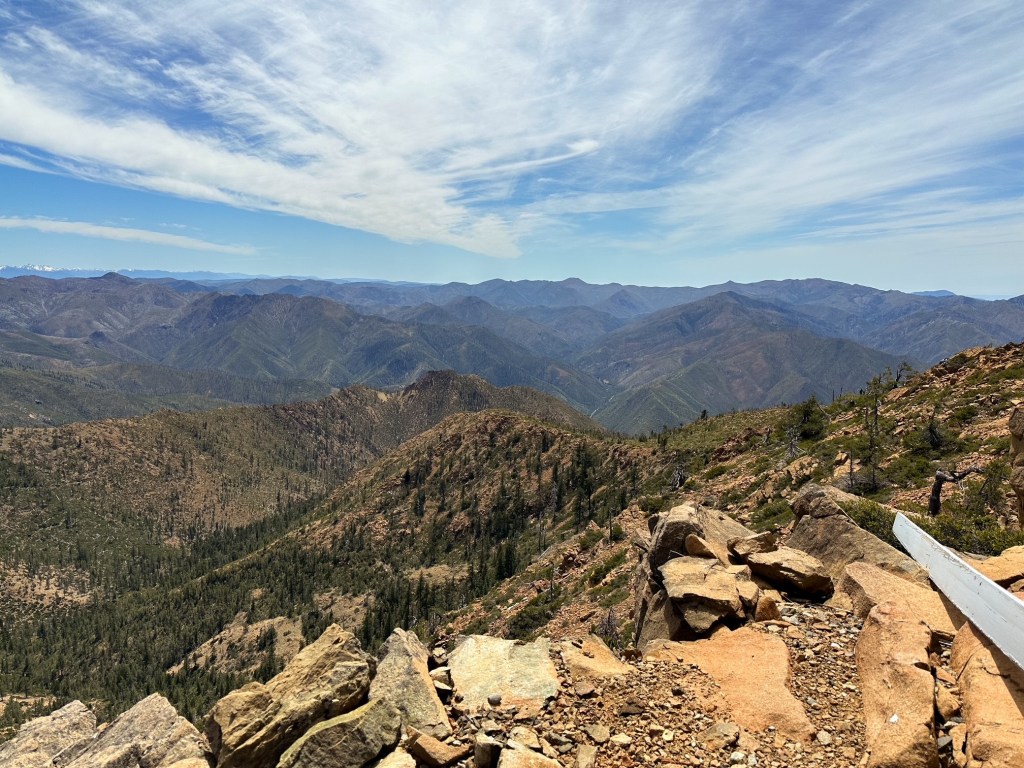
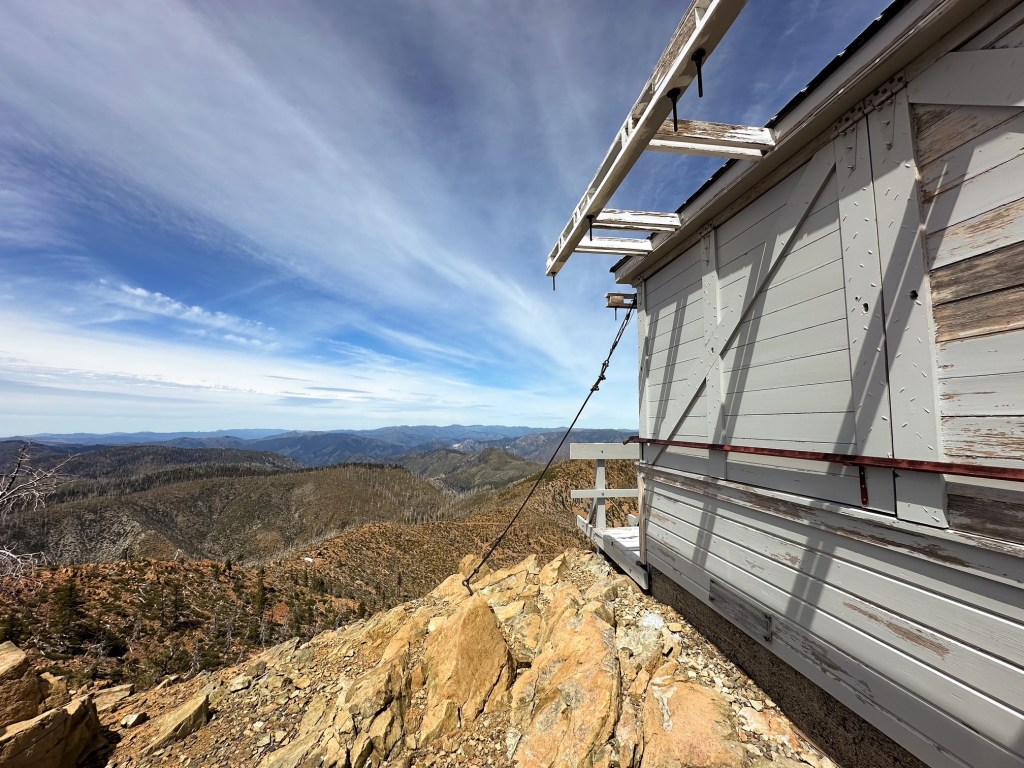
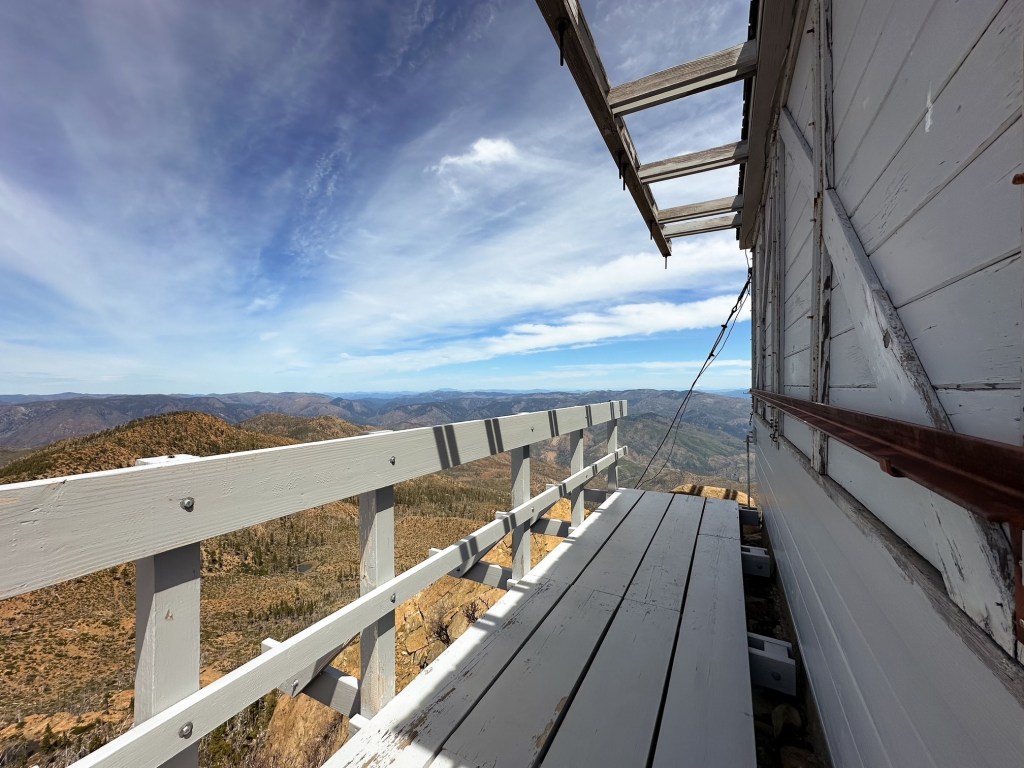
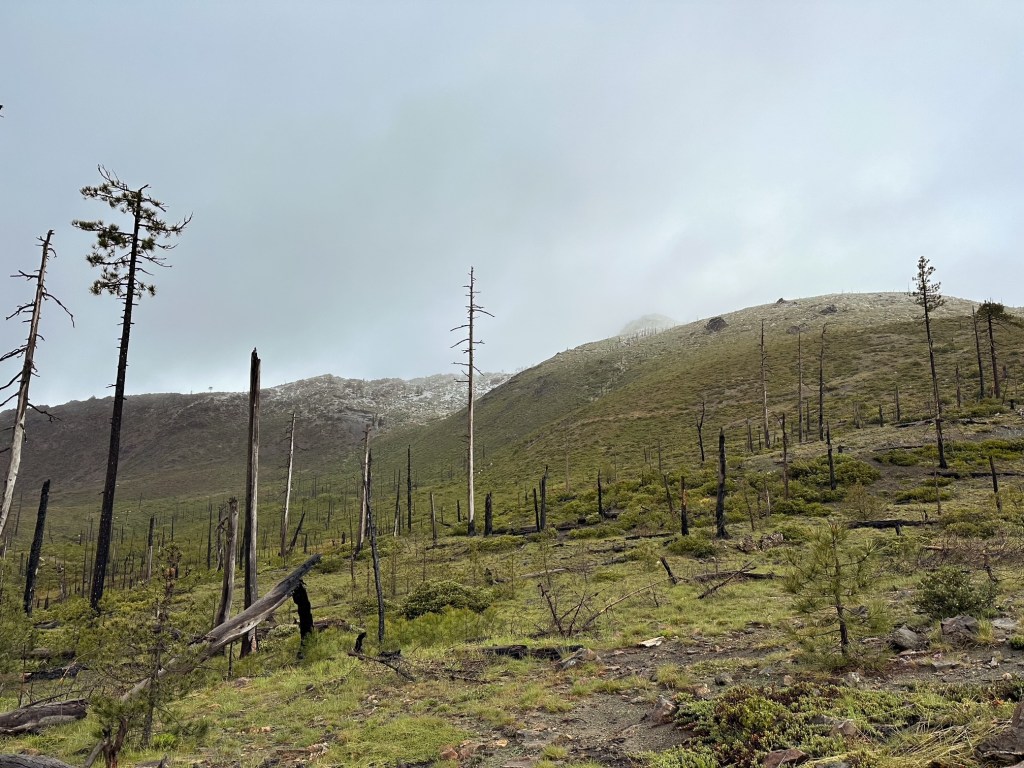
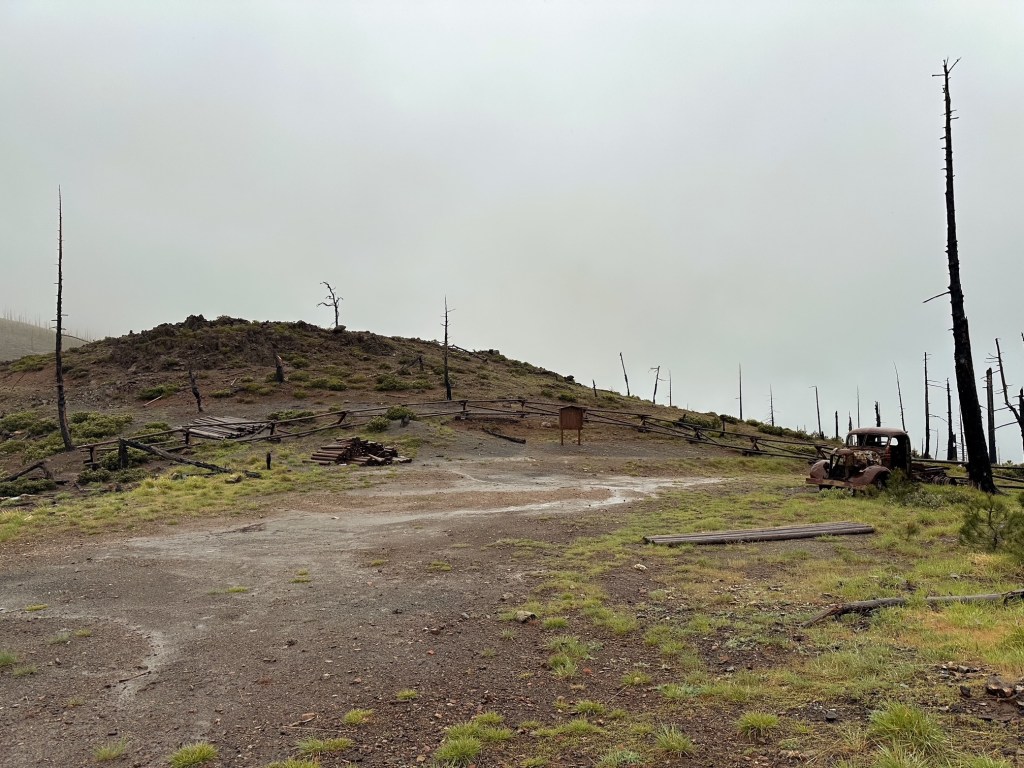
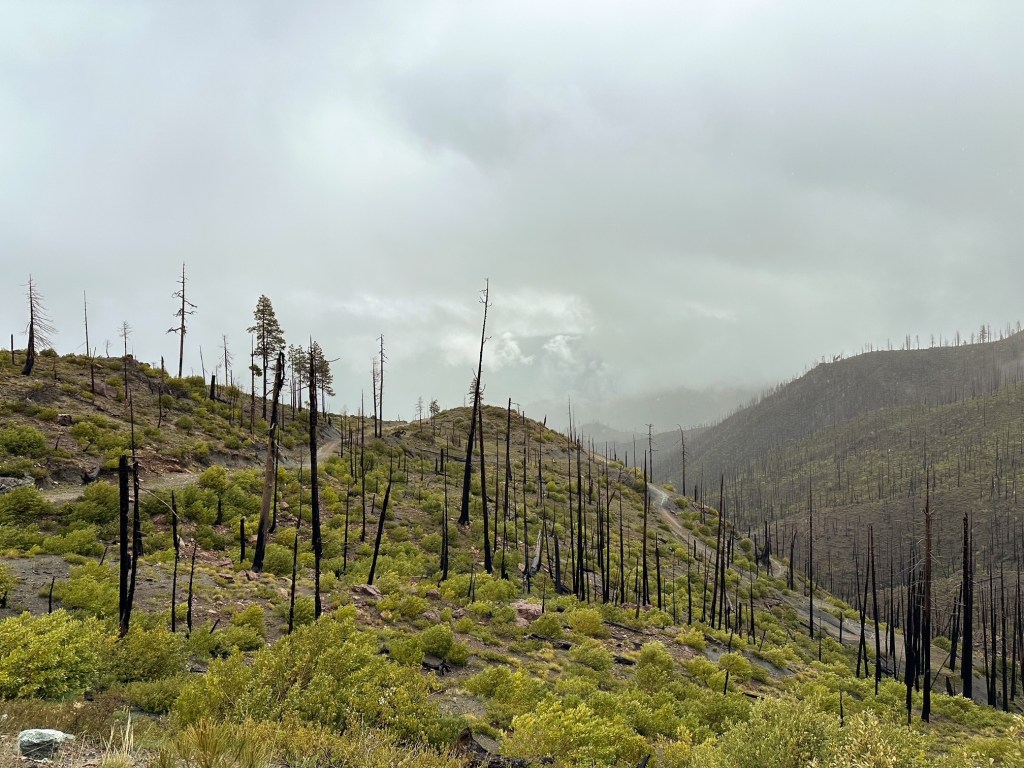
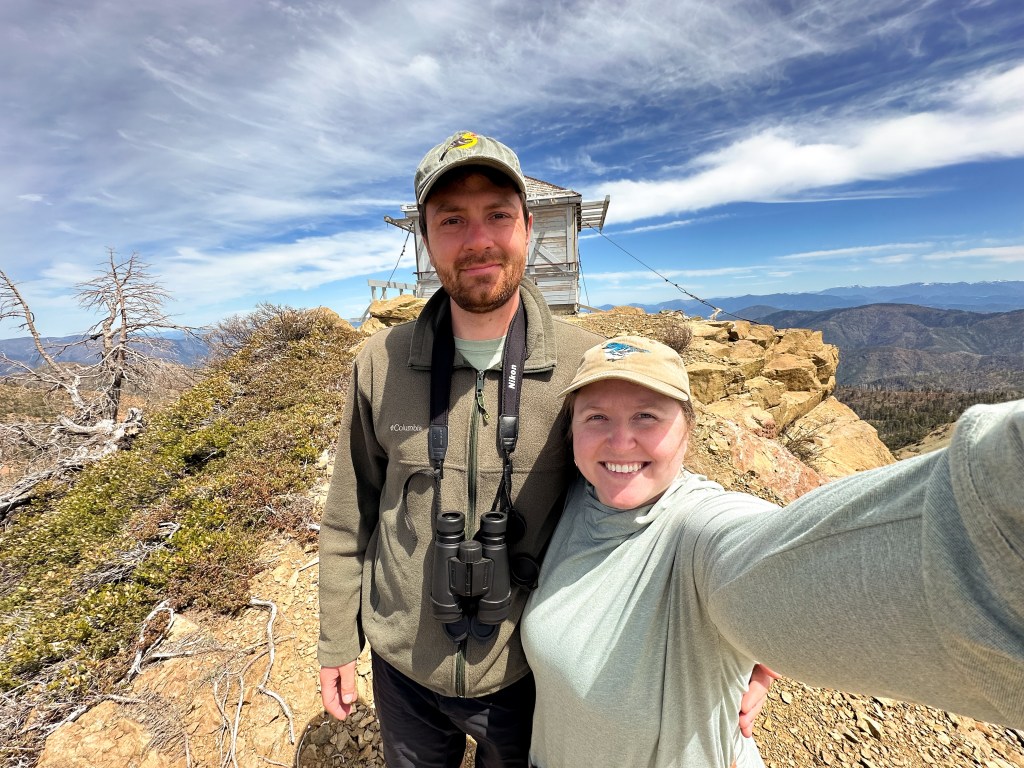
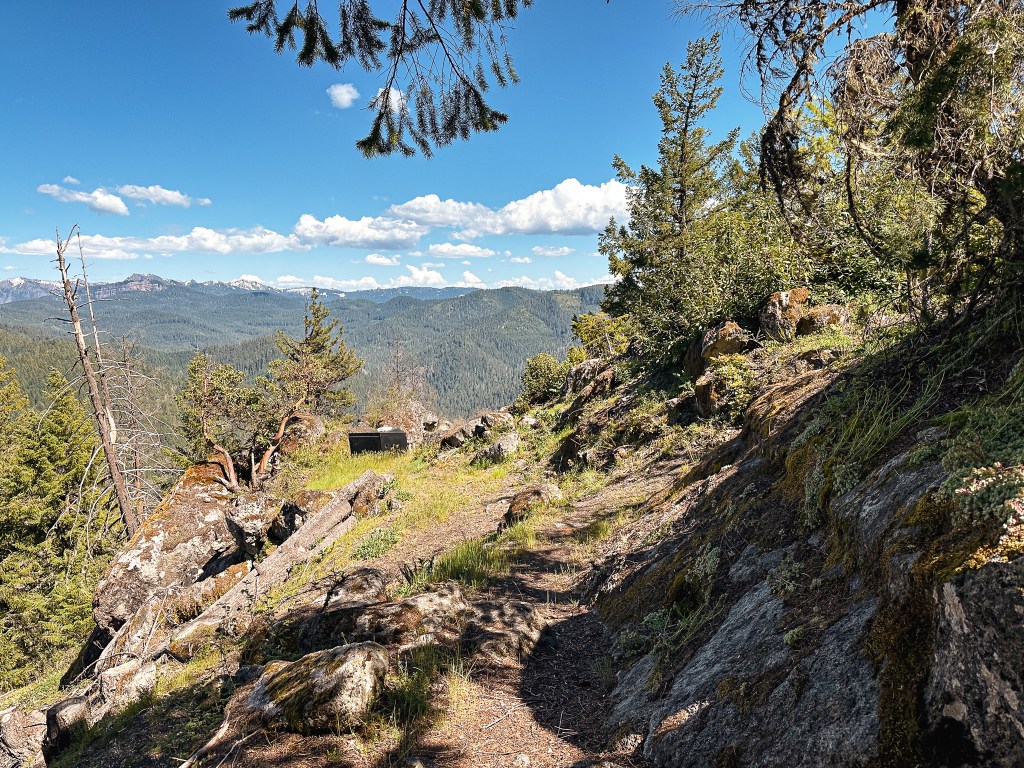
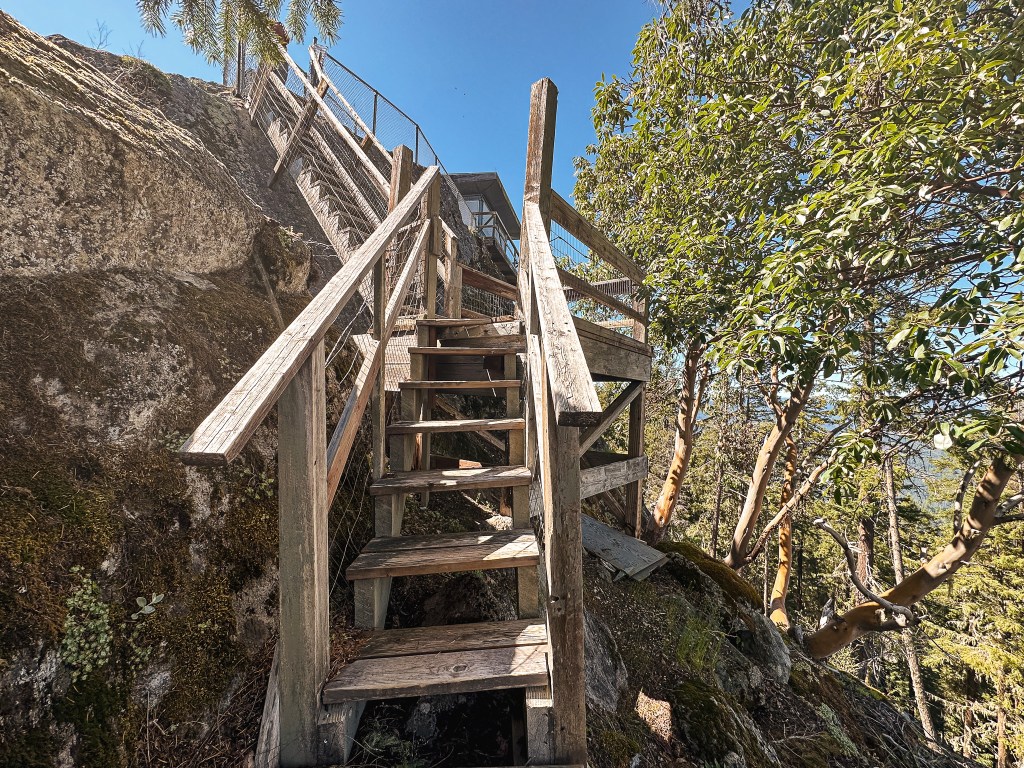
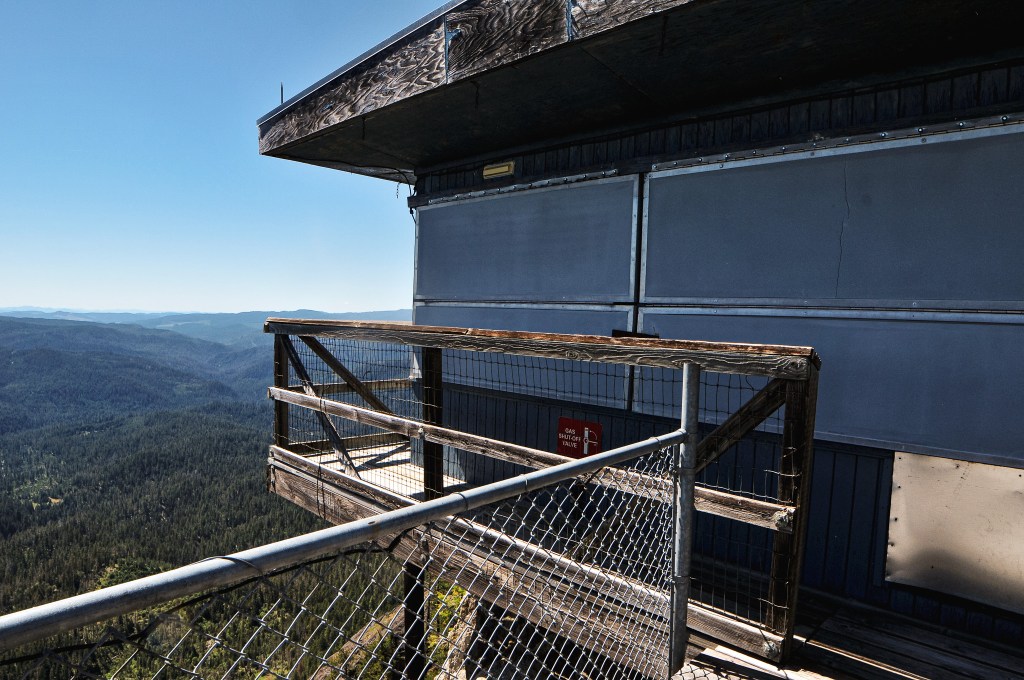
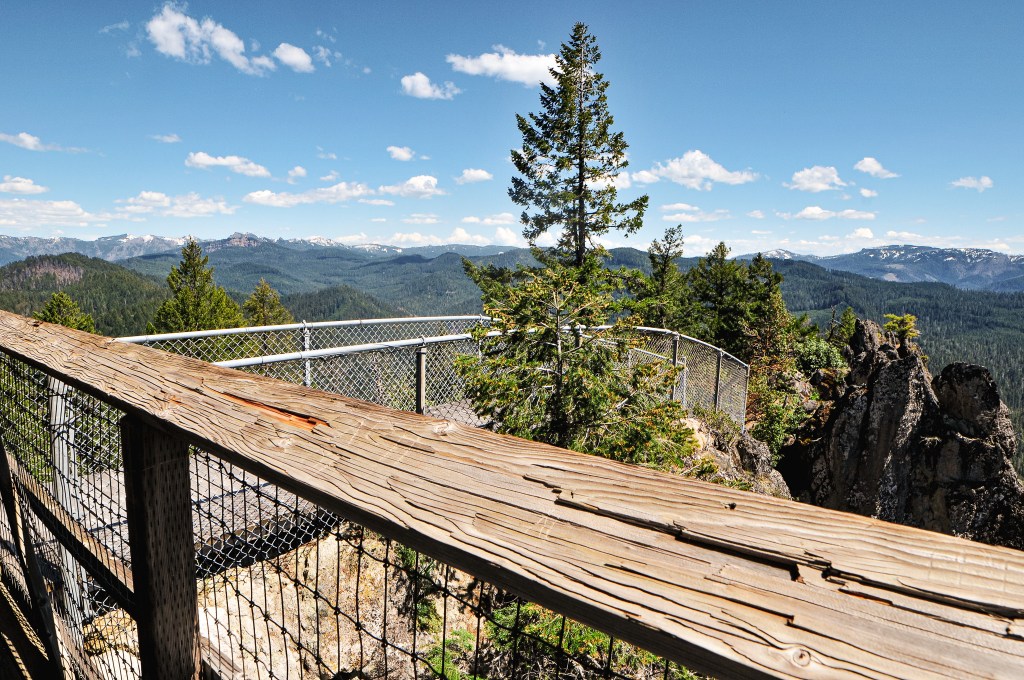
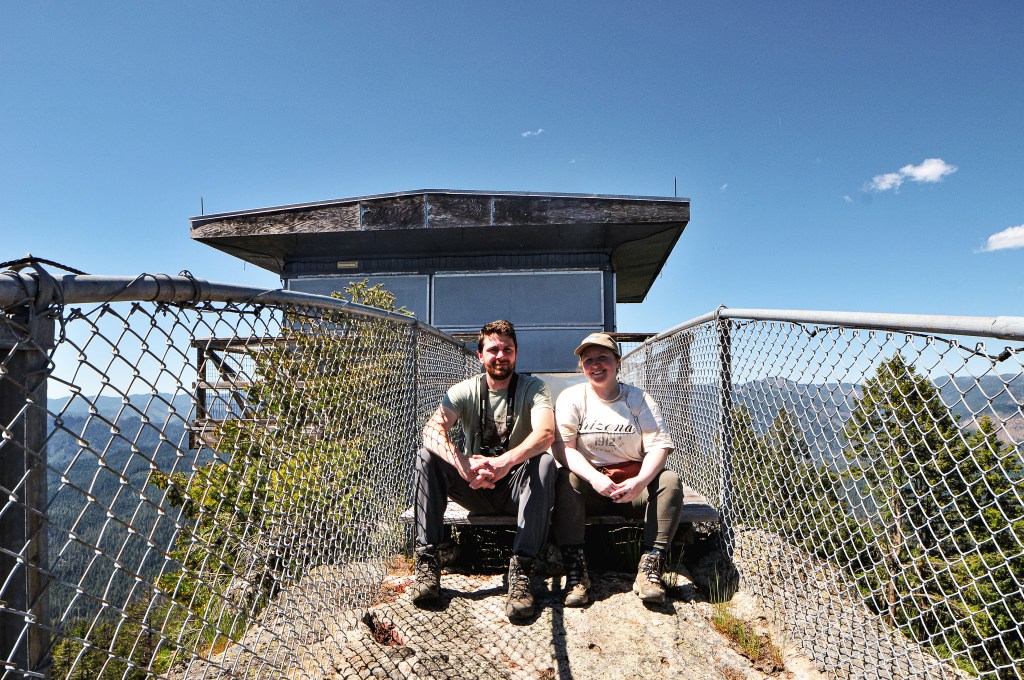
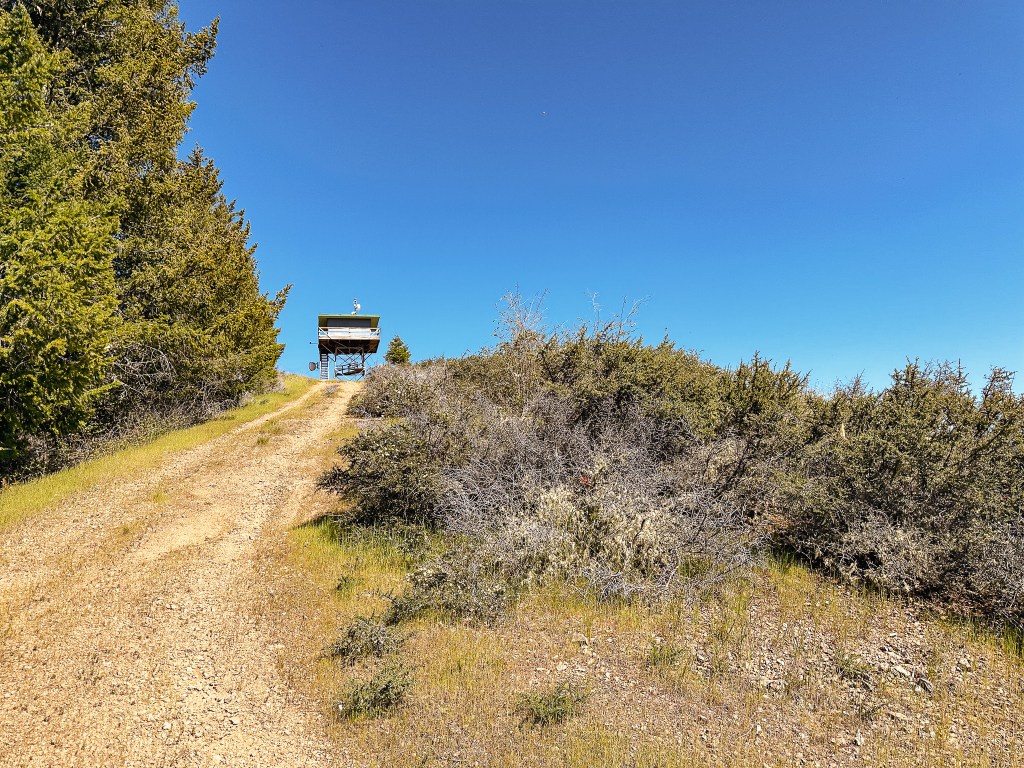
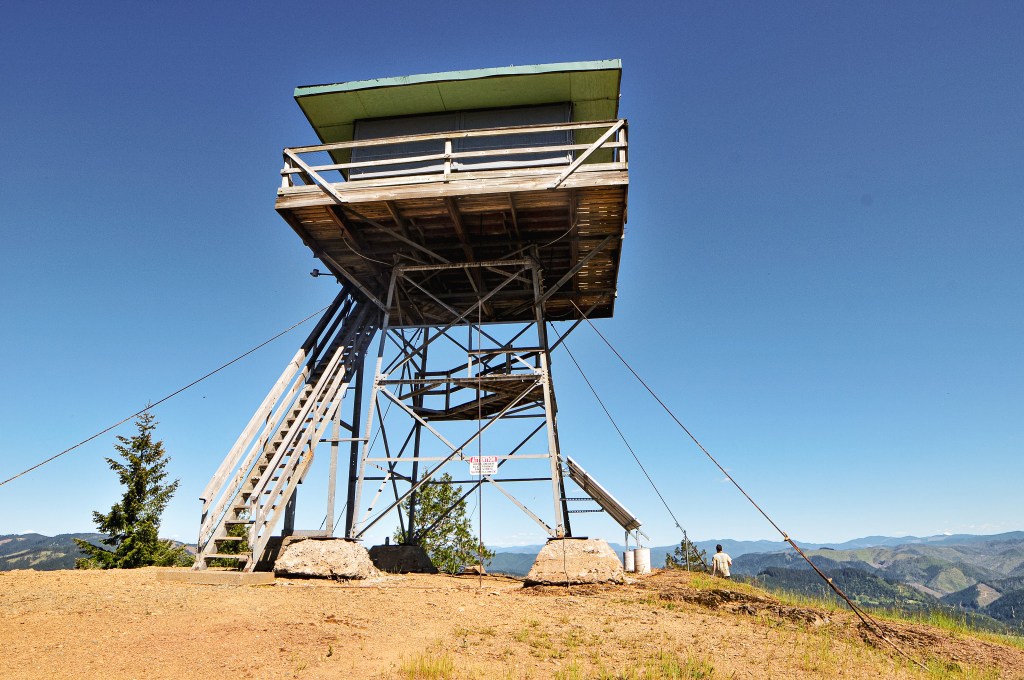
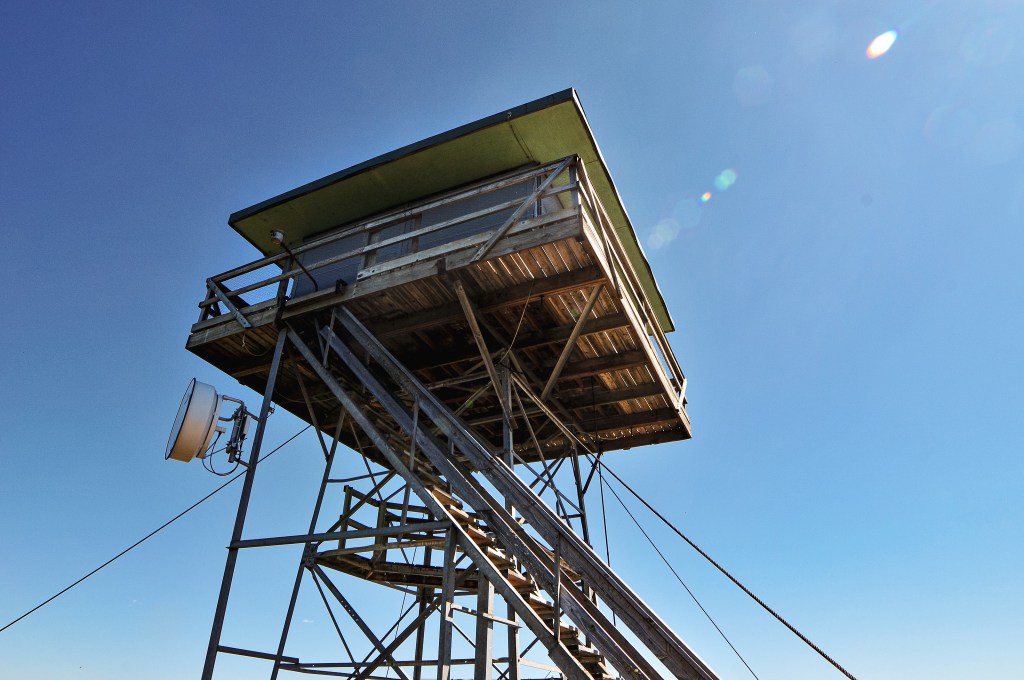
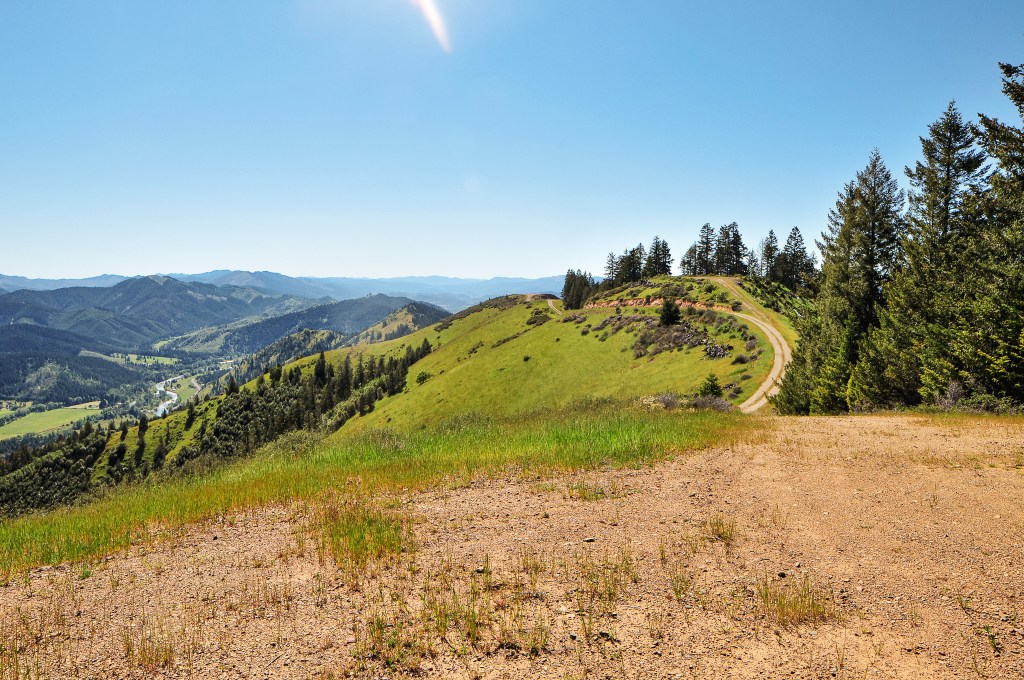
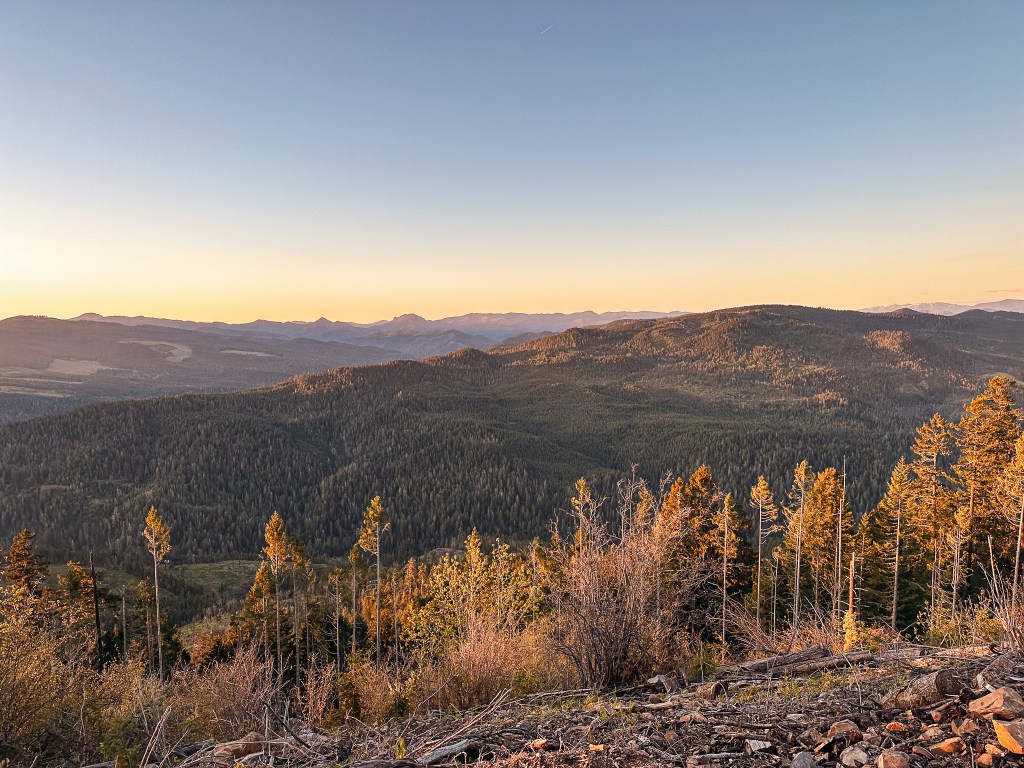
We took a sharp right to continue on the trail to the left of the sign board. The remainder of the trail is the route I had taken back in 2018. It was only another 2ish miles with ~1,500′ of gain from the upper trailhead to the summit. While the lower trail and the first portion of this trail are forested, it eventually opens up to an exposed slope before reaching the broad summit. Thankfully, we had the reprieve of cloud coverage for this portion. We also saw most of the people during this section of the hike – though still significantly less than if we were to come during peak season. I had prompted Garnet to hike ahead during the final push since I wanted to take a few extra breaks and pictures. I could not see where he was when I reached the summit, but headed for the Cupola first. A few hikers we had passed on the way up warned that the summit was windy and cold. I didn’t feel the true nature of their statements until I stepped out to the viewpoint platform beyond the Cupola. My body temperature instantly dropped and my fingers hurt from the bite in the wind. I made a quick retreat after taking a few pictures to put on additional layers. Unfortunately, I was missing the pair of gloves I usually keep in my day pack and it was hard to keep my hands warm (they were probably packed away at home in a different bag from last season). Garnet had been over by the tower during this time and eventually joined me on a bench. We decided to move back closer to the tower for our lunch since it had more of a windbreak. This did not last long as I could not stay warm even with my layers. I started hiking down while Garnet finished eating. The clouds had been threatening precipitation most of the morning and it finally started to snow on my way down. There was not a ton of precipitation, but it felt more like little ice pellets as the wind whipped it into my face.
The descent was much quicker than the ascent and Garnet caught up shortly after it started snowing. We found ourselves delayering again as quickly as the clouds rolled out. I was feeling minimal fatigue by the time we returned to the Upper Trailhead, but it caught up to us on the lower portion. Garnet ended up taking more breaks on the down hill than he needed on the up hill. Once the sun came out we were both feeling extreme sleep deprivation and felt like we could easily fall asleep on trail. Luckily, I had stashed some caffeinated drinks in the car to help make the 3-ish hour drive back home. Strava calculated our final hike at 10.46 miles and 3,534′ of gain.
Hello fellow lookout enthusiasts, staffers, or readers alike;
It is nearing the end of 2025 and has been a while since I have posted on here. For lack of better words I have simply fallen behind. The reality is, despite being busy in many different ways, I have lacked motivation to write. I do plan on completing my backlog and I know there are no expectations for my own blog, but the longer I sit on it the less useful the information becomes. Anyway this is all just a quick post to say – hi, hello – I am still here and see that there is still traffic on this page.
A small update on this last season. We didn’t visit as many fire lookouts within our own state, but have found ourselves at more former sites than previous years. They can be just as interesting to us and tend to still have a decent view. One of our longer trips was a 10-day 1,768 mile road trip around Minnesota which consisted of visiting 23 fire lookouts within the state. That trip made up the bulk of the fire lookouts we have visited this year. Our second longer trip was an 8-day 50 mile backpacking loop through the Eagle Cap Wilderness. We did manage to check off some harder to reach lookouts in Oregon via backpacking trips, specifically Pearsoll and Mule Peak.
What’s to come in 2026? Only the forest service roads can tell us for sure. We are planning on a 2-week road trip but haven’t settled on which states or parks that will include yet. We are still in the speculative stage of planning beyond the dates. More than likely it will expand our fire lookout scope to another state but that is not the sole purpose of the trip. we will still continue to chip away at fire lookouts here locally but there are less and less every year.
I am most active on Instagram for now under the handle @takeahikedani if you want more day to day updates on where we have been recently.
I am also happy to stay connected via e-mail – especially if you notice any discrepancies of information, have condition updates, recommendations, or have questions on fire lookouts we have visited (e-mail: sullivan.danielle@yahoo.com).
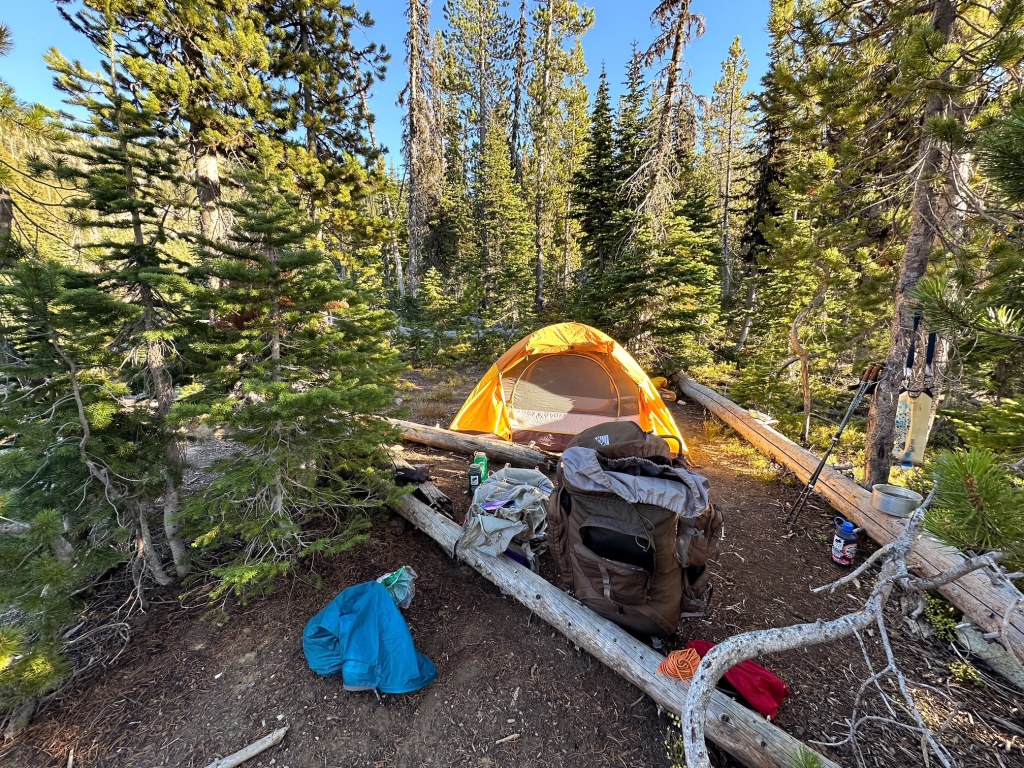
Similar to other fire lookouts located deep within the wilderness, we decided the best way to access Mule Peak was via a backpacking trip. This cut out the need for an overly strenuous day hike and presented the opportunity to explore deeper into a wilderness that we’ve come to love. There are a few different route options for accessing Mule Peak, but not all seemed accessible for a low clearance vehicle. We decided to start from the Buck Creek trailhead given the available information online. Our first day of the trip was dedicated to driving to the trailhead for a few different reasons (i.e work schedules, hiking distance to camp, drive time). There is a nice forest service campground at the trailhead with 3 or 4 available spots and a pit toilet. This set us up nicely to start our hike early the next morning. The road in was passable but definitely had some hazards to avoid.
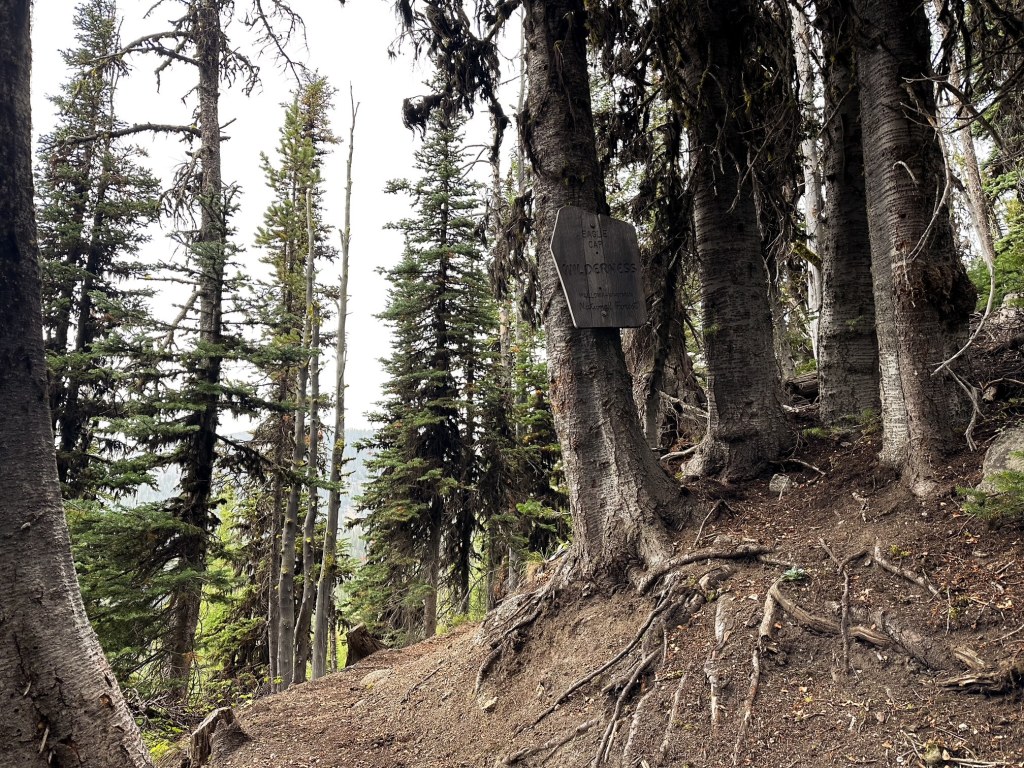
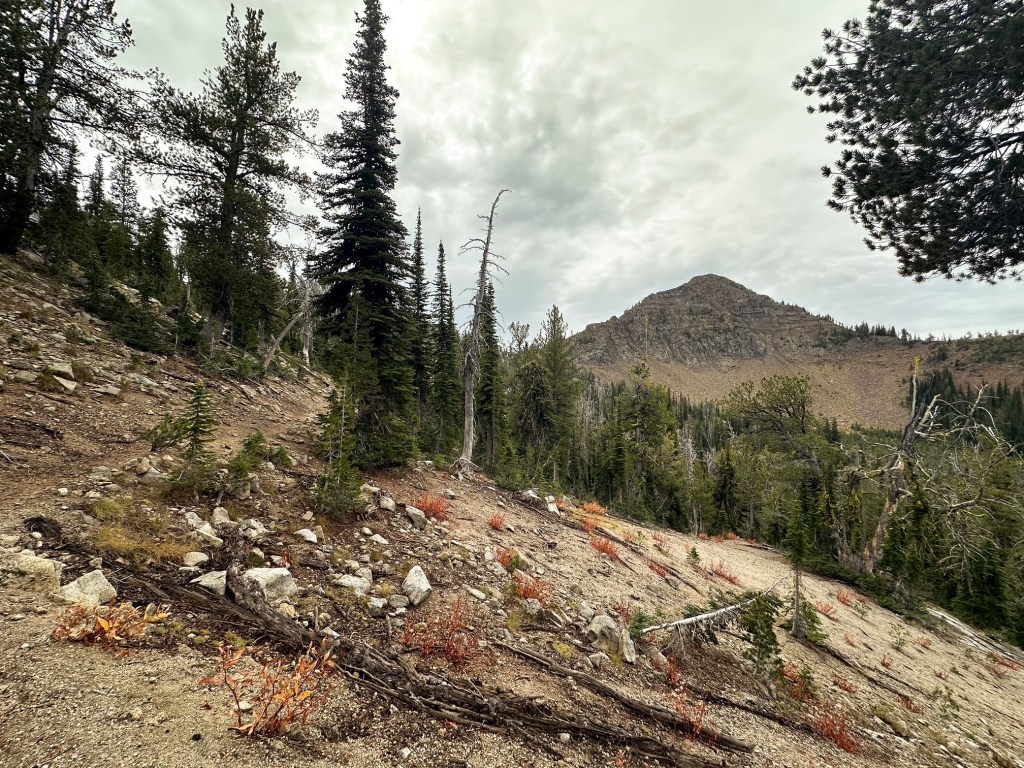
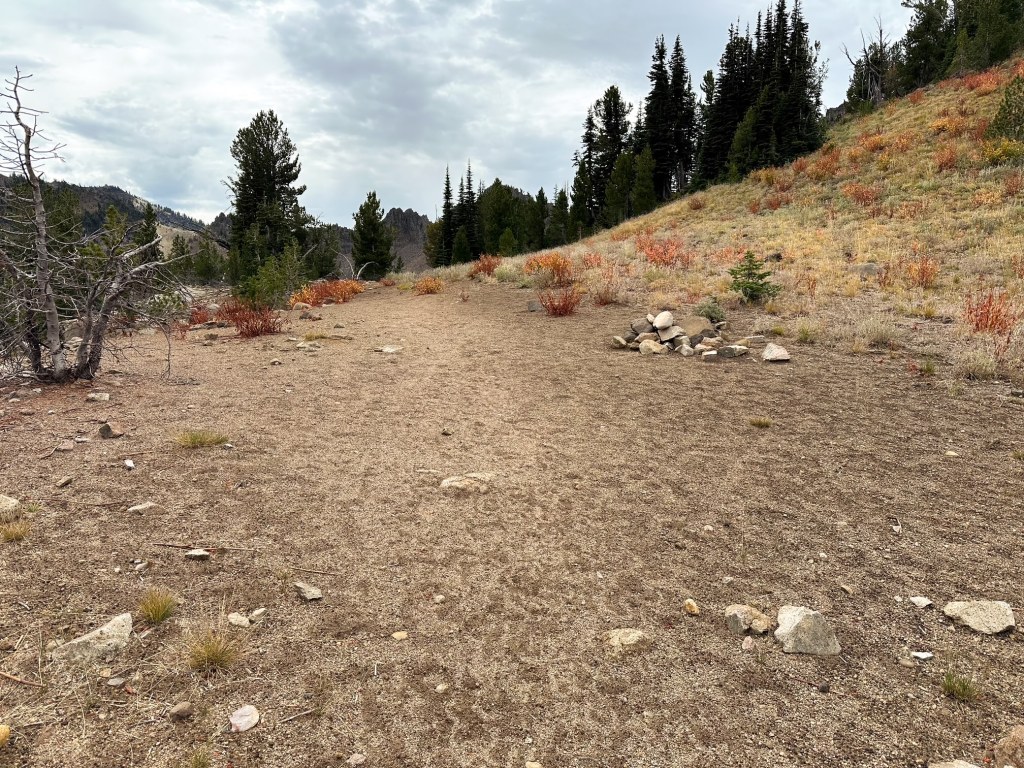
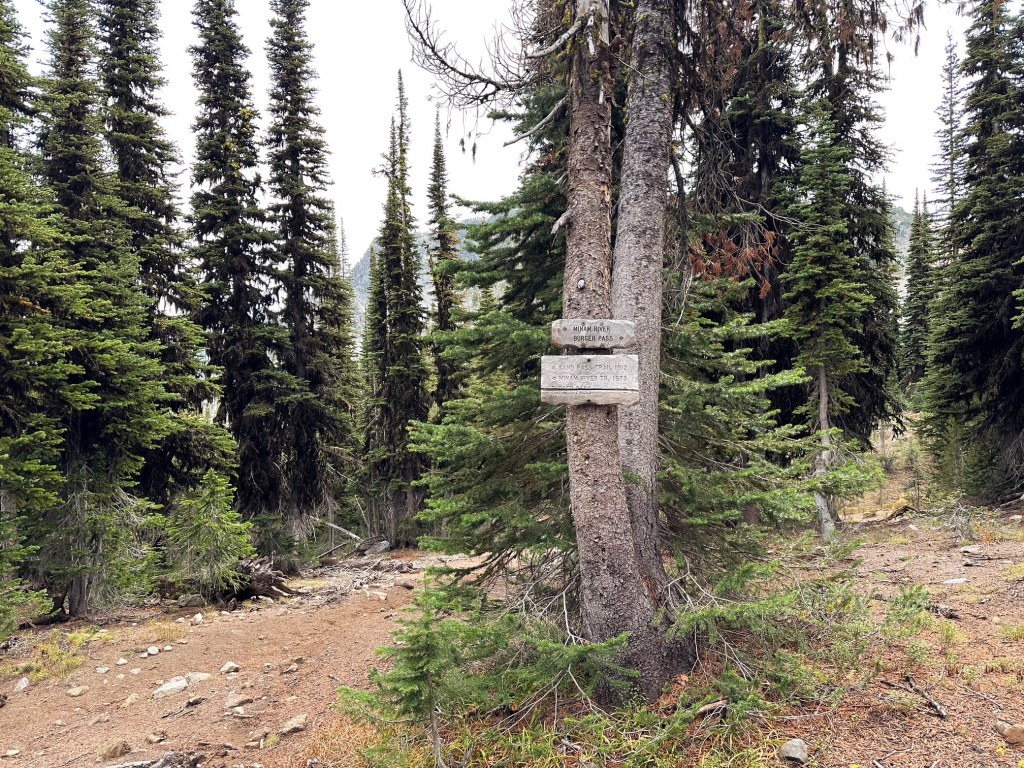
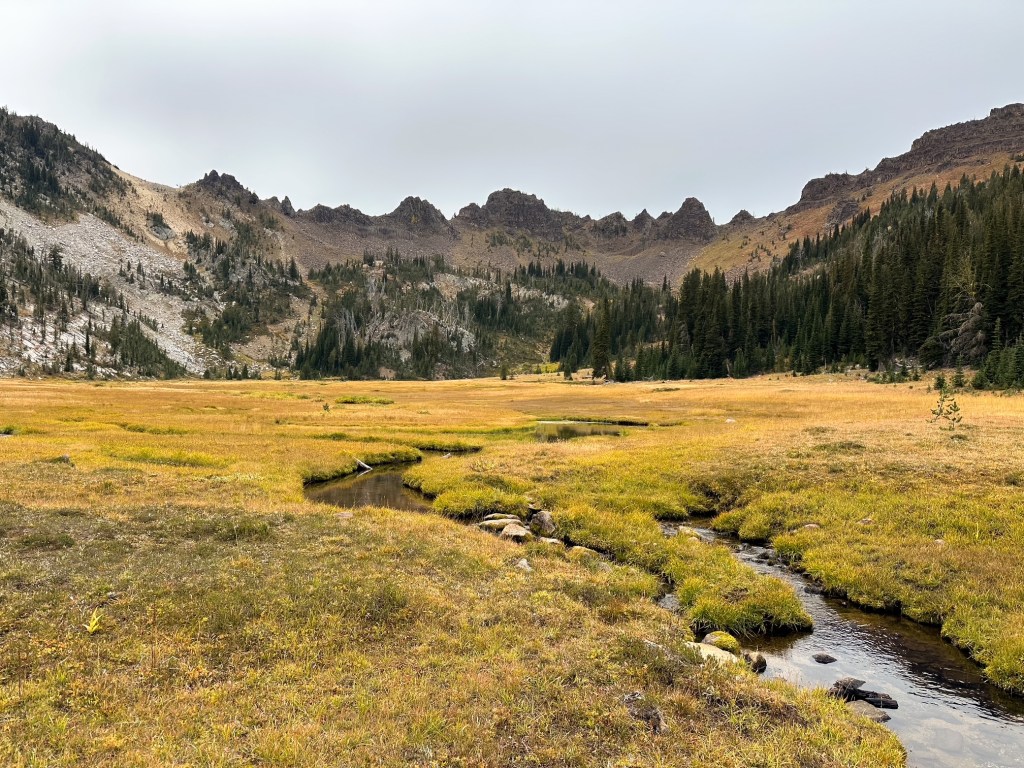
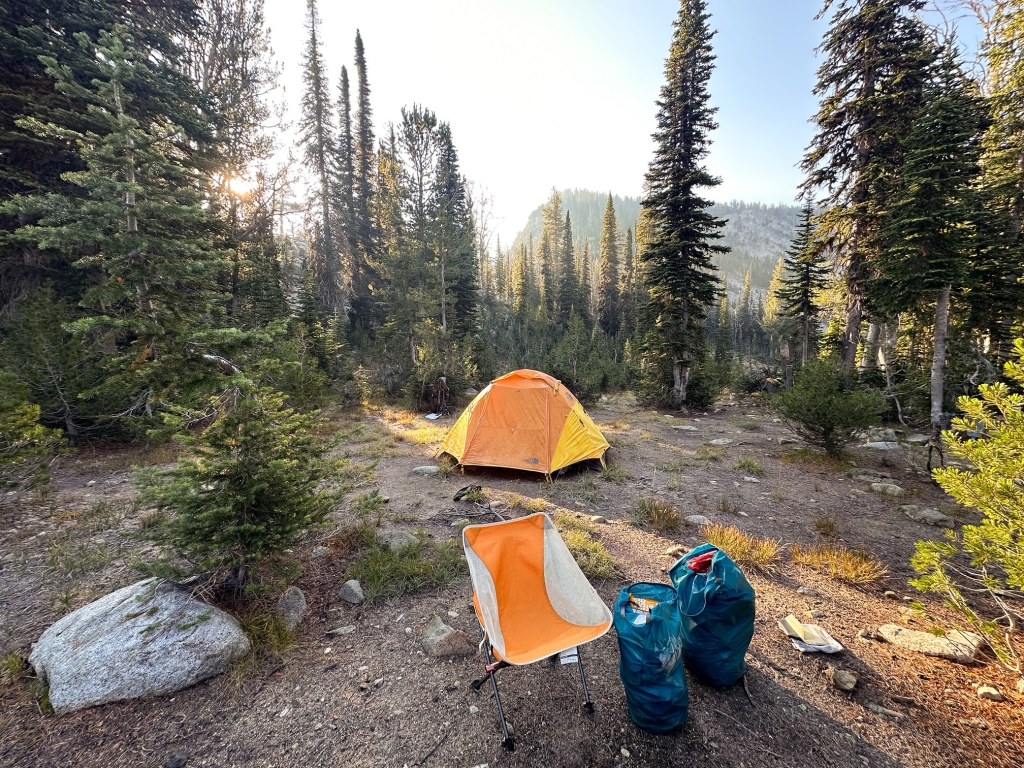
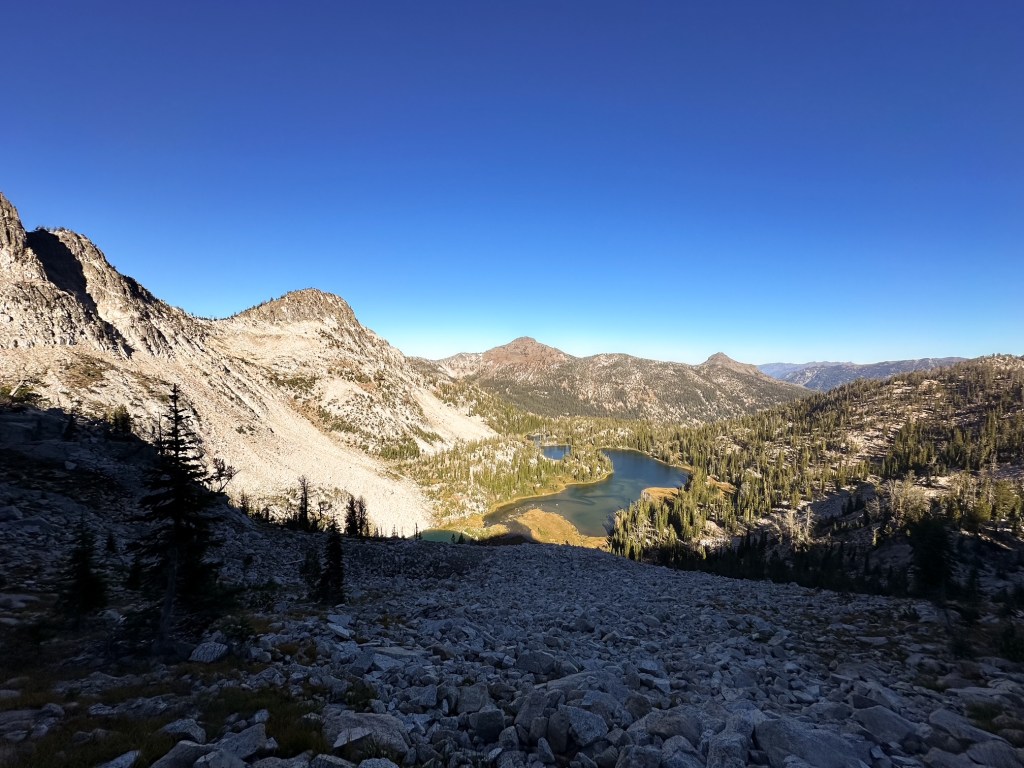
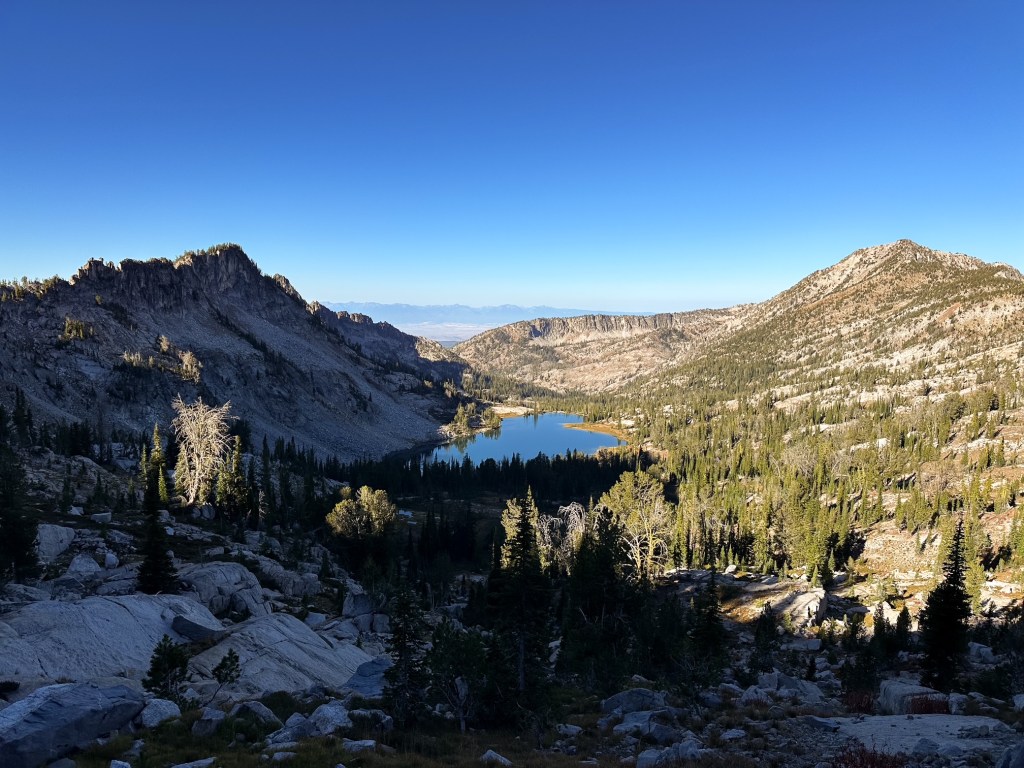
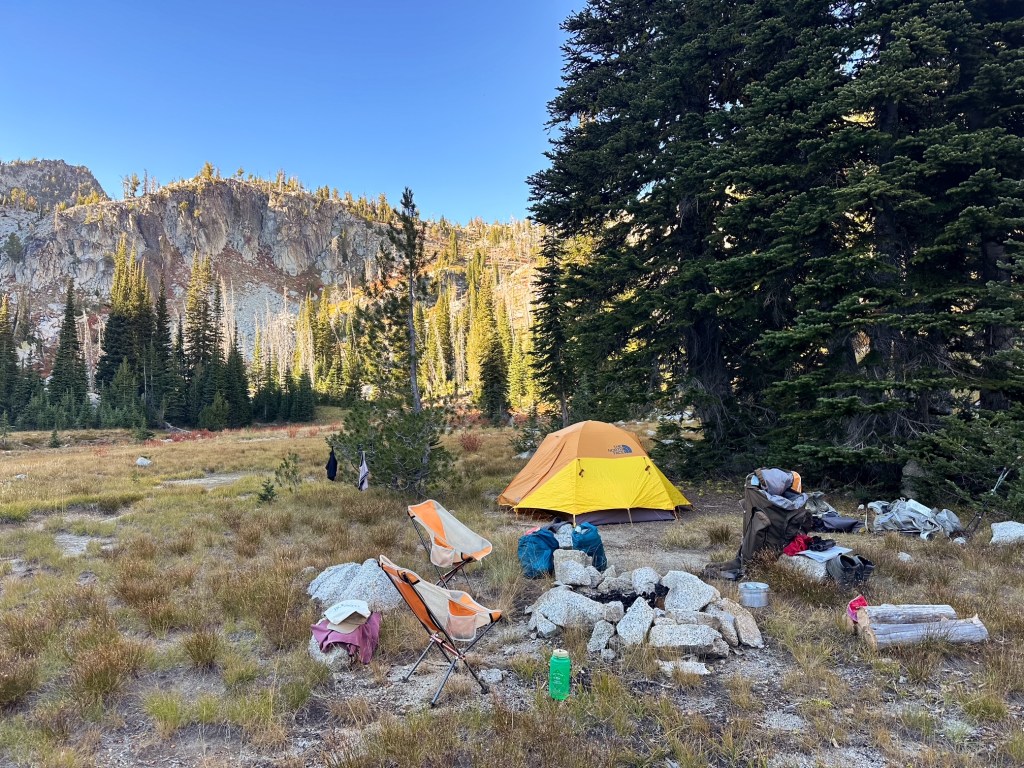
The forecast for the beginning of the trip was spotty with rain and clouds, but it was expected to clear up for the rest of the week. We woke up early to dark cloudy skies and hoped for the best. Our route followed the Elk Creek trail #1944 up and over Burger pass to the junction at Burger meadows. There were a couple of junctions before reaching the pass, but we stayed right each time to keep climbing. Despite all the trail information available online, we were not sure if there would be an official camp or water source once we reached the meadow. Pictures and topography suggested there would be, but no one seemed to confirm this online. Once over Burger pass, the Elk Creek trail descends to a junction prior to reaching the meadow and continues left all the way down to the Minam River. This would be part of our route for the following day and the trail we’d take to complete our West Eagle loop later in the week. For now, we turned right on to the Sand Pass trail #1912 to descend the remaining distance to the meadow. We were relieved to find a well worn camping area and a creek cutting across. This area is known for horse packing and there were signs of this around the camp. There was no one else here upon our arrival so we took our time picking out our tent spot. It had rained on us intermittently throughout the hike, but there was now a break in the clouds where the sun was trying to poke through.
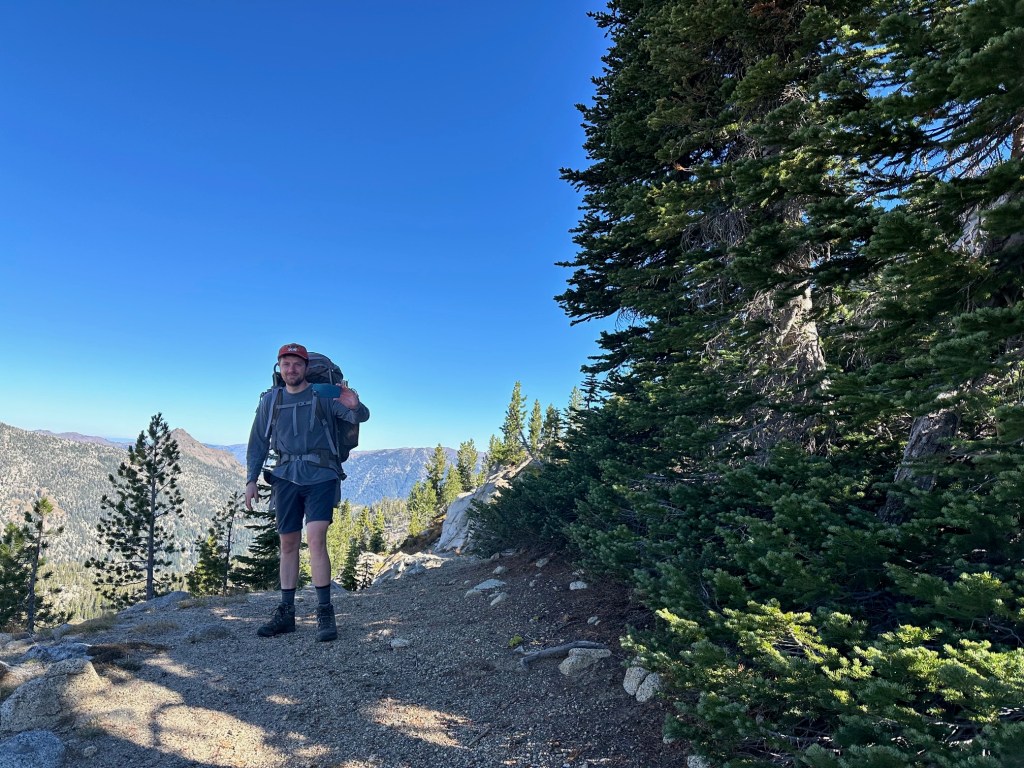
Our initial plan was to hike to Mule Peak the next morning before moving camps, but current conditions had Garnet tempted to do it day of. I was hesitant since I could see the trail heading up to the pass from camp and it looked like it disappeared into loose scree, which is my nemesis for trail conditions. I was unsure at that point if I was going to even attempt it and wanted to sleep on it first. Garnet decided to hike on while I hung out in camp and would report on conditions upon his return. He figured if I ended up deciding not to do it this could save us time the next day. I passed most of my time in our tent trying to stay warm while reading. Eventually, I heard someone call out as they walked into camp thinking it was probably Garnet. I was joined by an older gentleman that had hiked up from the Elk Creek trail instead. He was very gregarious and we chatted for a bit before agreeing to share the space. There really is only one area to camp in the meadows, but it is big enough to accommodate a few tents. Darker clouds started to roll in again prior to Garnet’s return, and I retreated to the safety of our tent while our new neighbor was setting up. Garnet seemed to be taking longer than anticipated for the estimated mileage. Per usual, he did eventually return and was excited to inform me he met the attendant onsite (which is why it took him longer than expected). He had only been there for a few days this season, but was working on closing up the lookout for winter when Garnet arrived. It was interesting to hear that it is still actively staffed and not just in emergencies given the location. Garnet met our camp neighbor when he came out to make tea and chatted with him for a bit. The temperatures started to drop and the rain rolled in while we were making dinner. It was hard to even get the water boiling. We all retreated to the warmth of our tents shortly after.
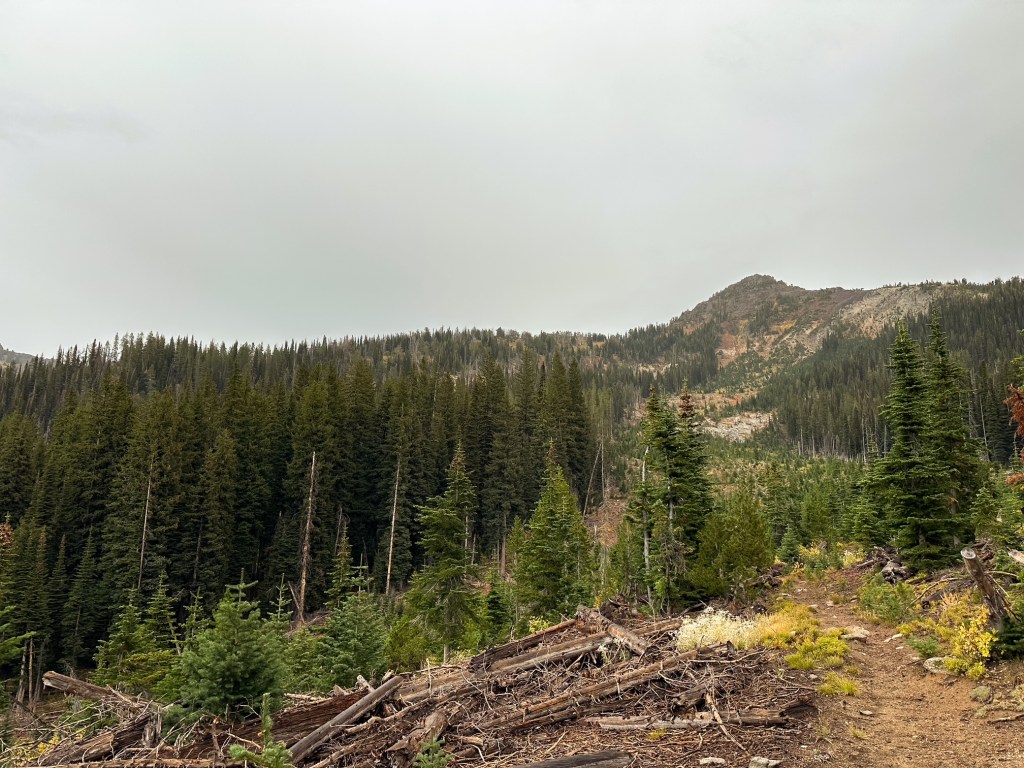
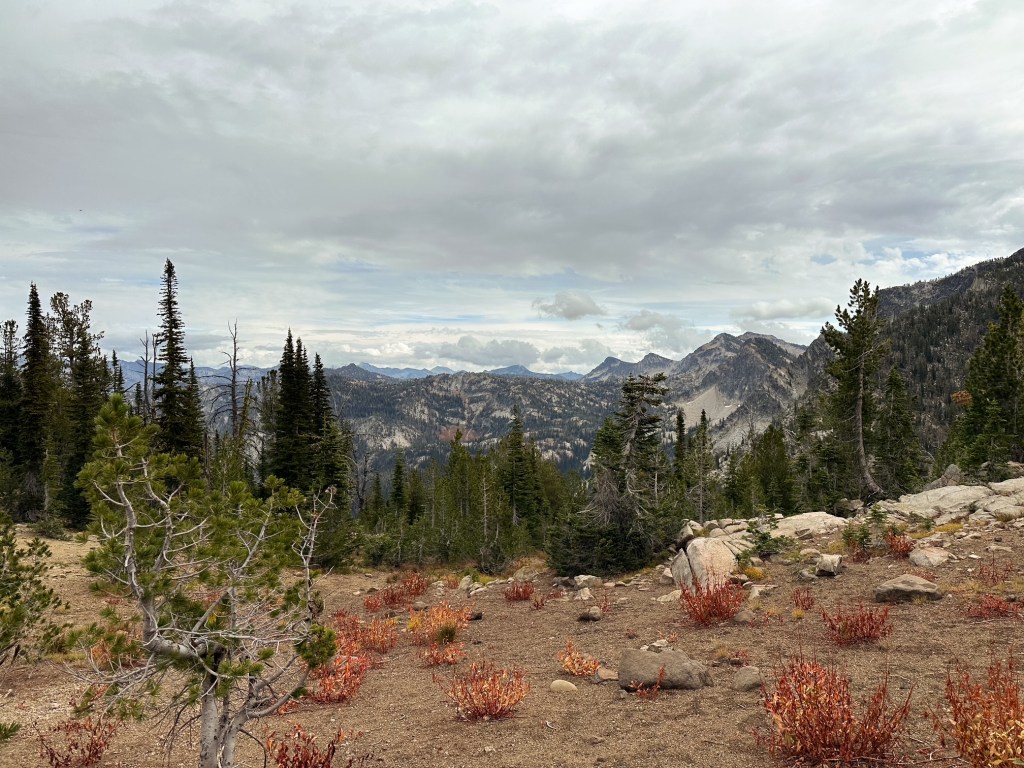
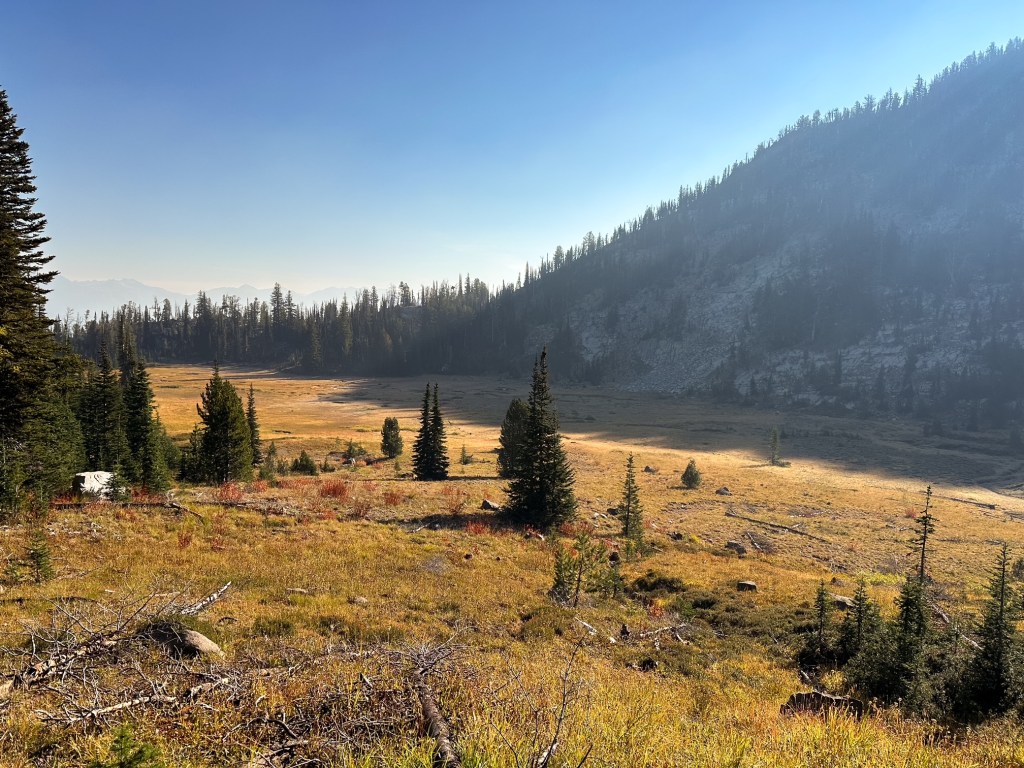
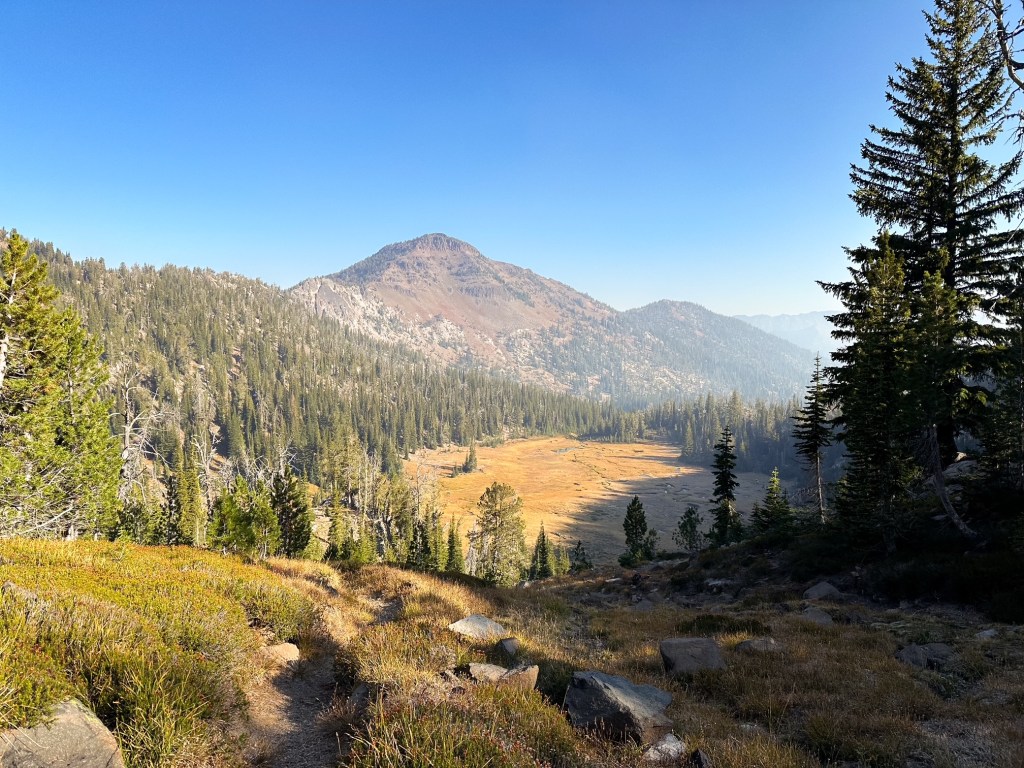
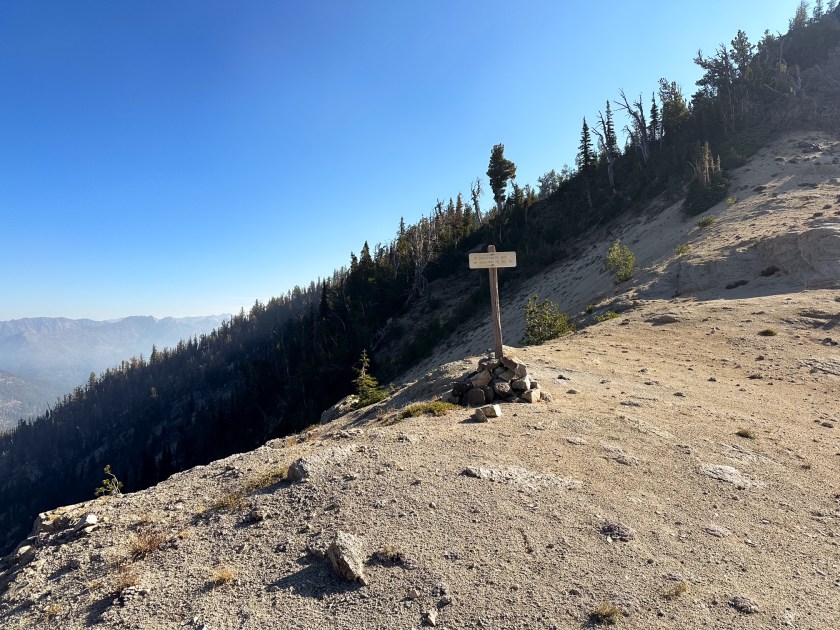
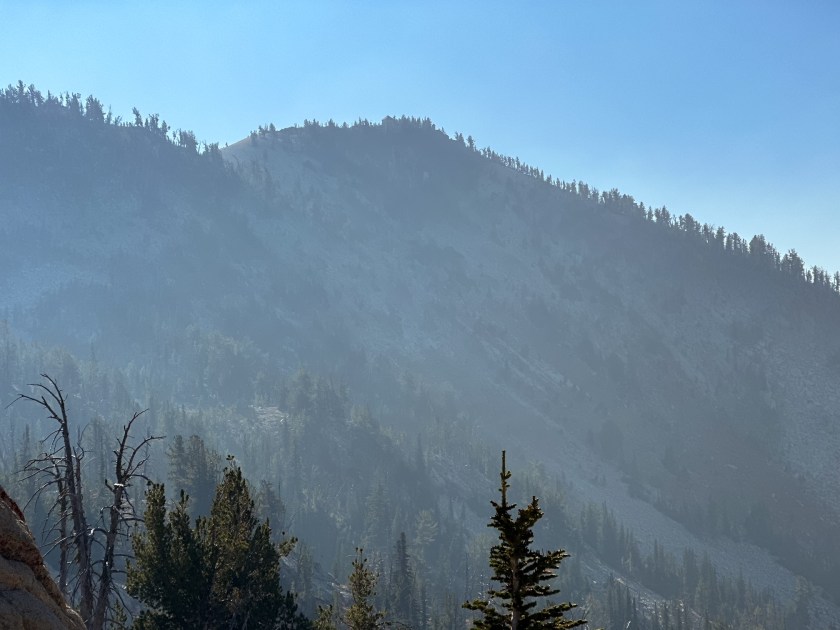
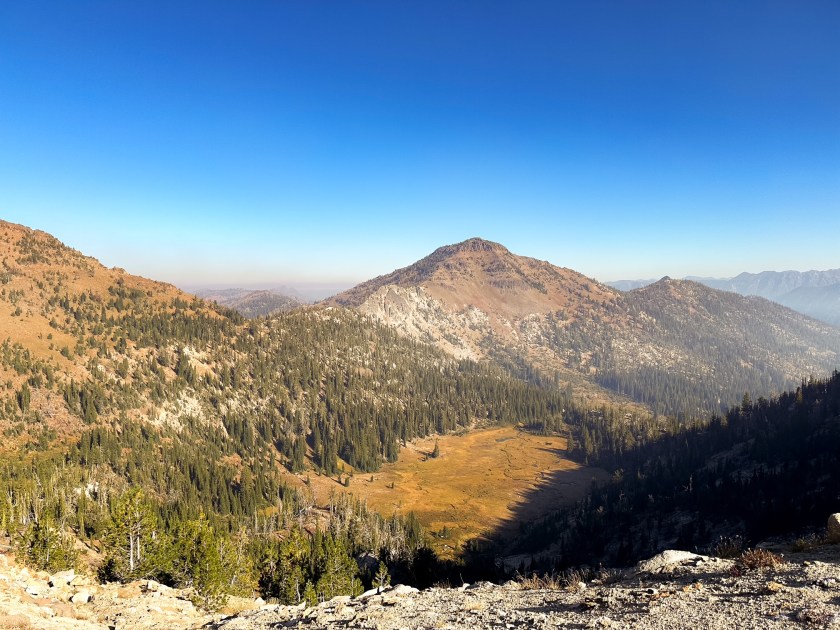
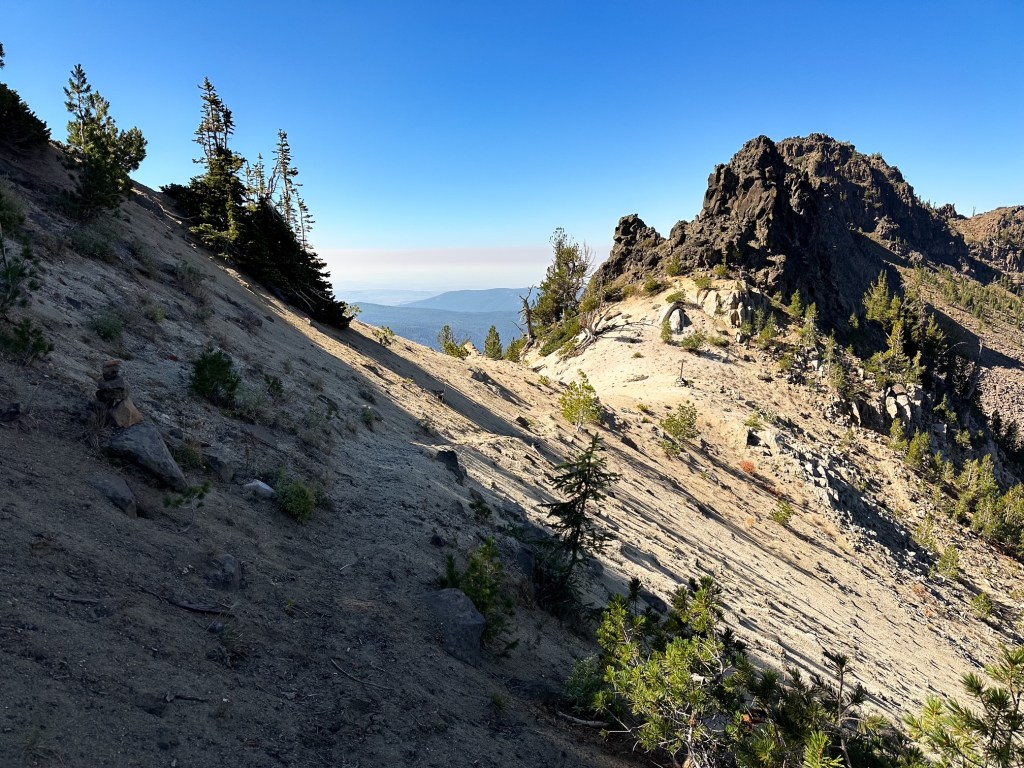
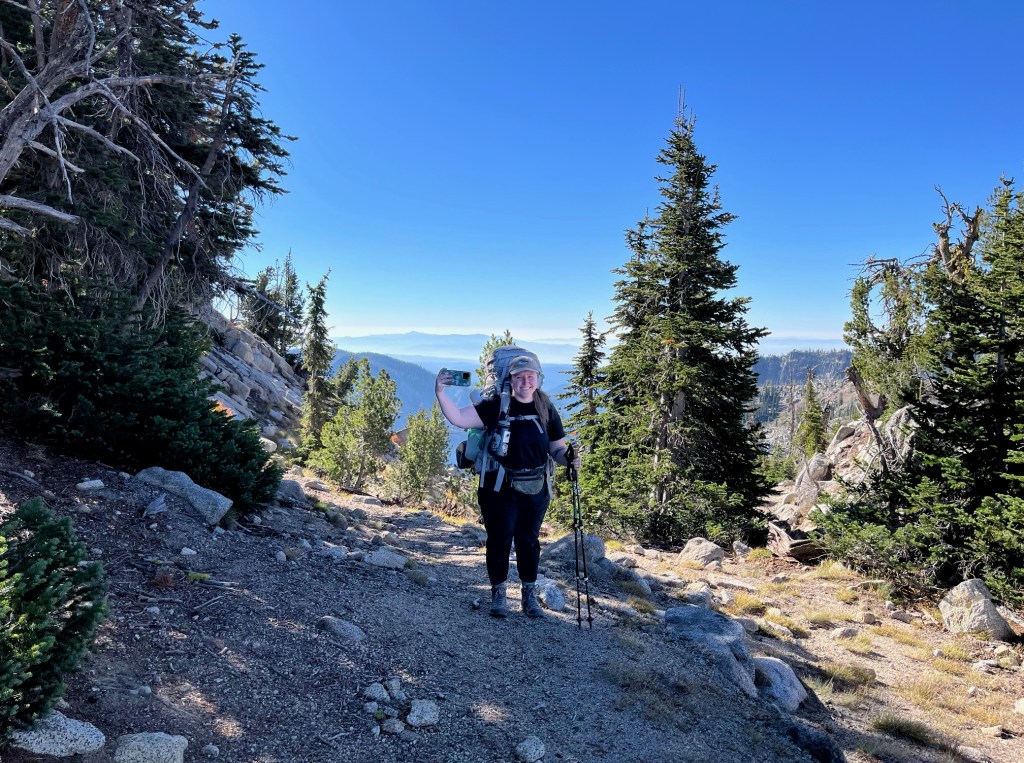
The next morning we awoke to clear blue skies, partially frozen water bottles, and frost on our tent. I have had the water in my Nalgene freeze a handful of times, but the frost on the tent was a first. It felt like winter was right at our heels instead of fall. It also made getting out of the tent early less appealing. Garnet had convinced me the night prior to attempt a hike up to Mule Peak by showing pictures of the trail conditions. The scree I was worried about was more stable than it looked from afar. I figured I’d regret not at least attempting it too. We decided to eat and start the hike prior to packing up camp. This would give everything time to defrost and dry. We said good bye to our camp neighbor who didn’t seem in a hurry to pack up either, but we weren’t sure he’d be there upon our return. We reconnected to the Sand Pass trail #1912 and followed it along the edge of the meadow. Once on the other end of the meadow, it starts to turn up and wastes no time switch backing up to the pass. The trail does turn to sand making the pass aptly named. You get your first view of the lookout from the saddle at the pass. The Mule Peak trail #1924 continues to the left of the ridgeline even though your view of the lookout is to the right. There is a trail that continues down the other side of the pass which is the continuation of the Sand Pass trail #1912. This trail looked significantly less used. The worst of the trail conditions were just to the left of the pass at the start of the Mule Peak trail. The sandy conditions have eroded away to a short section of side slope and it is not a friendly section to those afraid of heights, or in my case falling. Beyond this section the trail compacts back to dirt and is much more solid. I managed to muddle through while saying “I hate this, I hate this, I hate this!”. Coming back down this small section was much worse than going up it though.
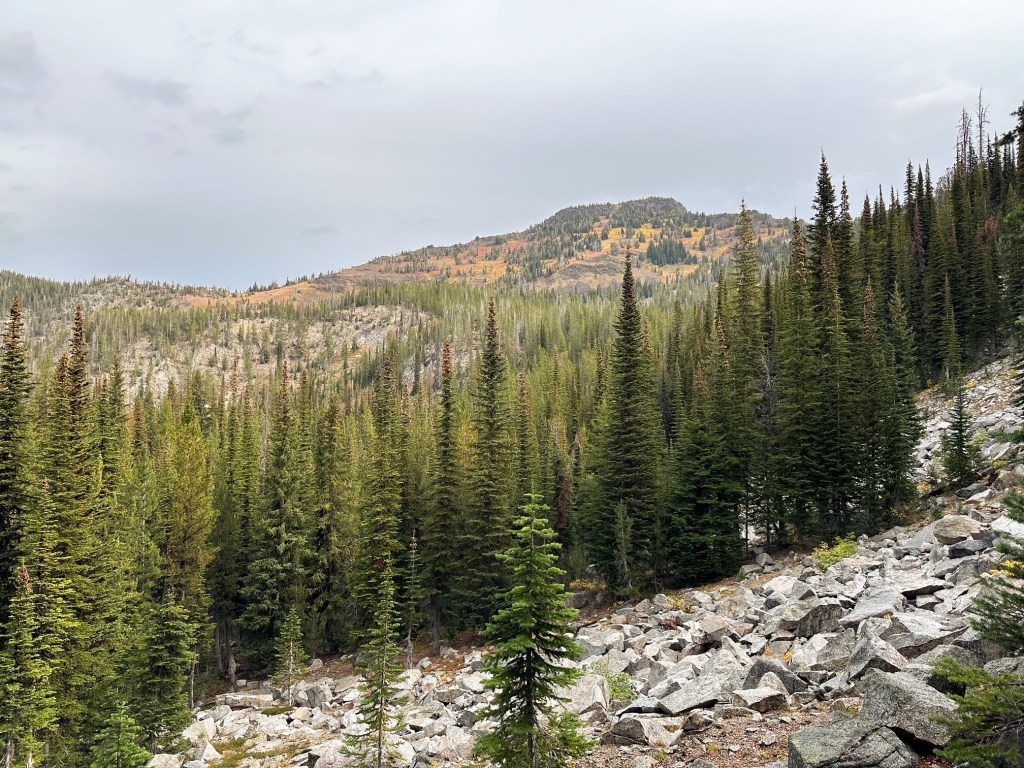
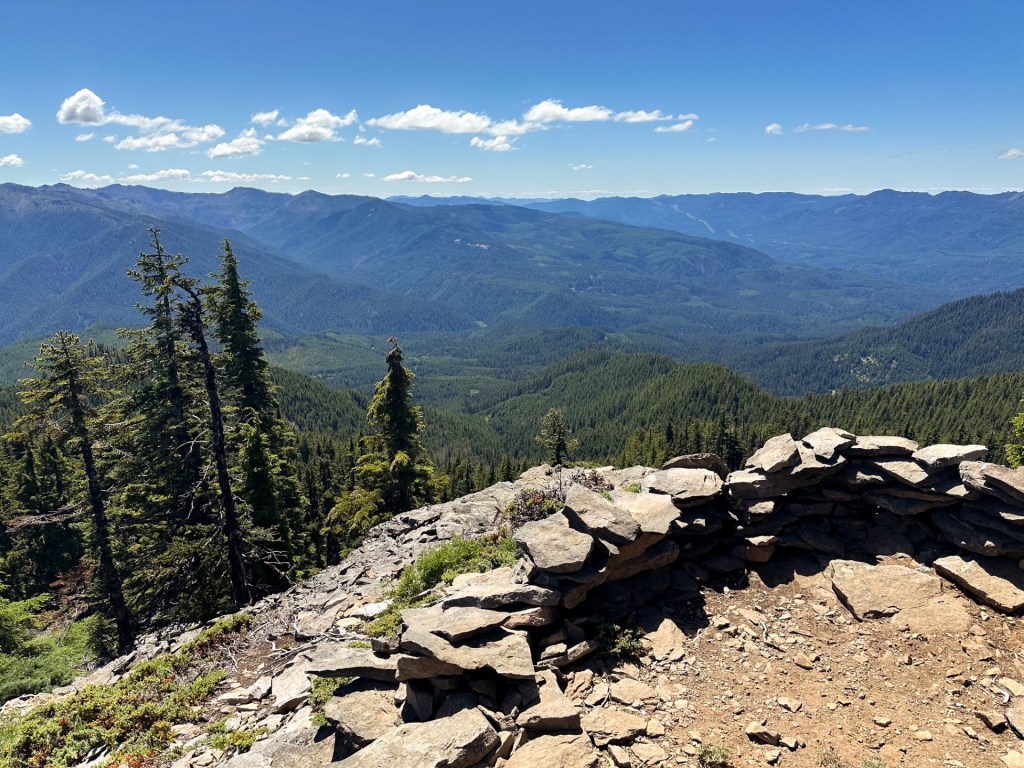
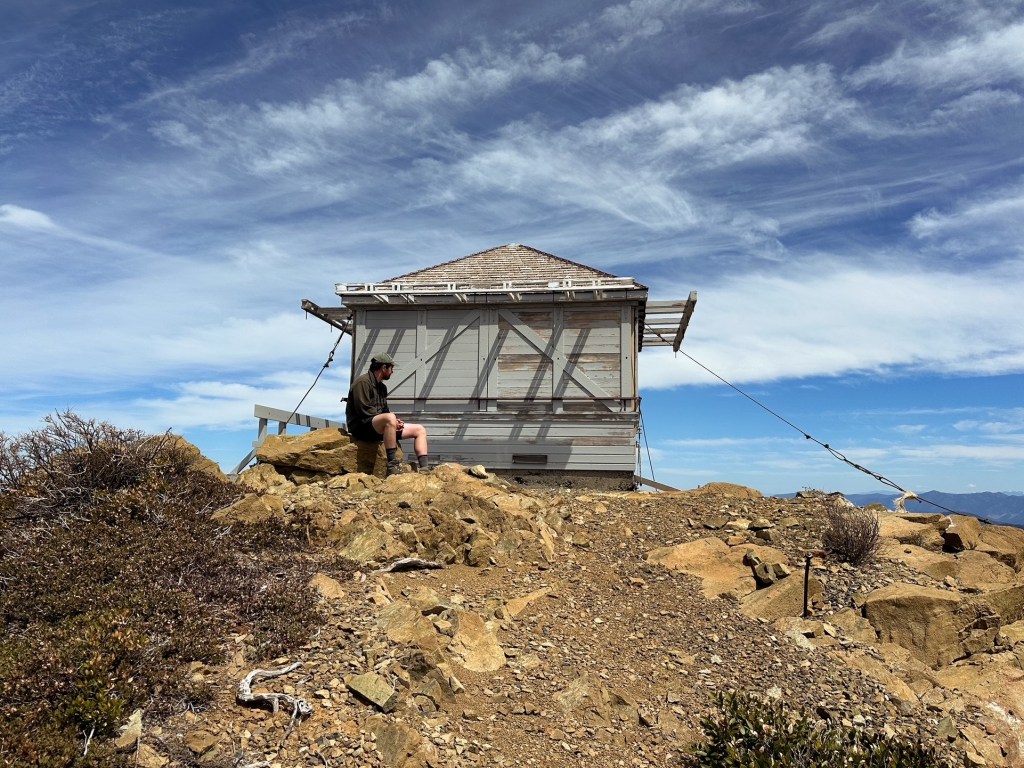
The rest of the trail undulates along the ridge line and is fairly easy to follow. There are a few sections of trail that are faint or not as clear to follow, but as long as you keep heading along the ridge towards Mule Peak you should be fine. If you stop and look long enough you’ll typically find a cairn, or cut log, or faint tread to point you in the right direction. The trail cuts over the ridge and drops just below Granite Butte before dipping to another saddle between Mule Peak. The last little pitch goes straight up the slope before reconnecting to a rocky ridge that wraps around the back of the lookout. Everything was locked up for the season when we arrived. If Garnet had not been there the day prior we would have had no idea someone had been here. There are some nice views from the summit. Despite the rain from yesterday there still seemed to be a lingering haze on the horizon though. Unfortunately, we didn’t stay for too long since we still had to move our camp for the night. I started to back track before Garnet and made it all the way back to the pass before he caught up. I was a bit worried about how I would fair on the sandy descent. I expected it to feel more like scree which slips away easily and makes me feel unstable. But, it ended up being the perfect texture for stepping down and made my return to the meadow painless.
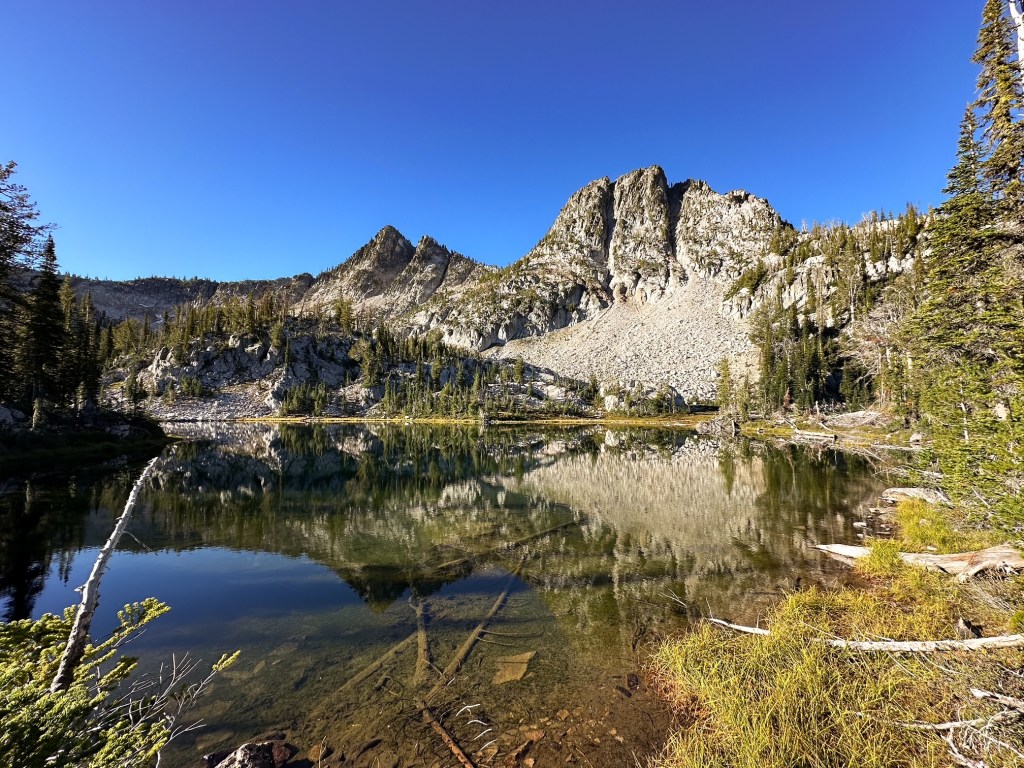
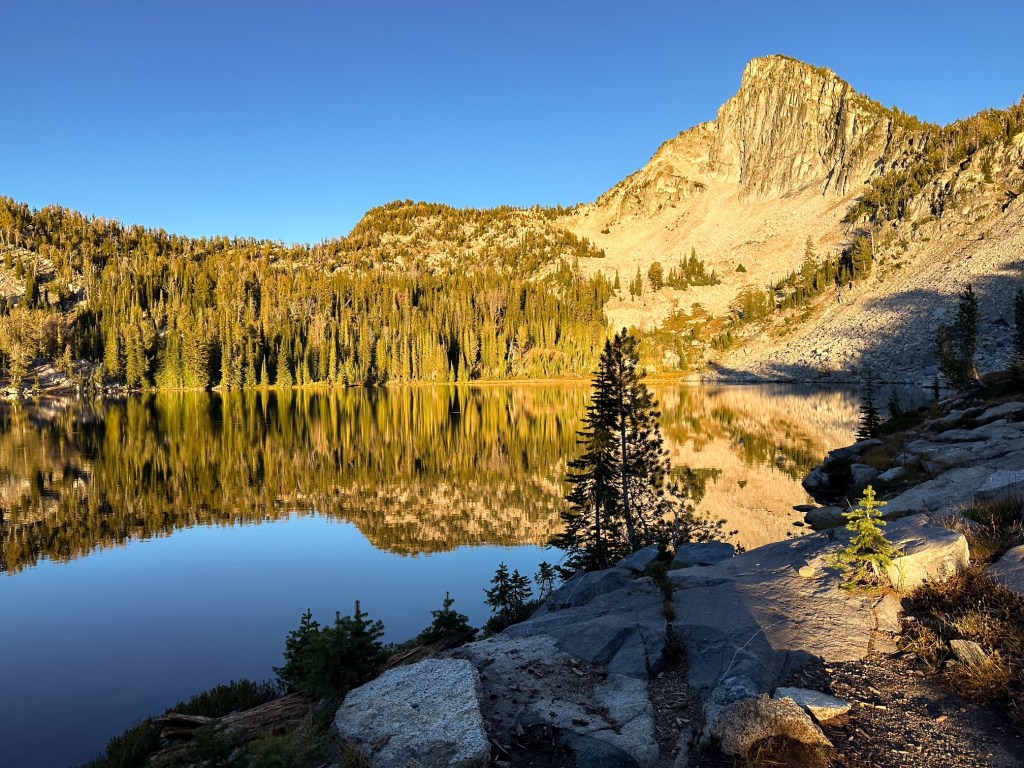
Our neighbor was still hanging in camp when we returned. Seemingly rejuvenated by the sunshine, he declared he was going to camp for another night and asked if we were staying too. We told him we planned to move on to complete a loop with our next destination being Tombstone lake. He seemed concerned that we wouldn’t make it there in time and said my mileage was off. He also mentioned he never found the continuation of the trail from the lake when he visited the other day. We took his words of caution with us and continued on our way. He was right about one thing, my mileage was off but so was his. We did make it to Tombstone Lake, albeit later than I had hoped, and the trail continuation was well defined beyond (so I’m not sure where he was looking for it). Tombstone Lake was one of the prettier lakes we have camped at and I was bummed we didn’t get to spend more time there. So much so I almost debated throwing out the entire loop and just staying there for a few extra days. But, the rest of the west eagle loop was just as pretty and I’m glad we continued on from there. Traverse Lake was another really pretty destination and our camps along the Minam River were all nice. Most trail conditions in this area were good with only a few sections of eroding trail and blowdown. The plan was to camp in Burger Meadows again at the end of our loop, but after climbing up all day from the Minam River we found the spot already taken by a group of horse packers. We didn’t even bother trying to see if there was room for us before continuing up and over Burger Pass. There had been a small proximity camp just before the Middle Fork of Catherine Creek we noticed on the way in. It was barely big enough for our tent and just off the trail, but it got the job done and made for a quicker hike out the next day. The entire loop came out to about 50.73 miles with 10,555′ of gain over 8-days.
Buck Creek TH to Burger Meadows was 5.45 miles with 2,484′ of gain (one way).
Burger Meadows to Mule peak was 3.10 miles RT with 961′ of gain.
The rest of my tracked mileage included other trails, so the round trip distance can only be estimated. Buck Creek TH to Mule Peak is roughly 14 miles RT with at least 3,445′ of elevation gain. I would probably factor in at least a few hundred extra feet of gain to that since it doesn’t include the elevation to climb back out to Burger Pass. This route seems to get more traffic than the other route, but requires the up and down of two passes. Or you can attempt a cross country scramble between the two as some peakbaggers have done.
The more direct route to the summit and one that the lookout attendant takes starts from the Pole Creek trailhead. If you want to glean an idea on those conditions and directions Cheryl Hill hiked this route in 2023 (post).
History.
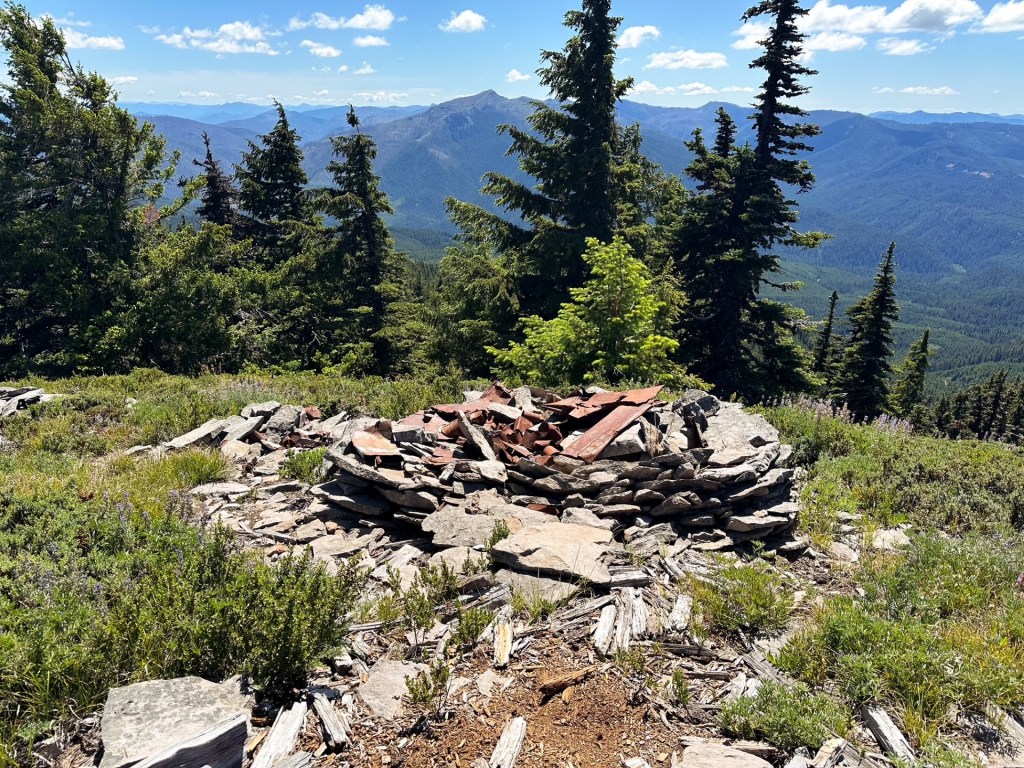
The area around Mule Peak has been utilized for fire detection as early as 1916, at least from the ajoining peak of Granite Butte. Though aside from The Morning Oregonian report on Ron Kemnow’s site states there is not much online information on Granite Butte as a former lookout site. The attendant Garnet met during his visit also confirmed this was a former site and Garnet confirmed there was evidence of such on the summit. The most interesting detail about this is that Granite Butte sits higher at 8,679′ than Mule Peak, which one would think would deem it the better site for a permanent structure. Alas Mule Peak was selected and has stood the test of time for over 100 years now. Originally built in 1924 as a D-5 wooden ground cabin. It has seen maintenance as recent as 2021 when it received a fresh coat of paint and new cedar shake roof. It is still intermittently staffed.
This trip originally started as an option for a 4th of July day hike, but when the opportunity arose it rapidly evolved into an overnight. Hawk Mountain was the main point of interest, but we decided we had time to add in a couple of former fire lookout sites too. Lowe Mountain was an easy addition since it’s located along the same ridge and trail as Hawk Mountain. We chose the West Pinhead Butte site as our follow up option before heading home the next day. This made a nice driving loop through the forest. Garnet had a shift change at work that has lead us to be more creative for our trips. This was part of the reason we did not get an early start and had to be back in town by Friday evening.
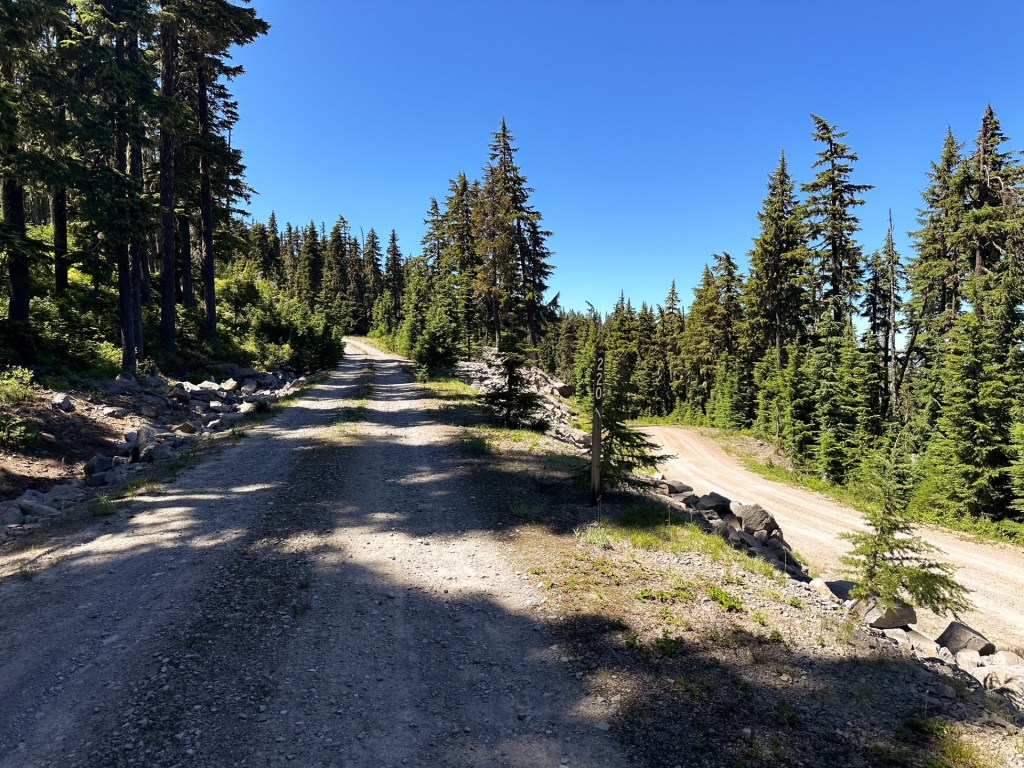
There are a few ways to get to Hawk and Lowe Mountain, the most common being from Estacada or Detroit Lake. We decided to take a more unconventional way from HWY-26 to NF-42 towards Timothy Lake. We wound our way through the forest on NF-42 until we reached NF-46. We turned left to only briefly stay on NF-46 until the next junction with NF-4670 off to the right. The Rhododendren Ridge Trail #564 is a fairly long trail that follows the ridge line and can be accessed from multiple points to make longer or shorter hikes. For the sake of time, we decided to access Lowe Mountain from it’s shortest point before heading on to Hawk Mountain. We parked at the junction with NF-220 along NF-4670 and hiked up the NF-220 road to find the trail junction. We probably could have drove up the spur road since it seemed to be in fair condition. There was even a couple of people camping where the trail met the road. We had a minorly awkward, but friendly, exchange as their dog came barking at us and we aimed to walk through their camp to access the trail. Little did we know if we had hiked a few more yards to the complete end of the road there was another access point. Those kind of mistakes live rent free in my head.
From where we parked on NF-4670 to the summit of Mount Lowe was only 1.42 miles RT with 339′ of elevation gain. Most of that distance was along the NF-220 road too – it was a short trail otherwise. We quickly moved on to our next hike by driving farther down NF-4670 until it met up with NF-6350 and took that to the junction with NF-6355. The trailhead was only a short distance from the junction and was more of a pull out on the side of the road.
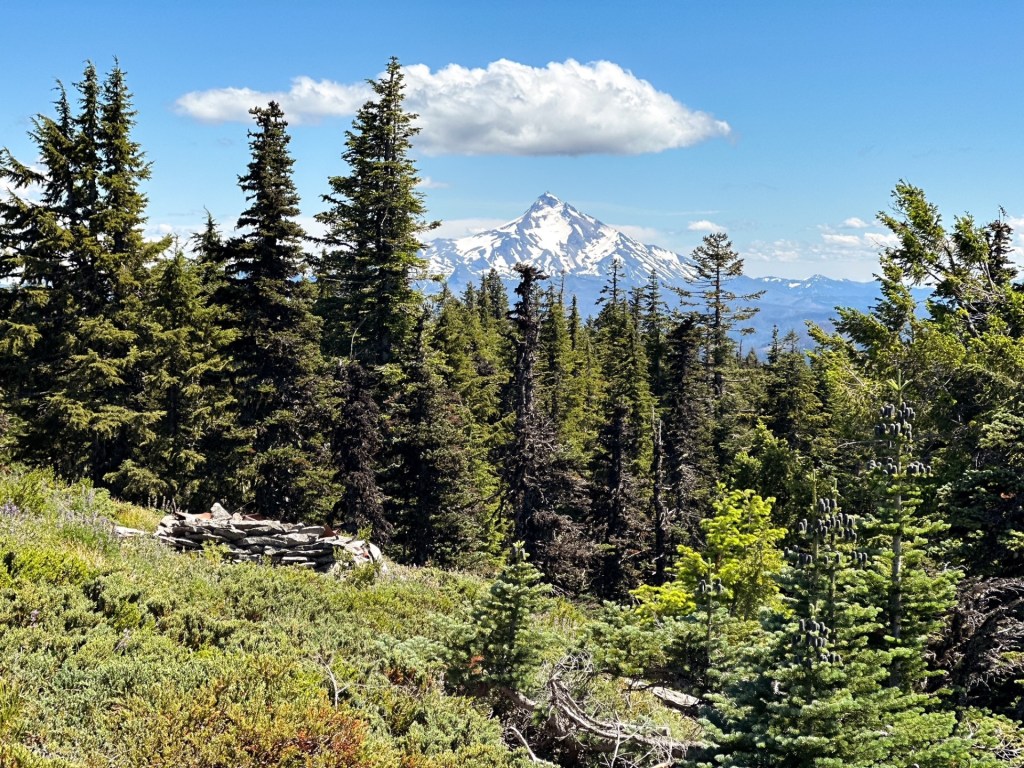
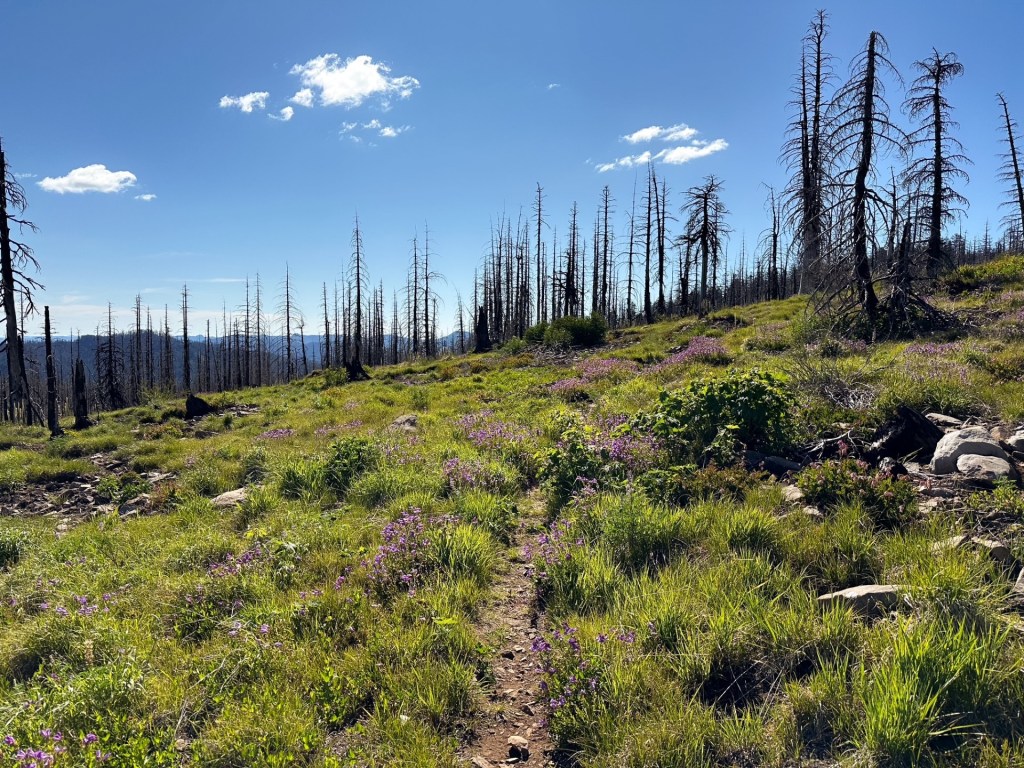
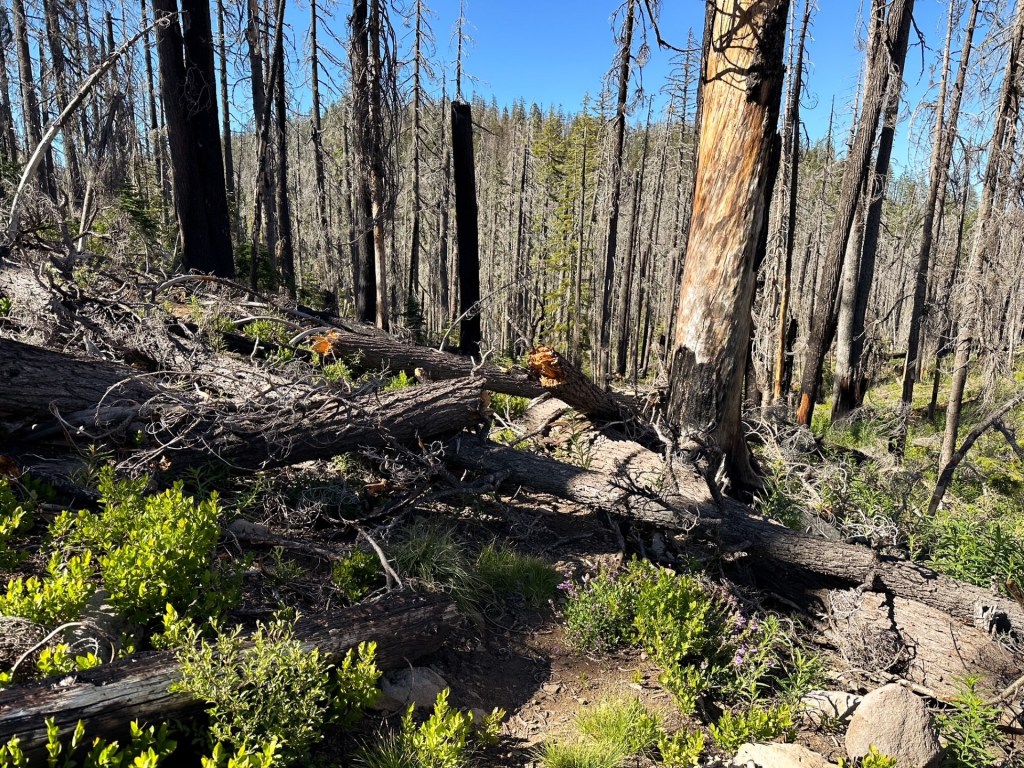
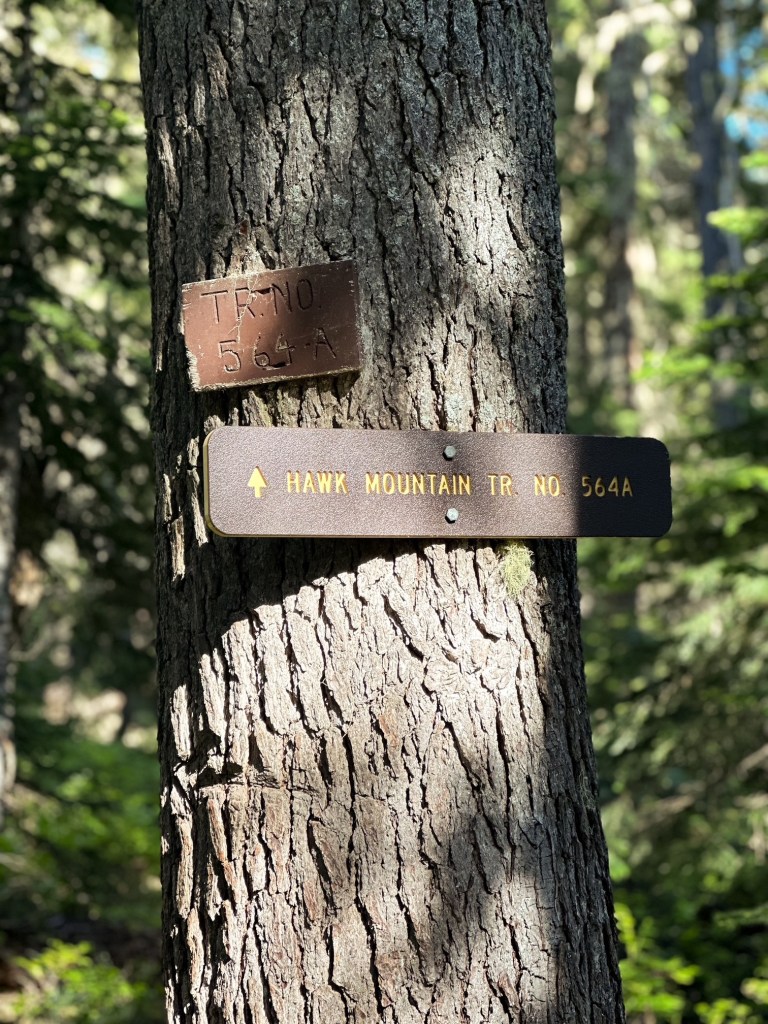
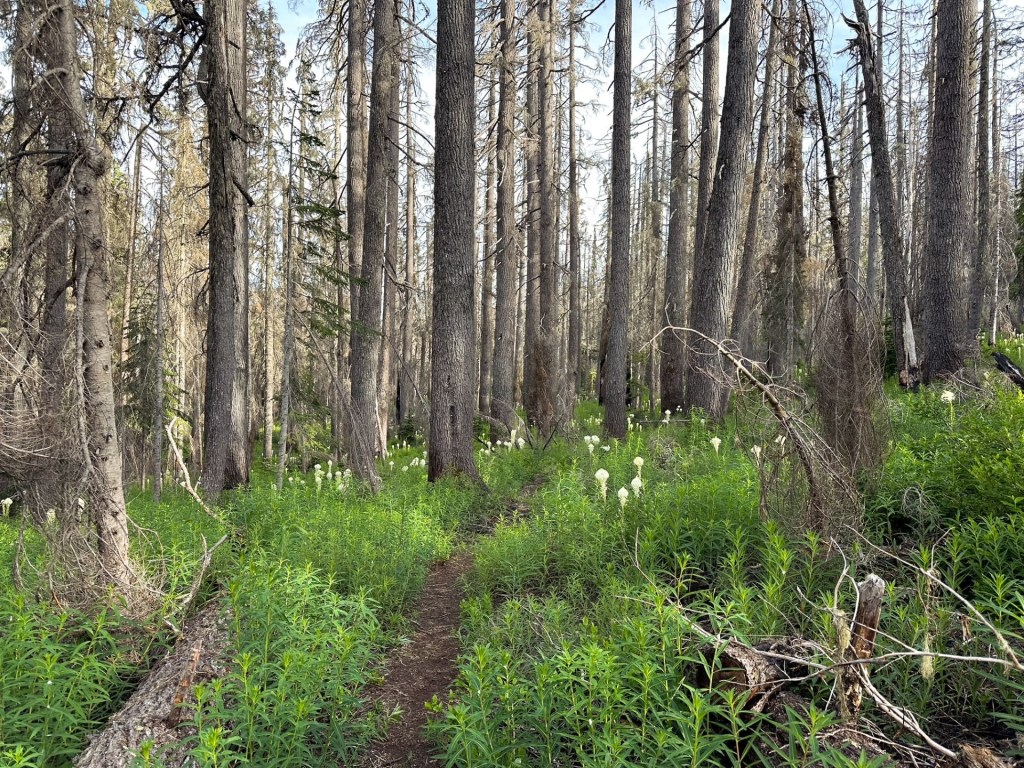
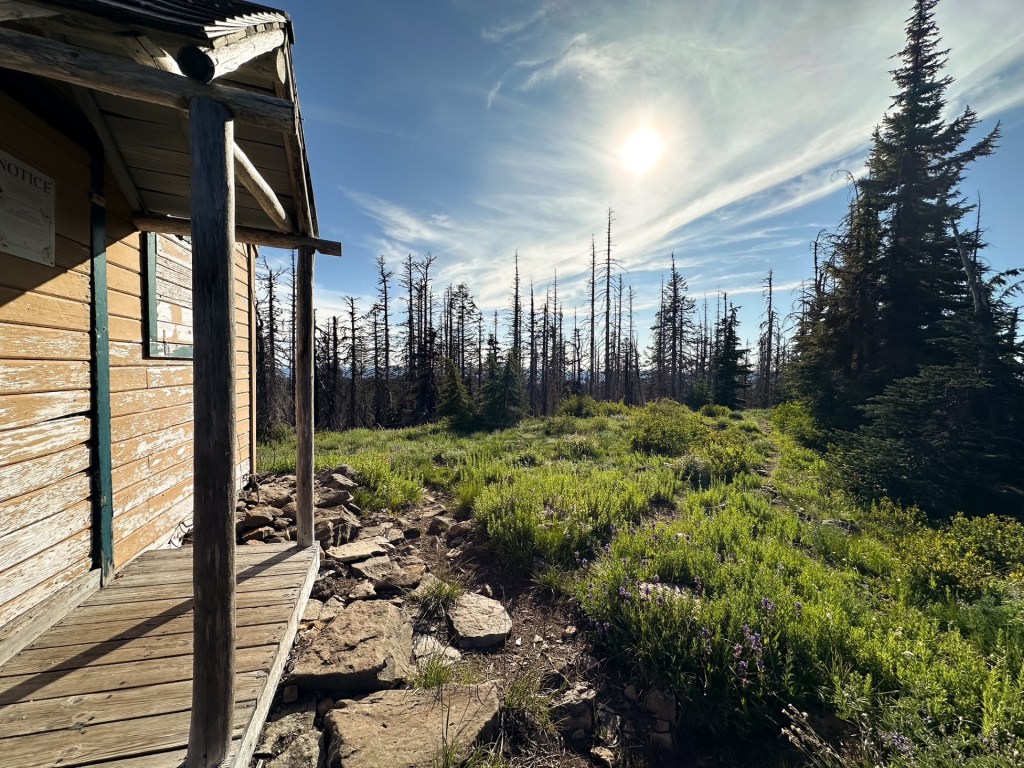
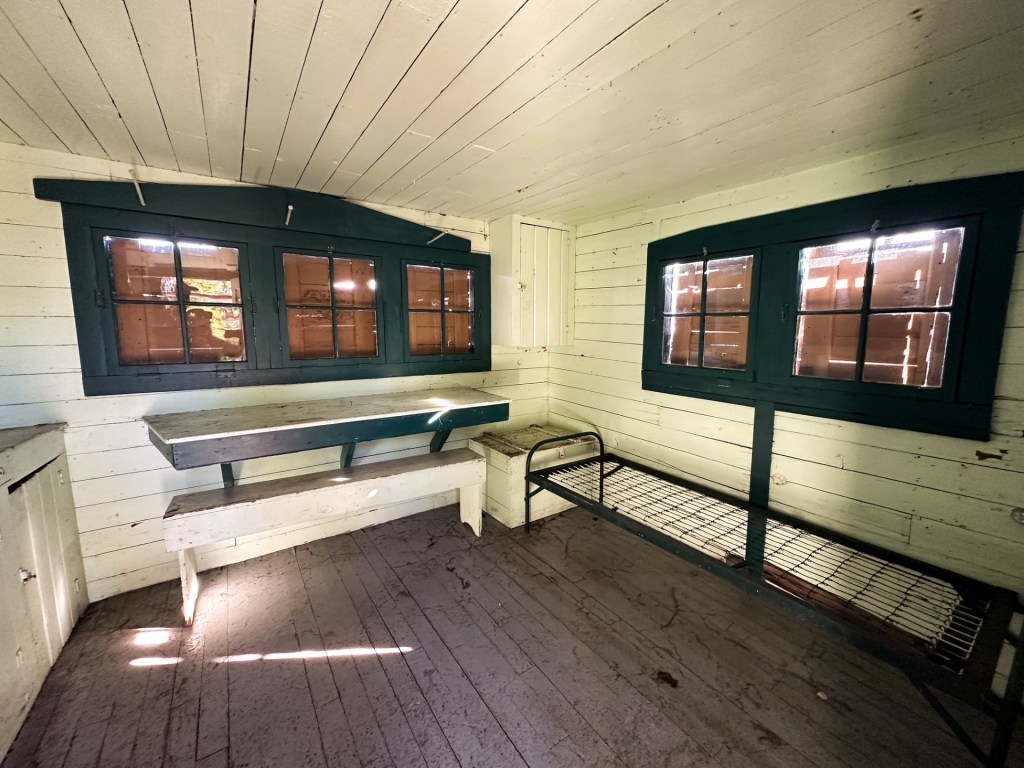
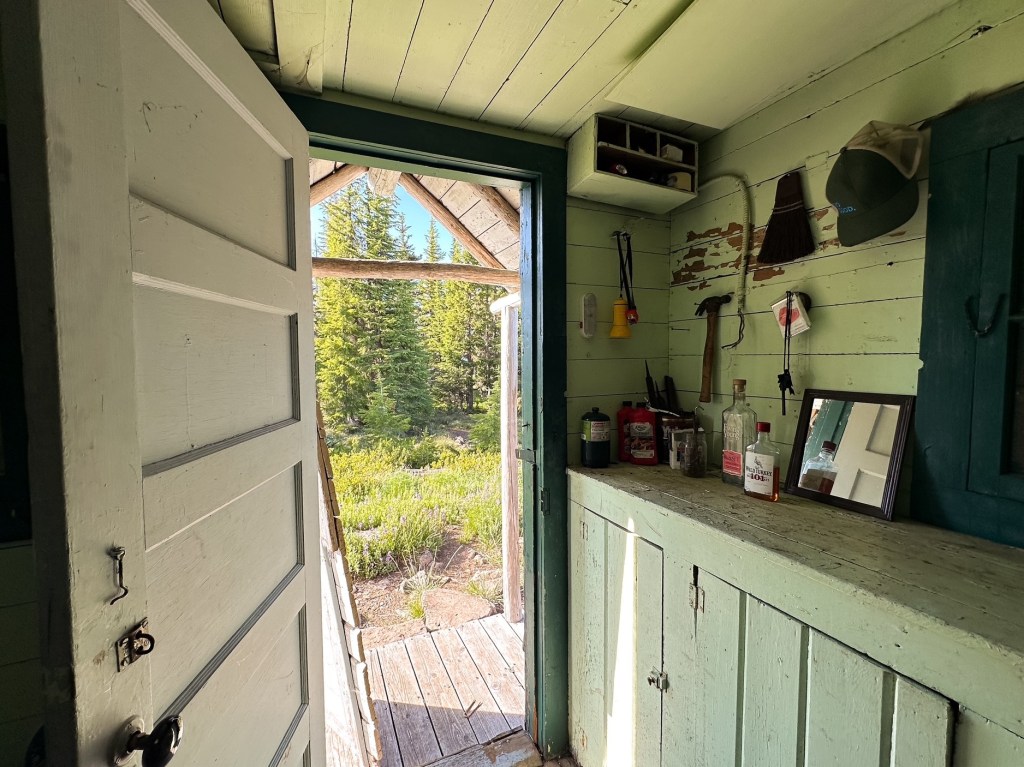
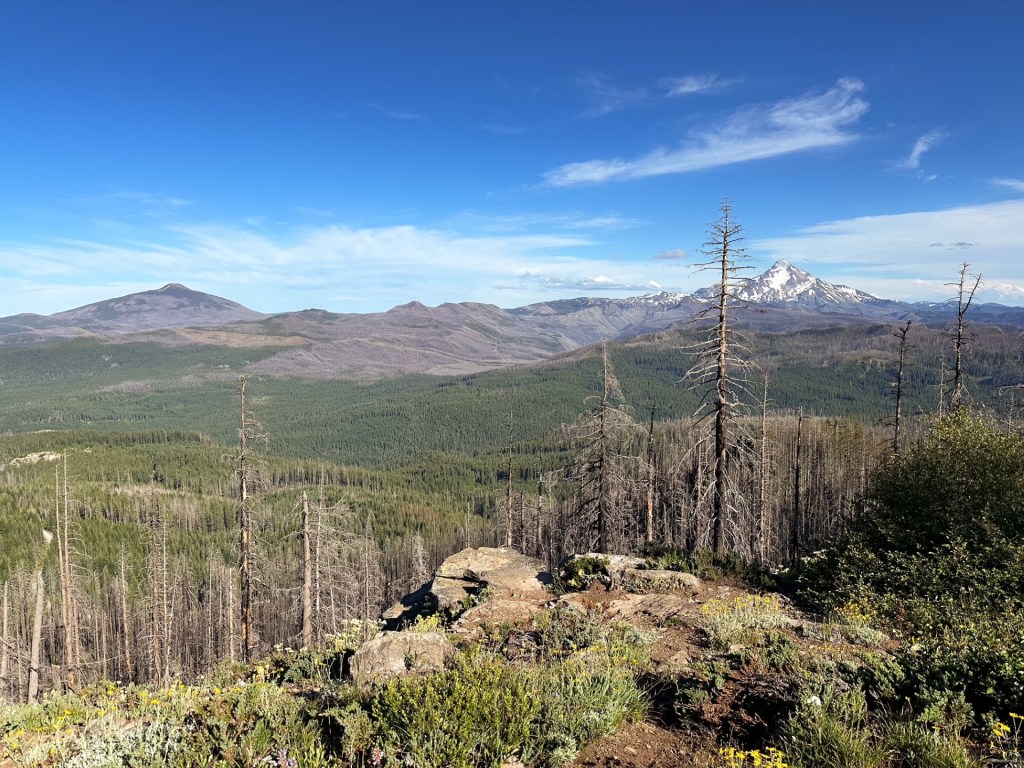
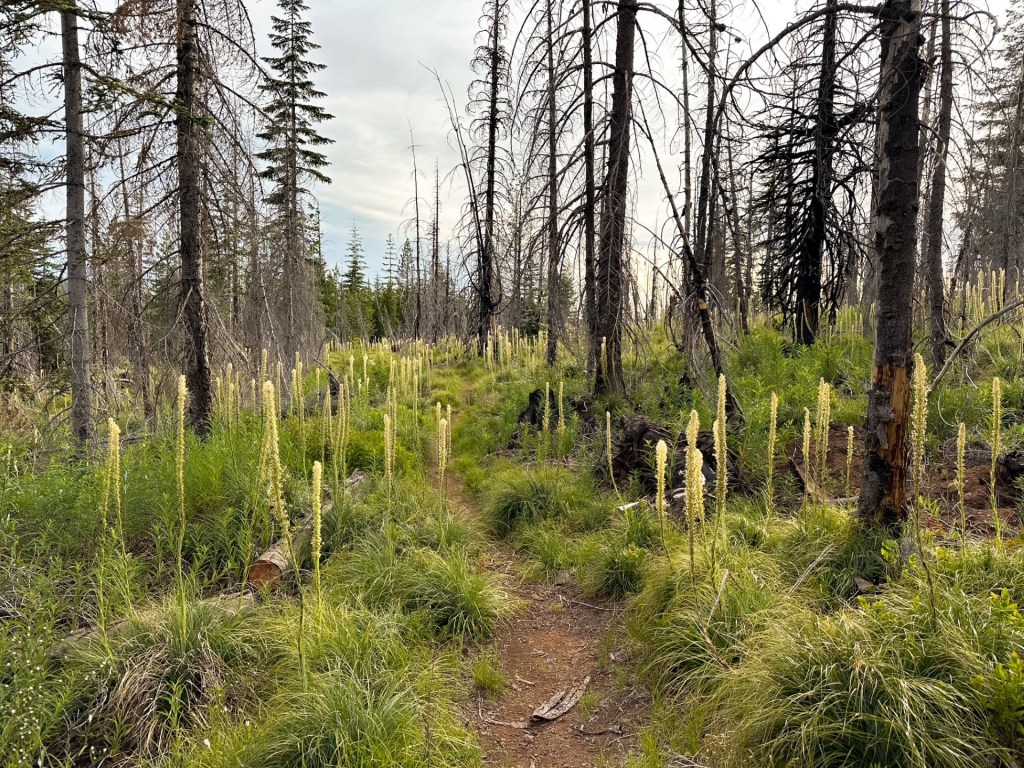
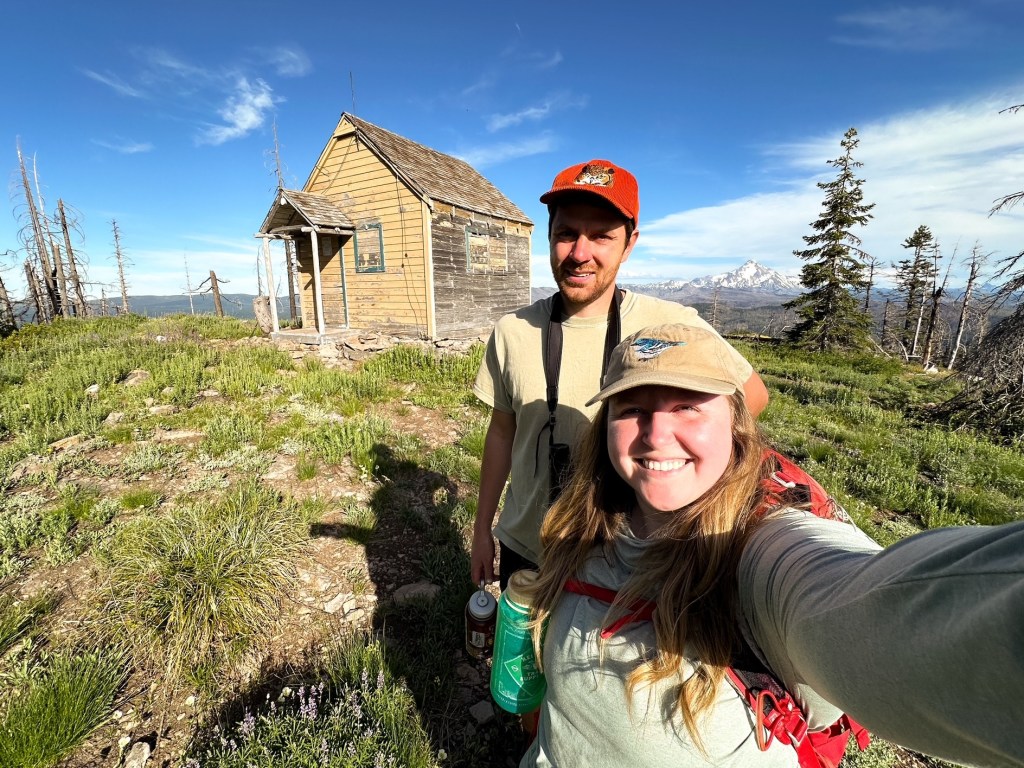
We unexpectedly came near the tail end of the bear grass bloom and it made for a really pretty hike. The trail gradually switch backs up to an open hill side offering views out towards Mount Jefferson. It plateaus for a bit as it enters the burned area from the 2021 Bull Complex before it dips back down. There were some downed trees to cross over in this section but nothing too challenging. We exited the burn into a dense forested area before climbing again to the final summit. We eventually reached a junction where the Rhododendron Ridge #564 trail continued left and the spur trail to Hawk Mountain #564A continued right. We could have hypothetically hiked all the way from Mount Lowe along this trail given enough time. But it is a much longer route, longer than we’d like to hike, and I am unsure of the trail conditions between the two points. The summit is broad and opens up again to another view out to Mount Jefferson. The cabin was unlocked during our visit and open for overnight stays on a first-come first serve basis. The inside was fairly well kept and clean, though you would probably be sharing your stay with the wood rats regardless.
Given our later start and side trip to Mount Lowe, we didn’t have as much time to hang out. We still had to find a dispersed camp for the night too. We hadn’t seen anyone else on our hike up, but there were a couple of people heading up as we hiked down. We assume they were looking for a nice spot to view the sunset since neither seemed to have overnight gear with them. Strava calculated our hike at 4.23 miles RT with 950′ of elevation gain.
History.
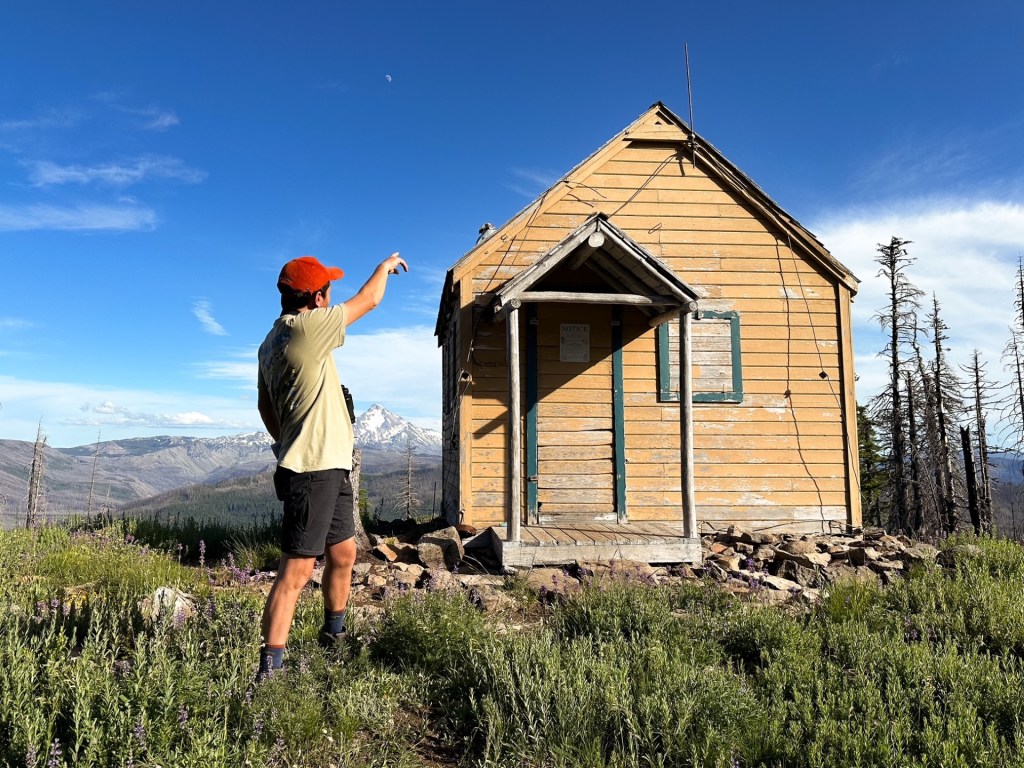
Hawk Mountain
This site was established in 1919 with a 60′ 3-legged platform tower and framed in cabin. Old pictures suggest that these were replaced with updated versions but I was unable to verify a date (my guess would be sometime in the early 1930s). There is a 1936 picture on Ron Kemnow’s website that shows the cabin that stands today next to an older log style cabin. Another picture on his site with no date looks like a rudimentary version of the 3-legged tower supported by trees. The site was abandoned around the 1950s and the 3-legged tower was removed in 1967. The cabin used for the living quarters still stands today which I would classify as a standing lookout site. The FFLA does not agree with this sentiment and rejected my request to register it as a standing lookout, but it is all subjective at this point.
Lowe Mountain
Elevation: 5,334′
Former Fire Lookout Register Site: US 615; OR 56
Located due north of Hawk Mountain and roughly 100′ higher was Lowe Mountain, also known as Rho Mountain given it’s location along the Rhododendron Ridge. This site was established in 1915 with a log style cabin and attached roof platform. It was replaced in 1932 with a standard L-4 ground cabin. It was deactivated and removed sometime between 1964-1966.
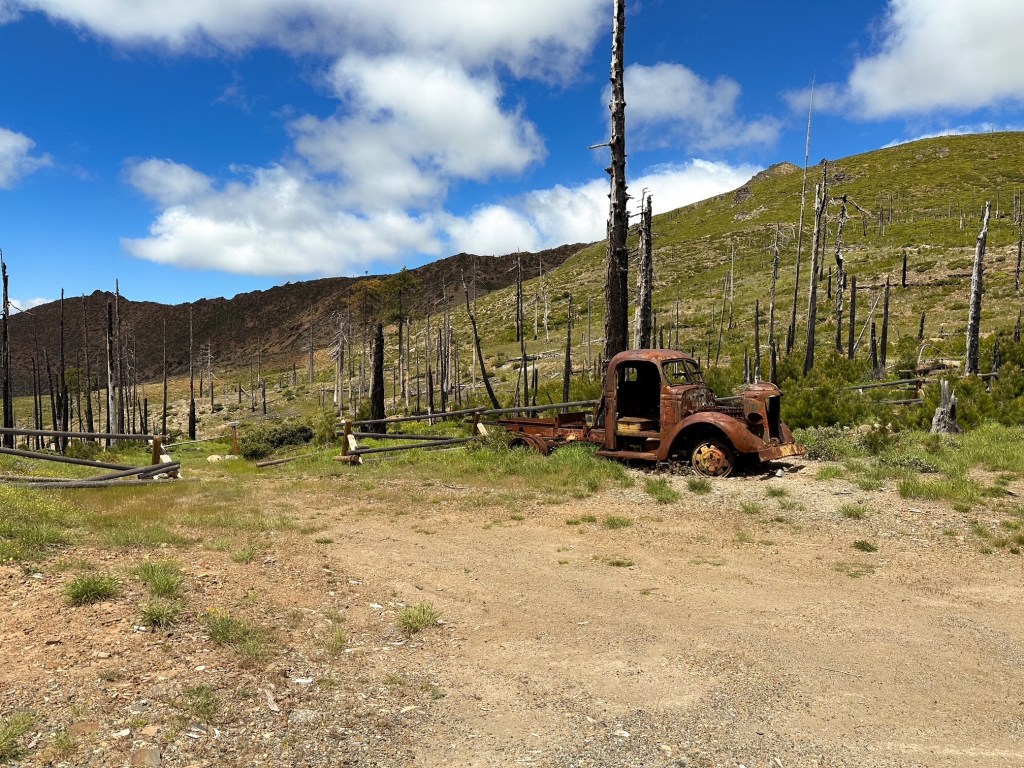
I learned a new term on the way back from our most recent trip to the Kalmiopsis wilderness. Kalmiopsised. As far as I can tell this was a term coined by the Northwest Rafting Co that does commercial rafting trips to this area. It is the best description I have found to explain the appeal and hardships that come from visiting the Kalmiopsis wilderness.
Kalmiopsised [Cal-mee-opp-sis-ed] – adj. 1. being cold, wet, exhausted, and happy in Oregon’s Kalmiopsis Wilderness. 2. in pain and despair in a rugged, harsh place with a big smile your brain is trying to relay to your face muscles.
We have been to the Kalmiopsis wilderness a handful of times now. Our first trip was just last year during the 2024 Memorial Weekend, where we planned a 5-day backpacking loop through the eastern side of the wilderness. The second trip was for Garnet’s birthday and focused solely on reaching the fire lookout on Pearsoll Peak. Our most recent trip(s) were for Garnet to complete the 50-mile Leech Loop through the wilderness. I had backpacked into Babyfoot lake both times to send him off and pick him up. Each trip has offered memorable challenges and left us wanting to return for more. The below report will detail the relevant sections of trail from these trips that you can take to reach Pearsoll Peak.
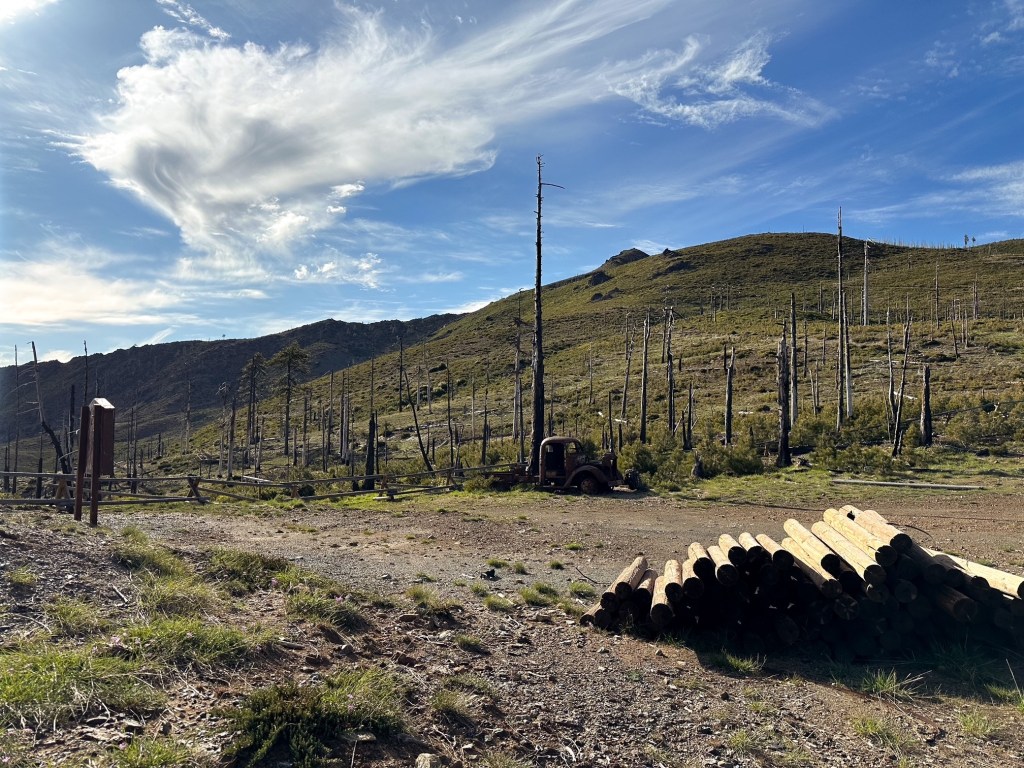
The Chetco Pass trailhead is the main access point to reach Pearsoll Peak. From there, the hike is moderate in length and elevation along the old roads that now make up the “trail”. The variance in routes comes from how you decide to get to Chetco Pass. The access road is gated in the rainy season from end of September to beginning of June. It is narrow, rocky, and full of erosion issues not suitable for most vehicles. If you drive a low clearance vehicle, like us, the only way to reach Chetco Pass is via hiking. Unfortunately, this turns a relatively moderate day hike into a strenuously long one. We opted to break up the distance and spend more time in the area by turning this into a backpacking trip. Please note the fire lookout is not open for overnight stays at this time and is currently secured with a lock bar – do not plan on camping in the lookout. If you are hiking your way to Chetco Pass, the closest starting points are going to be from the McCaleb Ranch area or the Kalmiopsis Rim trailhead.
McCaleb Ranch Access to Chetco Pass
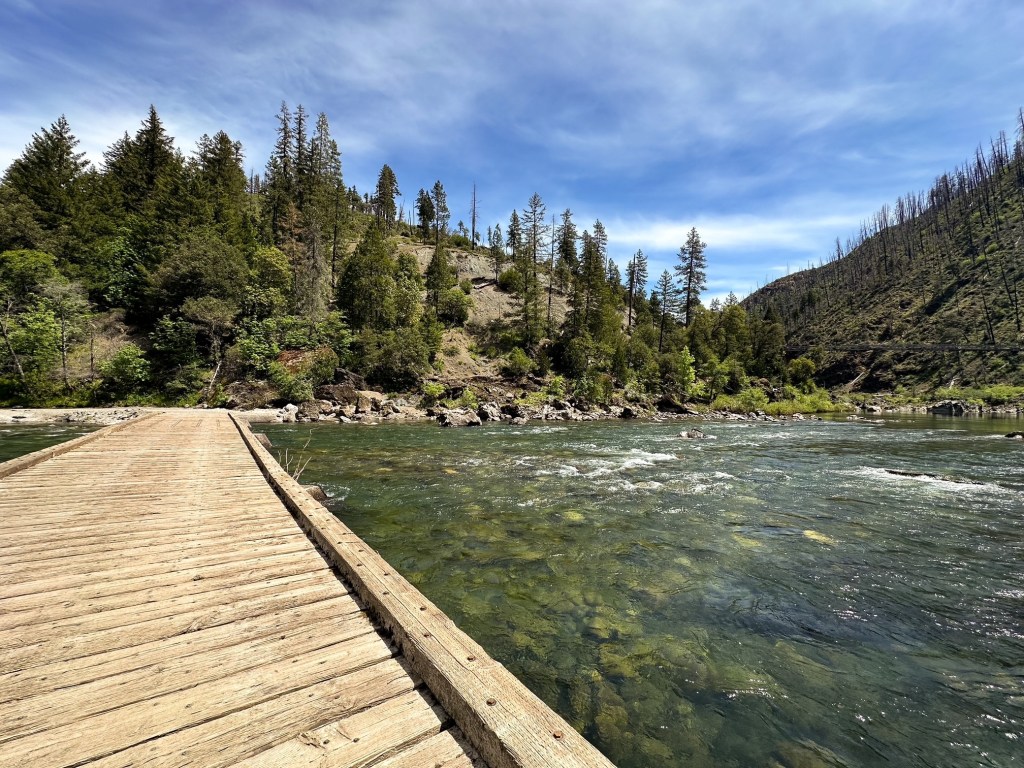
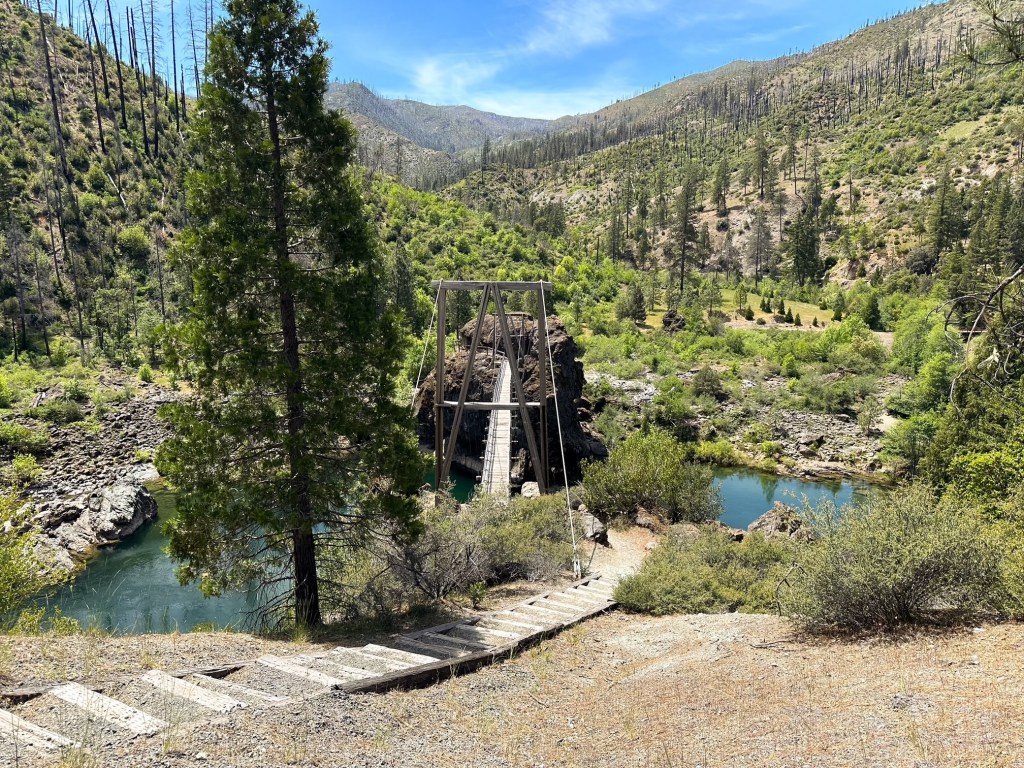
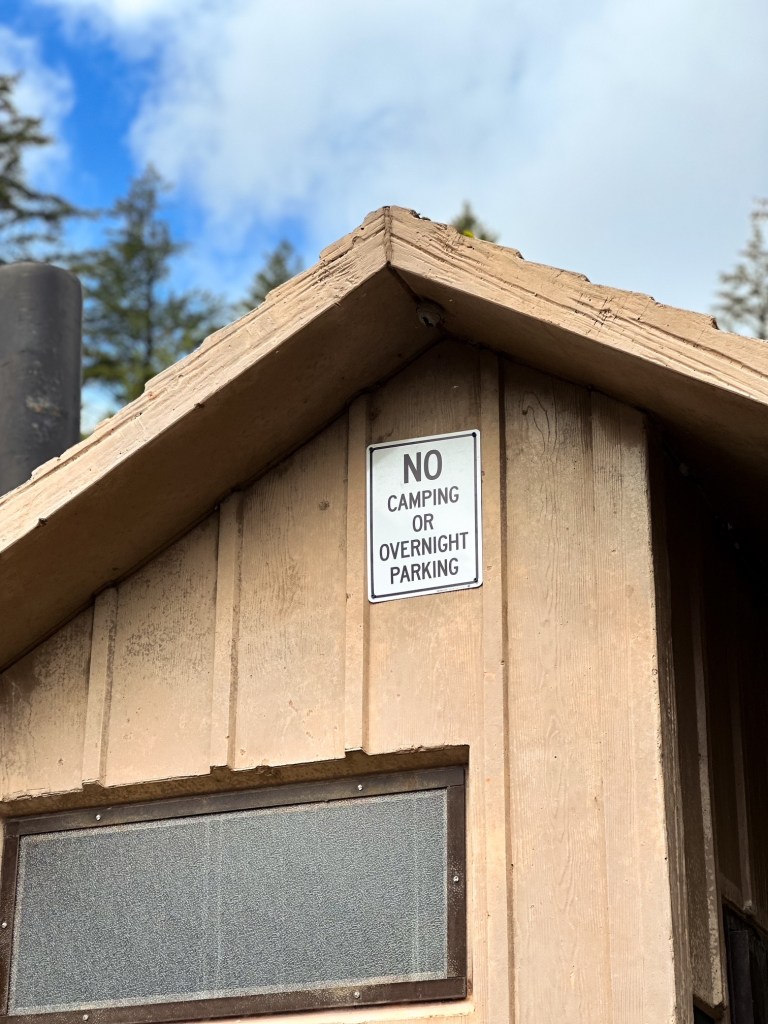
From Grants Pass, we followed HWY-199 until we reached Selma. We turned right onto the paved Illinois River Road that leaves directly from the community. We stayed on this road until we reached the unsigned junction with NF-087 off to the left that heads steeply down to the McCaleb Ranch. The junction is located where the pavement ends and the road splits off from a wide turn around area. The Illinois River Road is paved most of the way to this junction minus one short section of gravel in the middle. There are some potholes to avoid along the route, but we were able to maneuver around them. You will also pass a major junction with NF-4105, stay left to continue on the Illinois River Road. It should be obvious since NF-4105 is not paved. The biggest hazard along this route is meeting oncoming traffic. The road narrows the farther you drive and it is not wide enough for two passing cars except for when there is a pull out to utilize. You will know you are close when you pass the Store Gulch Campground. Once at the NF-087 road you have three options for parking. The first option is located at the bottom of the road just below the McCaleb Ranch after you cross the river. This is only suitable for high-clearance vehicles and day hikers. The parking area is large and offers a bathroom, but has signs posted for no overnight parking or camping. There is also a small section just beyond the bridge before you reach the trailhead that is not passable to low clearance vehicles. If you are attempting to drive all the way to Chetco Pass you would follow the directions to this trailhead and continue beyond the yellow gate from there. The second option is to park at the trailhead for the swinging bridge, I believe the official name is the Fall Creek trailhead. This is located along the first sharp bend of the NF-087 road. This is where we decided to park our car. It was slightly confusing on if we could park here given the two No Parking signs posted on each side of the trailhead. We ultimately decided those were meant to keep people from parking on the edges and potentially blocking the road. The old signboard here offers no information and the historic swinging bridge is currently closed to pedestrians due to some structural concerns. From what we found online, the Forest Service does plan to repair the bridge eventually but it is a slow going process that is not as simple as it seems and even more so with our current administration in place. If you want to avoid any confusion or are worried about traction issues, your third option would be to park at the junction at the top of the NF-087 road and hike down from there.
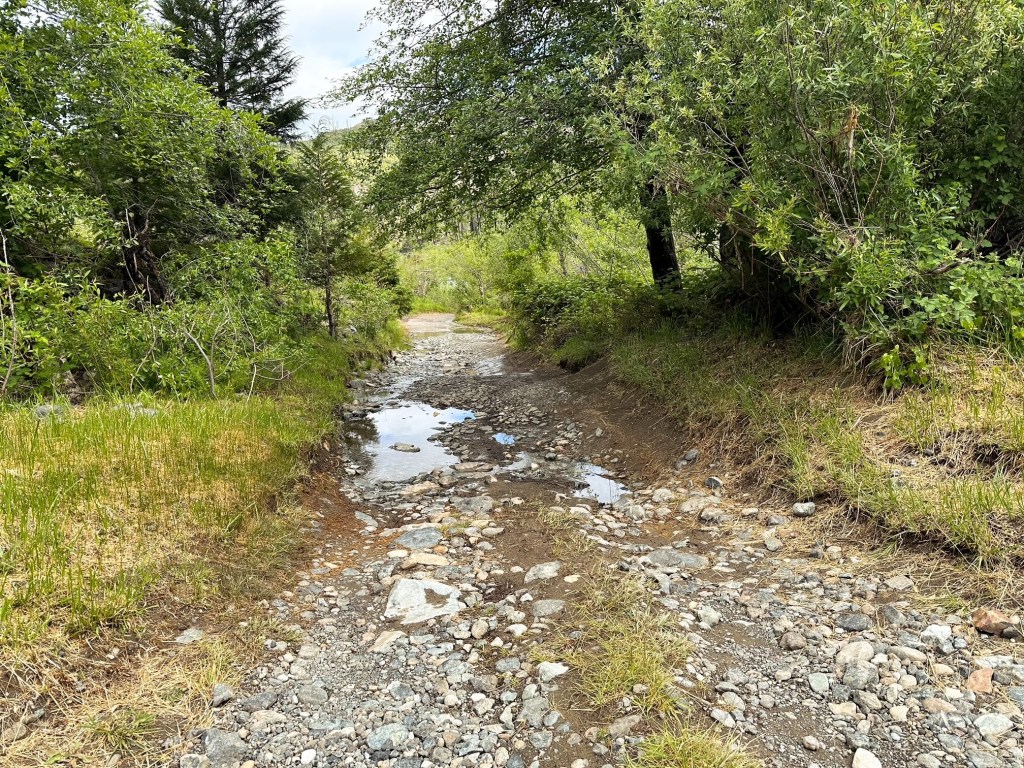
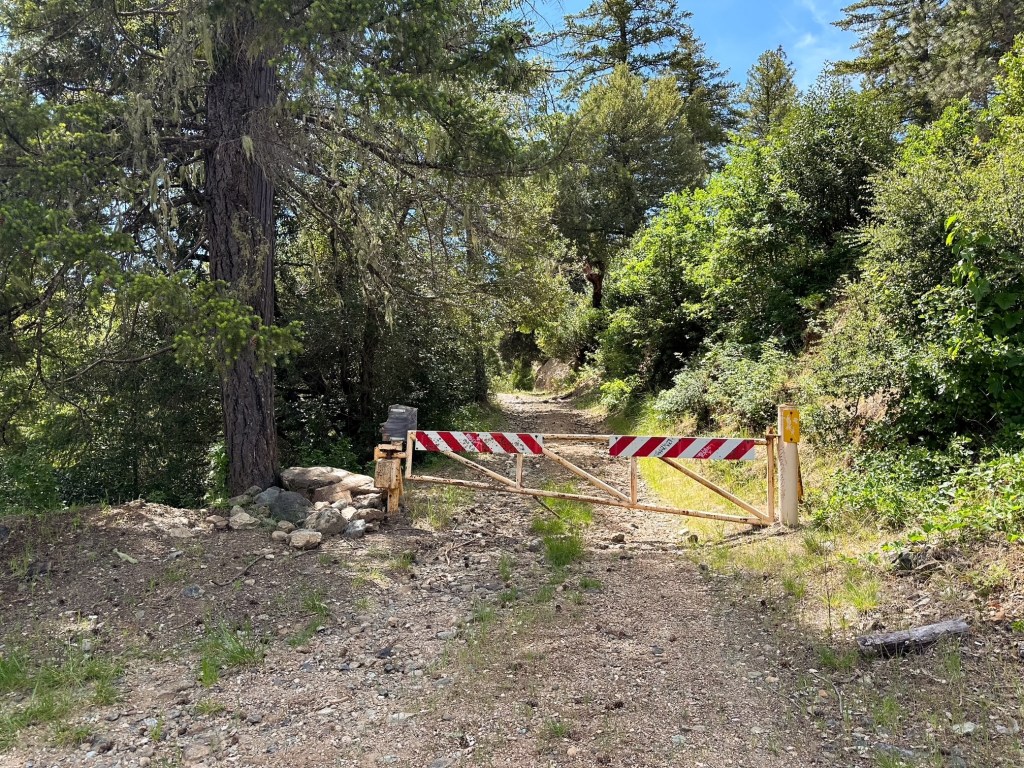
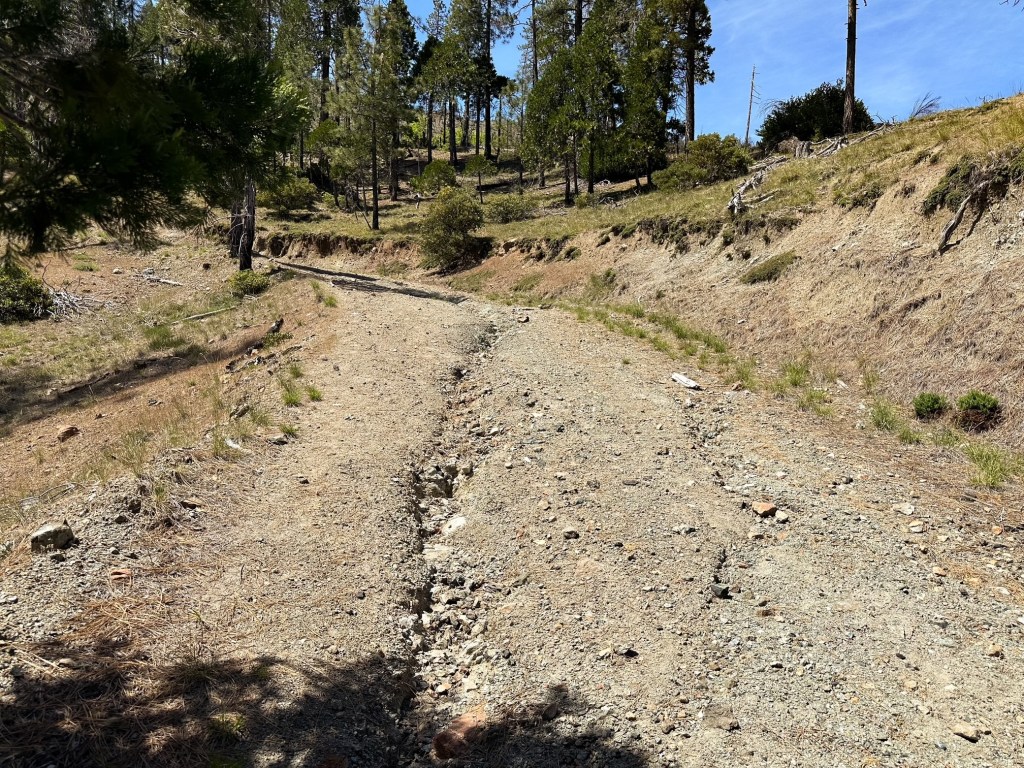
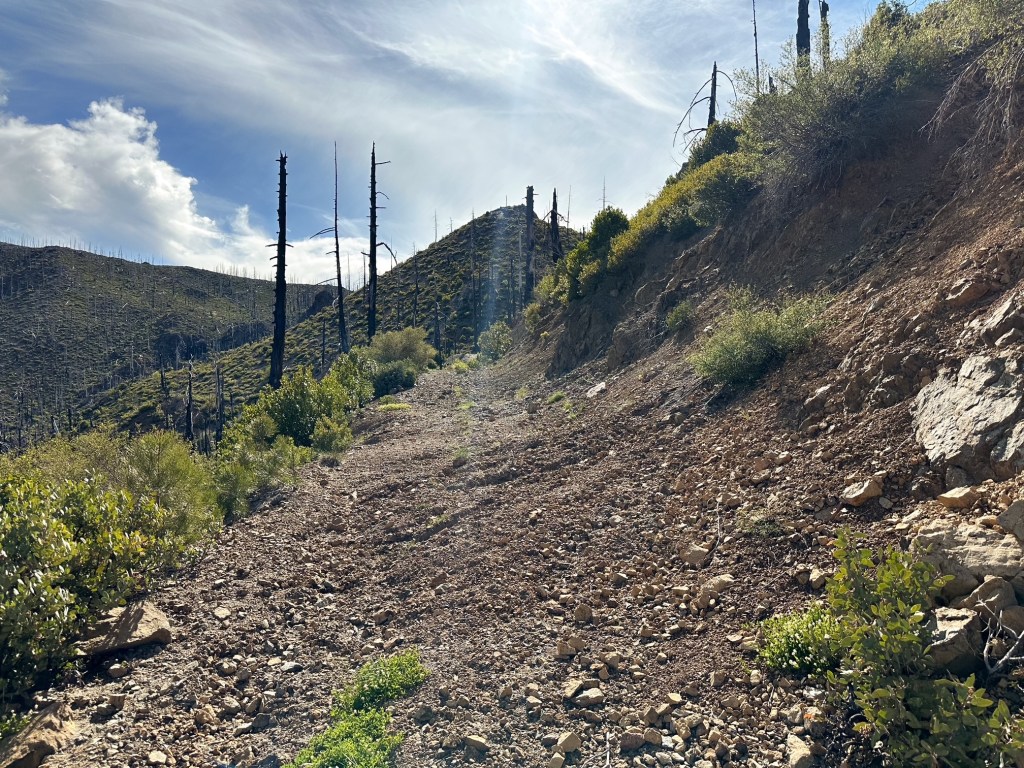
We reached the trailhead just after noon and had a quick lunch before saddling up with our packs to hike the road. We knew we had at least 4-1/2 miles of road walking to reach Chetco Pass and planned to find camp just beyond along the Slide Creek trail. The temps were forecast for a high in the low-60s and mostly sunny, but with the exposure and weight of our packs it ended up feeling much warmer. We had to hike down the road and cross via the vehicle bridge due to the swinging bridge closure. Once across the Illinois River, we headed towards the yellow gate at the back of the parking area. The only other gate is posted with private property and no trespassing signs for the McCaleb Ranch behind the bathroom. There is also a bridge that leads to the Fall Creek Trail off to the left. The road wastes no time gaining elevation and we took breaks often in what little shade the few trees had to offer. The condition of the road is deteriorating and I wouldn’t be surprised if they end up permanently closing the gate at some point instead of making the needed repairs. There are some sections that are not that bad, but there are major erosion issues happening that will make it difficult for most vehicles. The worst of it was about a mile below the pass on a tight switch back. The water run-off cuts deep through the road and a small section has eroded away to no more than the width of an ATV. You would most likely have to put one of your wheels on the side slope or off the road completely to fit a standard vehicle past this point. These are just cautionary warnings since the road is narrow, rocky, soft bedded when wet, and does not offer many turn around points if you decide to abort part of the way there. It’s obvious this road does not see much traffic just from the amount of shrubs and grass growing through it.
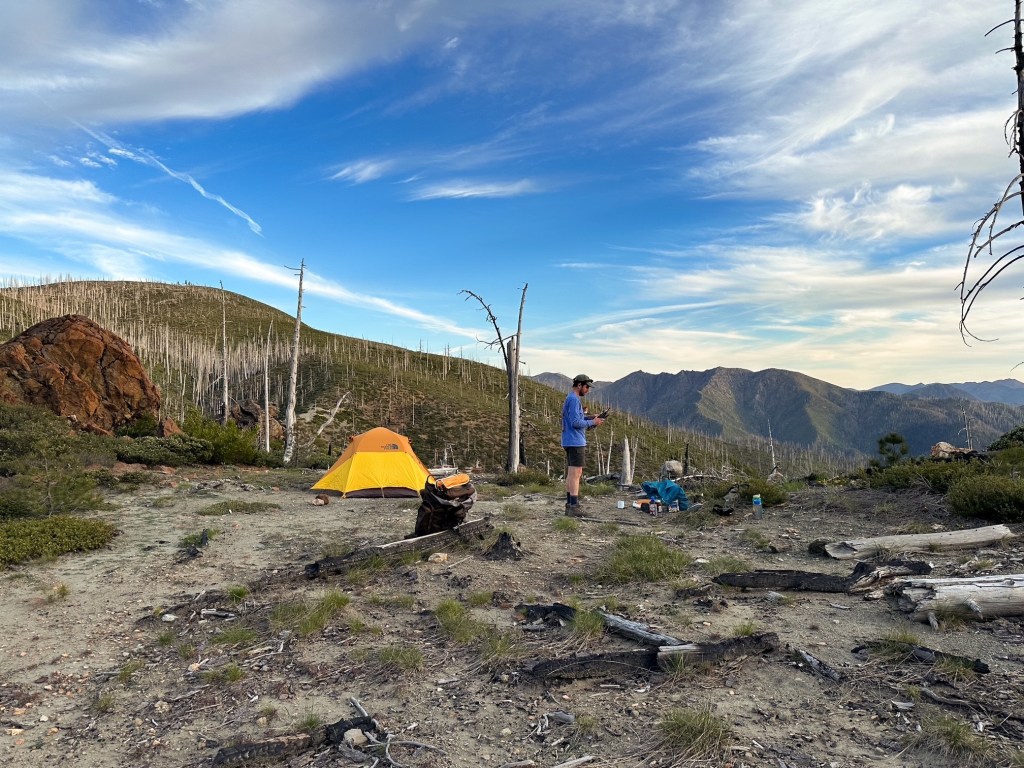
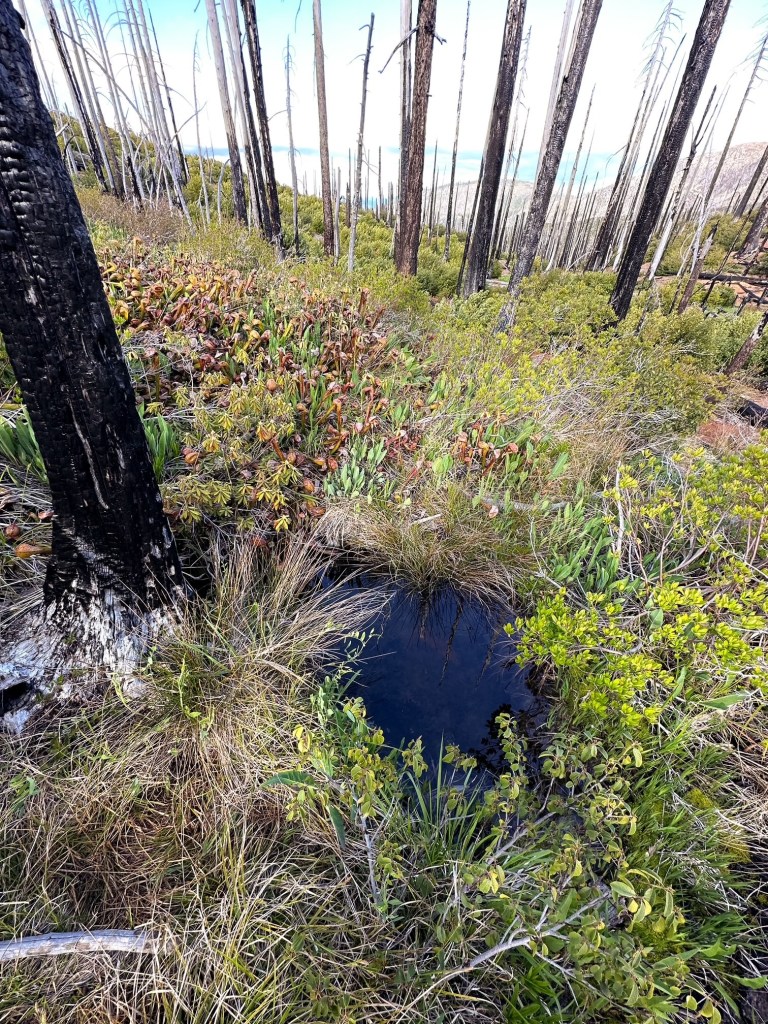
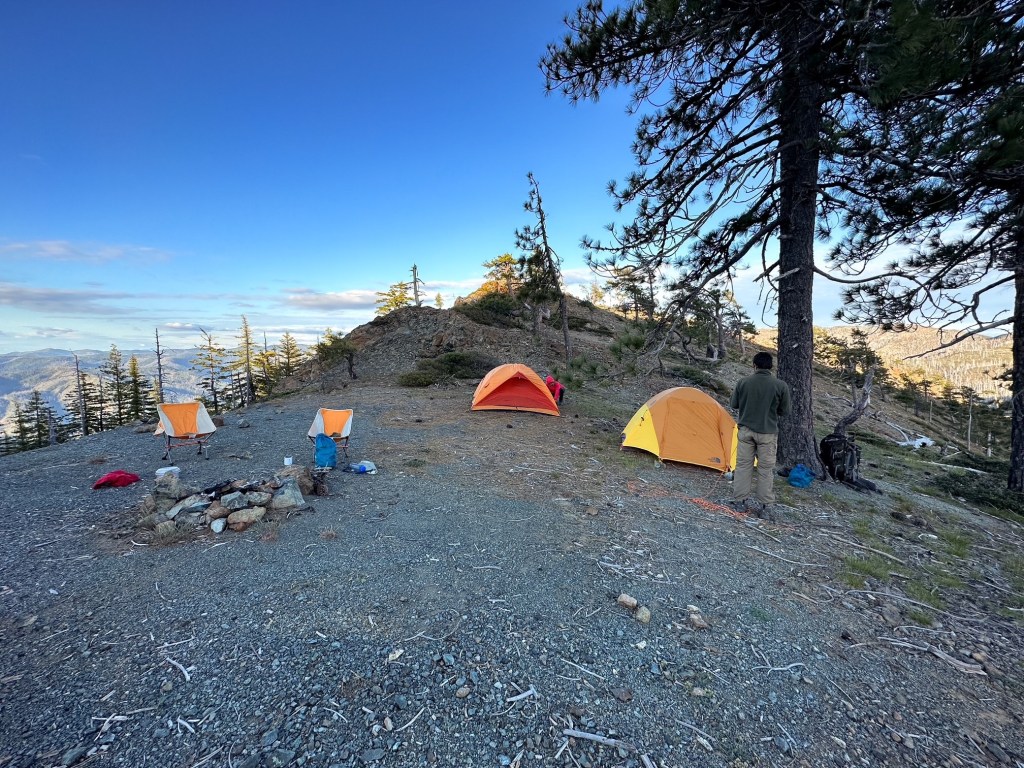
I eventually fell behind Garnet and started to struggle with my calves trying to seize into a charlie horse. I was probably less than half a mile from the pass when my calf cramped. I was frustrated because I had drank almost all of my water and wasn’t even over exerting myself. One water bottle was even full of electrolytes. I felt fine in every other aspect, but my body obviously needed more water. I had to shorten my steps the rest of the way to keep my calves from cramping again but I eventually made it to the pass with Garnet waiting. I won’t even bother telling you how long he had been waiting for me. We continued straight to head down the Slide Creek trail in search of a camp. We knew there was a decent one at least a mile down, but ended up finding one less than a few 100 yards from the pass that worked perfectly for our base camp. There was a creek not too much farther down the road either. I’m not sure how reliable this water source is for year round visits, but if you are ever in need of water in this area look for the Darlingtonia plants. They grow where the water sources are most concentrated. Strava tracked my mileage from where we parked to our camp at 5 miles with 2,650′ of elevation gain. I took a screen shot when I reached the pass of the mileage and it was around 4.85 miles. The elevation gain would have been the same since we only headed down to reach camp.
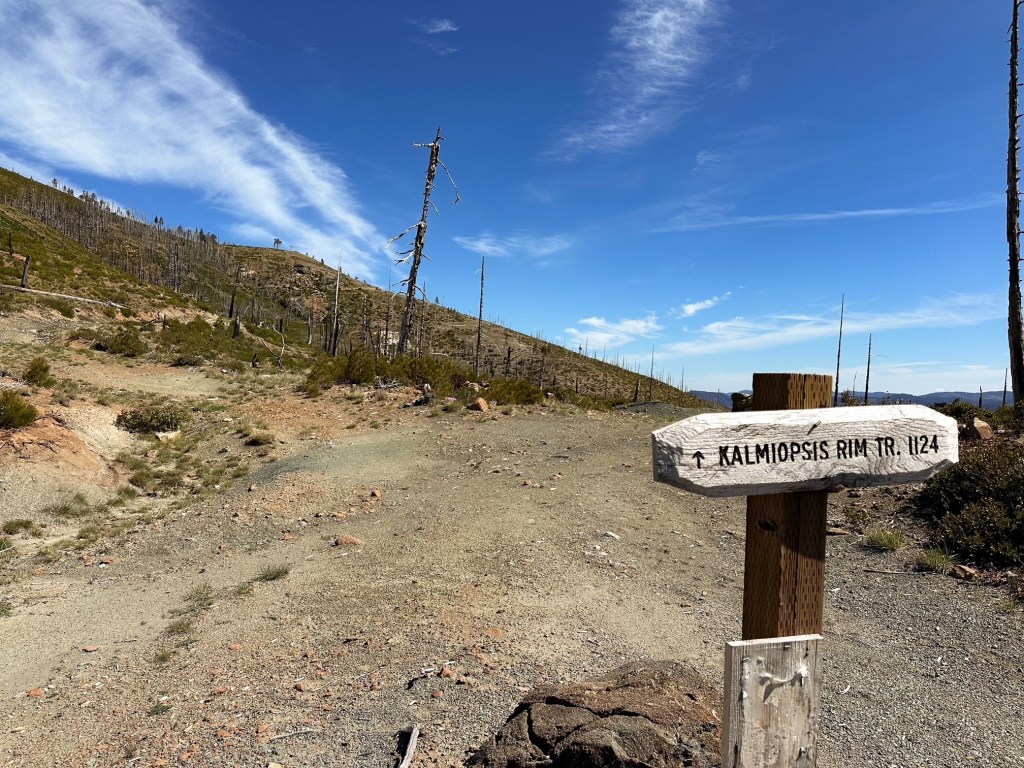
Kalmiopsis Rim (Onion Camp) Trailhead to Chetco Pass
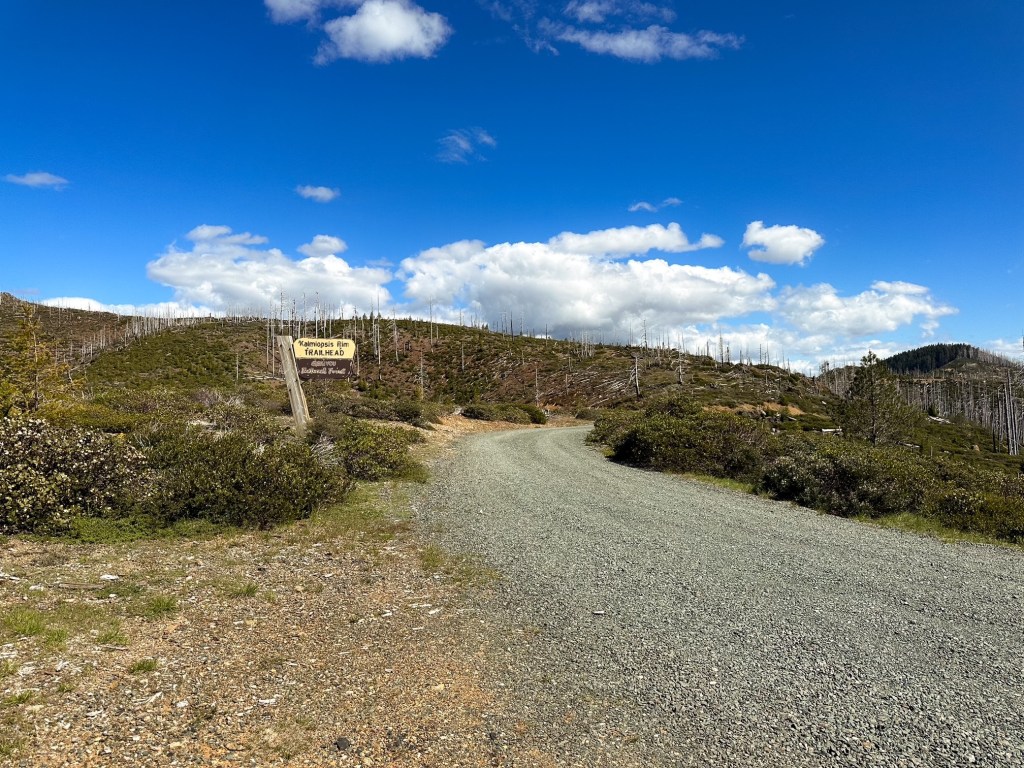
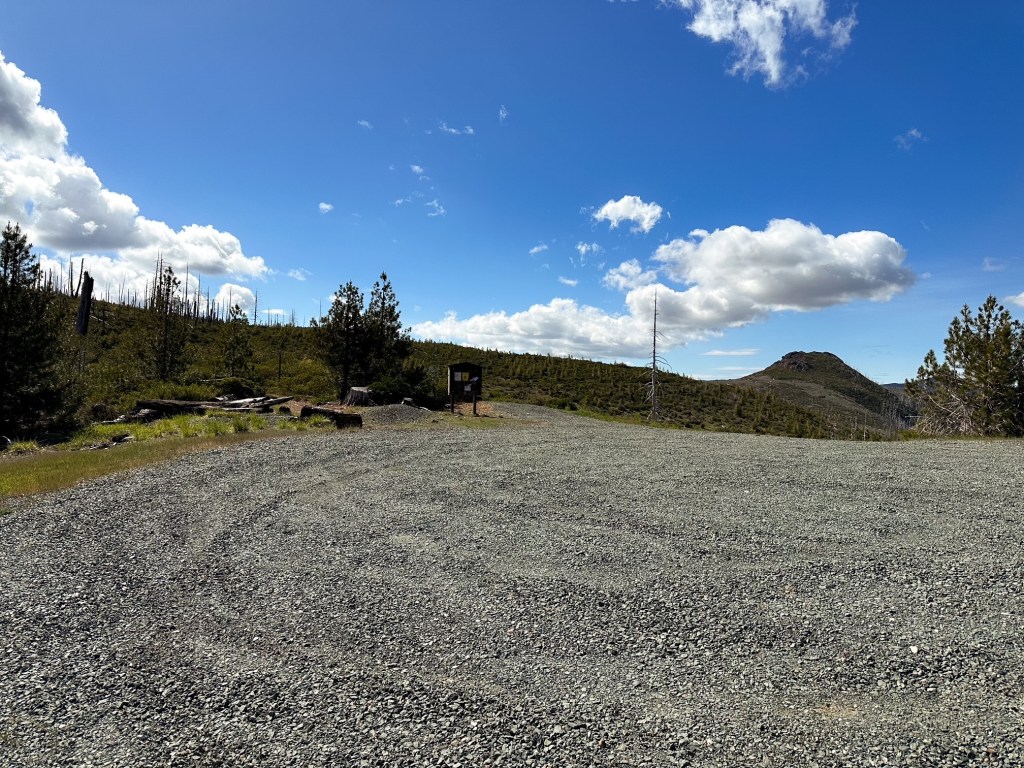
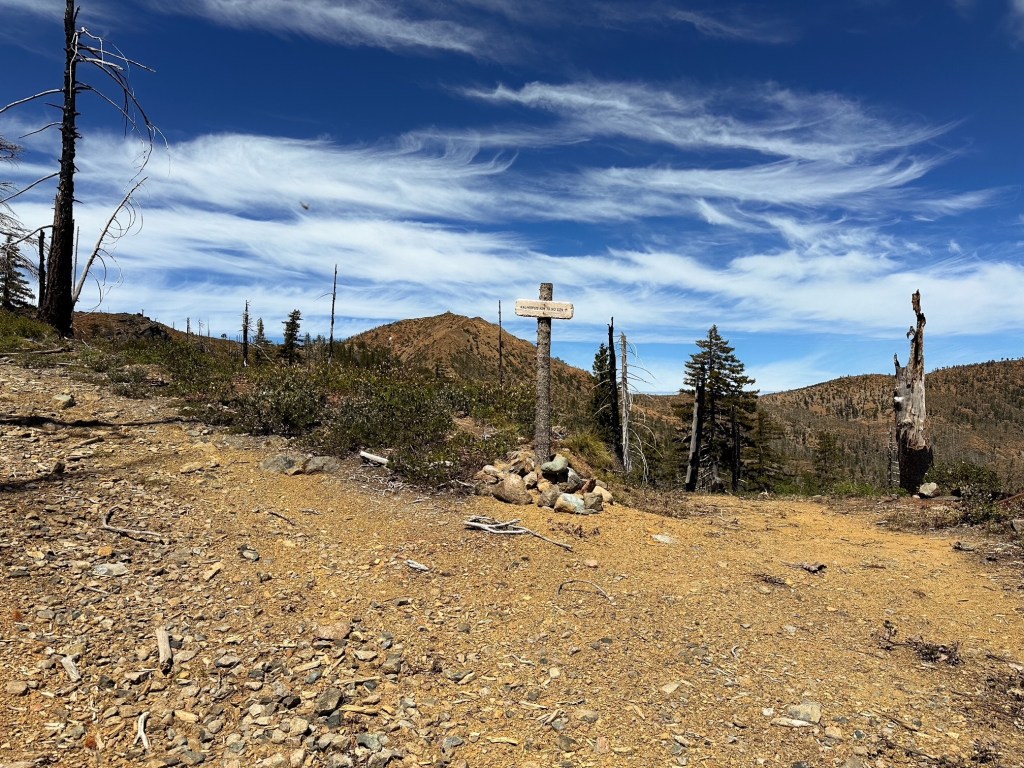
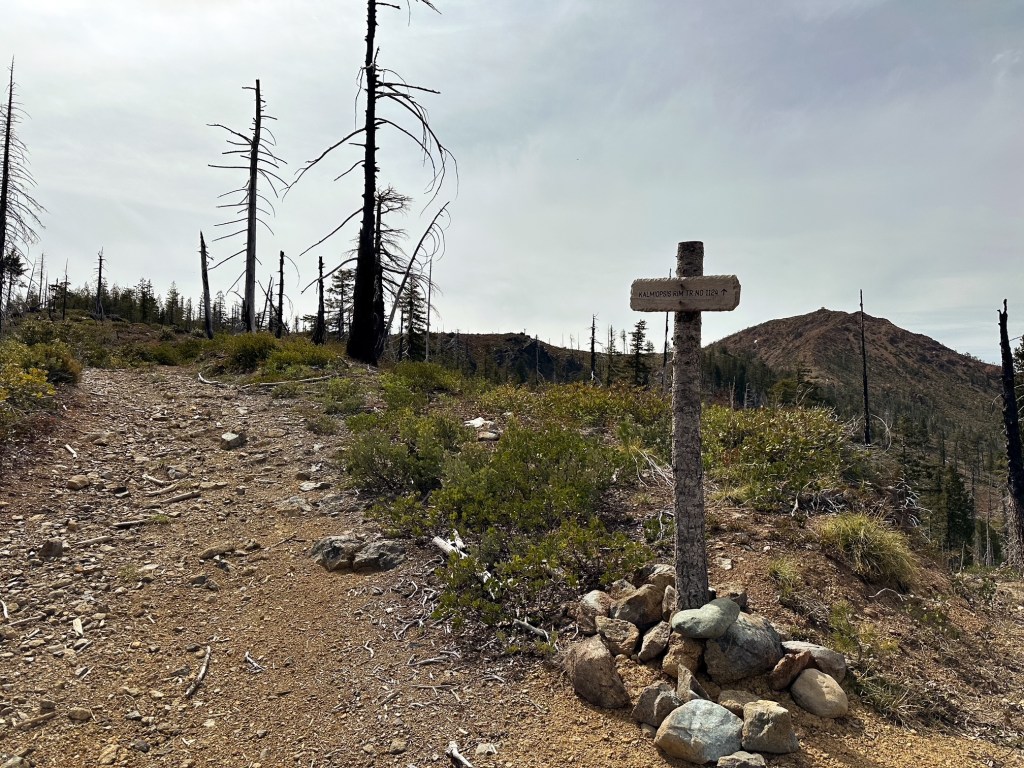
From Grants Pass, we followed HWY-199 past Selma until we reached the paved Eight Dollar Mountain Road off to the right. It’s on a curve in the highway with it’s own turn lane. If you reach the community of Kerby you have gone too far. The Eight Dollar Mountain Road narrows to a single lane beyond the gate and eventually turns into the NF-4201. It becomes gravel after crossing the bridge over the Illinois River. There are a few deep potholes in the paved section of this road but all are currently avoidable. You will stay on the NF-4201 road until you are almost to the Babyfoot Lake Trailhead. Just before you reach the Babyfoot Lake TH, you will turn right onto NF-142 and follow this to the Kalmiopsis Rim Trailhead (sometimes referred to as the Onion Camp TH). The gravel conditions are good for the majority of the drive and passable to low clearance vehicles. Some caution is required though. The last six miles has the majority of hazards as the road narrows and becomes rockier. There are some potholes and minor high lines but all are currently passable. Your biggest threat is oncoming traffic around blind corners. It is roughly 17 miles from the highway to the trailheads and there is a little less than a mile and a half between the two trailheads. The trail begins to the left of the signboard at the Kalmiopsis Rim TH.
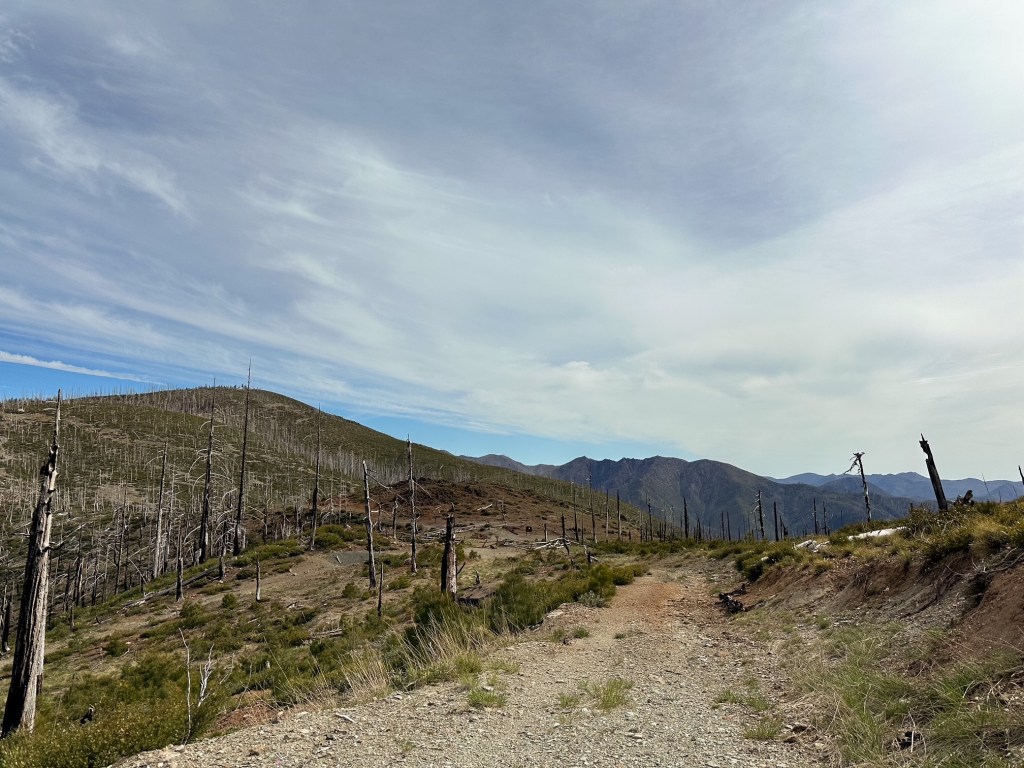
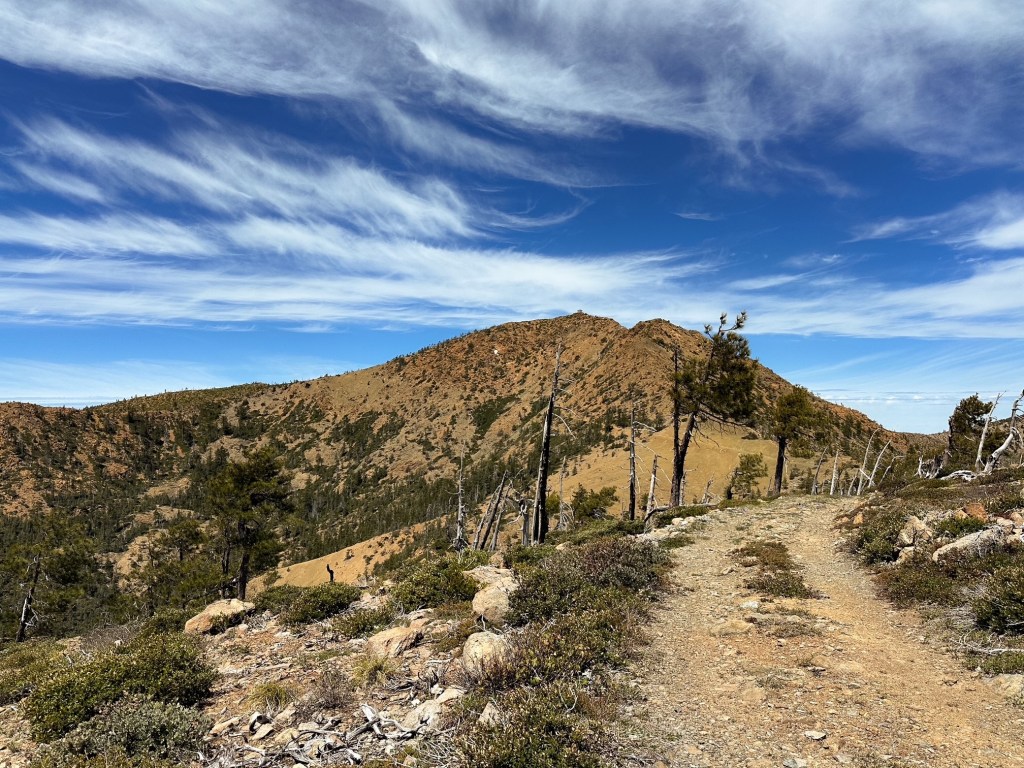
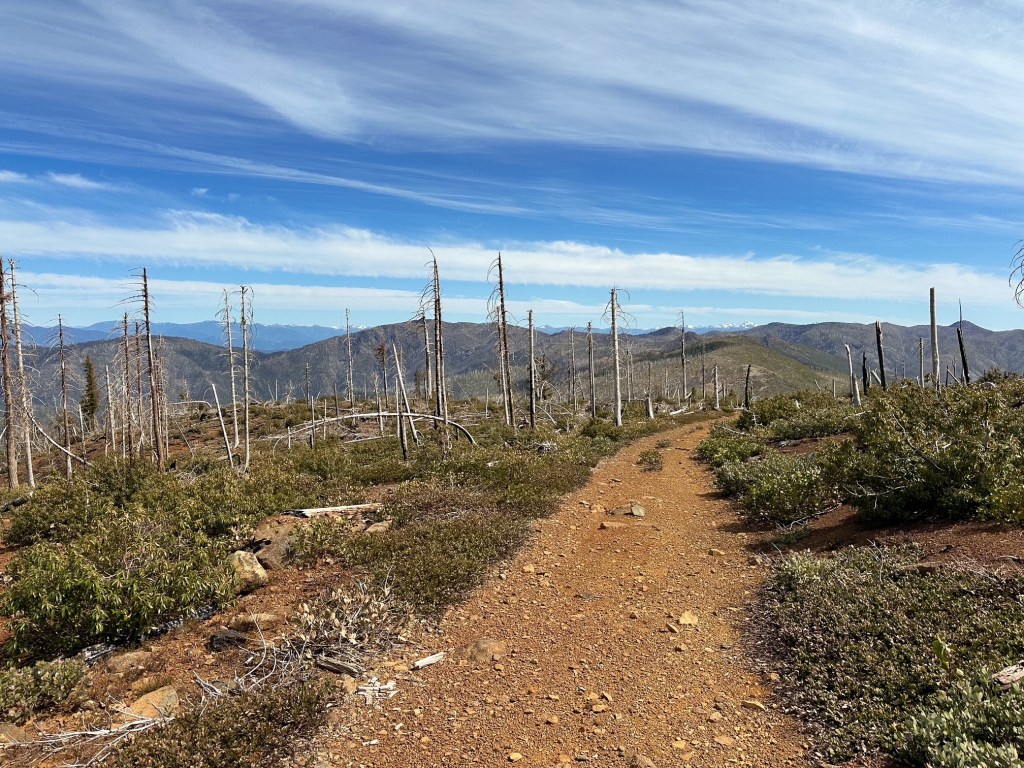
We had hiked the Kalmiopsis Rim Trail #1124 as the start of our route for a 5-day trip through the wilderness. The mileage for this route is estimated based on online information since I didn’t track it on Strava. I opted to conserve my phone’s battery for photos instead. The trail starts out by mildly climbing to meet the ridge line and turning to head towards Whetstone Butte. It drops down on the left hand side of the butte to descend to Eagle gap. Our destination for the night was a dry campsite tucked in a saddle between Eagle Gap and the summit of Eagle Mountain. We didn’t plan on making it very far our first day since we had a long drive from Portland and didn’t make it to the trailhead until after 4PM. We were also traveling with Garnet’s mom for the weekend and had to keep that in mind. There is a spring at Eagle Gap and that is where you would need to get water if you plan on camping in the same spot. You have to drop below the trail on the right side of the gap to reach it. It wasn’t completely obvious where exactly it was located, but we were able to locate it by the Darlingtonia growing around it. From Eagle Gap, the trail becomes faint and steeply climbs to the ridge again. It is roughly 2.75 miles and anywhere from 1,300′ to 1,700′ of elevation gain (I found varying information online) from the trailhead to the summit of Eagle Mountain. I’d estimate the camp spot is about 1/2 of a mile before the summit (a little over 2 miles from the trailhead). These mileages really only matter if you want to break up your route into a backpacking trip like we did.
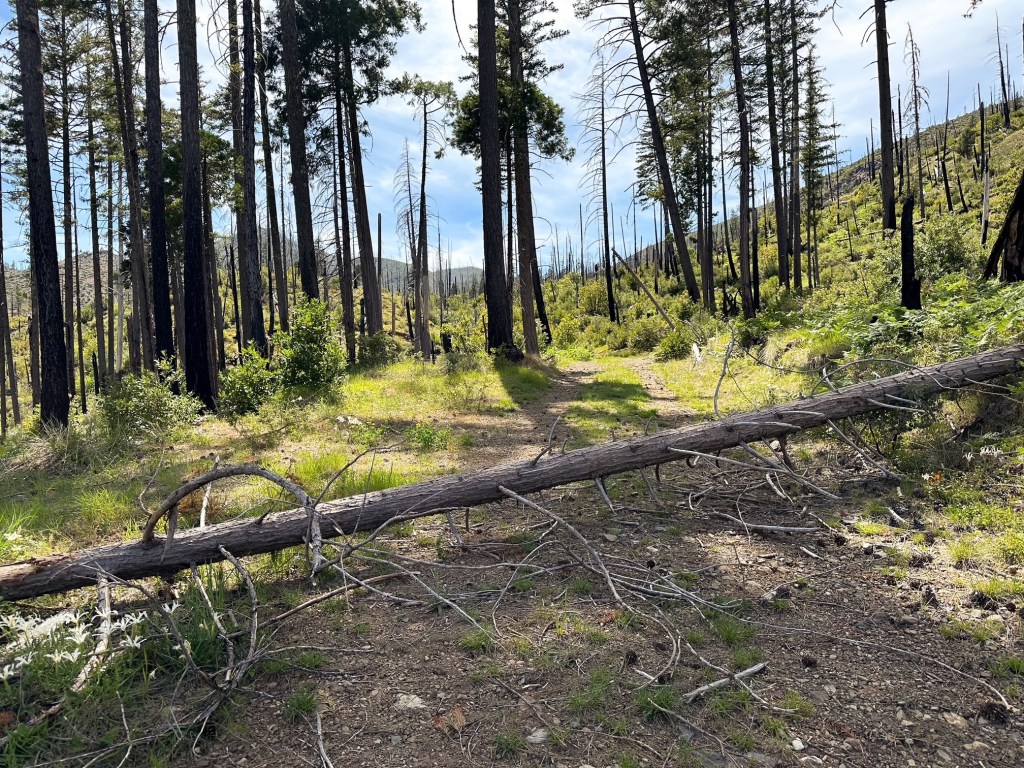
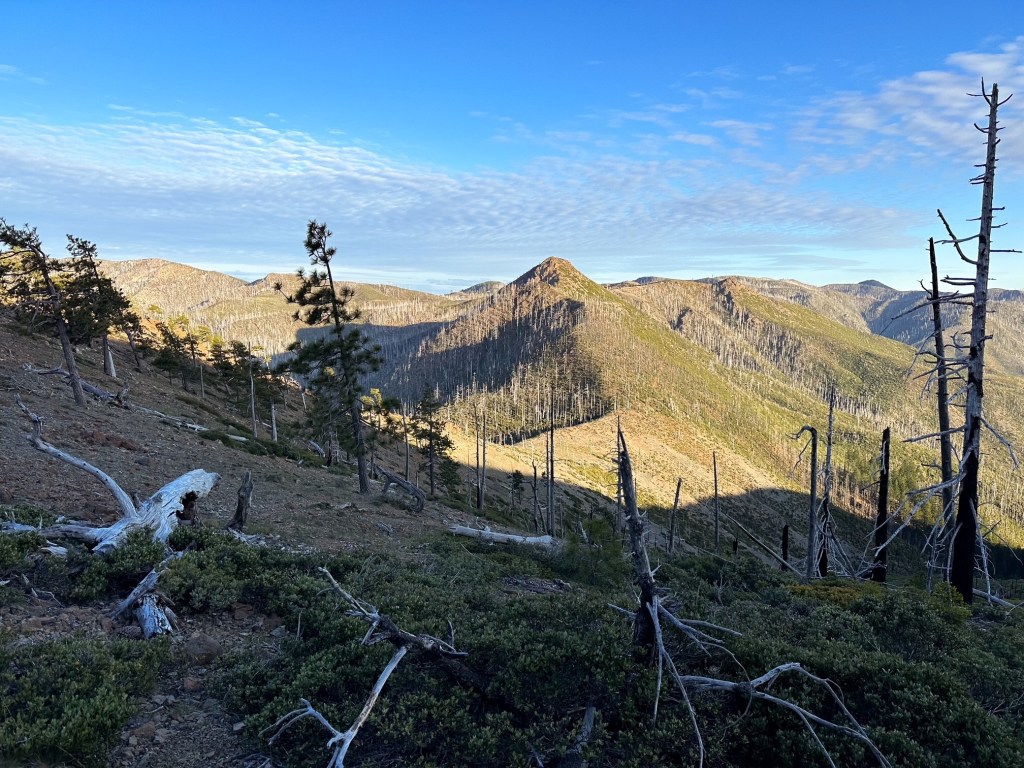
The next morning we woke in a dense cloud with wet gear. We packed up to make the final climb up Eagle Mountain before heading down again to Chetco Pass. I recommend taking a small off trail detour to take in the expansive views from the official summit of Eagle Mountain. There is a small pocket as you are coming down from the mountain that has a few matchstick sections of downed trees to navigate. Once past the treed area the trail widens to an old mining road and you have a clear view of where you are headed. Chetco Pass is roughly 4-1/2 miles from the Kalmiopsis Rim trailhead. You don’t gain much more beyond summiting Eagle Mountain from this route to reach Chetco Pass. You could hypothetically break up your route by camping just below Chetco Pass instead of near Eagle Mountain too. We had hoped we would have had time to reach Pearsoll Peak during this trip but that would’ve required another day for us. Our route for the weekend instead continued down the Slide Creek trail from there to meet up with the Chetco River before heading back up to Babyfoot lake.
Chetco Pass to Pearsoll Peak
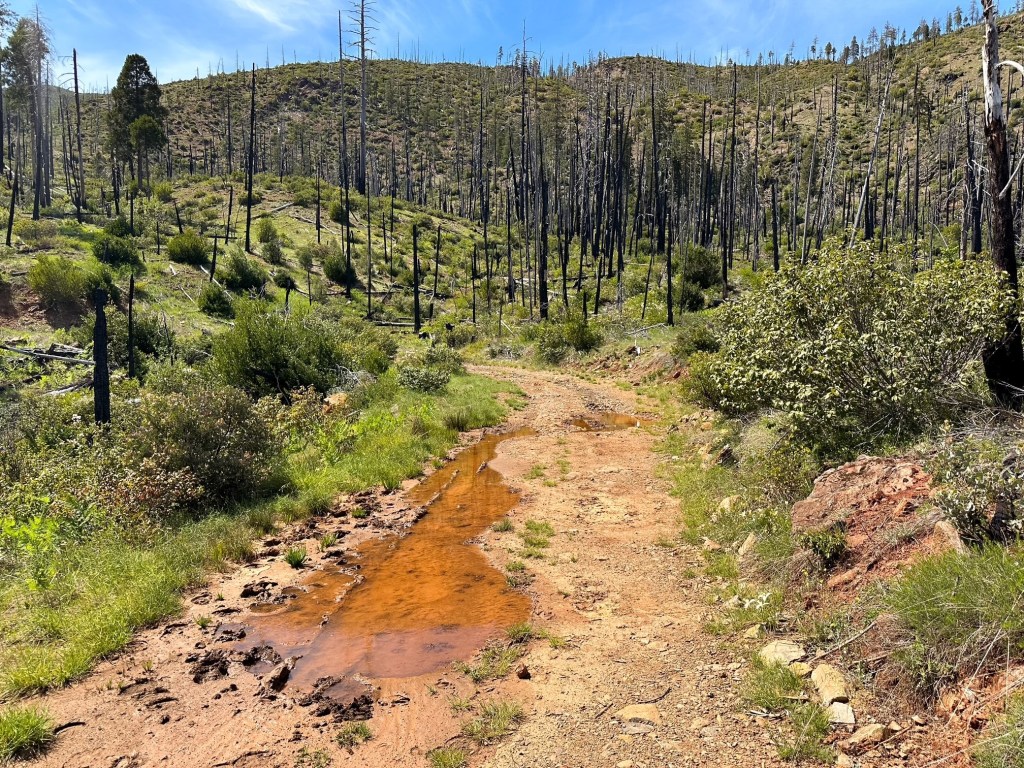
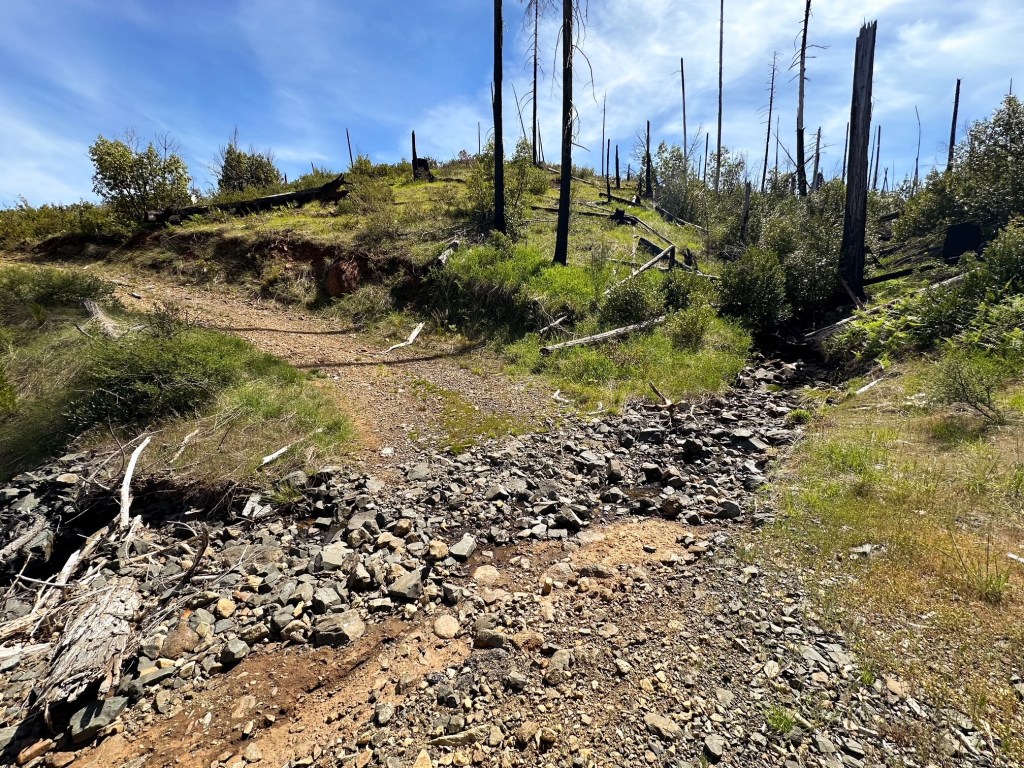
Once you have determined which route you want to take to reach Chetco Pass, the official hike to Pearsoll Peak begins. There are three trails that leave from Chetco Pass. The Kalmiopsis Rim Trail #1124 continues on both the left and right side of the pass, while the Slide Creek Trial #1102 continues straight (if you’re looking at it head on from the road). The hike to Pearsoll is accessed from the right hand side of the trailhead and follows the old road to the official lookout trail. This is the only area with the wood fence cut out – I’m not sure if that was intentionally done or if someone personally cut it to drive farther up the road. The old road continues for a mile before you reach a fork with your first view of Pearsoll Peak. The Kalmiopsis Rim Trail continues straight, but you will want to take the road heading left. This road continues for another mile before ending at the remains of the old Pearsoll Mine and narrowing into the official Pearsoll Peak Trail #1125. The Pearsoll Peak Trail climbs steeply to the back side of the ridge for half of a mile to reach the summit. The map shows that this trail can be accessed from the continuation of the Kalmiopsis Rim Trail on the other side as well, but we did not scope out that route (Aka if you continued straight at the aforementioned junction). The tread along the trail is in mostly good condition given that it is built into the rock, there is only one section that looks like it could erode over time near the main switchback given the looser conditions. We enjoyed our time on the summit with a leisurely lunch before heading back down. Breaking up the distance allowed for us to have more time to enjoy our surroundings.
Although we decided to turn this into a 4-day backpacking trip, you could easily modify it into a shorter trip or a day hike if you’re into hardier hikes. The first half of our trip was sunny conditions and warm temps, but the second half and hike out was in the rain. This lead us to a couple of discoveries. The first was that our tent is probably well overdue for a re-water proofing. The second was that the Chetco Pass road becomes very soft under wet conditions – I wouldn’t recommend trying to drive it if there is any rain in the forecast. Even our feet were sinking in the road in certain areas which only tells me that a car would do the same. Anyway, I’m sure this is way more information than what you need or even want but if you made it this far congrats.
Chetco Pass to Pearsoll Peak is ~ 5.4 miles RT, 1,400′ of elevation gain
Kalmiopsis Rim TH to Pearsoll Peak is ~ 14.4 miles RT, 2,900′ of elevation gain
McCaleb Ranch TH to Pearsoll Peak is ~ 15 miles RT, 4,050′ of elevation gain
History.
The first structure built on Pearsoll Peak was completed in 1920 as a D-6 Cupola style cabin. There is evidence to suggest this was utilized as a fire detection camp as early as 1914 when a telephone line was constructed. The lookout was replaced in 1954 by the current L-4 ground cabin. This was actively staffed into the early 1970s before being abandoned and falling into a state of disrepair. In the early 1990s, the Sand Mountain Society partnered with the Illinois Ranger District to help to restore the lookout. Thanks to their efforts it still stands today. It is unclear if the Sand Mountain Society still plays a part in maintaining this structure (their website has some glitches and is under construction last I checked). There is a new standing platform and signs of recent paint on some of the shutters. I think most of the maintenance and work is now captained by the Siskiyou Mountain Club. They play a major role in keeping the Kalmiopsis Wilderness accessible for hikers and backpackers through their stewardship programs.
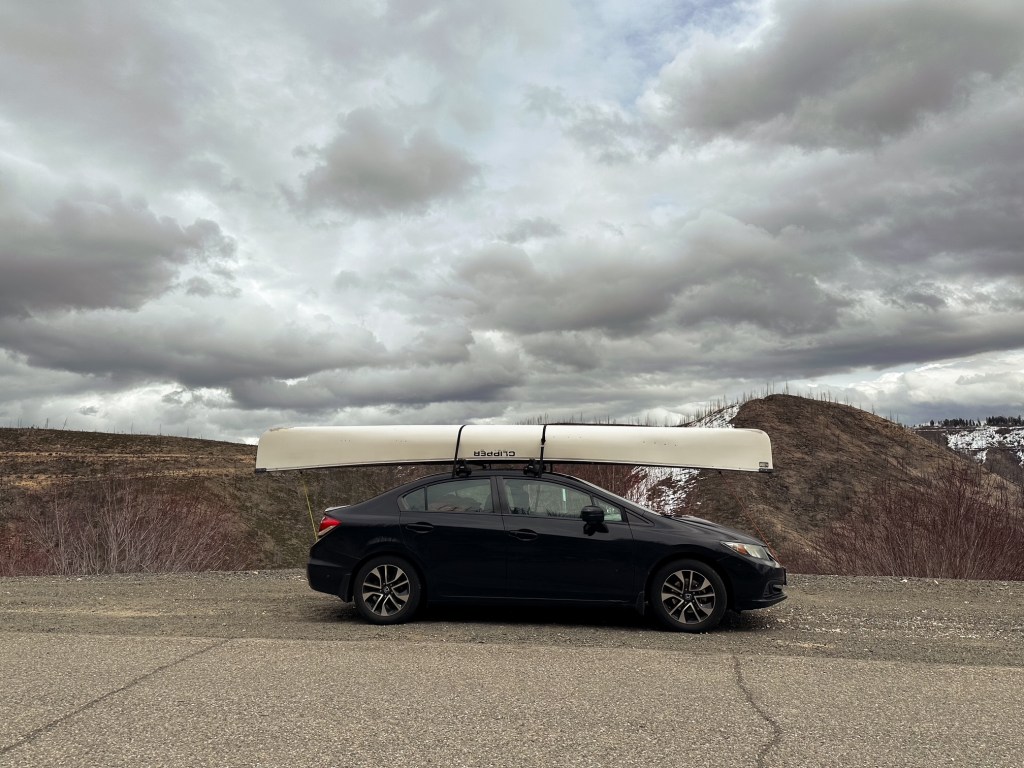
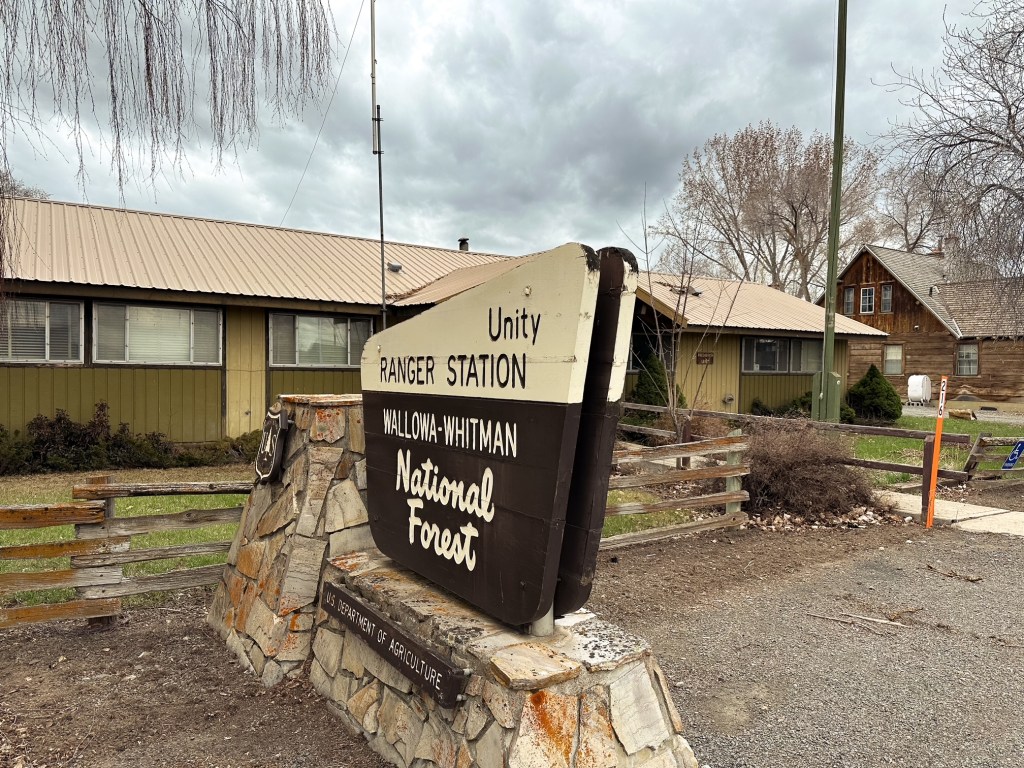
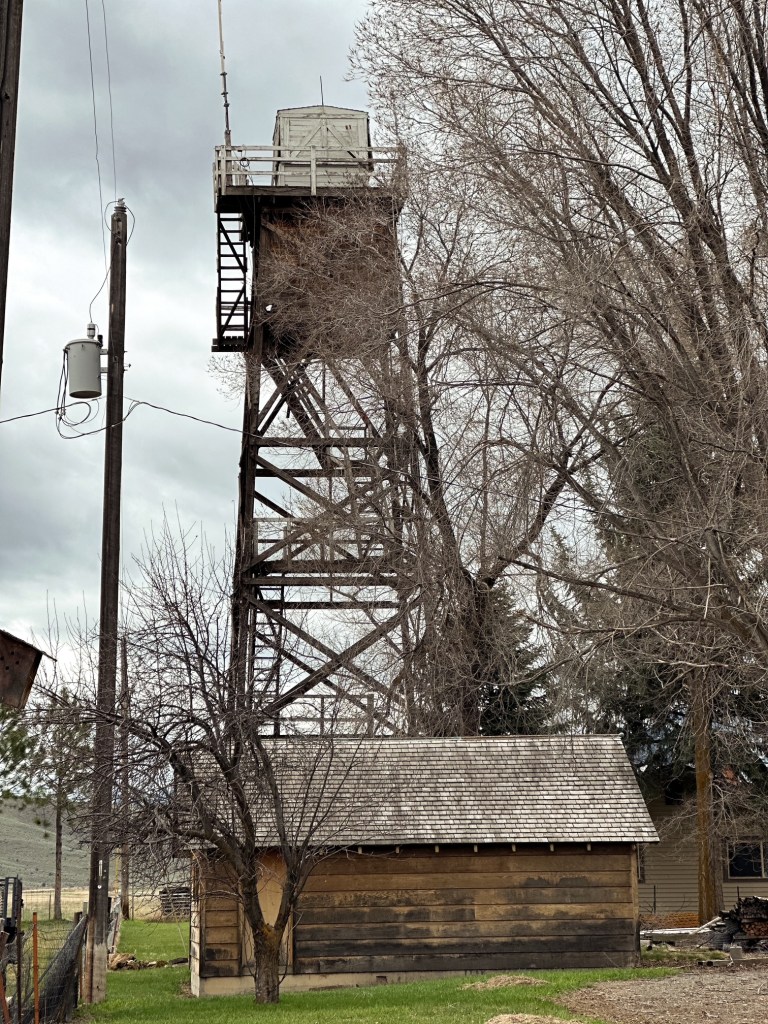
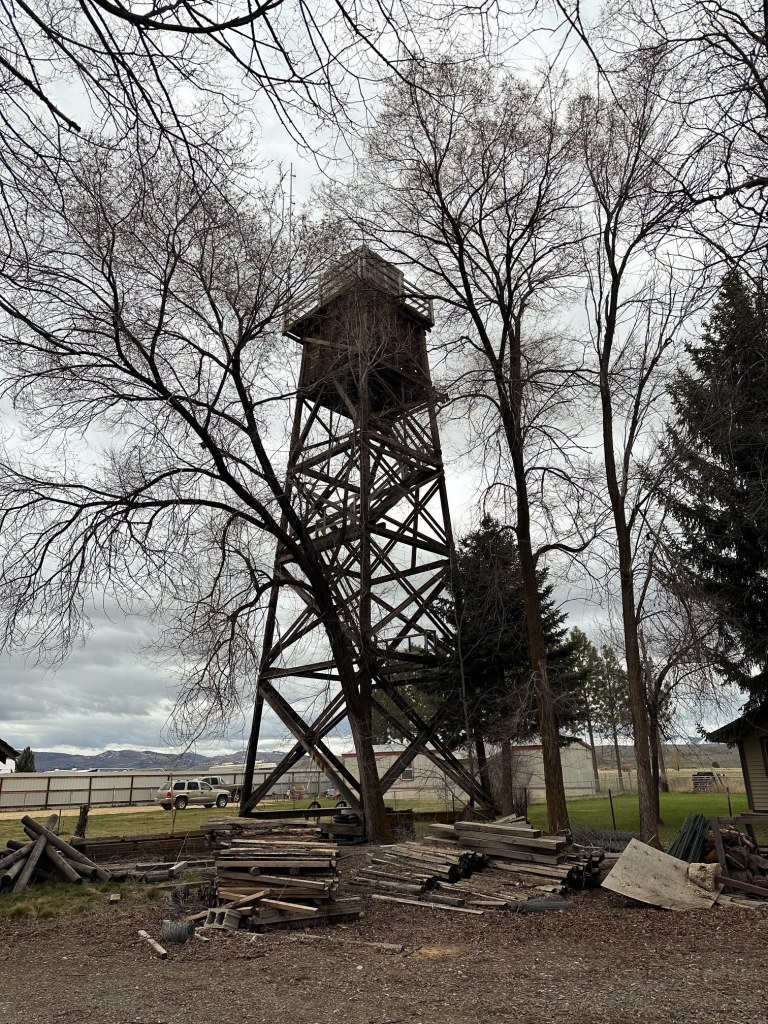
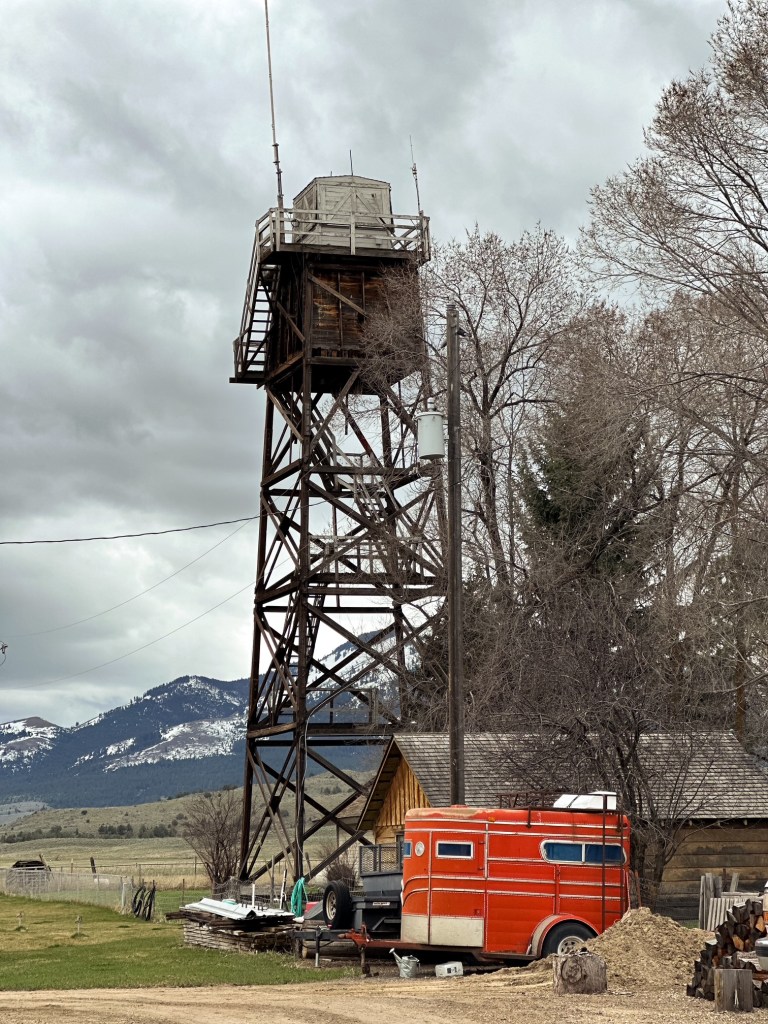
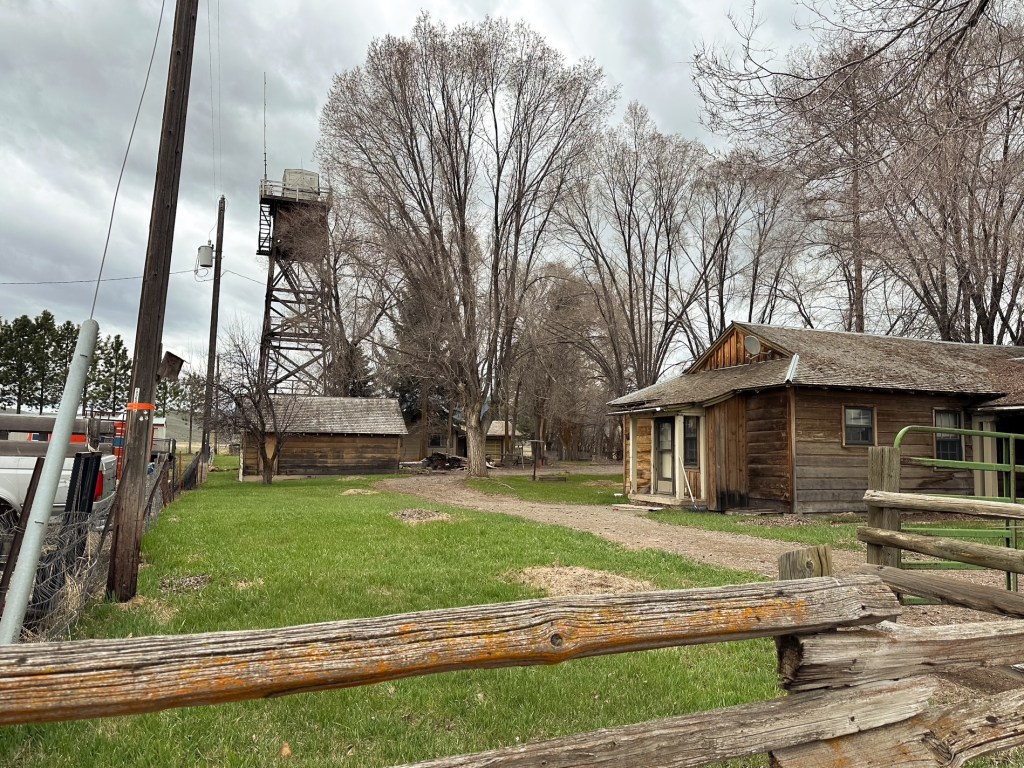
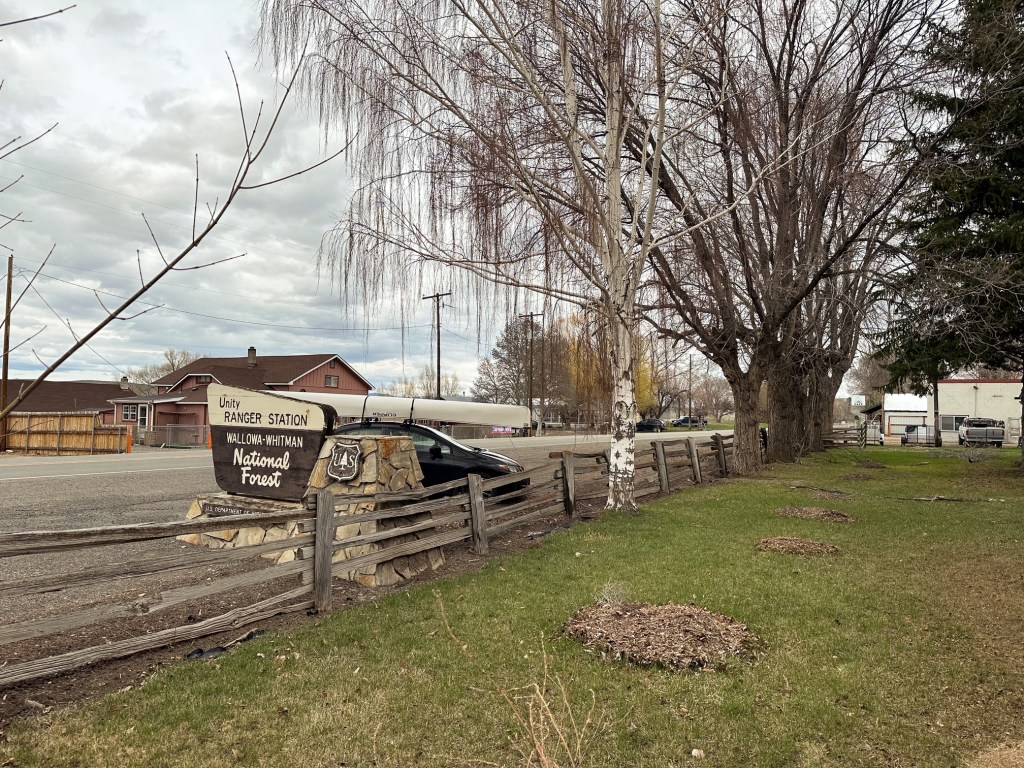
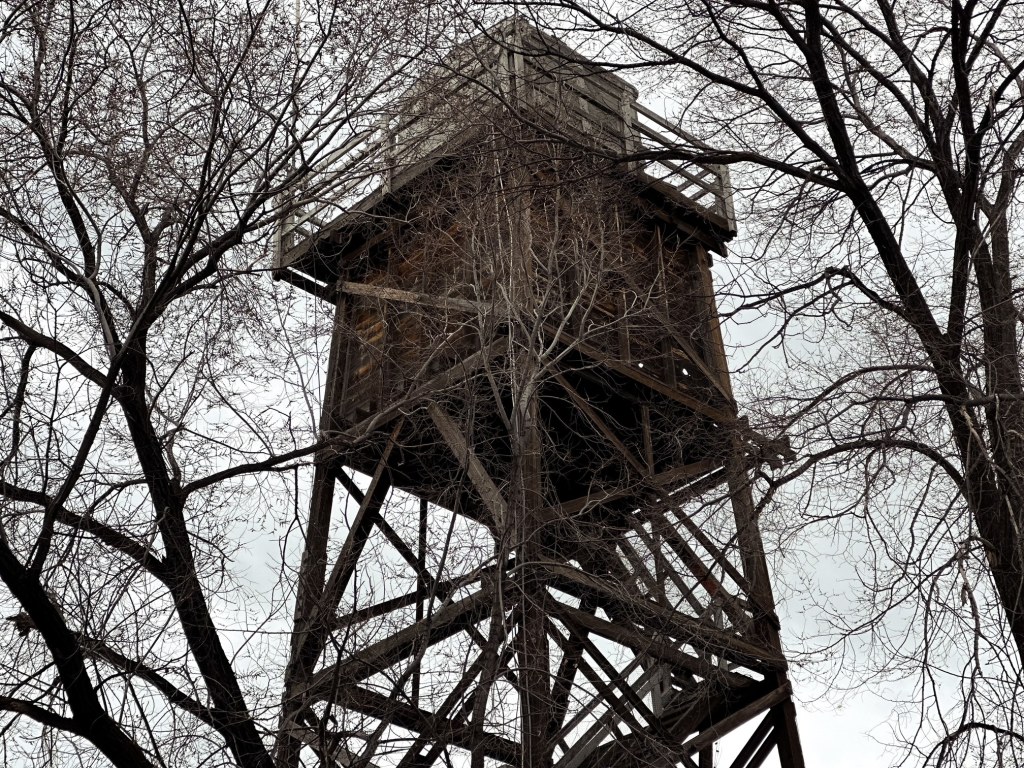
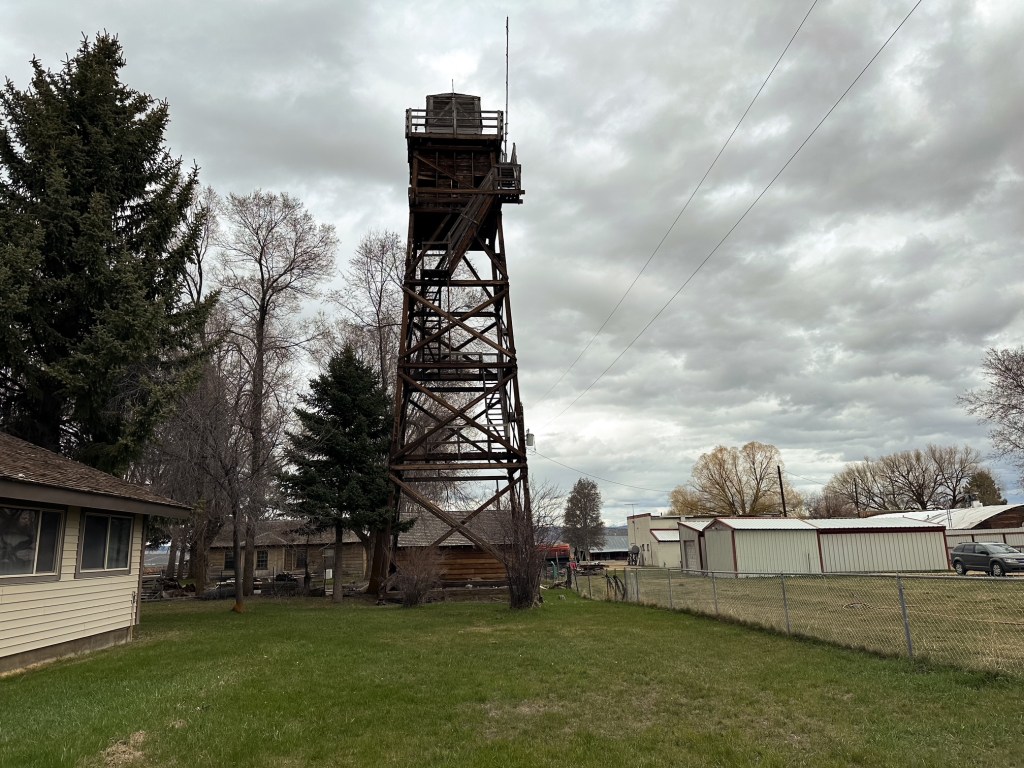
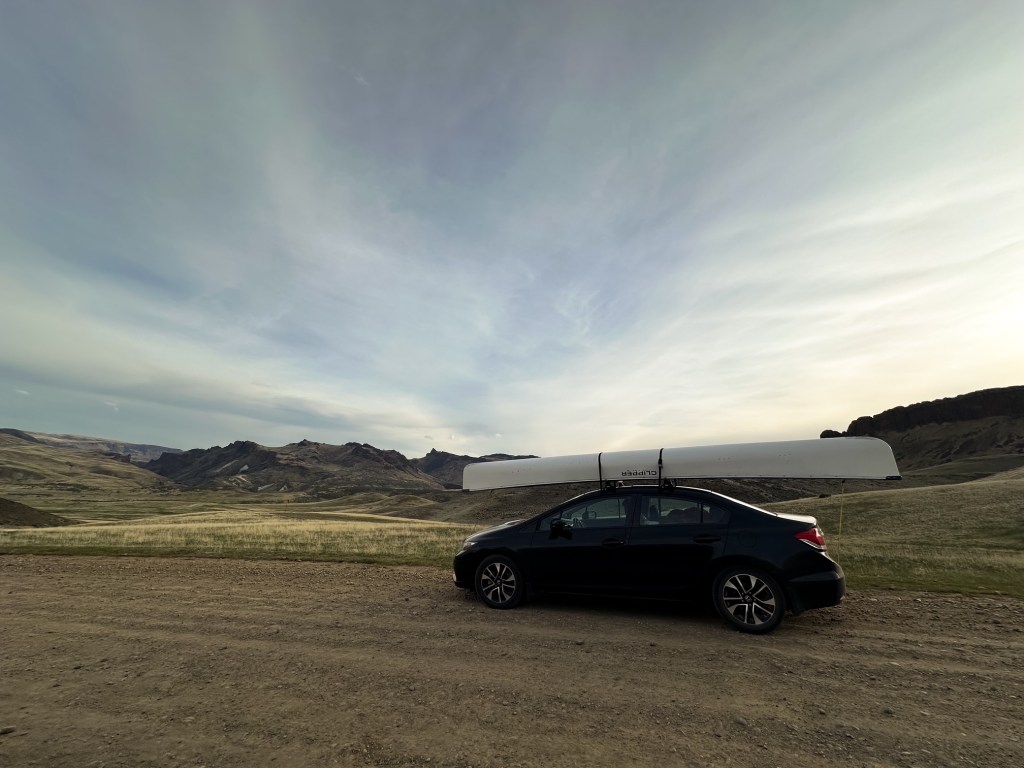
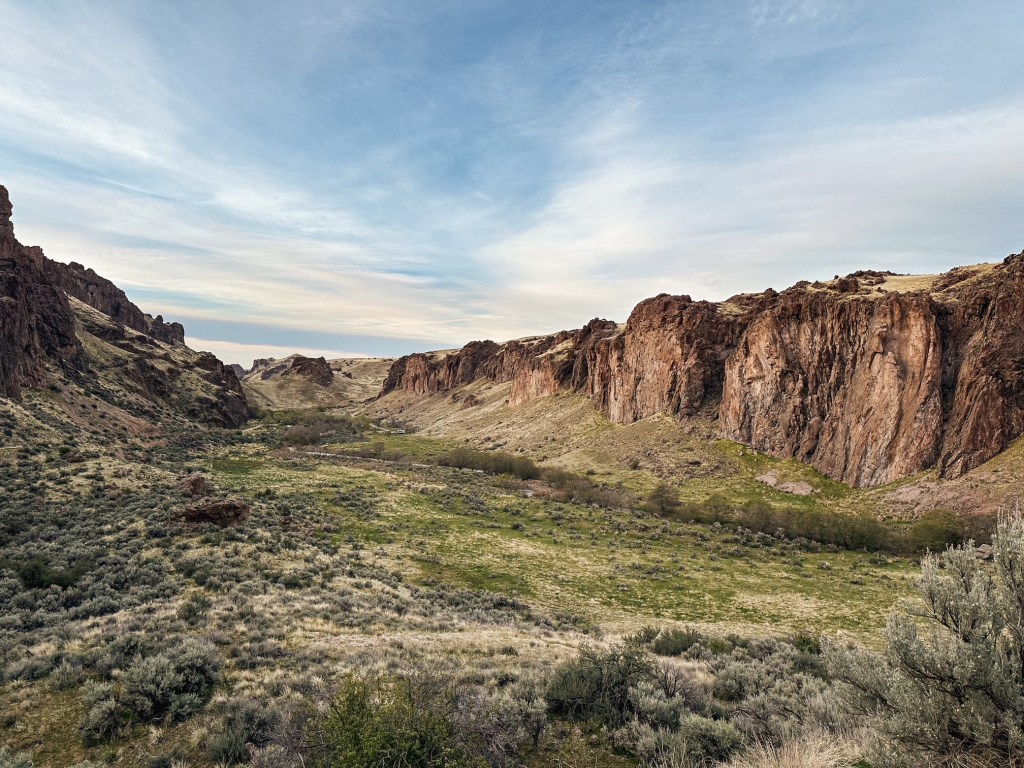
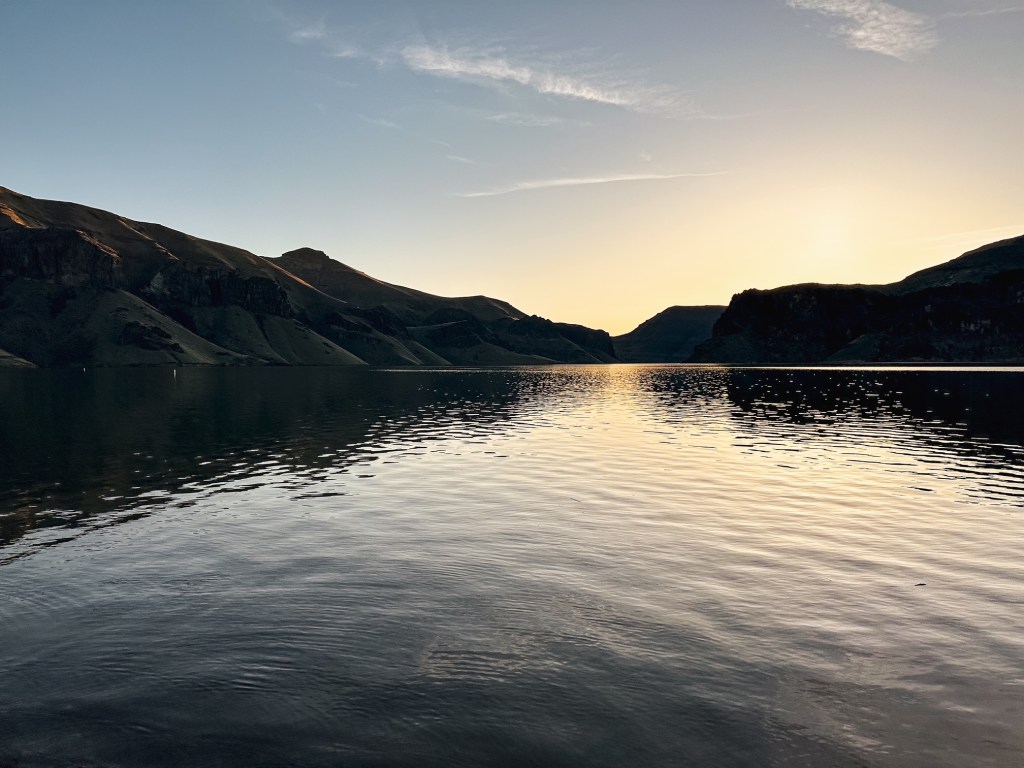
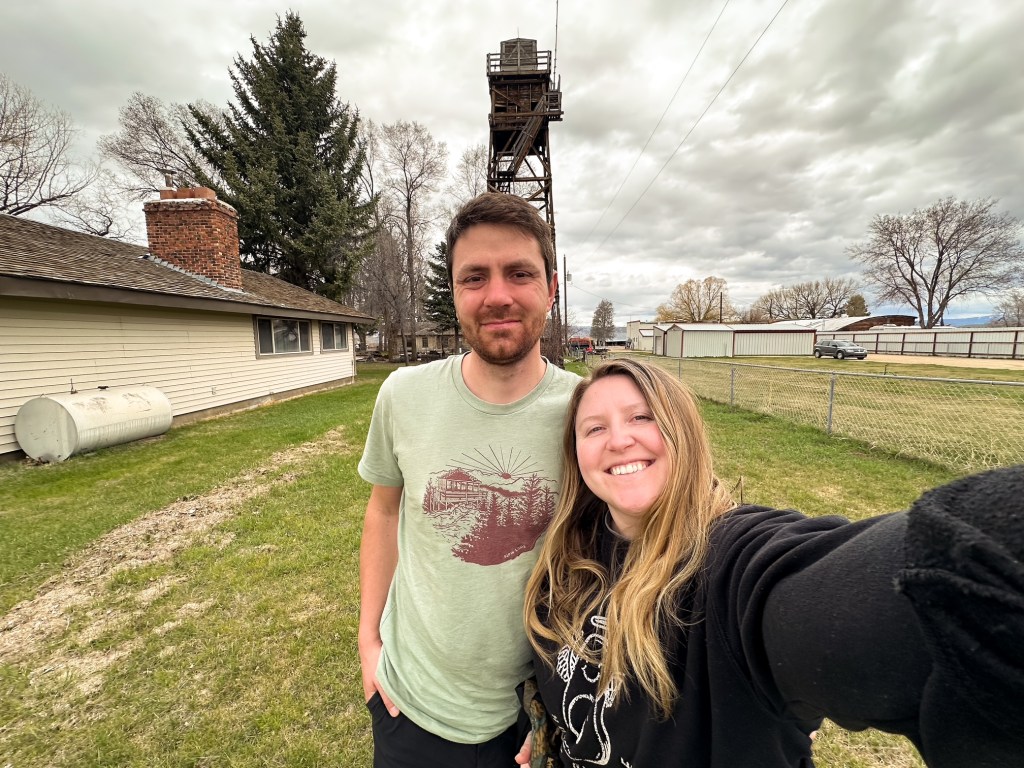
We decided to take the scenic route out to the Owyhee Canyons for my birthday this year. And by scenic route, I mean a route that might not make a ton of sense to most and was definitely not the most direct. We figured we could add in a pit stop to the community of Unity to see the fire lookout at the ranger station. It’s kind of, sorta of (not really), out in the same direction. We took I-84 to Baker City to HWY-7 to HWY-245 that heads up and over Dooley Summit before dropping down into the valley to connect to HWY-26. The lookout tower is right behind the ranger station and the ranger station is right off the highway. The highway is considered the main street of Unity and it would be hard to miss otherwise. We parked in front of the ranger station and walked around to get a better look. There was no one else onsite during our visit.
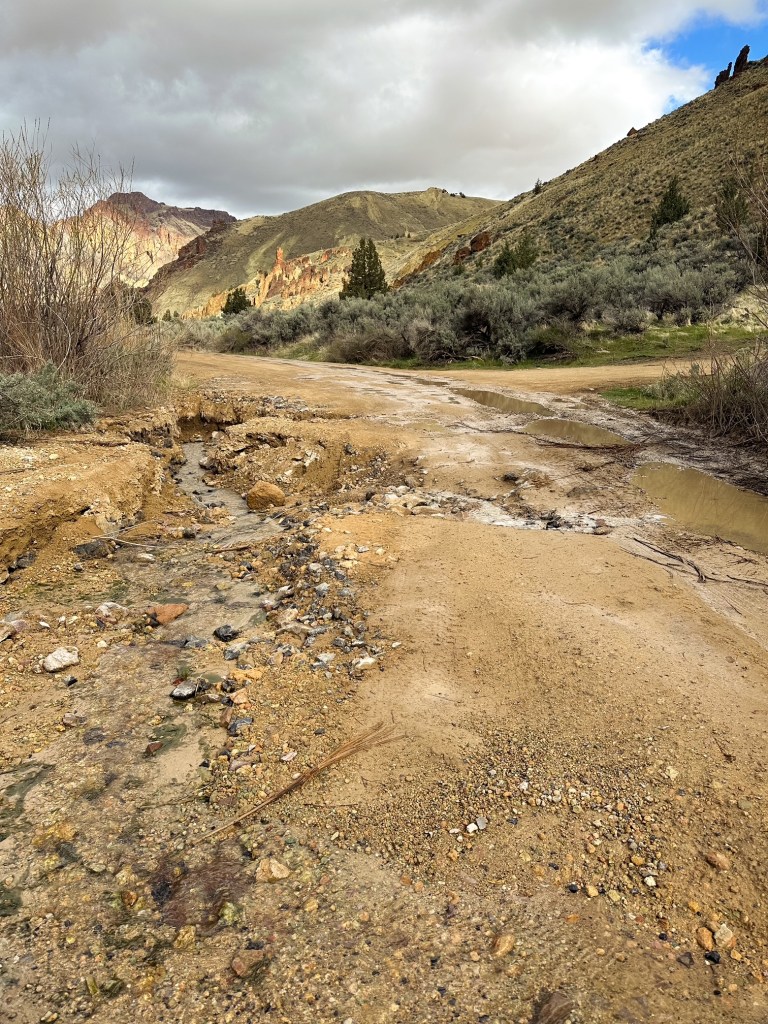
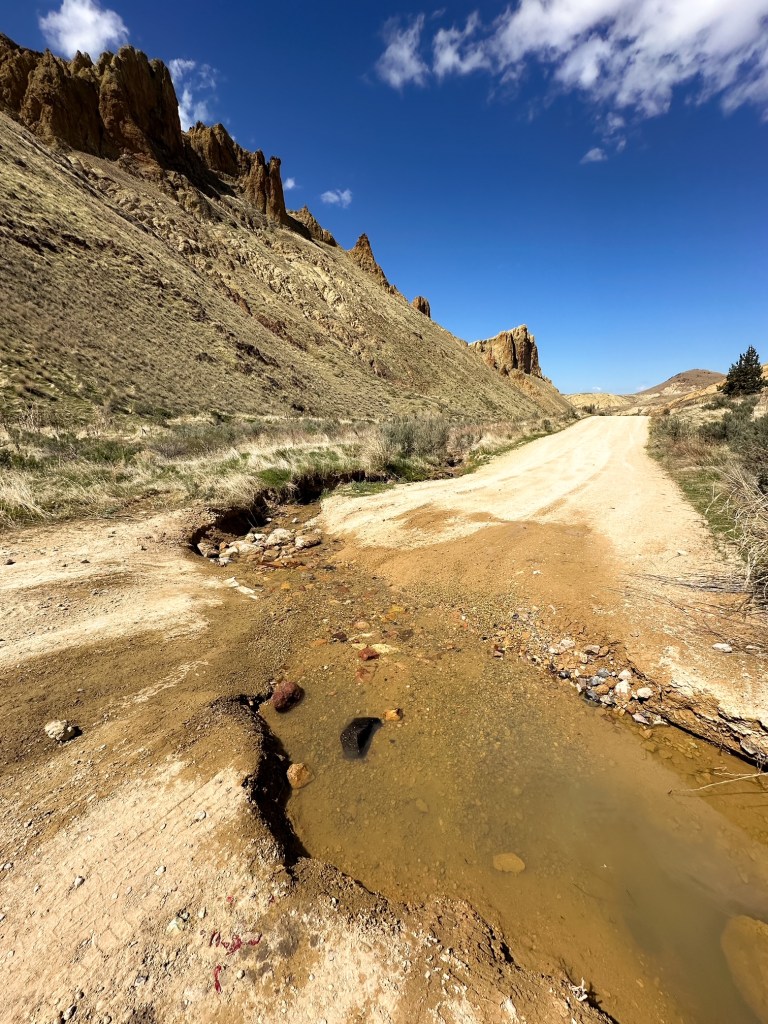
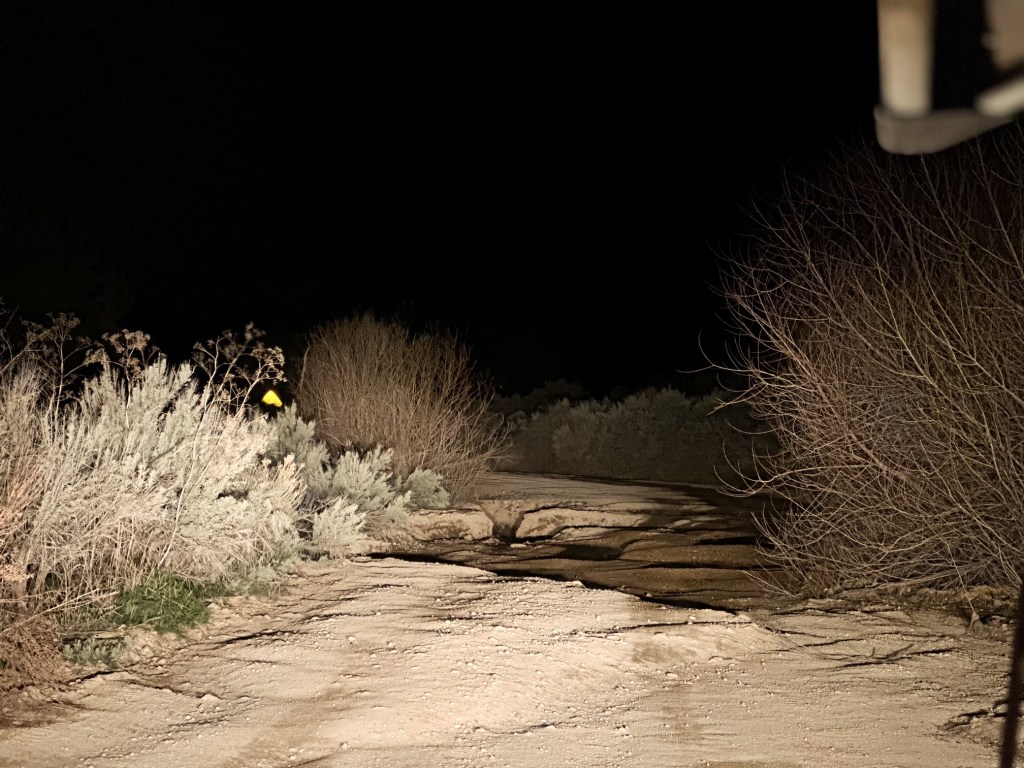
This route ended up taking us longer than expected since we were hauling our canoe. We also ended up taking the back entrance to the Leslie Gulch area which is long, rocky, and not low clearance friendly. It was in the sense that we made it, but not in the sense that the other access point was much better. We made it to the Leslie Gulch area after driving for 13 hours and well after dark. Only to reach a deep wash out in the road (also not low clearance friendly). This led to us having to find a make shift emergency camp spot and regroup in the morning. After some reassessments the next day we attempted a narrow circumvent of the washout and made it within a mile of our original camping destination. Only to be stopped again by the final water bar after the last trailhead. A nice Subaru driver tried to help us navigate, but no matter which angle we approached it wanted to take our bumper with it. The good news was we were able to do all the hikes we wanted in that area, but this road is definitely no longer drivable to any vehicle as some blogs had suggested. It is definitely a gorgeous area if you have the clearance for it. We left disappointed and wound our way back out to the State Park instead.
History.
This 60′ treated timber tower with 6′ x 6′ cab was built in 1938 by the CCC. It was also noted to support a water tank which is a unique feature (I believe this is the square wooden structure just below the cab). It was noted as last used in the 1960s, but I am unsure if it was ever staffed full time. I often wonder if these towers built at ranger stations were used more for training than anything else. Many note that this is still used for emergencies, but the bottom flight of stairs have been removed which suggests it’s out of commission to me. No one was onsite during our visit to confirm. It is currently still used for the community Christmas Tree lightings.
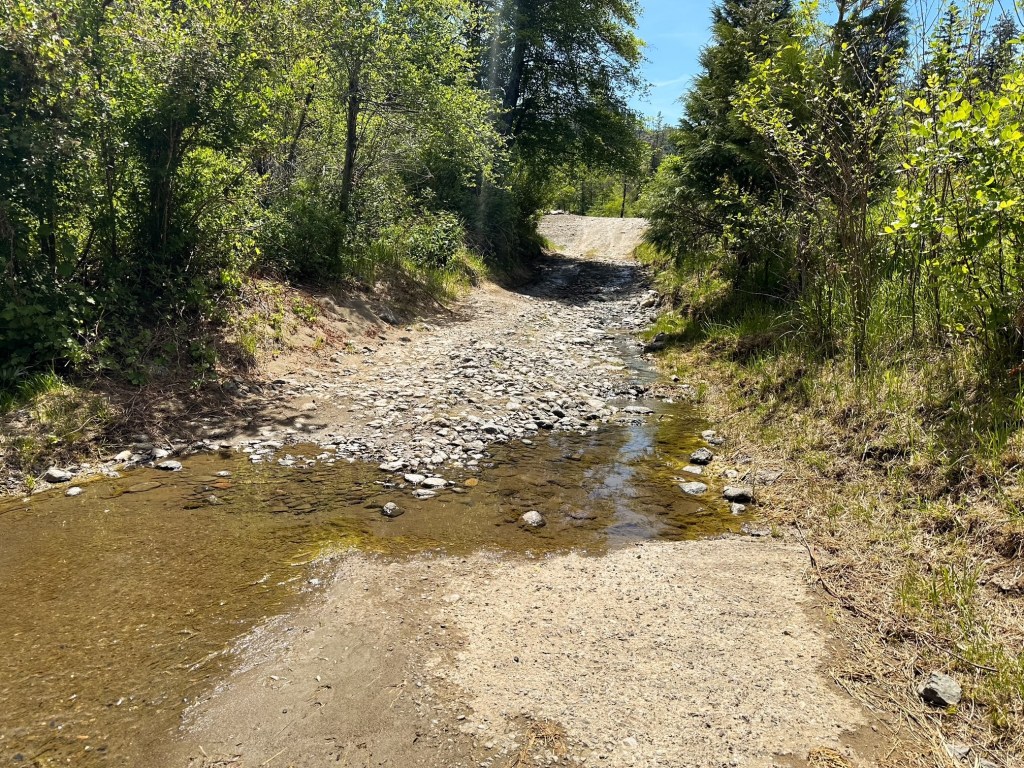
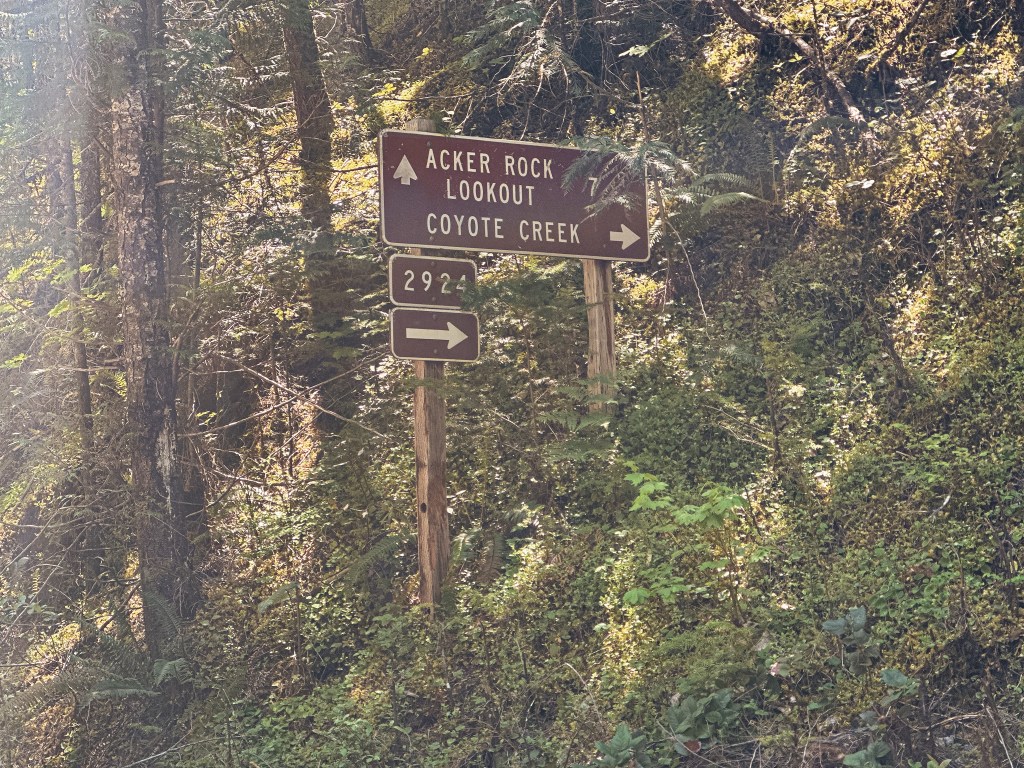
We still had one more night of our trip but I had fudged the reservation at Pickett Butte and only booked two nights. We brought all our gear to disperse camp for the final night. The trickiest part would be locating a good spot to camp. We got up early enough to pack up our things and clean up the fire lookout before locking up. Always try to leave it better than you found it. We headed back out to the paved CR-46 and turned right to head deeper into the forest. If you stay on CR-46 long enough it eventually turns into NF-28 once you have reached the forest boundary. We drove a little bit past our turn for Acker Rock to check out the South Umpqua Falls first. This is a popular swimming area in the summer when the water and current are not as strong. There were still a handful of people here trying to take advantage of the warm weekend in the shallower areas. We didn’t stay too long since the day was only getting warmer and we didn’t want to be hiking in the heat of the day if possible.
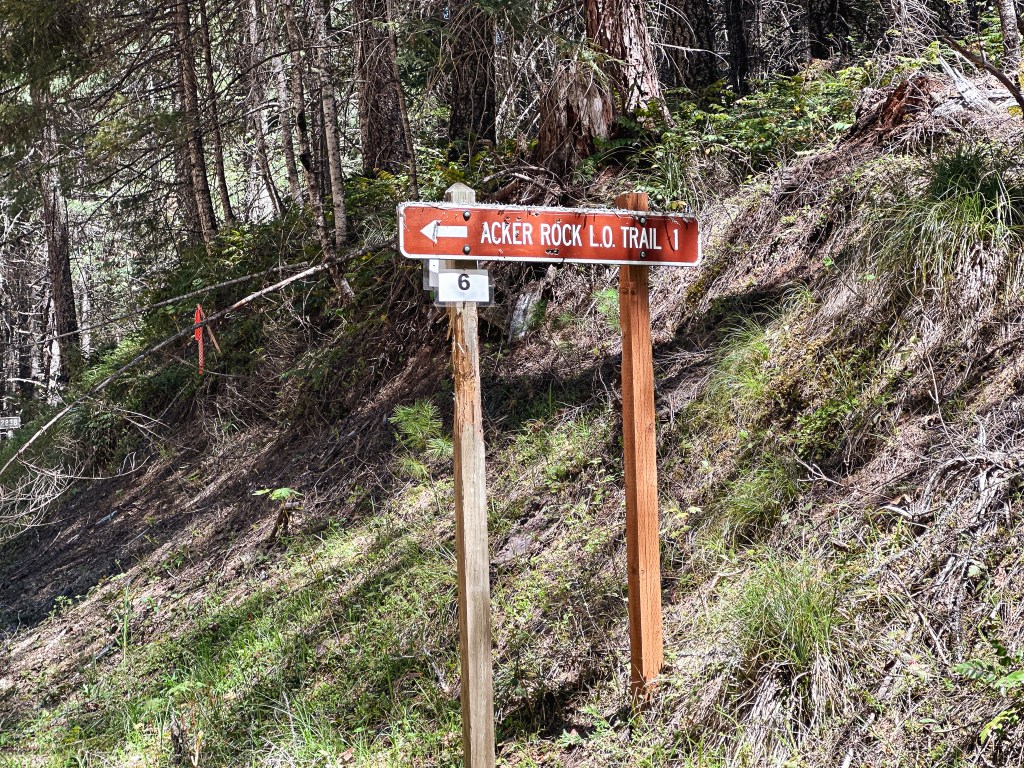
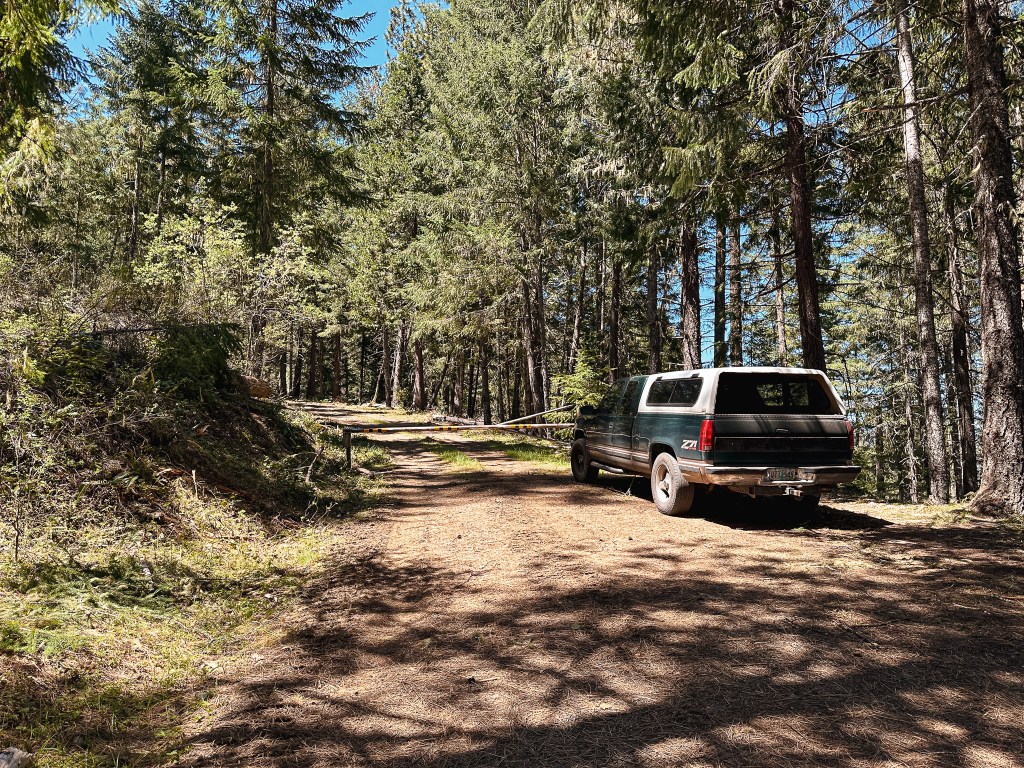
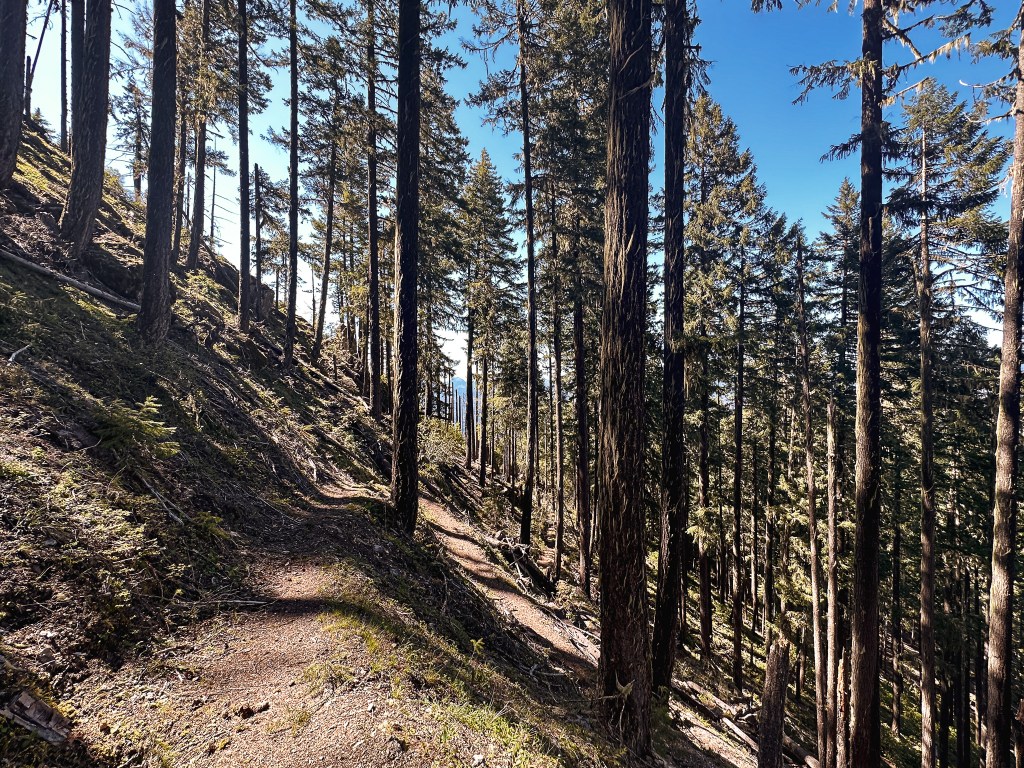
We back tracked a bit to cross the South Umpqua River on NF-29 and followed this to NF-2838 off to the left. We stayed on NF-2838 until we reached the gated NF-950 where the road walking would begin. There were a couple signs for Acker Rock along this route that made it easy to navigate. This is a rentable fire lookout as well, but the season is much shorter and it does not open until August 1st. We decided to visit outside of the rental season since it’s directly on the ground and would make it hard to visit without disturbing the renters. There was one other car parked near the gate when we arrived and we could only assume they were at the lookout. If you are renting, you should get a code to unlock the gate to drive closer. Though there is still a short but steep 0.4 mile hike to the fire lookout to be aware of. We packed a lunch to have at the lookout and began our road walk. It’s fairly straight forward. We followed the road until it dead ends in a parking/turn around area. From there, it turns into more of a trail that switchbacks up the side of the ridge. You will pass the exposed composting toilet on your way up and hope that no one is using it at the time of your visit (or hope that no comes up while you are using it). There were some smaller downed trees we had to navigate around at the start of the trail, but I’d be surprised if someone hadn’t cleaned them up since our visit. There was no one else at the lookout when we arrived and we didn’t run into anyone along the road either. We speculated that maybe the vehicle was abandoned or they were wondering somewhere off trail. We eventually got our answer as we saw two guys rock climbing up the other side of the ridge. One of them came over to check out the lookout while we were having lunch and gave himself a scare when he didn’t hear us. We spent a good chunk of time hanging out at this lookout since the only thing left to do for the day was find a place to camp.
The Strava app calculated this hike at 3.08 miles RT with 1,025′ of elevation gain. You can assume the road is around 1-1/2 miles from the gate to the summit. We ended up camping off the side of a road in a grassy pull out for the night. We passed up a couple different official dispersed spots given their location or otherwise. Not all dispersed camp spots end up being what we want and are more about convenience for the night. There were a couple of campgrounds in the area, but we had passed on those as well.
History.
Acker Rock was first established as a fire lookout site in 1932-1934 when a 14×14 L-4 gable roofed ground cabin was built on the summit. At the time the lookout was accessible by driving 21 miles outside of Tiller and then hiking an additional 3 miles. It was noted as possibly being used as a lookout point prior to this but no structure was utilized. It was replaced in 1963-1964 by the current R-6 flat cab structure and was staffed until at least the late 1980’s. Given the precarious location of the lookout, replacing the structure was no easy task and required helicopter assistance. A news article from 1963 stated “the lookout house appeared to be supported on one side by rock and on the other by little more than imagination”. In 2006, the roof was replaced and needed repairs were completed before it was added to the current rental program.
After heading back down from Bland Mountain (post), we continued our route along county HWY-1 to reach the community of Tiller. The ranger station is easily located after crossing the South Umpqua River on the left hand side. The office building was already closed for the evening but you are still welcome to explore the grounds. The access to the re-located fire lookout is found to the right of the main parking lot via a short trail. You can see the fire lookout from the lot and it is well signed for access. The lookout was closed up for our visit, but I believe they open it up to visitors during working hours upon request. Despite being well cared for throughout the years, it is definitely starting to show its age. I’m curious to see if access and maintenance on the lookout will change once the rangers are relocated to Canyonville. I would guess that it would make it and the other historic buildings onsite an easier target for vandals. Strava tracked the walk as only 0.24 miles RT with not enough elevation change to register. There wasn’t much to note about out visit except there is a spigot in the parking lot that provides water to the public. After taking a refreshing rinse, we continued on into the forest for the weekend.
History.
The original site of Red Mountain was developed in 1921 by adding a 25′ platform crows nest with tent camp. A D-6 style 12’x12′ cupola cabin was added to the site in 1928. The fire lookout was actively staffed into the 1960s. It sat unused on the site until it was relocated to the Tiller Ranger Station in the fall of 1985. There is a dedication plaque on the lookout crediting Roy O. Brogden, District Ranger 1984-1998, with heading the relocation and restoration efforts in this area. Restoration work was completed in June 1986 by a combined effort of the Forest Service, State Historic Preservation Office, and the National Advisory Council on Historic Preservation. Additional restoration work was completed in 2000 by community volunteers in celebration of National Public Lands day. The site is open to self guided tours at anytime, but the lookout itself is locked. You can inquire about gaining access between Monday through Friday from 8am to 3:30pm. I’m unsure if access to the interior will be available after they move the Rangers stationed here to Canyonville.
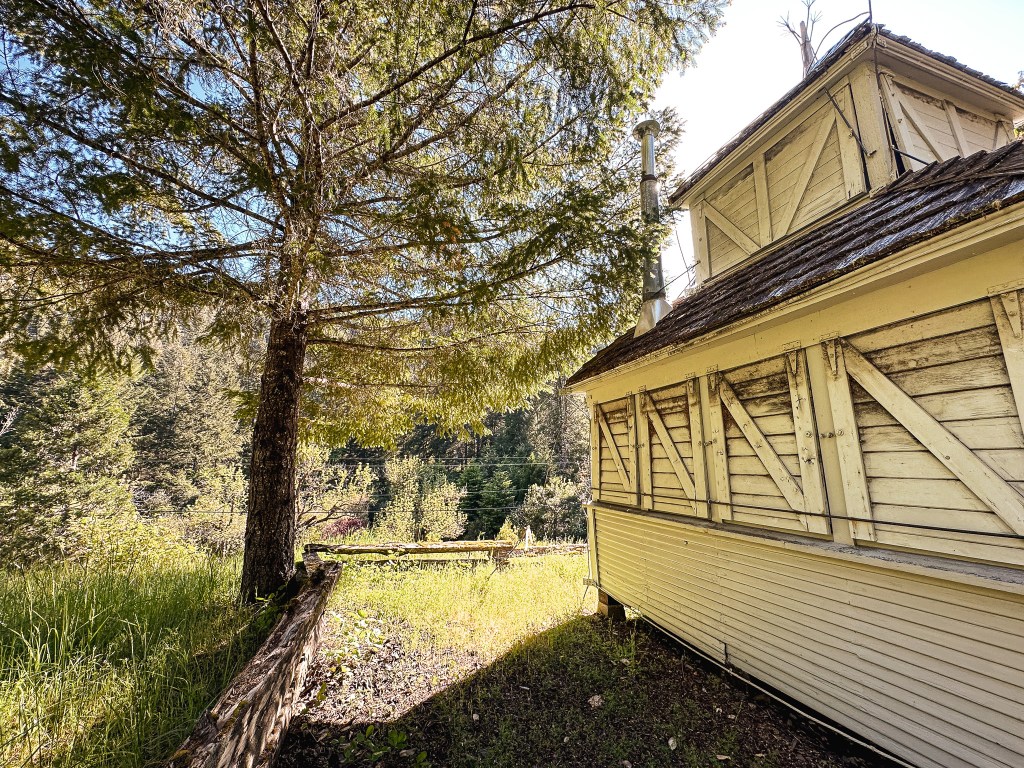
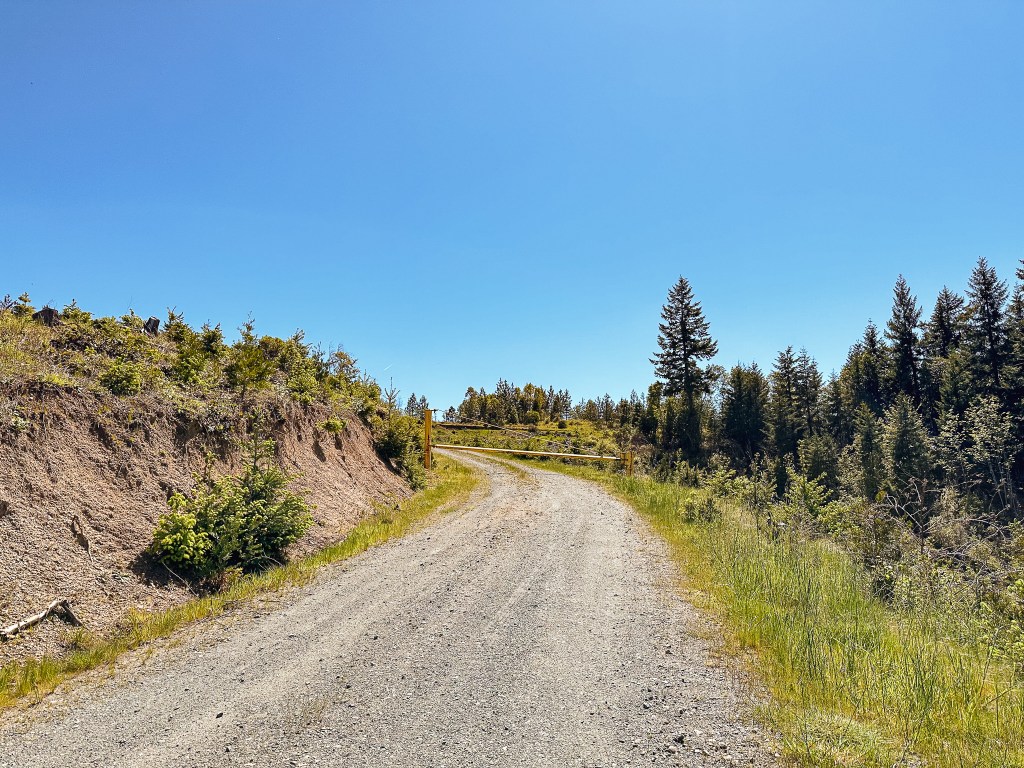
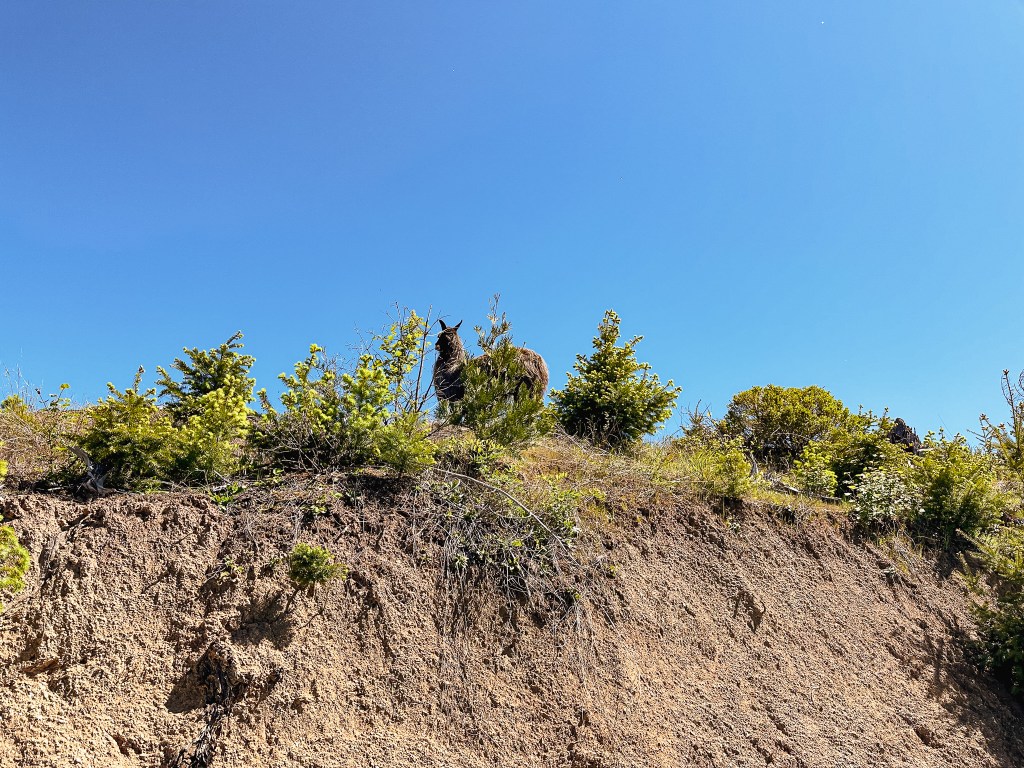
We were headed out on a four day trip to explore the South Umpqua drainage in celebration of Garnet’s 30th birthday. I had booked Pickett Butte for two nights and we planned to disperse camp for the third night. Bland Mountain was planned as our first stop before heading into the forest for the weekend. It is located just outside of the community of Days Creek on BLM land. From Portland, we shot down I-5 all the way to Canyonville and turned onto county HWY-1 to head towards Tiller. We followed this to Days Creek where we hung a left onto Days Creek Road. The road is located right off the bend entering the community. We were following the directions off a Peakbagger report from Dennis Poulin. He seems to have a lot of helpful reports on Peakbagger in relation to accessing fire lookouts. I always click on his reports first when I see his name listed. Unfortunately, we saw somewhere that he had passed away (may he rest in peace). His directions indicated that the BLM road 30-4-10 was only 2 miles down Days Creek Road. This was helpful since most of the roads off of Days Creek are private drives. There was a sign for the BLM road, but it would have been impossible to spot from the main road due to it being turned around and slightly leaning in the brush. It’s easy enough to locate if you keep an eye out for a main gravel road off to the right around the two mile marker. Once on the BLM road 30-4-10 its a little under 2-1/2 miles to the gate for Bland Mountain. There was one junction that wasn’t mentioned on the directions after we entered a clear cut and had a view of the fire lookout ahead. The road we were on looked to continue straight but there was another road veering right that looked like it could have headed toward the summit as well. We stayed left (straight) since it wasn’t mentioned. The next junction we met off to the right was on a bend in the road and was the one we took to reach the gate. The gate is shortly after you start up this road and doesn’t offer much room to turn around. I’d recommend parking below and hiking up from there if you’re not comfortable making a tight turn around or backing down the road. We parked at the gate and prepared to walk the remaining distance. As I was turning around the car I noticed an animal off to the left. This might be one of the strangest things I’ve seen in a while, but it was a llama free range grazing near the gate. I can only assume it was owned by someone in the area, but there was no one else around that we could see.
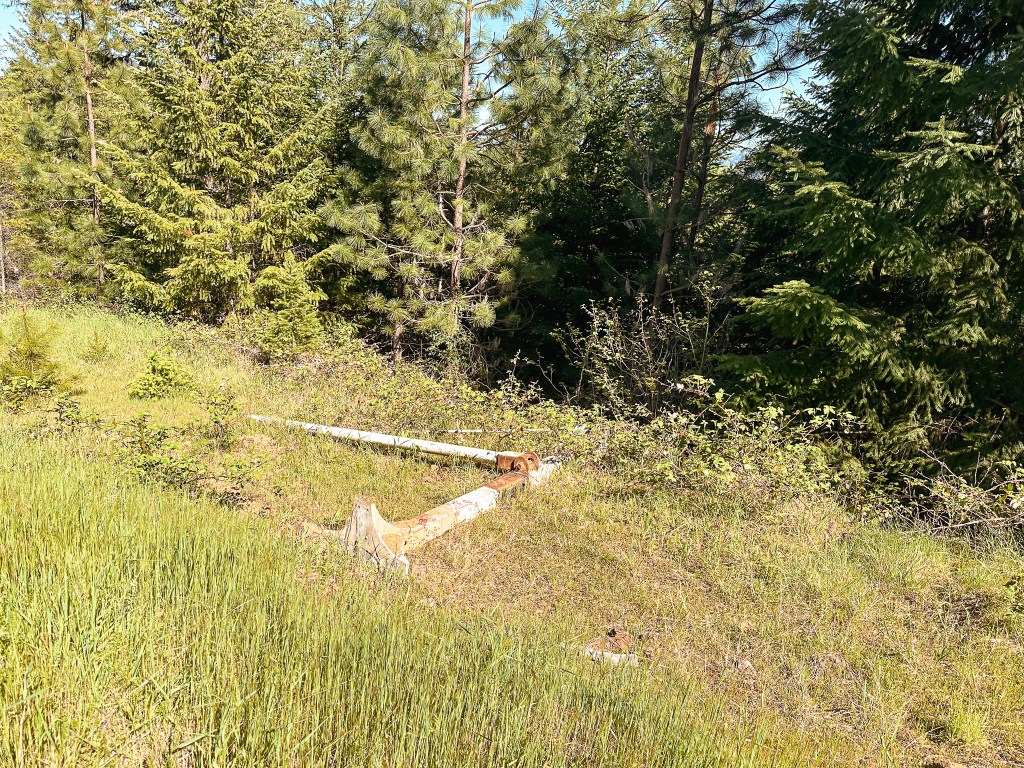
There wasn’t much to note about the road walk to the summit except that it was too hot and dry for early May. I feel like we’re gearing up for a terrible fire season this year *narrator: a terrible fire season indeed*. This entire spring has been lacking what Oregon is best known for, rain. There was a pretty display of California Poppies lining the road. I even found signs of an old gate that was probably used back when the fire lookout was staffed. The final spur to the fire lookout was off to the right while the main road continued straight. Despite being a short hike, I was struggling in the heat by the time I reached the base of the tower. I waved to the fairly new looking camera and headed for a spot in the shade of the tower. A new lock had been added to the trap door to keep visitors from accessing the catwalk and, more importantly, to keep them away from the fancy equipment. The view was pretty much the same from the base of the tower anyway. I found this lookout and summit to be accurately named. It does have a uniquely repurposed base to add interest though. We didn’t linger for too long since we still wanted to visit the lookout at the Tiller Ranger station and get settled at Pickett Butte for the night. All the roads getting here were good pavement or decent gravel and we had no issues in our Civic. The hike along the road came in at 1.75 miles RT with 472′ of elevation gain on the Strava App.
History.
Bland Mountain was established as a fire detection site in 1942 with a tent camp. The first tower was built in 1947 as a 20′ treated timber tower with 14’x14′ cab. The NHLR notes it as being a 25′ tower. The base was replaced in 1996 by a 20′ tapered metal tower that was formerly used to support a water tank. It was actively staffed up until the late 2000s, but has since been abandoned. It’s most likely still listed for emergency status. A camera has been added to the cab for surveillance of the area.
It seems that stumbling upon available fire lookout reservations has been our luck. We have yet to actively seek out renting a fire lookout, but have simply been looking at the recreation.gov page at the right time. This was how we acquired our Steliko Point (post) reservation and that is essentially how we acquired this one. I feel fortunate in this aspect since some people attempt for years to get certain reservations with no luck. We were searching for potential places to travel during my birthday trip in April and stumbled upon Pickett Butte availability. At first glance we thought the dates were for April, but quickly realized it was available during Garnet’s birthday weekend in May instead. We decided to roll the dice and book it with hopes of it being snow free with decent weather. It is a fairly low elevation fire lookout, so the main concern was how the weather would pan out. I did end up fudging our reservation a bit because I thought I needed to wait to book the third night, only to realize I should have booked it at the same time (a little too late). This was not a big deal to us, it just meant we needed to bring more gear to accommodate dispersed camping for one of the nights we’d be gone. Somehow our gamble paid off and the weather was forecasting in the mid 80s with sunny clear skies for the whole weekend.
Friday.
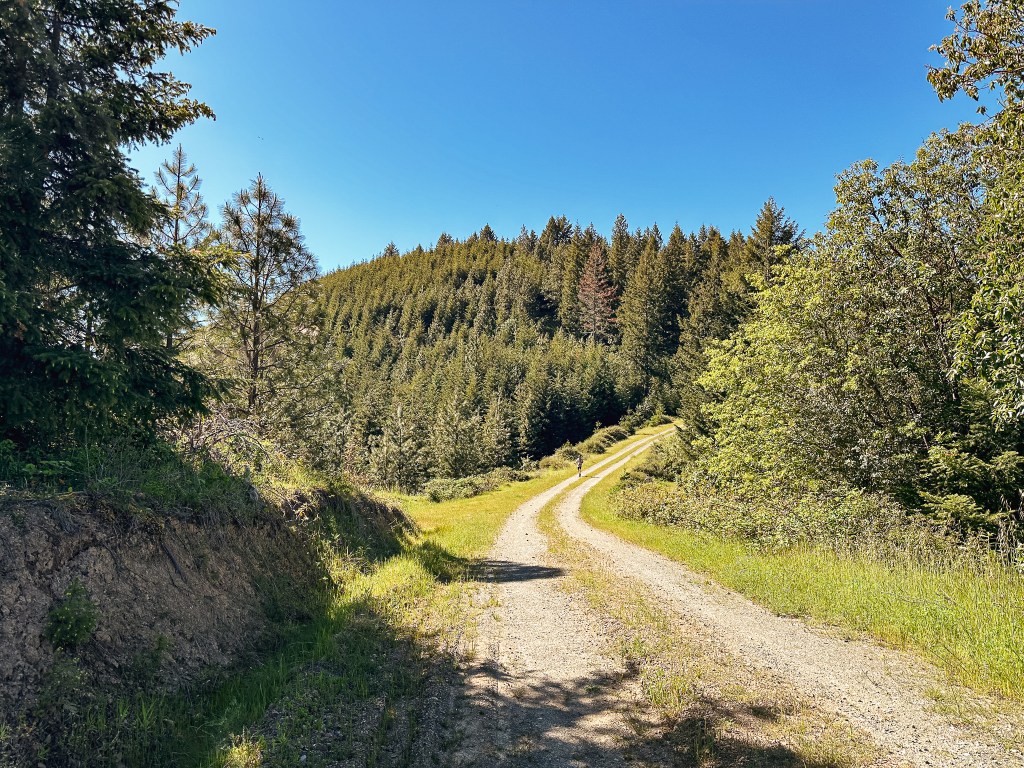
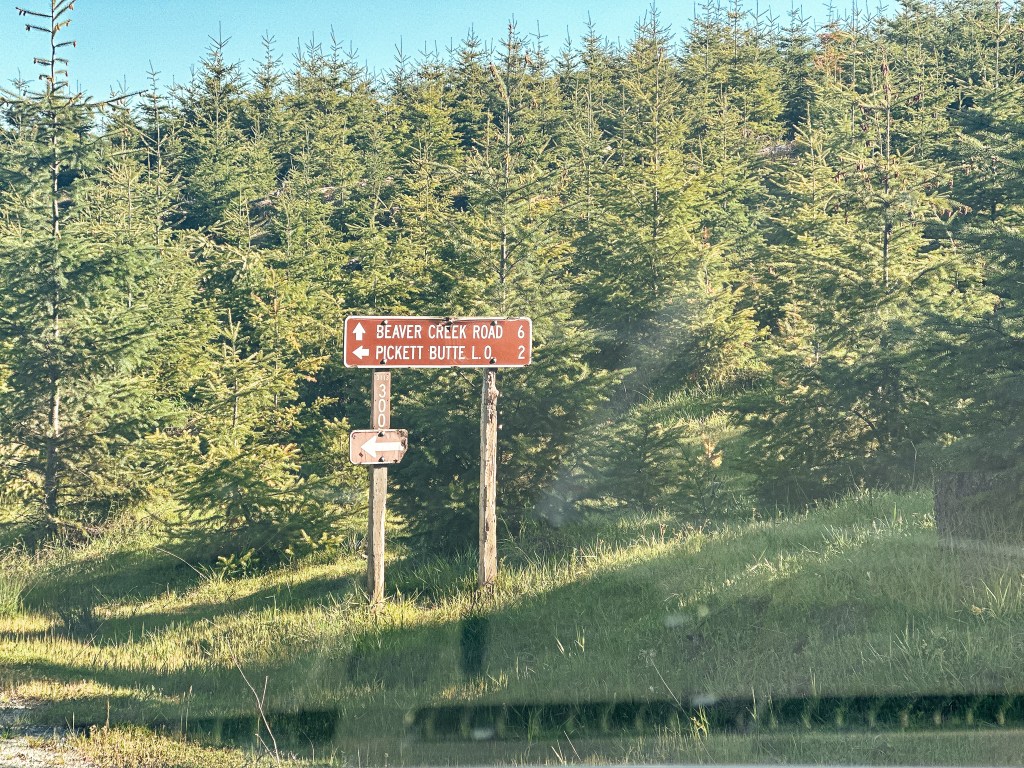
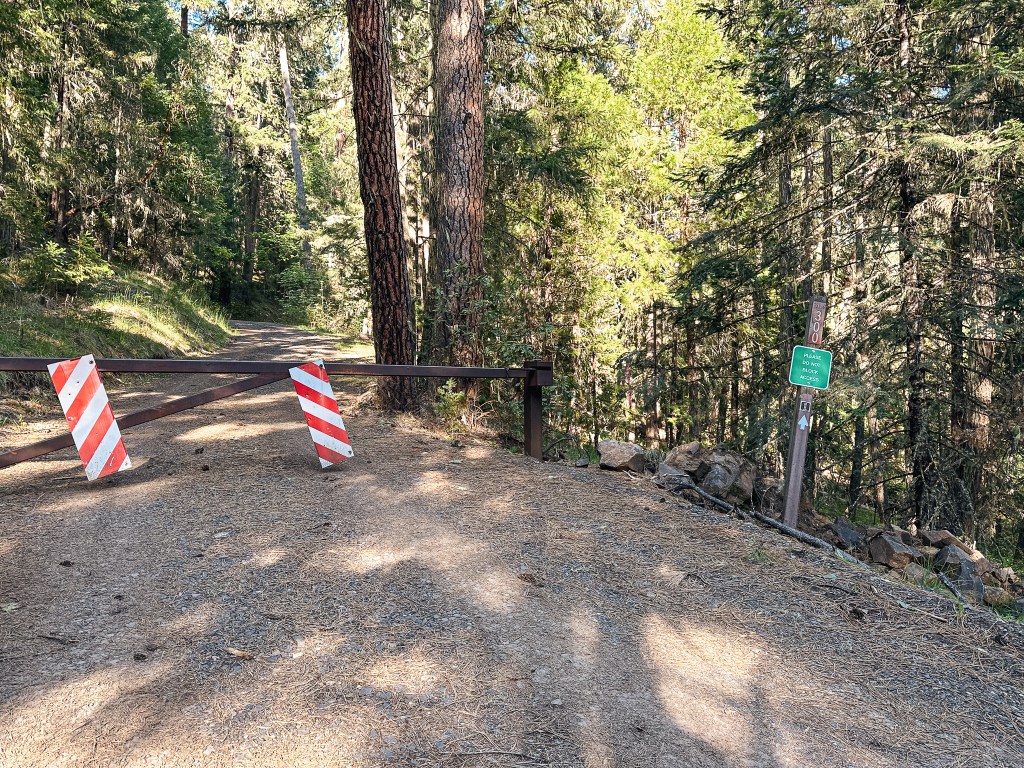
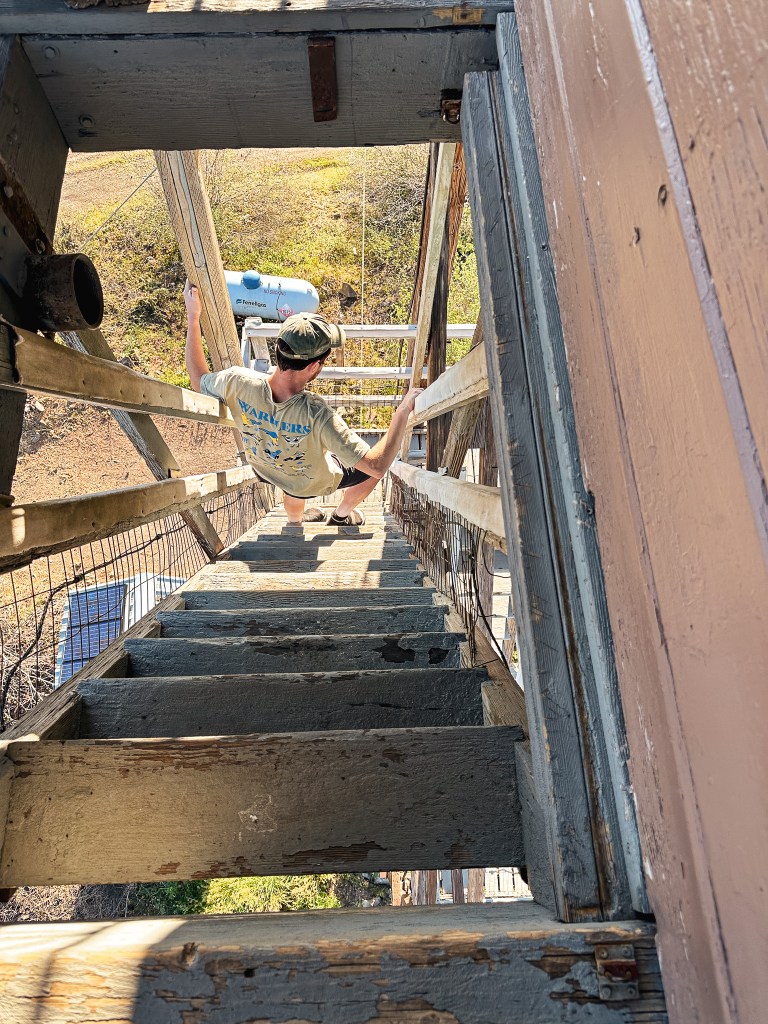
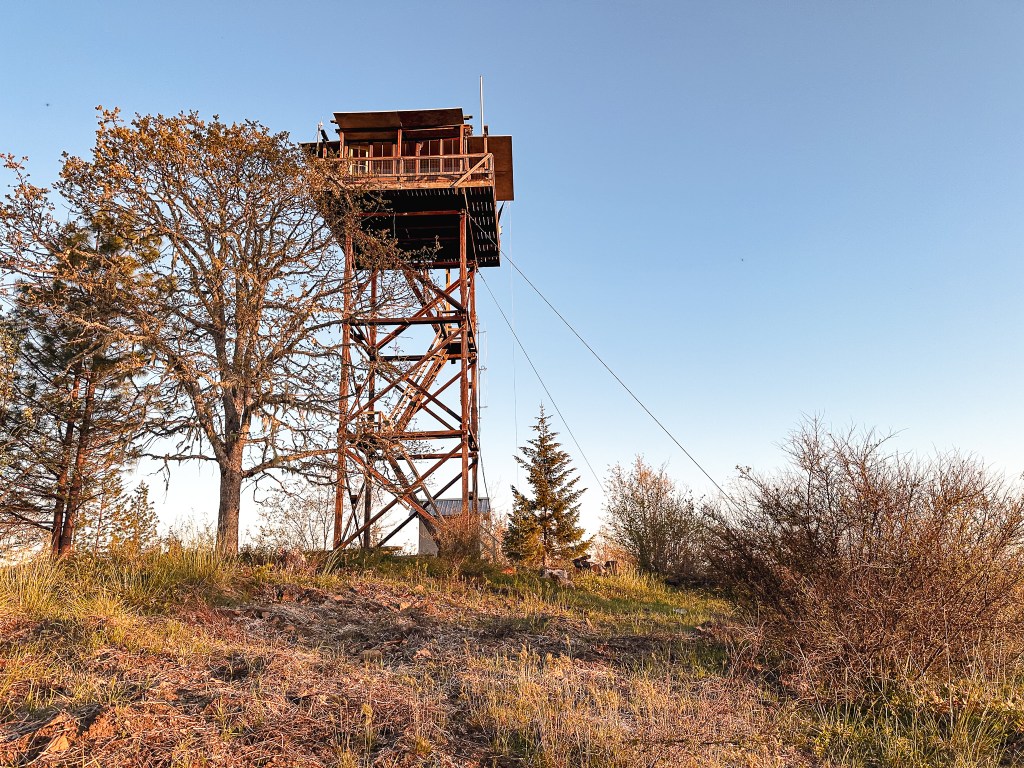
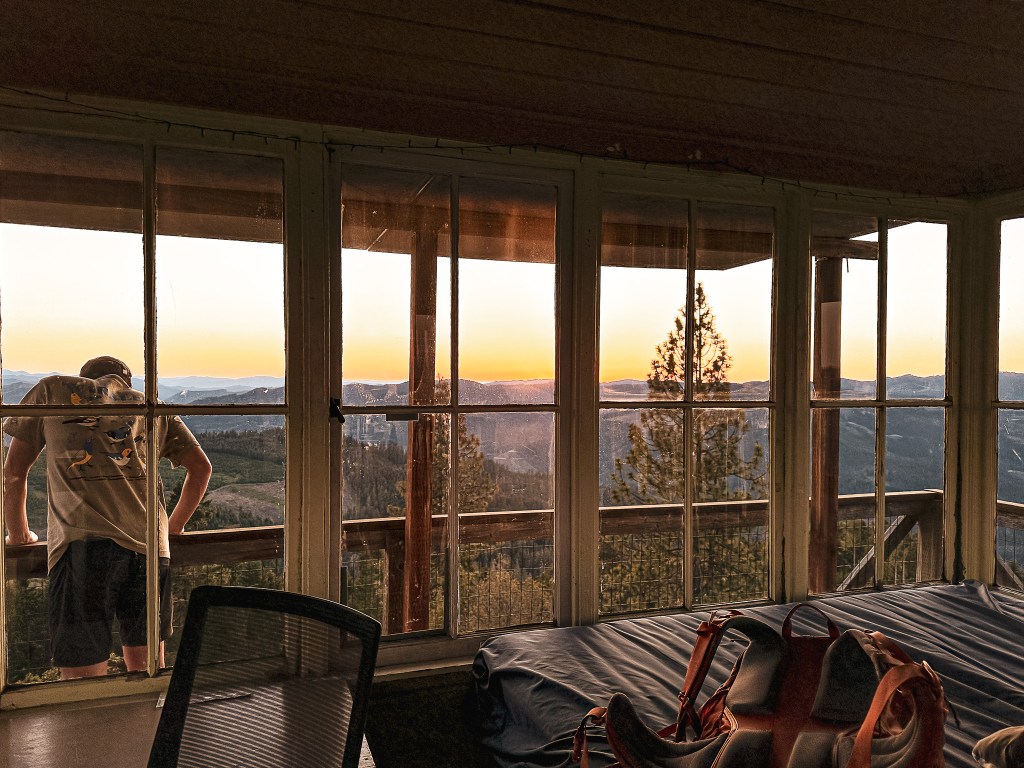
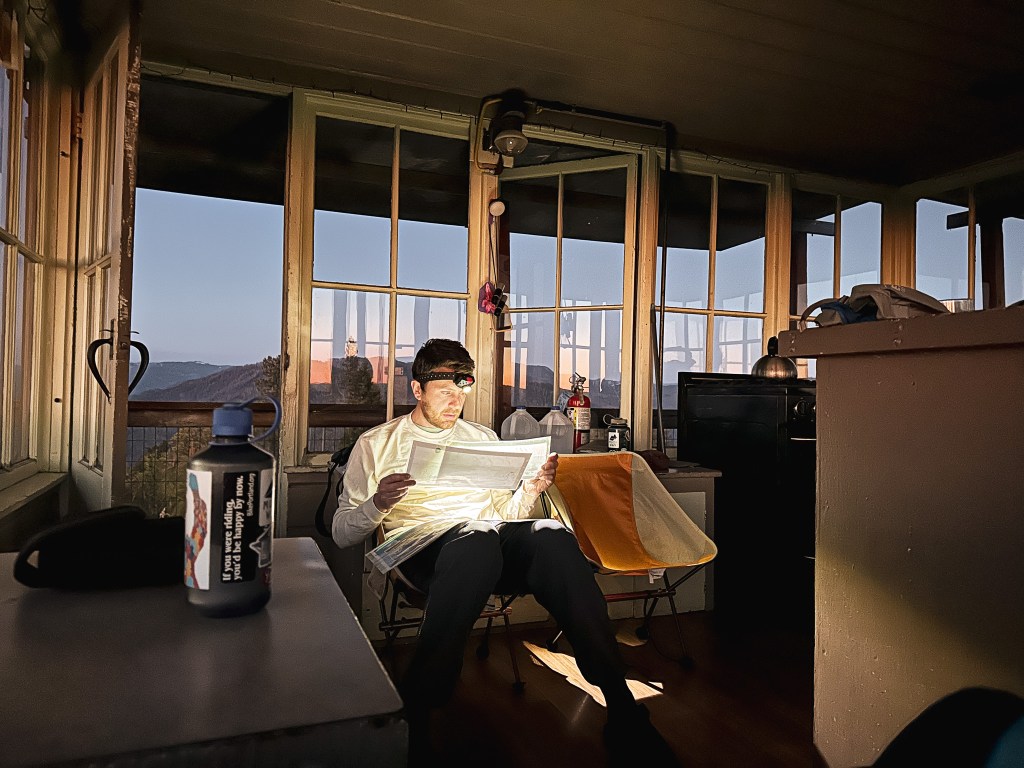
We headed out via I-5 and exited in Canyonville to turn towards Tiller on the county HWY-1 making brief stops at Bland Mountain (post) and the Tiller Ranger station (post). We turned onto CR-46 that is situated right before the ranger station. We stayed on this for 3 miles until it reached a signed junction with NF-3113 off to right. The route is well signed and seemed to be well maintained. We stayed on NF-3113 for 5 miles until we reached another signed junction with NF-300. It is an additional 2 miles to the fire lookout from this junction. There is a gate below the lookout that you will need the code for if you have a reservation for the night. Otherwise, this is where you would park to walk the remaining 0.6 miles along the road. Though the best time to visit if you’re not planning to make a reservation would be from mid-June to mid-October when it is staffed for the season. Keep in mind whether you visit during the active fire season or the renter season, it is their space and inviting you up to enjoy the view is at the discretion of those onsite. The road beyond the gate had the most signs of wear with a few water runoffs starting to form across it. There were a handful of potholes along the entire route, but they were minimal and easily avoided. This is probably one of the easier rentable fire lookouts to access in Oregon. Once parked we debated what we wanted to haul up or not. We thought it would be novel to cook something in the fire lookout, but ultimately opted to leave our food/cooking at ground level. There is a crate on a hand wench system to help bring your gear up, but it’s small and would require many loads. The stairs are also narrow and steeply pitched, more so than other fire lookouts we have visited. I could see making this effort if we had planned to hang around the fire lookout all weekend. But per usual, we had our days fully packed and only hauled the essentials to the top.
Saturday.
Our plan for the day was to back track out the way we came and continue further on county HWY-1 in search of the crows nest on Callahan Mountain. All the sources we found online claimed it was still standing and should be there. There are no trails or roads that lead directly to the summit, but we were able to get close enough to hike cross country the remaining distance. After a bit of wandering around the summit Garnet was able to identify the tree by a remaining grounding wire hanging from the branch. We are happy to confirm the tree is still very much alive and well with minimal evidence that it was ever used for fire detection. After a successful find, we headed back up CR-46 passing our turn off for Pickett Butte and continuing on to Cathedral Falls and the (former) World’s Tallest Sugarpine. There was some debate prior to our trip about adding in a former fire lookout site, but we were already feeling the fatigue from the heat and decided to enjoy a more leisurely afternoon instead. We stopped at a nice spot with access to Jackson Creek along NF-29 to cool off before heading back to the lookout for the evening.
Sunday.
We spent our morning packing up our gear since we wouldn’t be coming back to Pickett Butte for the night. Our agenda for the day included a stop at South Umpqua Falls and a hike to Acker Rock. That gave us the rest of the evening to locate a dispersed camp spot in the area. We had already spotted a few around, so we knew they existed. Our day eventually ended in a grassy pull out after passing up and vetoing a couple of our more official dispersed options. Nothing felt quit right to either of us. It wasn’t our best camp spot but it wasn’t our worst either. Thankfully the temperatures were much cooler that evening which was a nice change after feeling over heated the entire trip. We both agreed this area was pretty, but we much preferred the vibe of the North Umpqua area. Monday was spent driving home and finding out we missed a spectacular show of Northern Lights after coming back into service. It was unfortunate since where we were would have been a great spot to see them if we hadn’t been asleep. We didn’t even stay up for our regular star gazing and Milky Way.
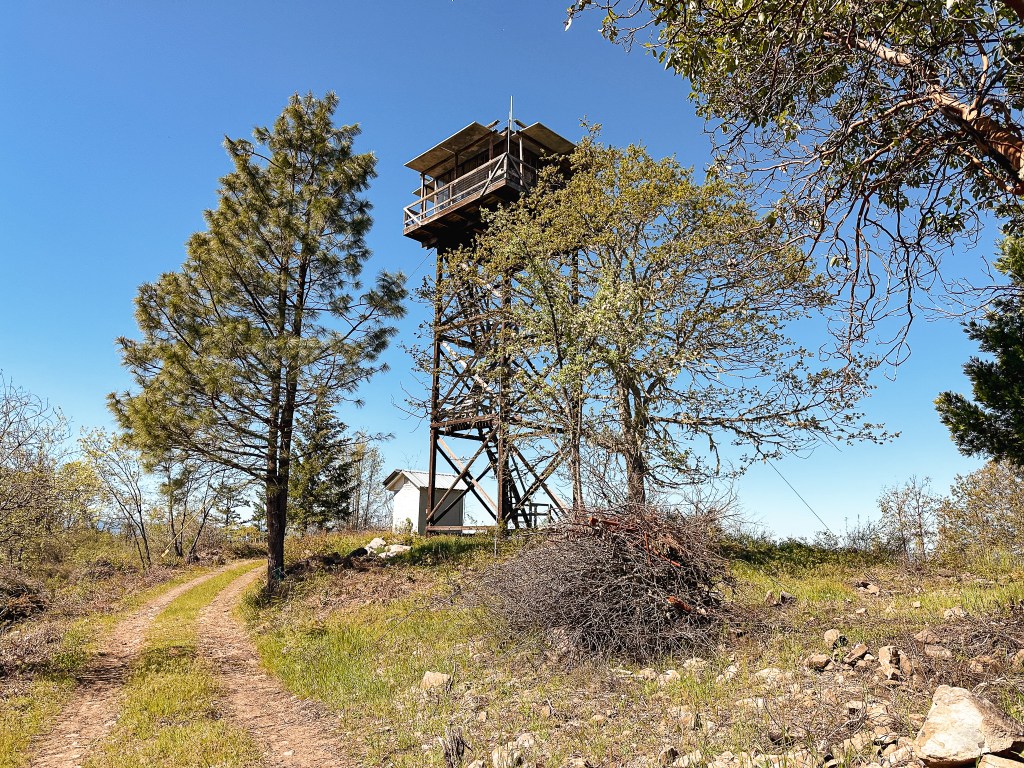
History.
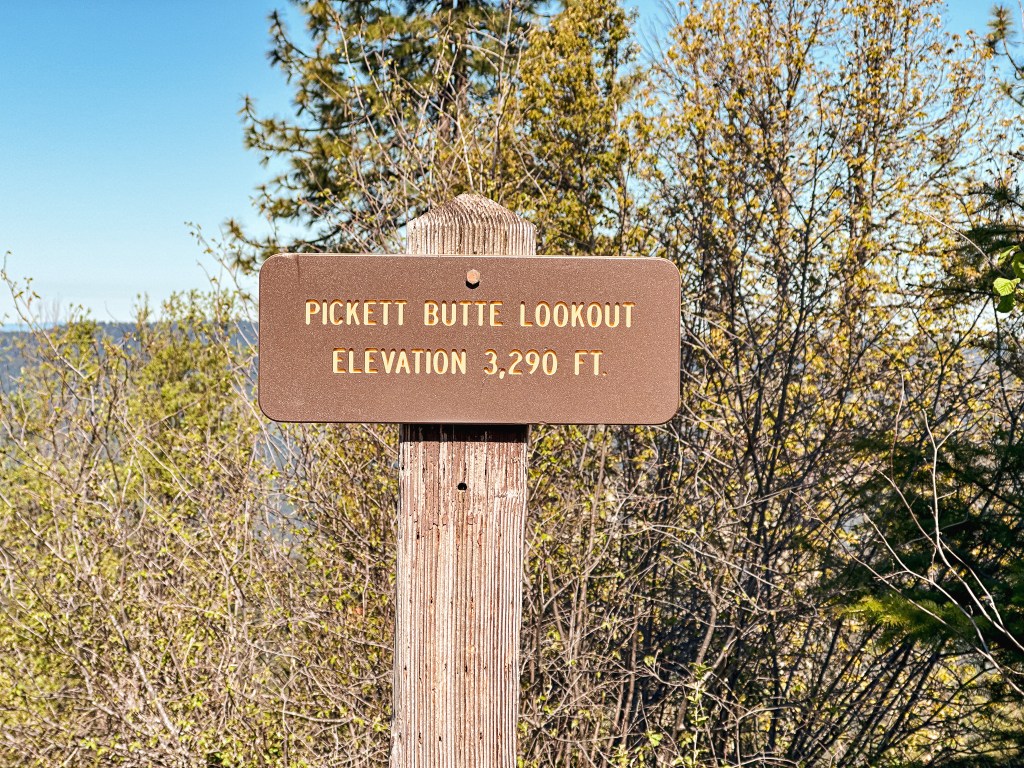
Pickett Butte gets its name from the homesteader, William T. Pickett. He traveled to the area via horseback in 1898 and decided to stay. The first lookout structure was built on the butte by the CCC in 1934 as a 25′ round timber tower with L-5 cab. It was replaced in 1941 by the current 41′ treated timber tower with L-4 cab. It was actively staffed up until the late 1990s. Eventually it was moved to the rental program for recreational use. In 2001, it was moved back into active duty to be staffed during the fire season while only offering this as a rental during the off season. As far as I can tell, this still remains to be true.