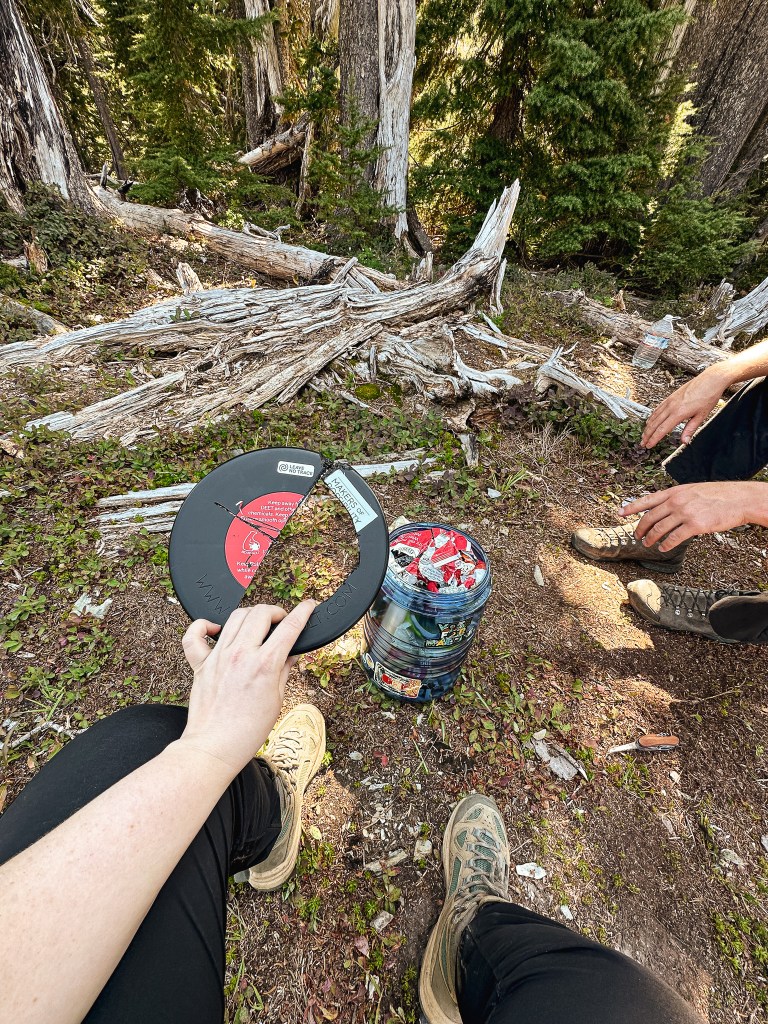
Hello fellow lookout enthusiasts, staffers, or readers alike;
It is nearing the end of 2025 and has been a while since I have posted on here. For lack of better words I have simply fallen behind. The reality is, despite being busy in many different ways, I have lacked motivation to write. I do plan on completing my backlog and I know there are no expectations for my own blog, but the longer I sit on it the less useful the information becomes. Anyway this is all just a quick post to say – hi, hello – I am still here and see that there is still traffic on this page.
A small update on this last season. We didn’t visit as many fire lookouts within our own state, but have found ourselves at more former sites than previous years. They can be just as interesting to us and tend to still have a decent view. One of our longer trips was a 10-day 1,768 mile road trip around Minnesota which consisted of visiting 23 fire lookouts within the state. That trip made up the bulk of the fire lookouts we have visited this year. Our second longer trip was an 8-day 50 mile backpacking loop through the Eagle Cap Wilderness. We did manage to check off some harder to reach lookouts in Oregon via backpacking trips, specifically Pearsoll and Mule Peak.
What’s to come in 2026? Only the forest service roads can tell us for sure. We are planning on a 2-week road trip but haven’t settled on which states or parks that will include yet. We are still in the speculative stage of planning beyond the dates. More than likely it will expand our fire lookout scope to another state but that is not the sole purpose of the trip. we will still continue to chip away at fire lookouts here locally but there are less and less every year.
I am most active on Instagram for now under the handle @takeahikedani if you want more day to day updates on where we have been recently.
I am also happy to stay connected via e-mail – especially if you notice any discrepancies of information, have condition updates, recommendations, or have questions on fire lookouts we have visited (e-mail: sullivan.danielle@yahoo.com).
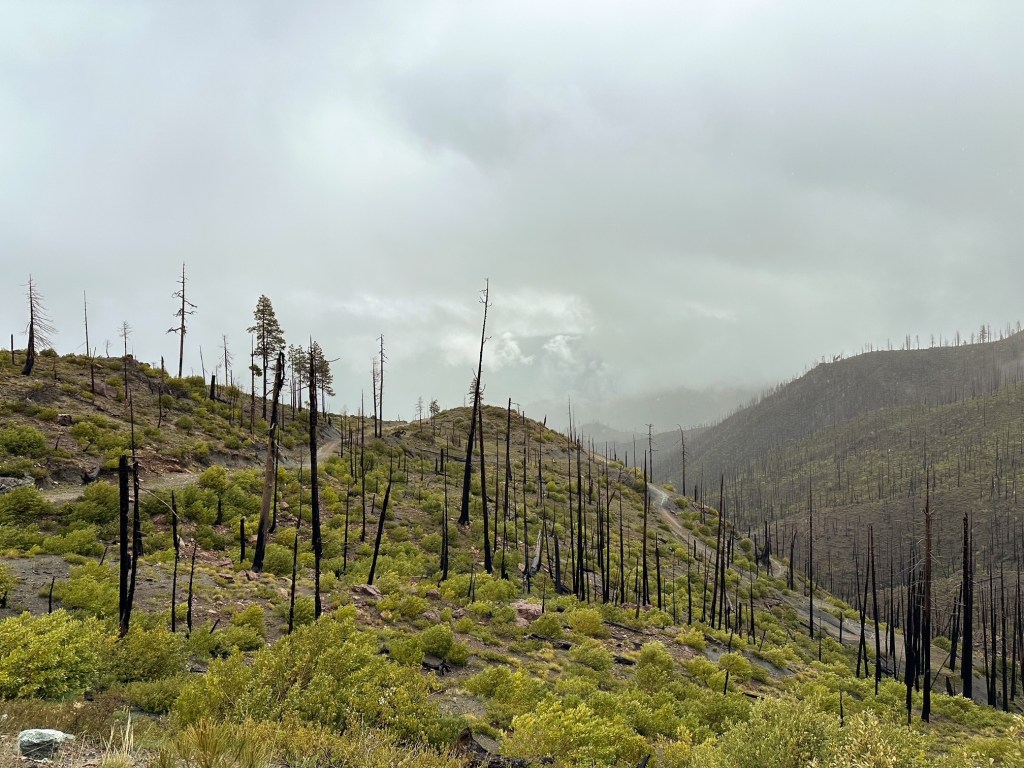
I learned a new term on the way back from our most recent trip to the Kalmiopsis wilderness. Kalmiopsised. As far as I can tell this was a term coined by the Northwest Rafting Co that does commercial rafting trips to this area. It is the best description I have found to explain the appeal and hardships that come from visiting the Kalmiopsis wilderness.
Kalmiopsised [Cal-mee-opp-sis-ed] – adj. 1. being cold, wet, exhausted, and happy in Oregon’s Kalmiopsis Wilderness. 2. in pain and despair in a rugged, harsh place with a big smile your brain is trying to relay to your face muscles.
We have been to the Kalmiopsis wilderness a handful of times now. Our first trip was just last year during the 2024 Memorial Weekend, where we planned a 5-day backpacking loop through the eastern side of the wilderness. The second trip was for Garnet’s birthday and focused solely on reaching the fire lookout on Pearsoll Peak. Our most recent trip(s) were for Garnet to complete the 50-mile Leech Loop through the wilderness. I had backpacked into Babyfoot lake both times to send him off and pick him up. Each trip has offered memorable challenges and left us wanting to return for more. The below report will detail the relevant sections of trail from these trips that you can take to reach Pearsoll Peak.
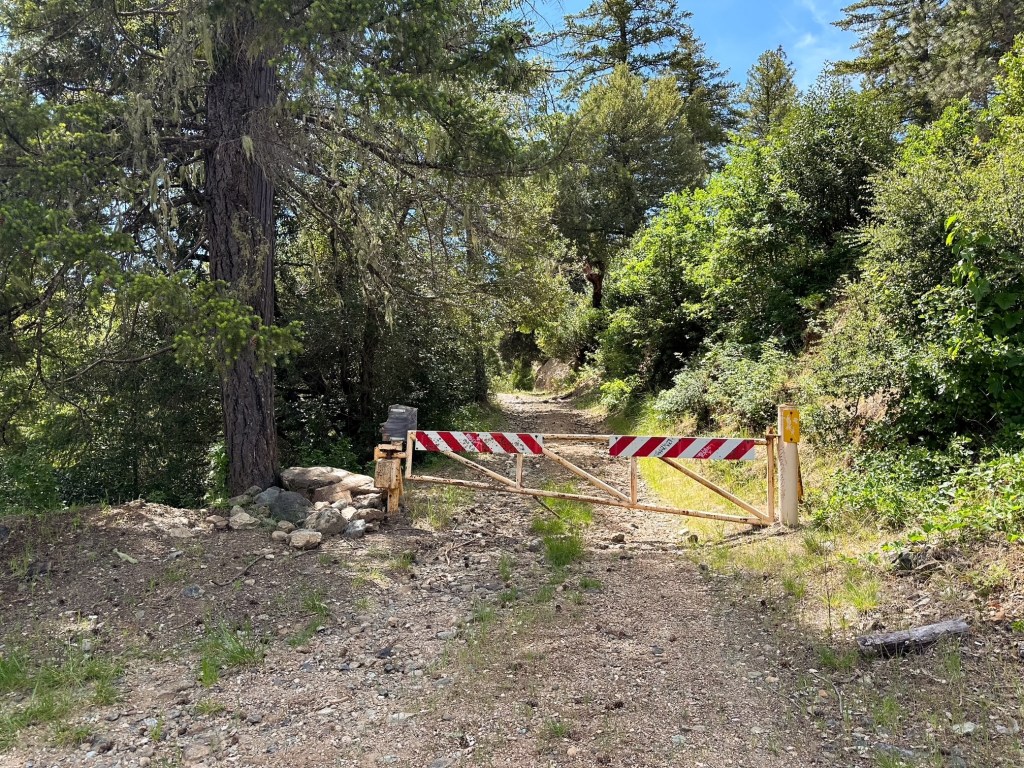
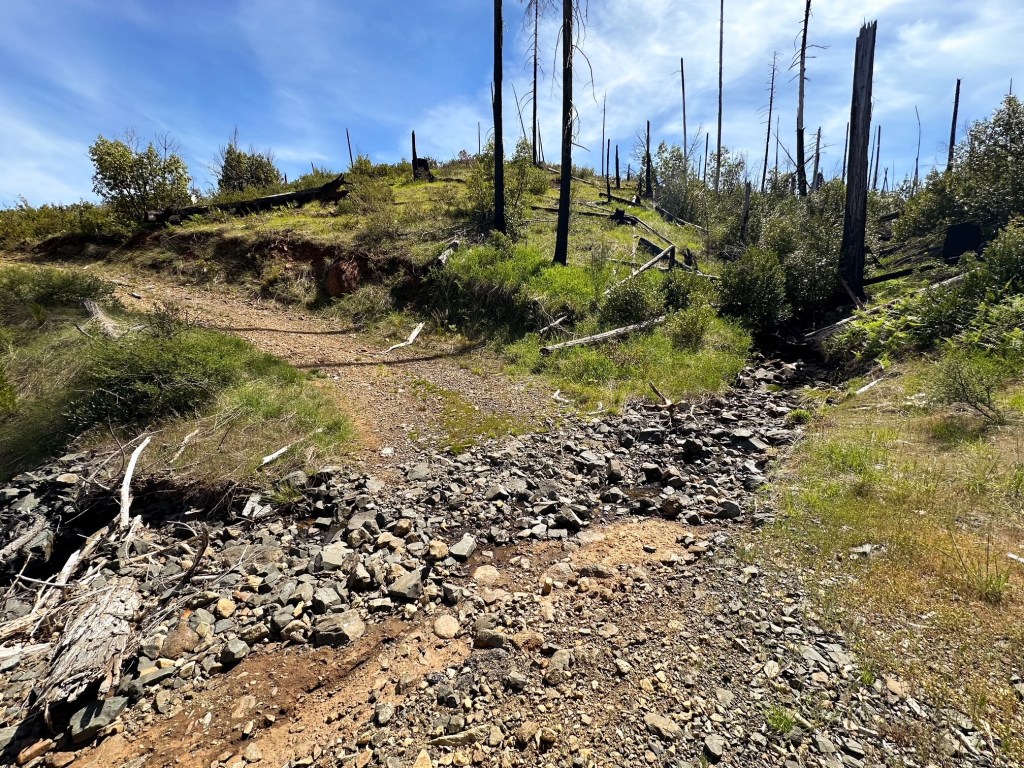
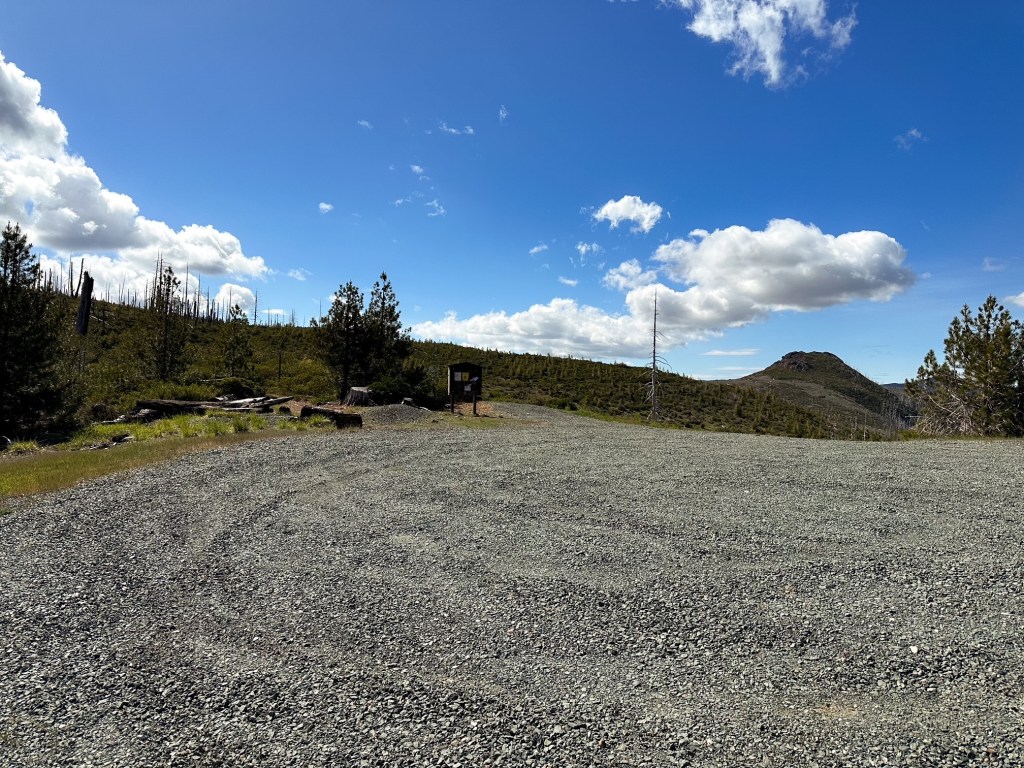
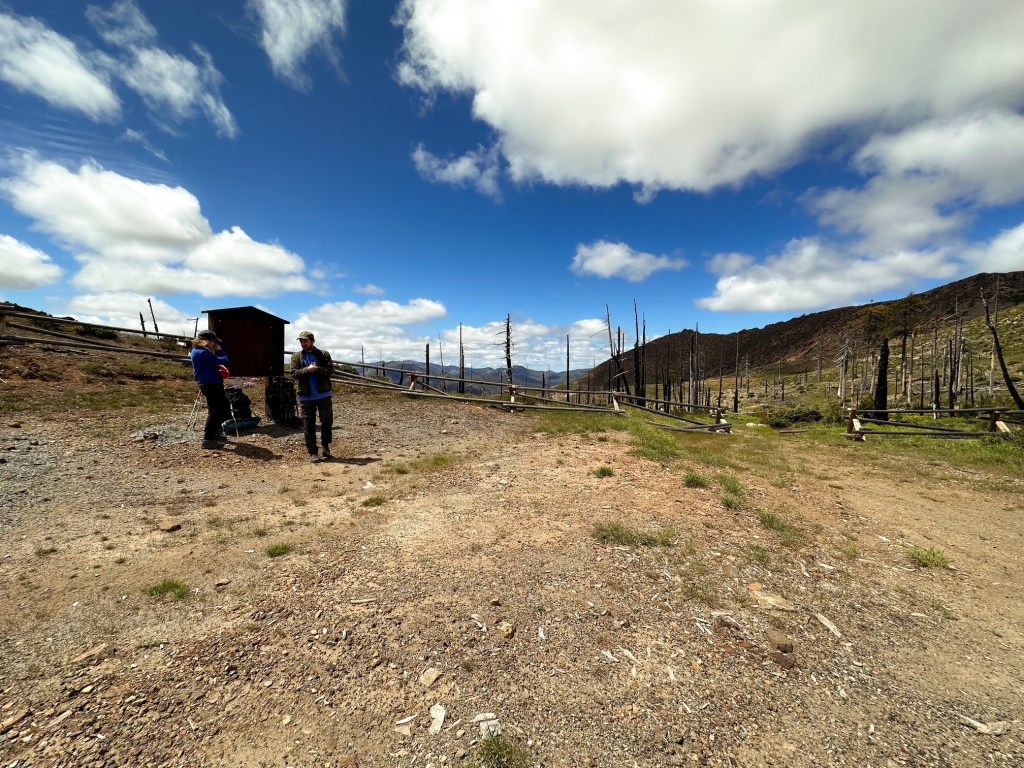
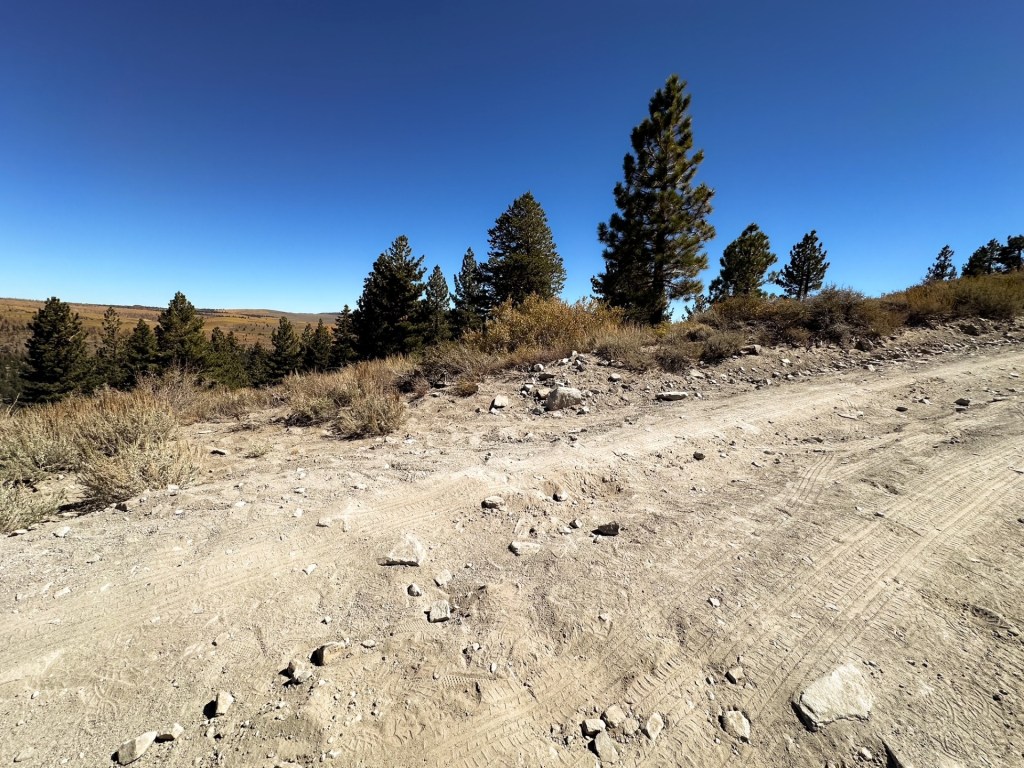
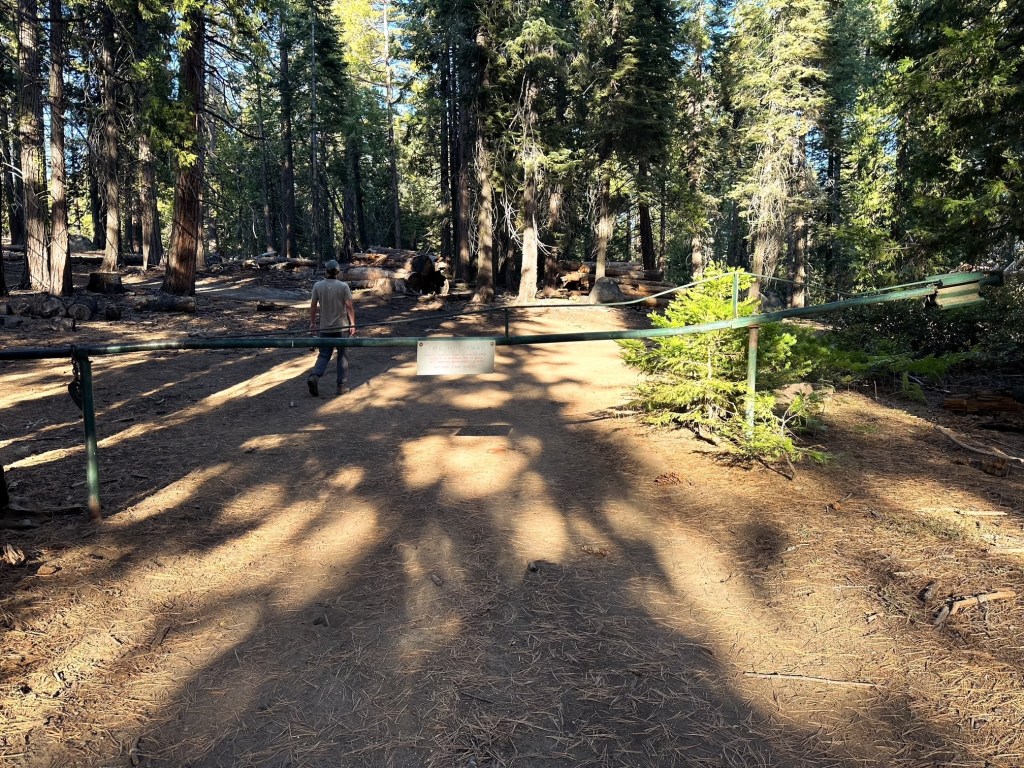
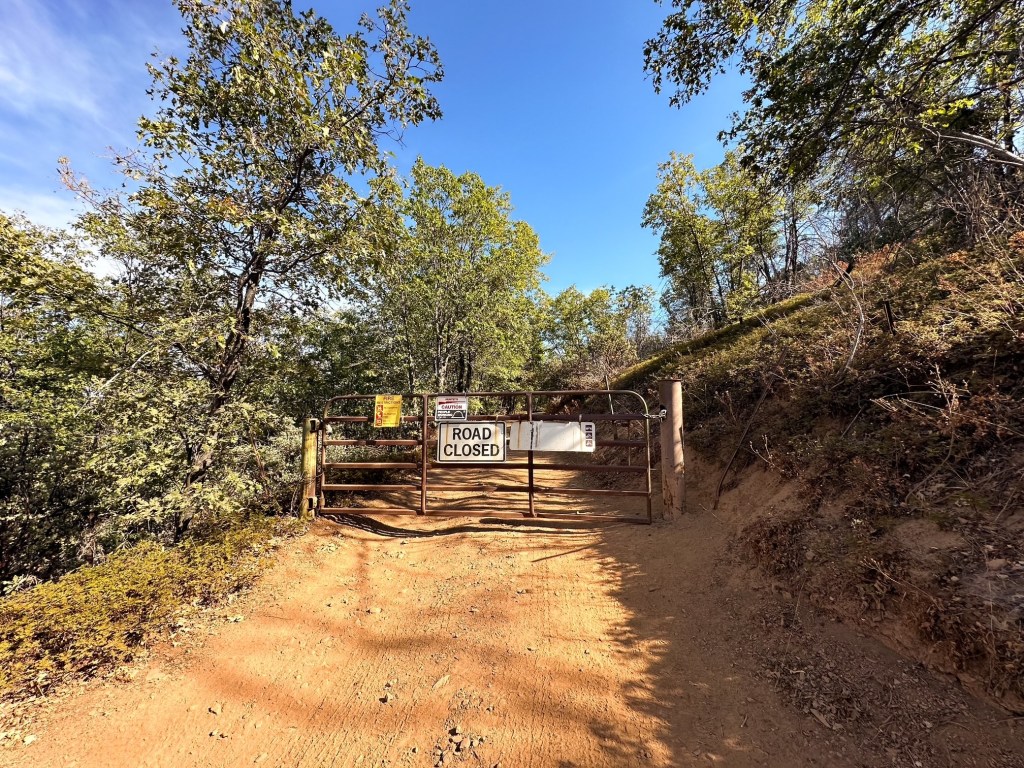
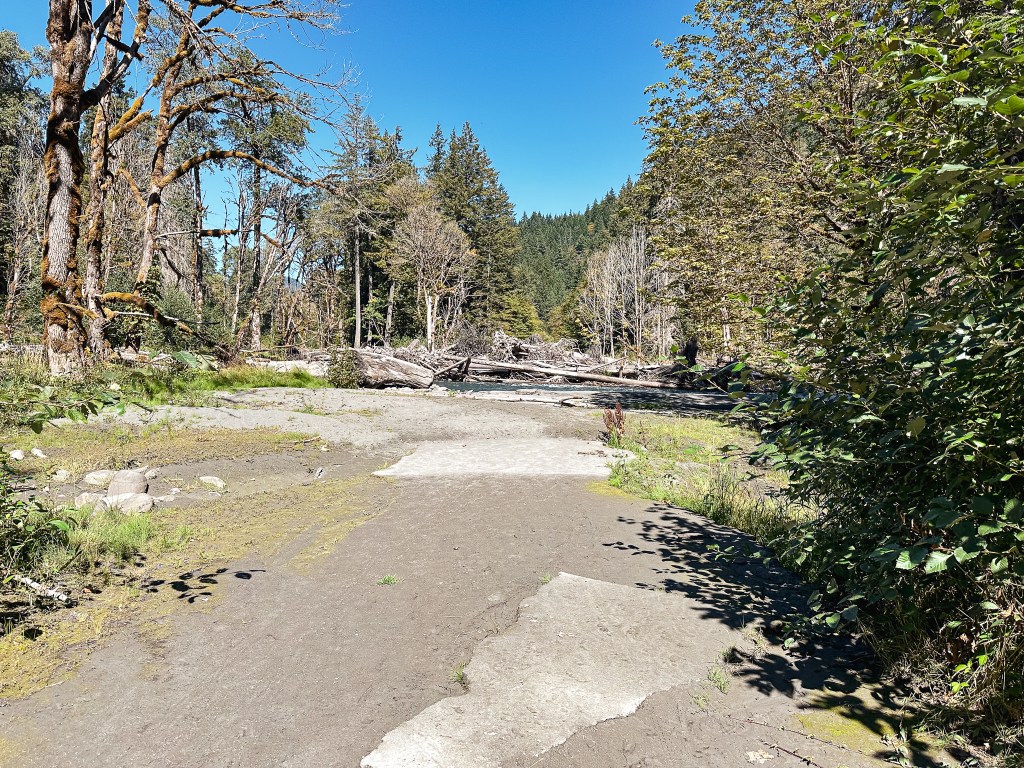
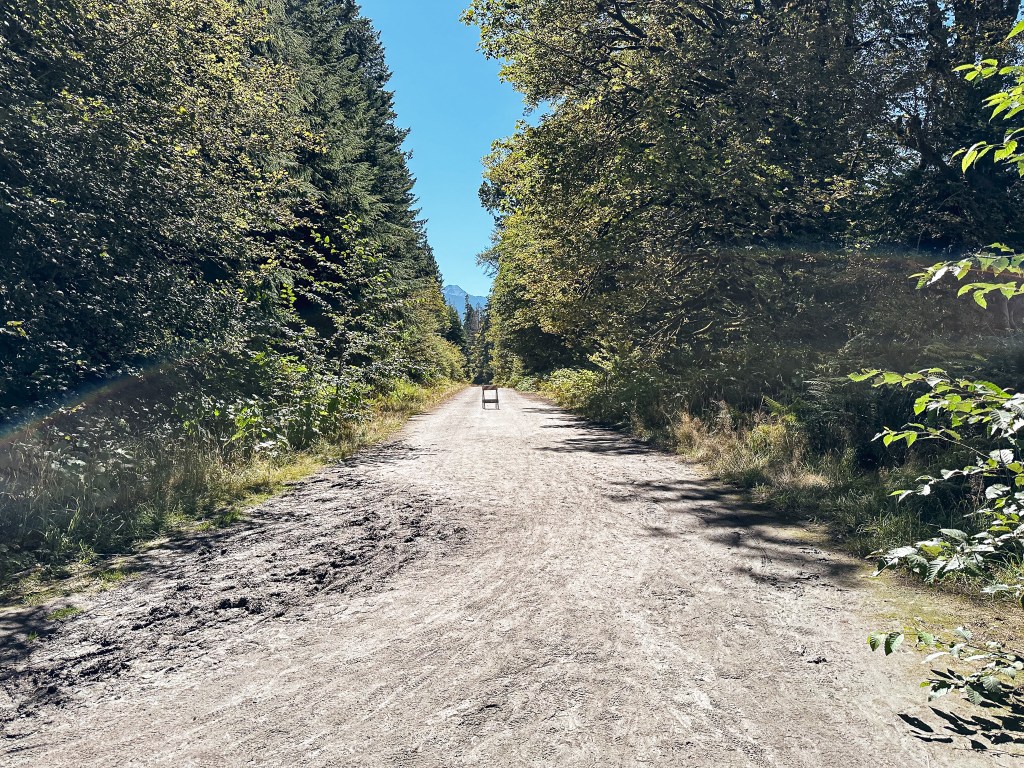
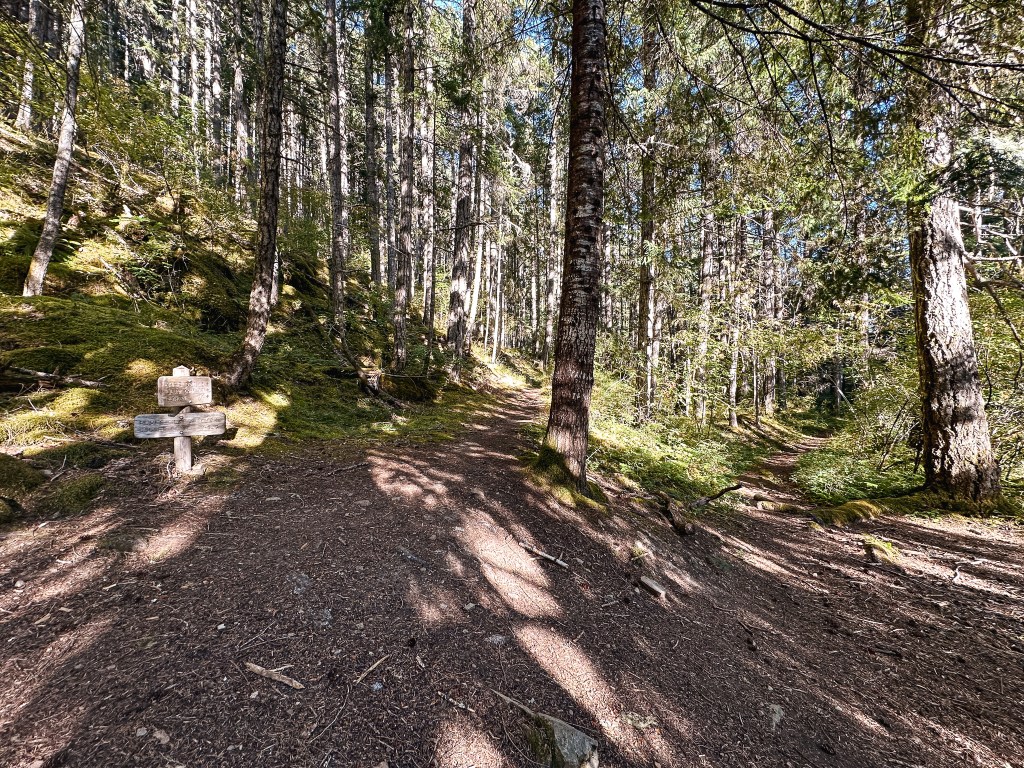
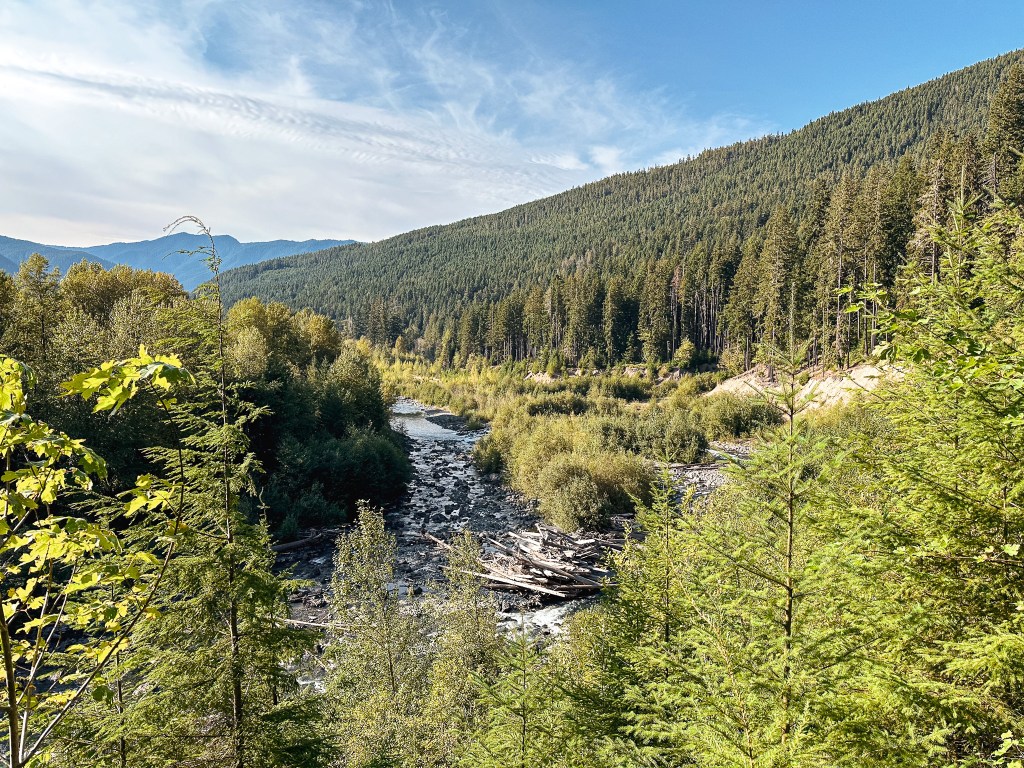
The Chetco Pass trailhead is the main access point to reach Pearsoll Peak. From there, the hike is moderate in length and elevation along the old roads that now make up the “trail”. The variance in routes comes from how you decide to get to Chetco Pass. The access road is gated in the rainy season from end of September to beginning of June. It is narrow, rocky, and full of erosion issues not suitable for most vehicles. If you drive a low clearance vehicle, like us, the only way to reach Chetco Pass is via hiking. Unfortunately, this turns a relatively moderate day hike into a strenuously long one. We opted to break up the distance and spend more time in the area by turning this into a backpacking trip. Please note the fire lookout is not open for overnight stays at this time and is currently secured with a lock bar – do not plan on camping in the lookout. If you are hiking your way to Chetco Pass, the closest starting points are going to be from the McCaleb Ranch area or the Kalmiopsis Rim trailhead.
McCaleb Ranch Access to Chetco Pass
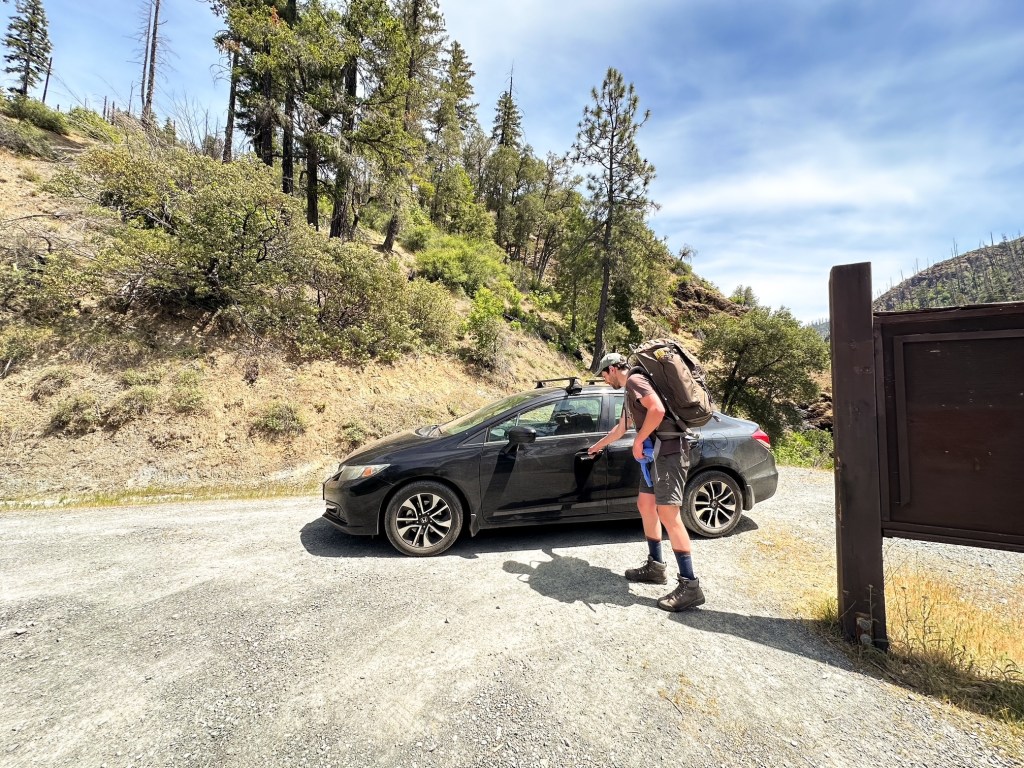
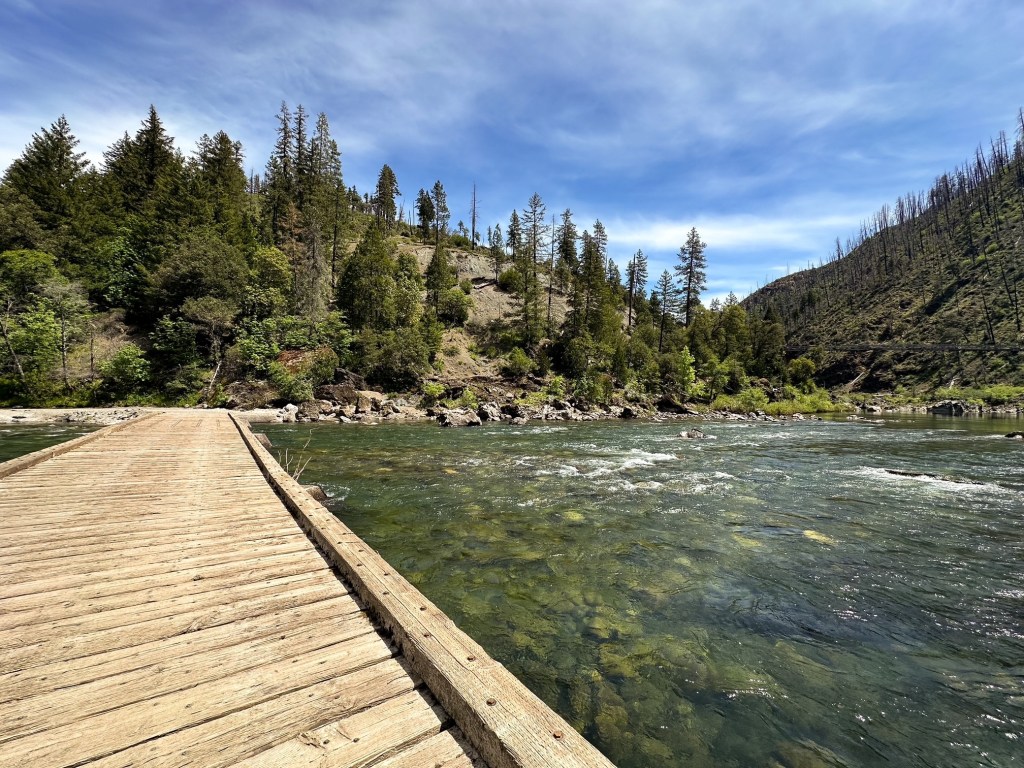
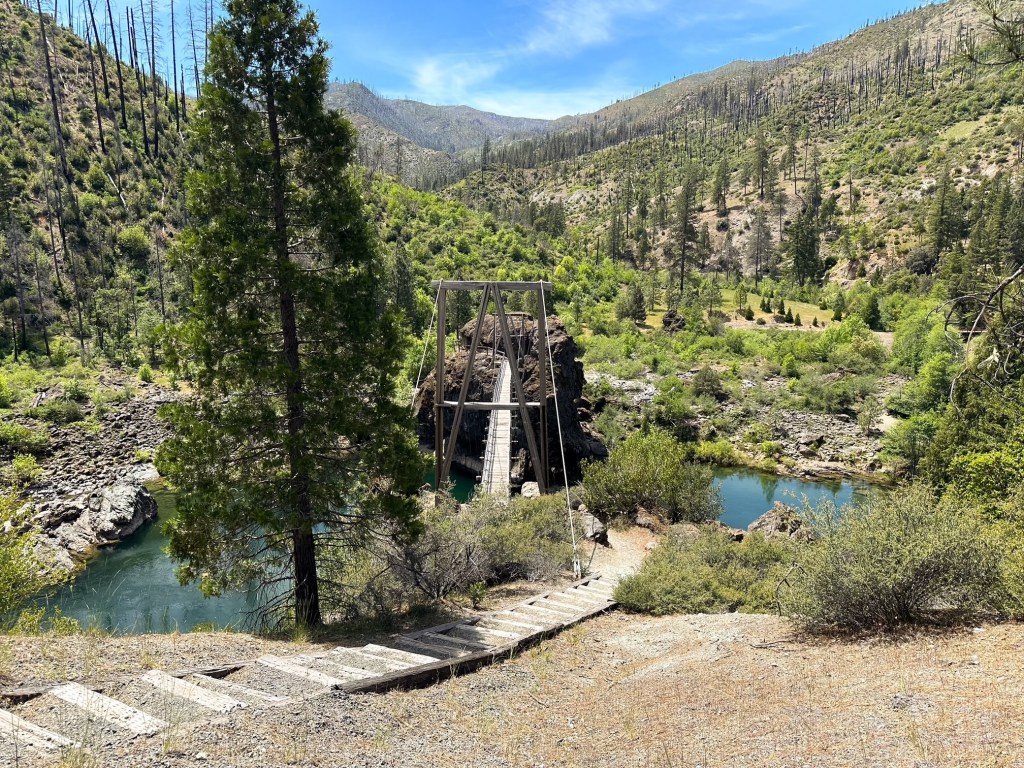
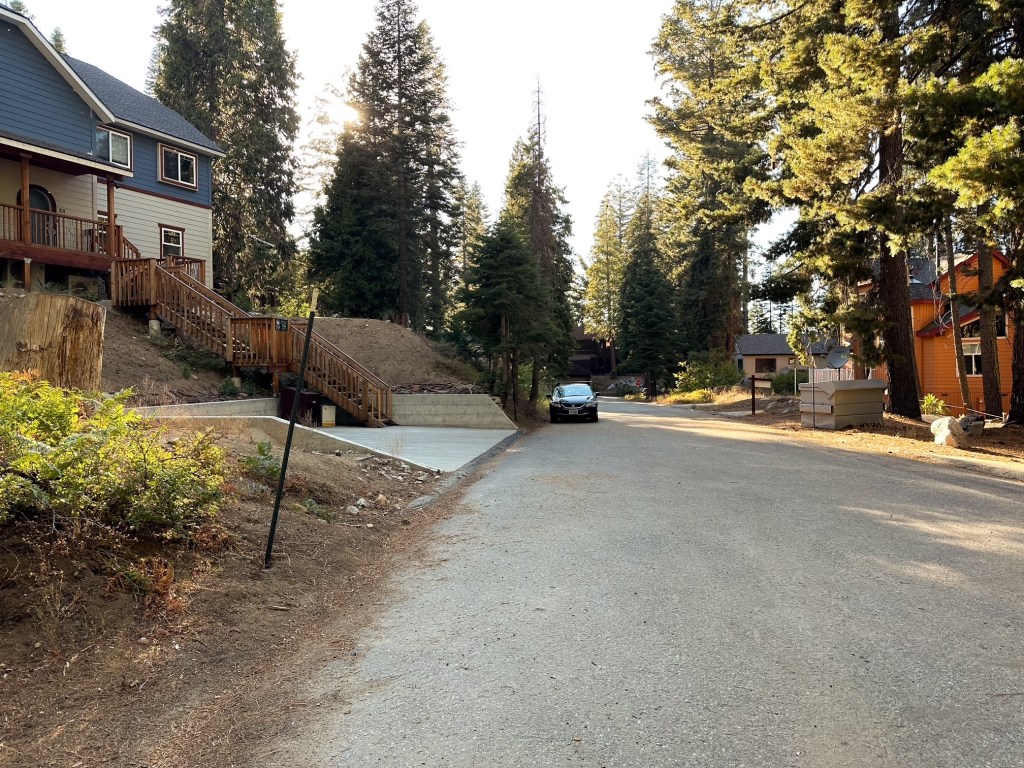
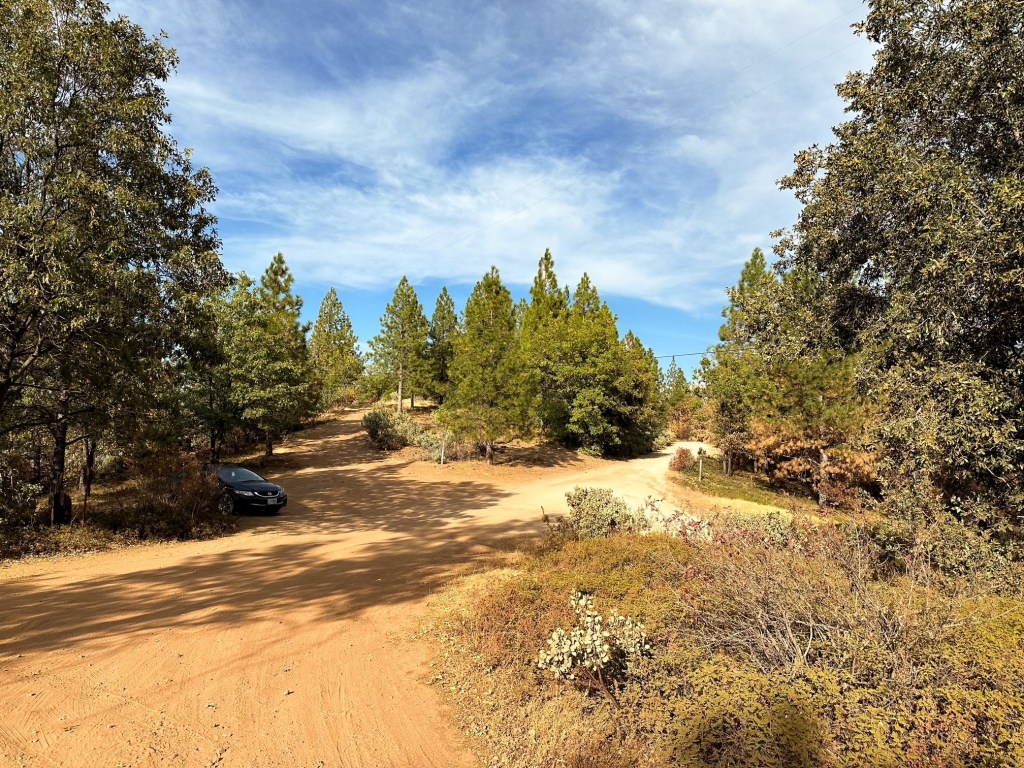
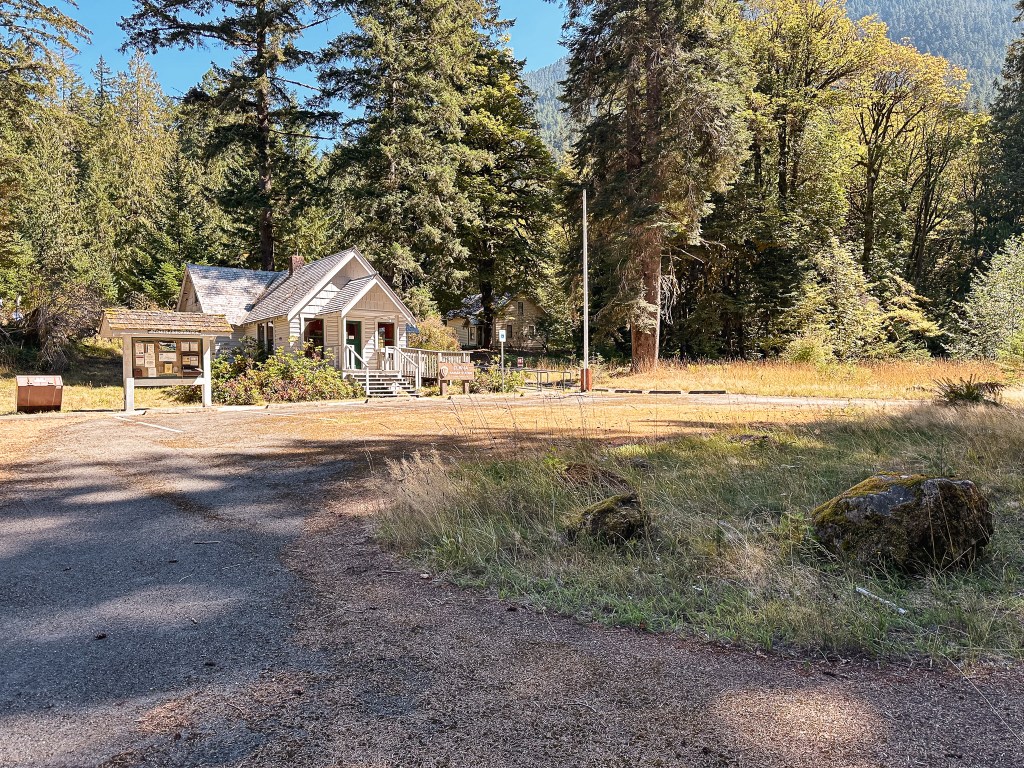
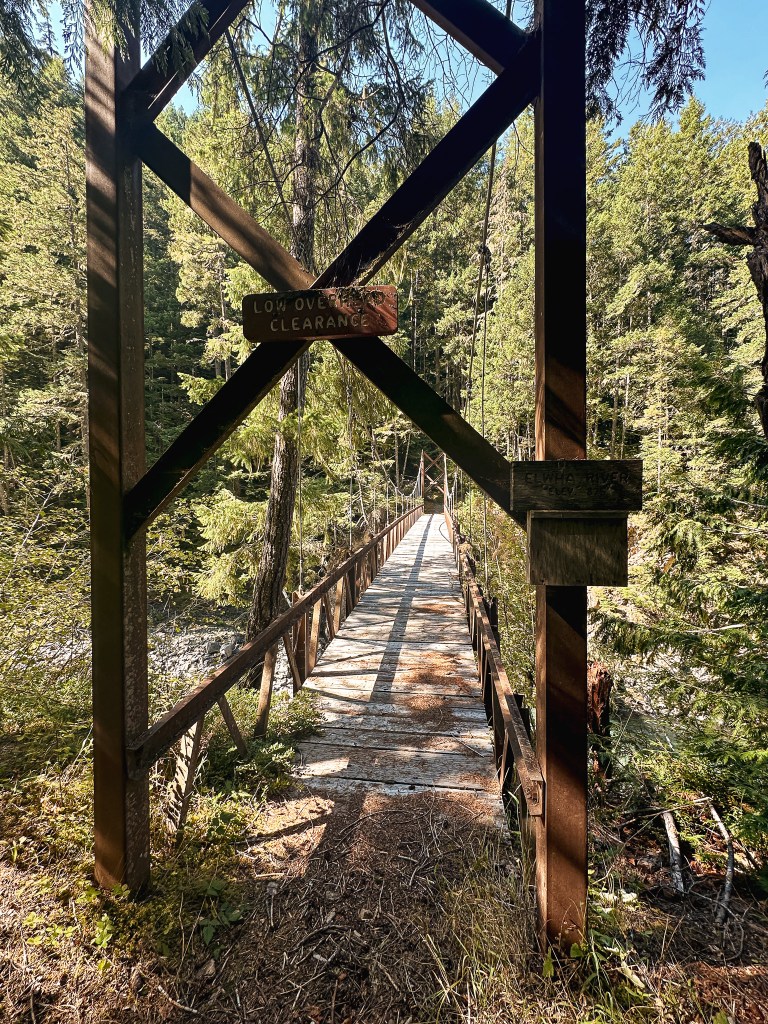
From Grants Pass, we followed HWY-199 until we reached Selma. We turned right onto the paved Illinois River Road that leaves directly from the community. We stayed on this road until we reached the unsigned junction with NF-087 off to the left that heads steeply down to the McCaleb Ranch. The junction is located where the pavement ends and the road splits off from a wide turn around area. The Illinois River Road is paved most of the way to this junction minus one short section of gravel in the middle. There are some potholes to avoid along the route, but we were able to maneuver around them. You will also pass a major junction with NF-4105, stay left to continue on the Illinois River Road. It should be obvious since NF-4105 is not paved. The biggest hazard along this route is meeting oncoming traffic. The road narrows the farther you drive and it is not wide enough for two passing cars except for when there is a pull out to utilize. You will know you are close when you pass the Store Gulch Campground. Once at the NF-087 road you have three options for parking. The first option is located at the bottom of the road just below the McCaleb Ranch after you cross the river. This is only suitable for high-clearance vehicles and day hikers. The parking area is large and offers a bathroom, but has signs posted for no overnight parking or camping. There is also a small section just beyond the bridge before you reach the trailhead that is not passable to low clearance vehicles. If you are attempting to drive all the way to Chetco Pass you would follow the directions to this trailhead and continue beyond the yellow gate from there. The second option is to park at the trailhead for the swinging bridge, I believe the official name is the Fall Creek trailhead. This is located along the first sharp bend of the NF-087 road. This is where we decided to park our car. It was slightly confusing on if we could park here given the two No Parking signs posted on each side of the trailhead. We ultimately decided those were meant to keep people from parking on the edges and potentially blocking the road. The old signboard here offers no information and the historic swinging bridge is currently closed to pedestrians due to some structural concerns. From what we found online, the Forest Service does plan to repair the bridge eventually but it is a slow going process that is not as simple as it seems and even more so with our current administration in place. If you want to avoid any confusion or are worried about traction issues, your third option would be to park at the junction at the top of the NF-087 road and hike down from there.
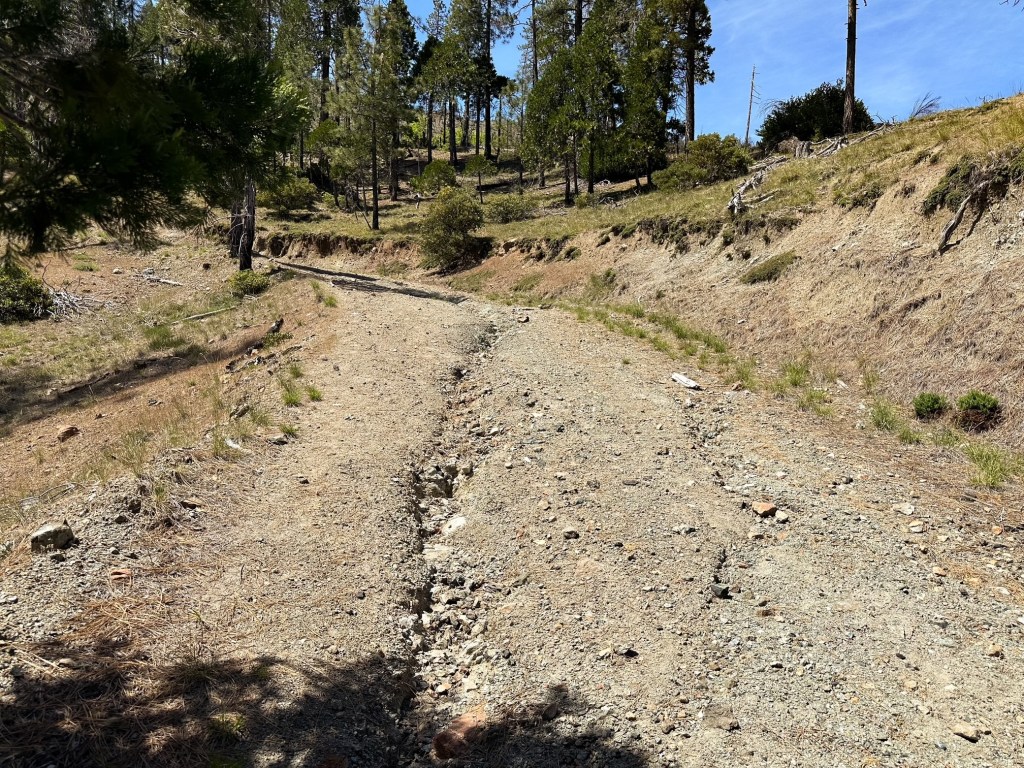
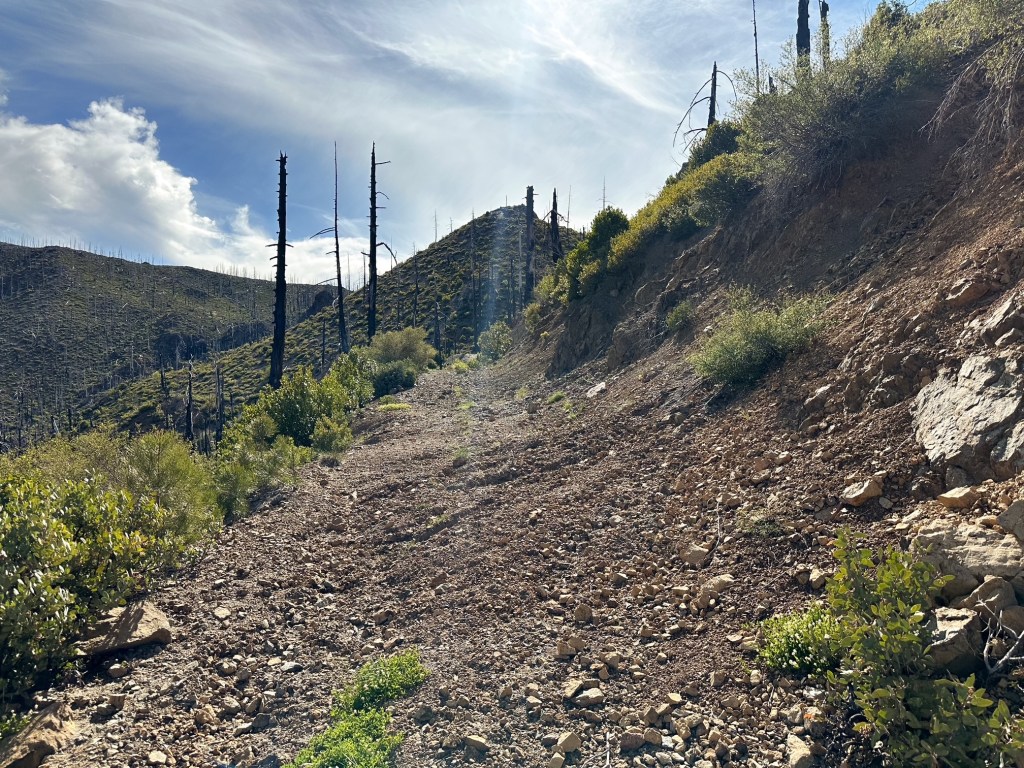
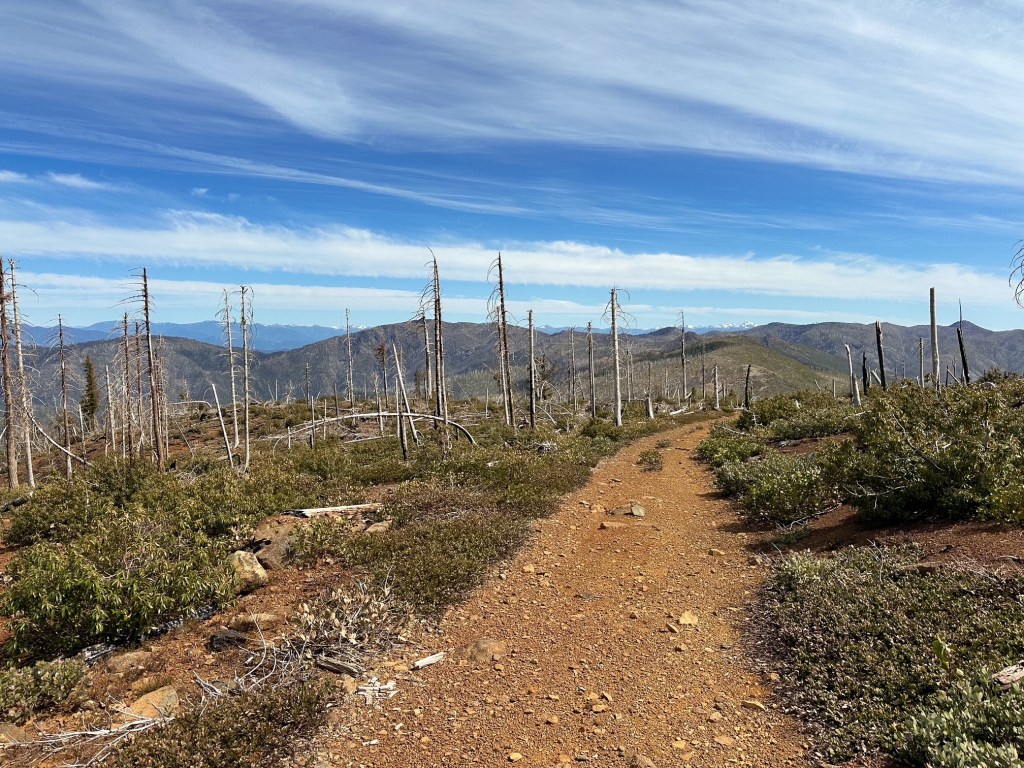
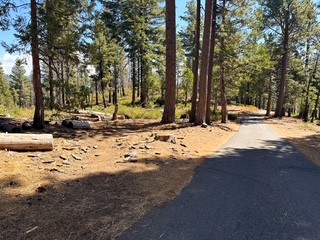
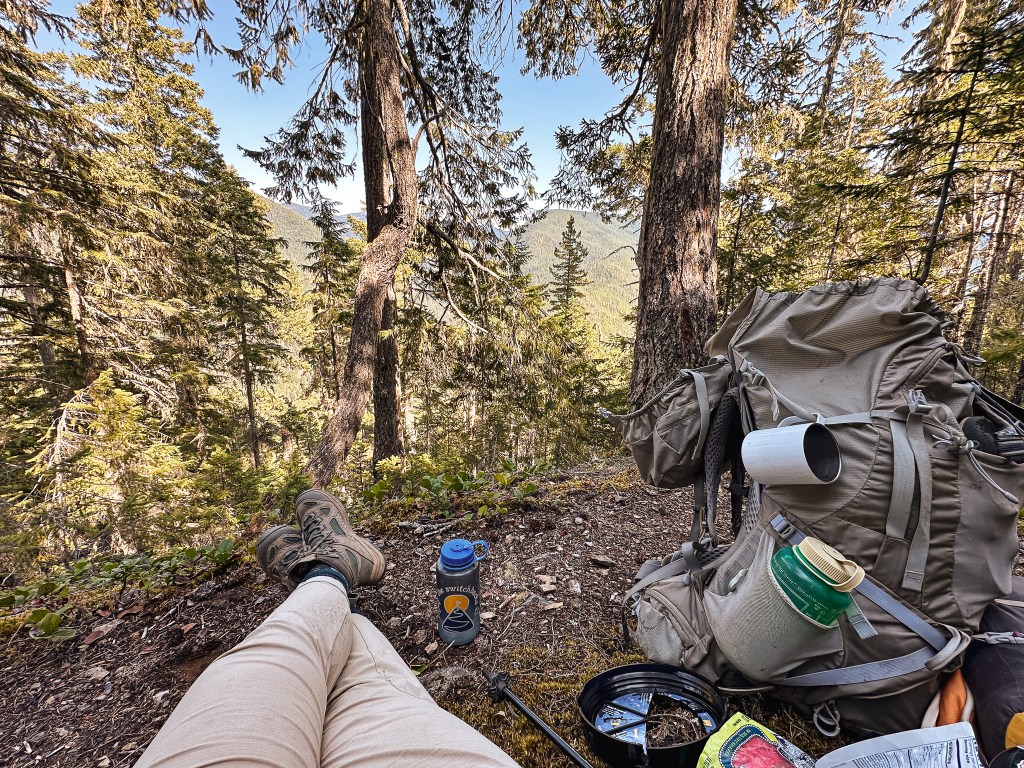
We reached the trailhead just after noon and had a quick lunch before saddling up with our packs to hike the road. We knew we had at least 4-1/2 miles of road walking to reach Chetco Pass and planned to find camp just beyond along the Slide Creek trail. The temps were forecast for a high in the low-60s and mostly sunny, but with the exposure and weight of our packs it ended up feeling much warmer. We had to hike down the road and cross via the vehicle bridge due to the swinging bridge closure. Once across the Illinois River, we headed towards the yellow gate at the back of the parking area. The only other gate is posted with private property and no trespassing signs for the McCaleb Ranch behind the bathroom. There is also a bridge that leads to the Fall Creek Trail off to the left. The road wastes no time gaining elevation and we took breaks often in what little shade the few trees had to offer. The condition of the road is deteriorating and I wouldn’t be surprised if they end up permanently closing the gate at some point instead of making the needed repairs. There are some sections that are not that bad, but there are major erosion issues happening that will make it difficult for most vehicles. The worst of it was about a mile below the pass on a tight switch back. The water run-off cuts deep through the road and a small section has eroded away to no more than the width of an ATV. You would most likely have to put one of your wheels on the side slope or off the road completely to fit a standard vehicle past this point. These are just cautionary warnings since the road is narrow, rocky, soft bedded when wet, and does not offer many turn around points if you decide to abort part of the way there. It’s obvious this road does not see much traffic just from the amount of shrubs and grass growing through it.
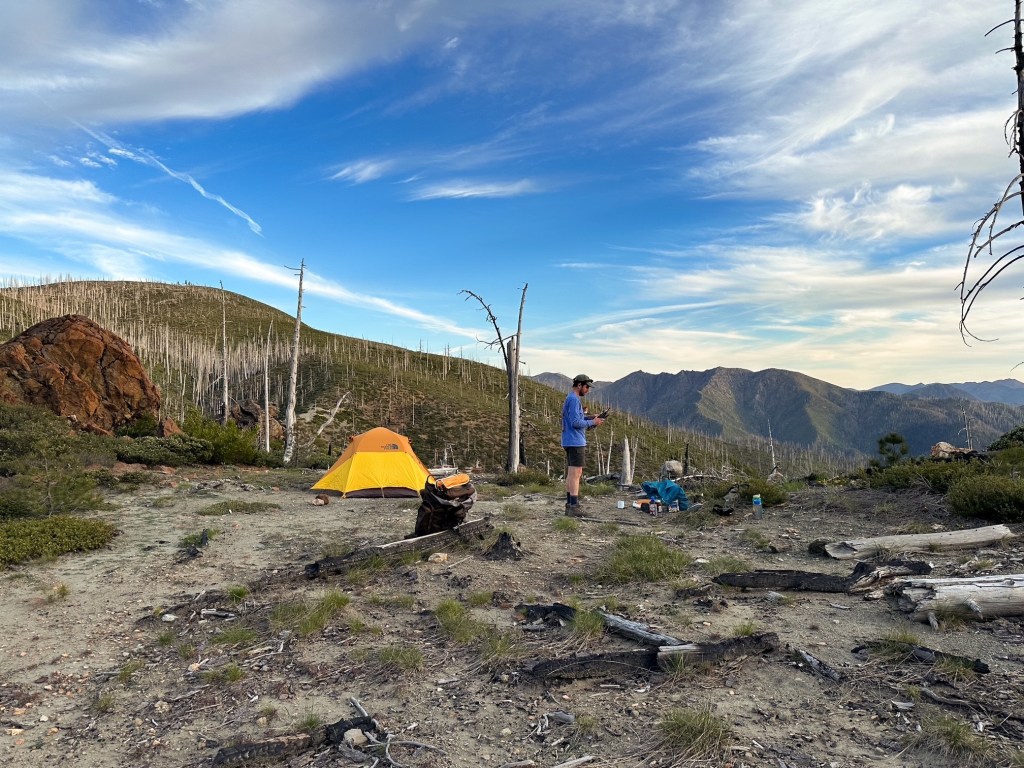
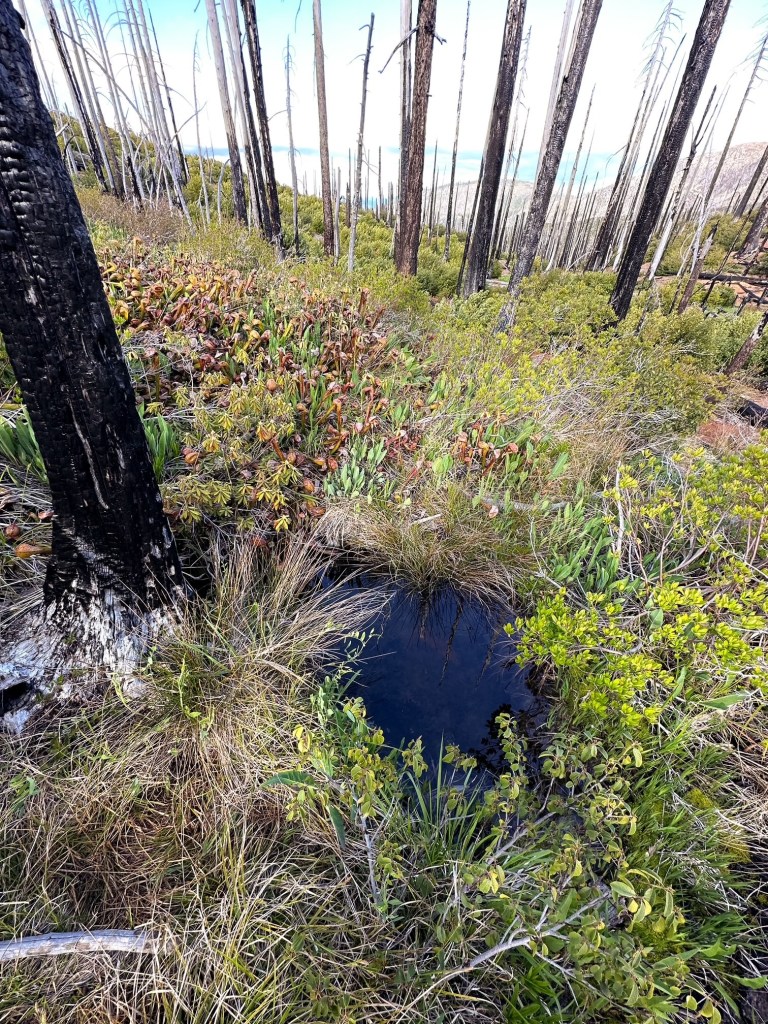
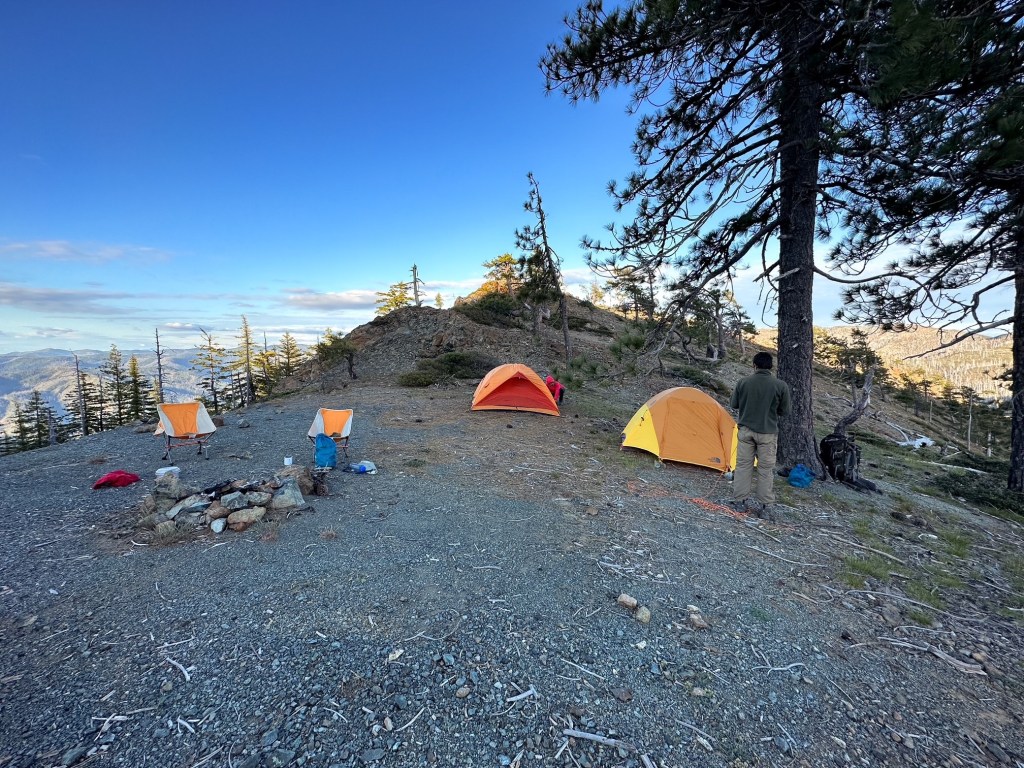
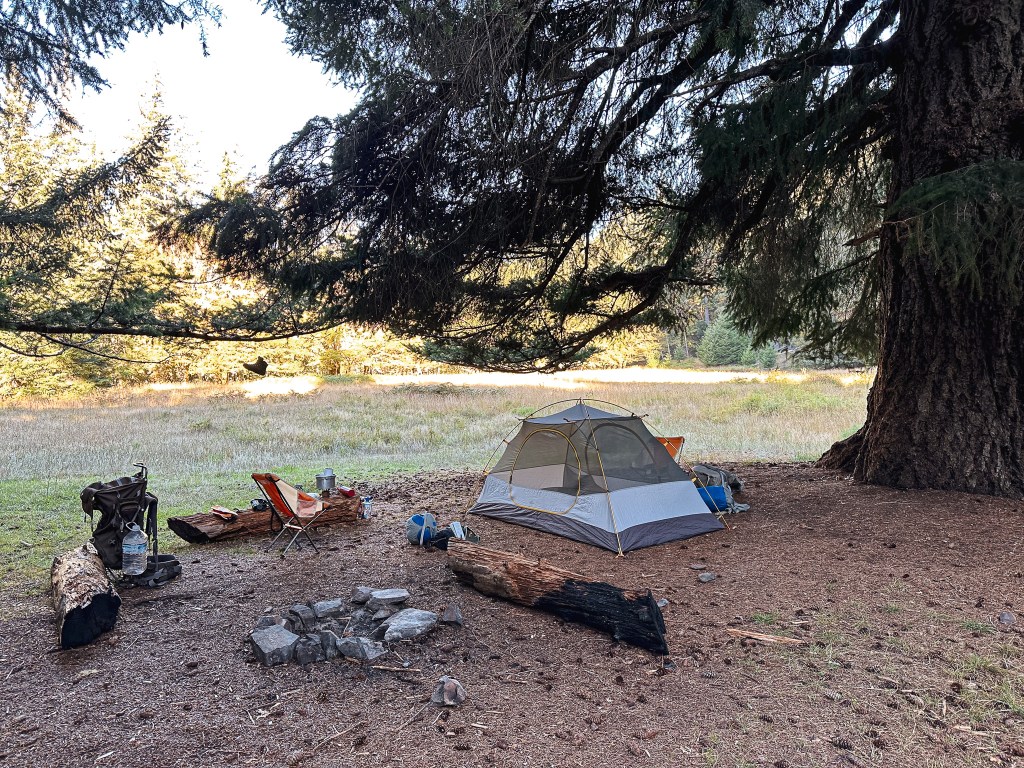
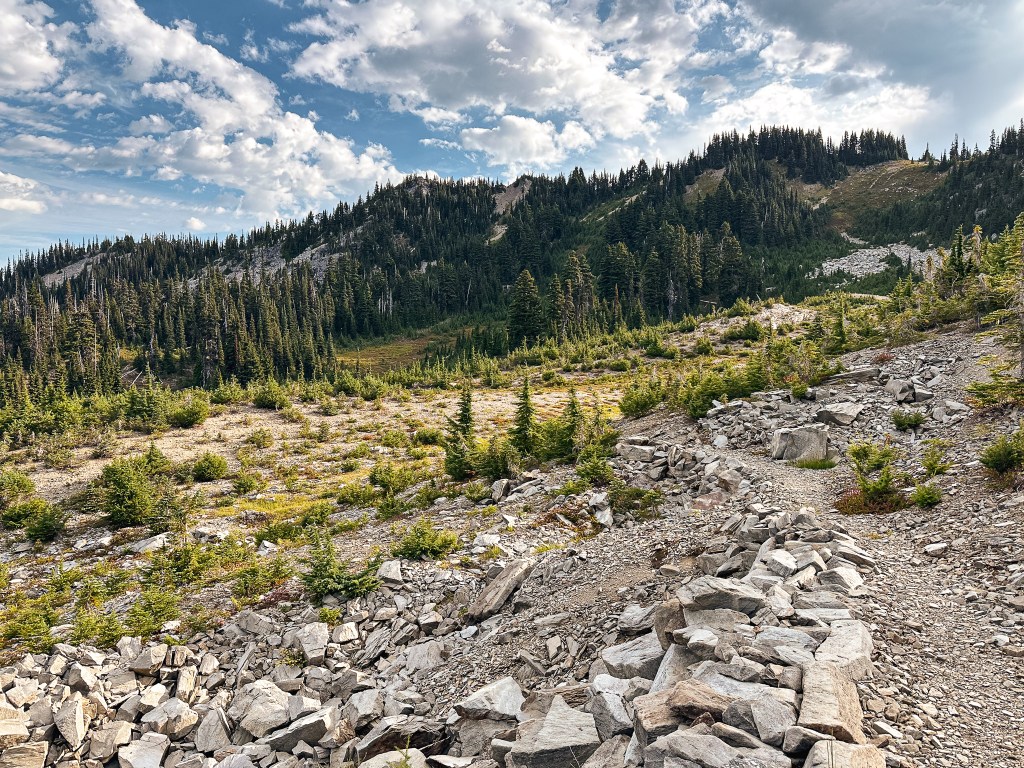
I eventually fell behind Garnet and started to struggle with my calves trying to seize into a charlie horse. I was probably less than half a mile from the pass when my calf cramped. I was frustrated because I had drank almost all of my water and wasn’t even over exerting myself. One water bottle was even full of electrolytes. I felt fine in every other aspect, but my body obviously needed more water. I had to shorten my steps the rest of the way to keep my calves from cramping again but I eventually made it to the pass with Garnet waiting. I won’t even bother telling you how long he had been waiting for me. We continued straight to head down the Slide Creek trail in search of a camp. We knew there was a decent one at least a mile down, but ended up finding one less than a few 100 yards from the pass that worked perfectly for our base camp. There was a creek not too much farther down the road either. I’m not sure how reliable this water source is for year round visits, but if you are ever in need of water in this area look for the Darlingtonia plants. They grow where the water sources are most concentrated. Strava tracked my mileage from where we parked to our camp at 5 miles with 2,650′ of elevation gain. I took a screen shot when I reached the pass of the mileage and it was around 4.85 miles. The elevation gain would have been the same since we only headed down to reach camp.
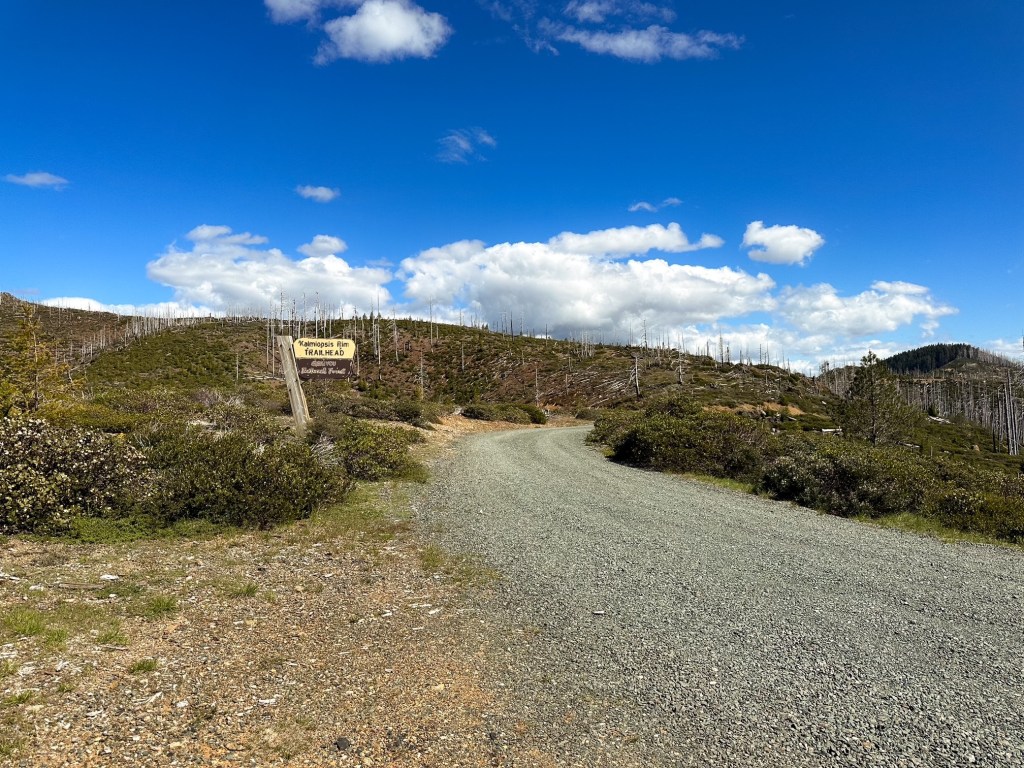
Kalmiopsis Rim (Onion Camp) Trailhead to Chetco Pass
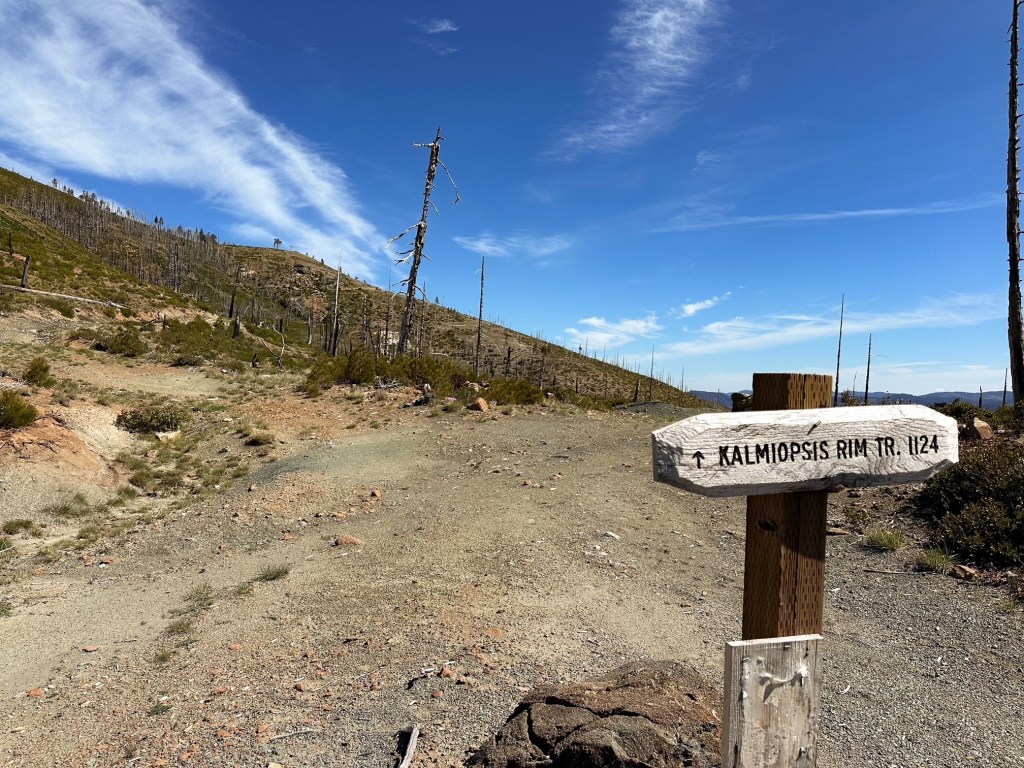
From Grants Pass, we followed HWY-199 past Selma until we reached the paved Eight Dollar Mountain Road off to the right. It’s on a curve in the highway with it’s own turn lane. If you reach the community of Kerby you have gone too far. The Eight Dollar Mountain Road narrows to a single lane beyond the gate and eventually turns into the NF-4201. It becomes gravel after crossing the bridge over the Illinois River. There are a few deep potholes in the paved section of this road but all are currently avoidable. You will stay on the NF-4201 road until you are almost to the Babyfoot Lake Trailhead. Just before you reach the Babyfoot Lake TH, you will turn right onto NF-142 and follow this to the Kalmiopsis Rim Trailhead (sometimes referred to as the Onion Camp TH). The gravel conditions are good for the majority of the drive and passable to low clearance vehicles. Some caution is required though. The last six miles has the majority of hazards as the road narrows and becomes rockier. There are some potholes and minor high lines but all are currently passable. Your biggest threat is oncoming traffic around blind corners. It is roughly 17 miles from the highway to the trailheads and there is a little less than a mile and a half between the two trailheads. The trail begins to the left of the signboard at the Kalmiopsis Rim TH.
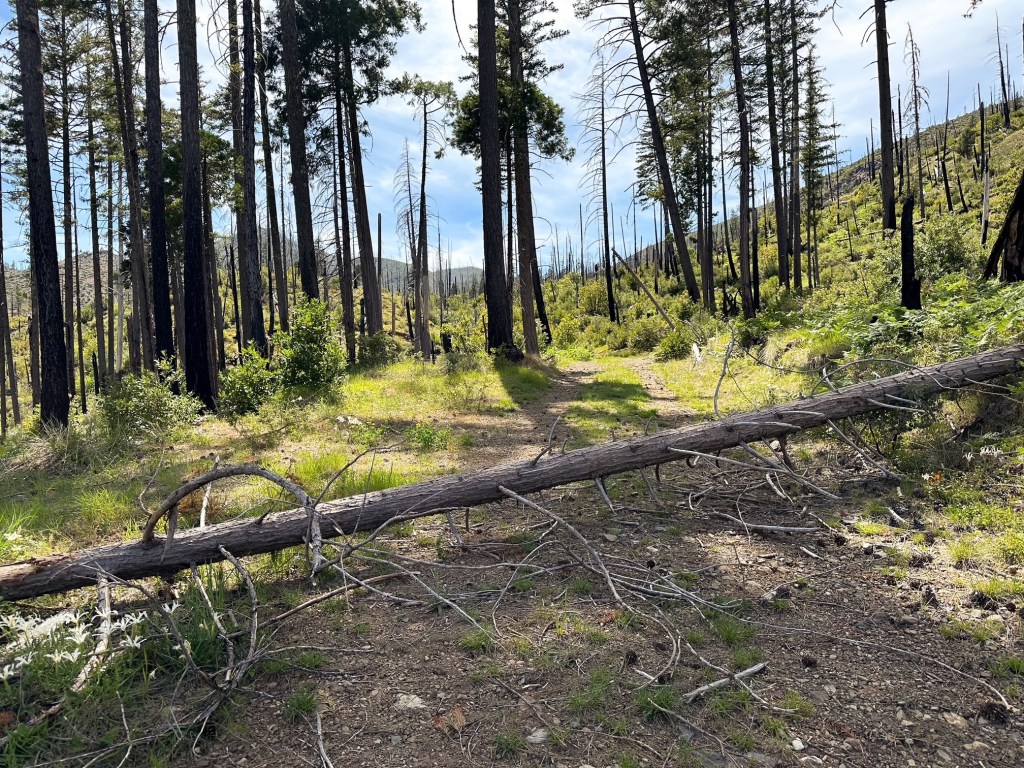
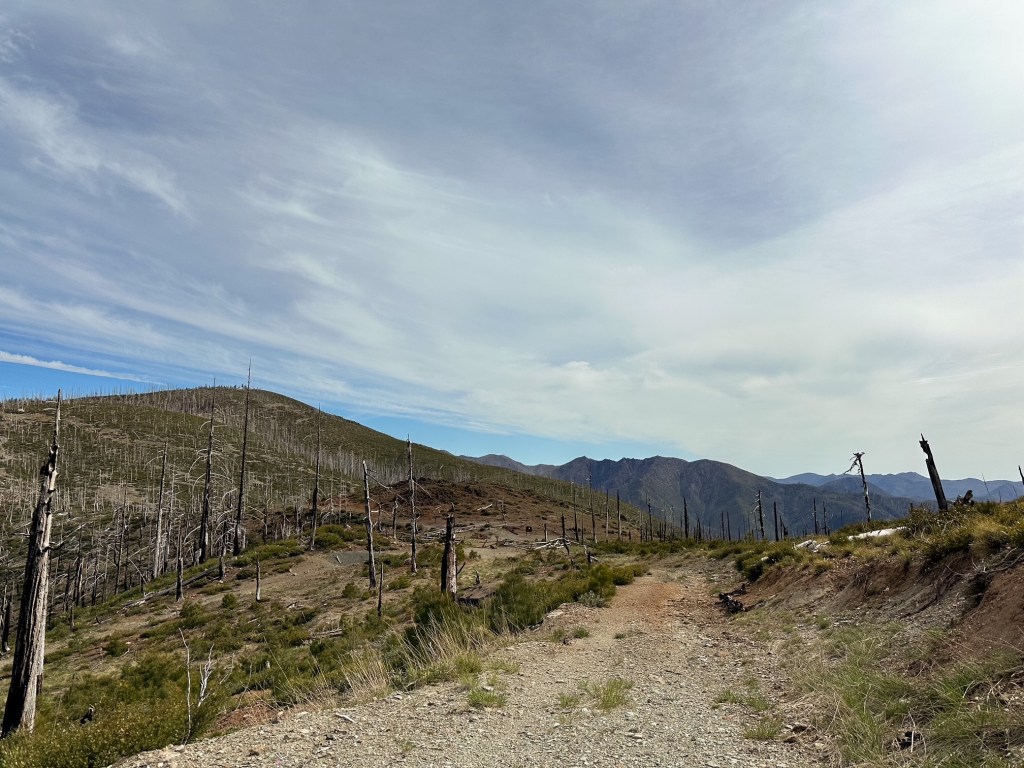
We had hiked the Kalmiopsis Rim Trail #1124 as the start of our route for a 5-day trip through the wilderness. The mileage for this route is estimated based on online information since I didn’t track it on Strava. I opted to conserve my phone’s battery for photos instead. The trail starts out by mildly climbing to meet the ridge line and turning to head towards Whetstone Butte. It drops down on the left hand side of the butte to descend to Eagle gap. Our destination for the night was a dry campsite tucked in a saddle between Eagle Gap and the summit of Eagle Mountain. We didn’t plan on making it very far our first day since we had a long drive from Portland and didn’t make it to the trailhead until after 4PM. We were also traveling with Garnet’s mom for the weekend and had to keep that in mind. There is a spring at Eagle Gap and that is where you would need to get water if you plan on camping in the same spot. You have to drop below the trail on the right side of the gap to reach it. It wasn’t completely obvious where exactly it was located, but we were able to locate it by the Darlingtonia growing around it. From Eagle Gap, the trail becomes faint and steeply climbs to the ridge again. It is roughly 2.75 miles and anywhere from 1,300′ to 1,700′ of elevation gain (I found varying information online) from the trailhead to the summit of Eagle Mountain. I’d estimate the camp spot is about 1/2 of a mile before the summit (a little over 2 miles from the trailhead). These mileages really only matter if you want to break up your route into a backpacking trip like we did.
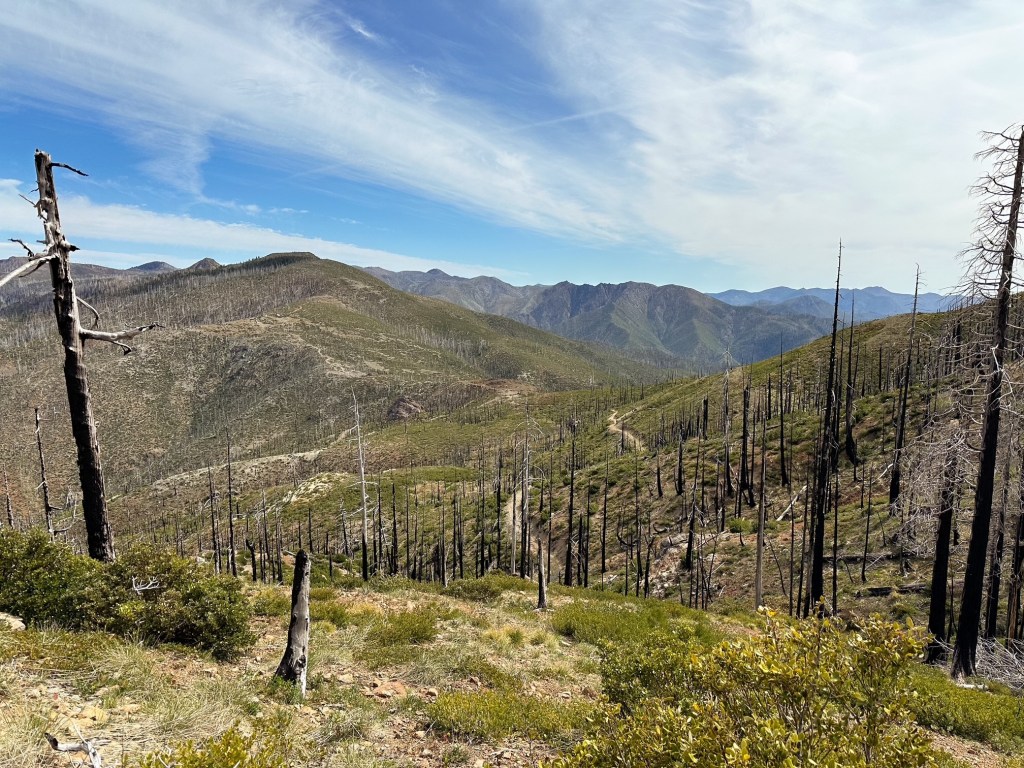
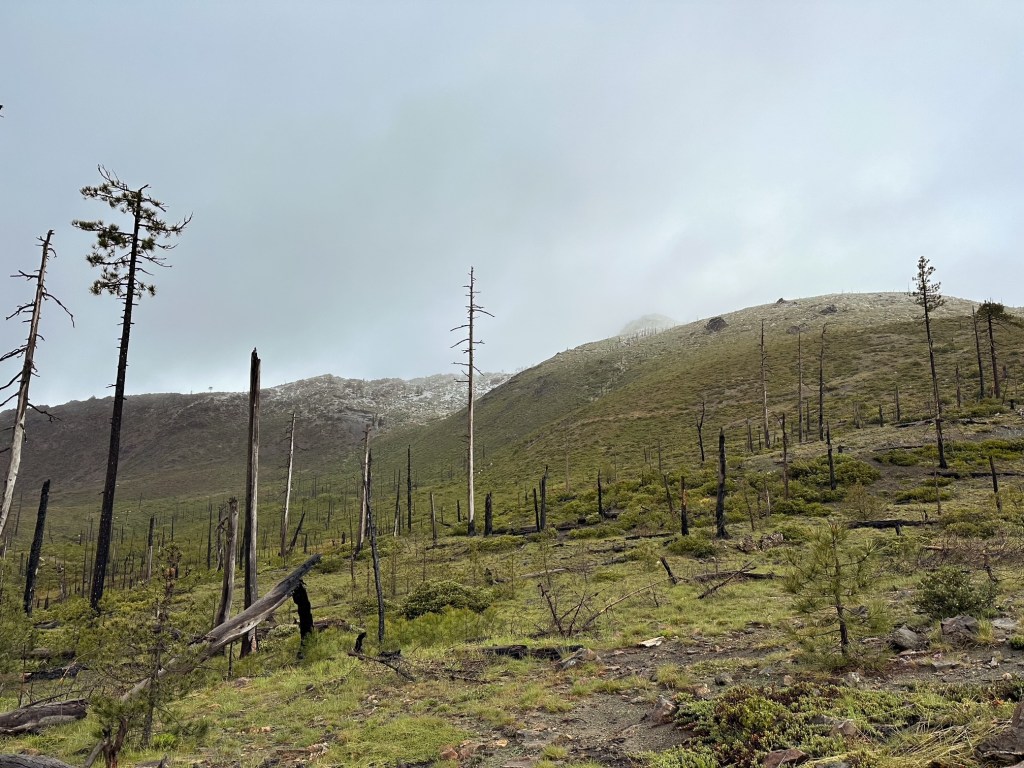
The next morning we woke in a dense cloud with wet gear. We packed up to make the final climb up Eagle Mountain before heading down again to Chetco Pass. I recommend taking a small off trail detour to take in the expansive views from the official summit of Eagle Mountain. There is a small pocket as you are coming down from the mountain that has a few matchstick sections of downed trees to navigate. Once past the treed area the trail widens to an old mining road and you have a clear view of where you are headed. Chetco Pass is roughly 4-1/2 miles from the Kalmiopsis Rim trailhead. You don’t gain much more beyond summiting Eagle Mountain from this route to reach Chetco Pass. You could hypothetically break up your route by camping just below Chetco Pass instead of near Eagle Mountain too. We had hoped we would have had time to reach Pearsoll Peak during this trip but that would’ve required another day for us. Our route for the weekend instead continued down the Slide Creek trail from there to meet up with the Chetco River before heading back up to Babyfoot lake.
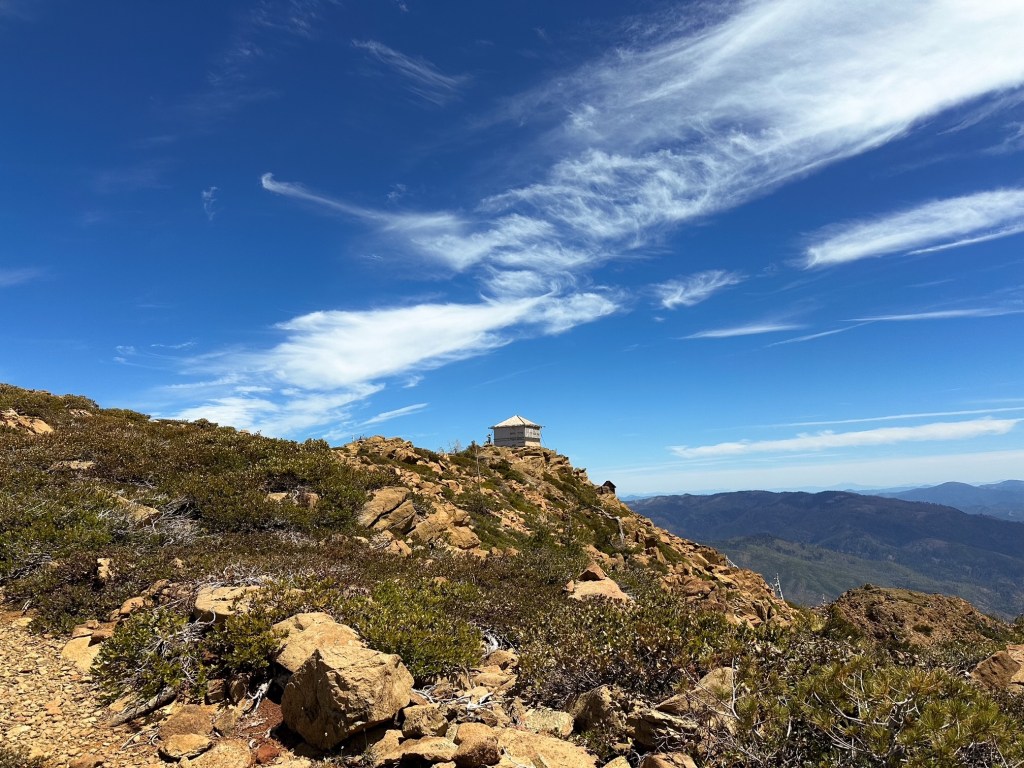
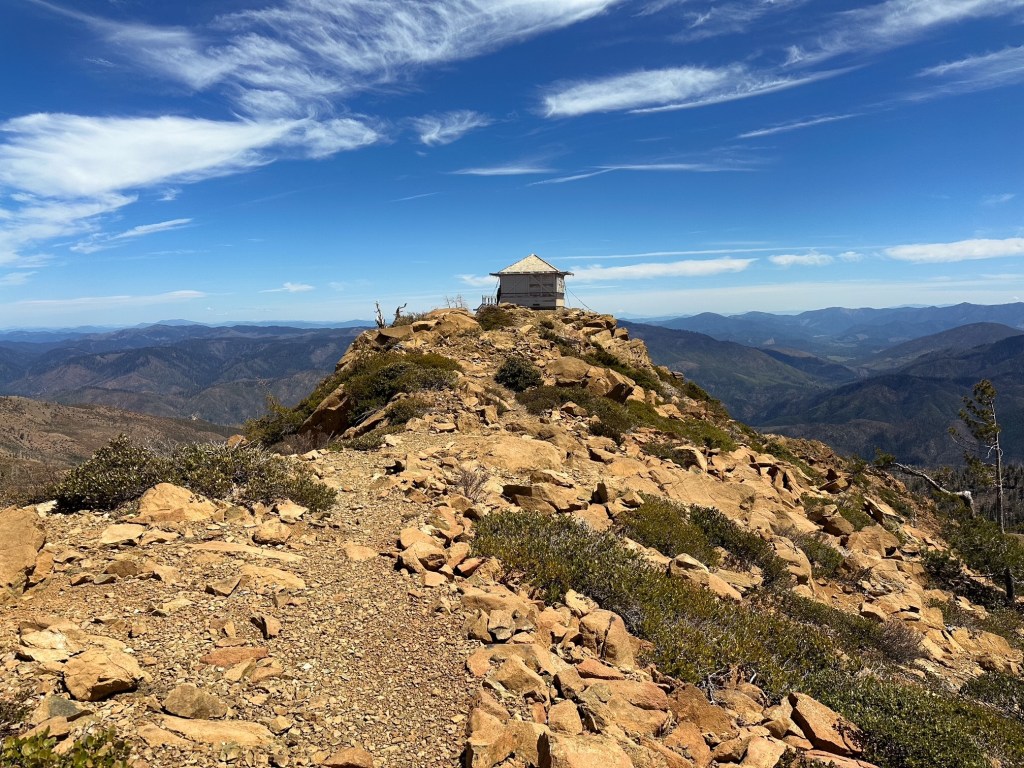
Chetco Pass to Pearsoll Peak
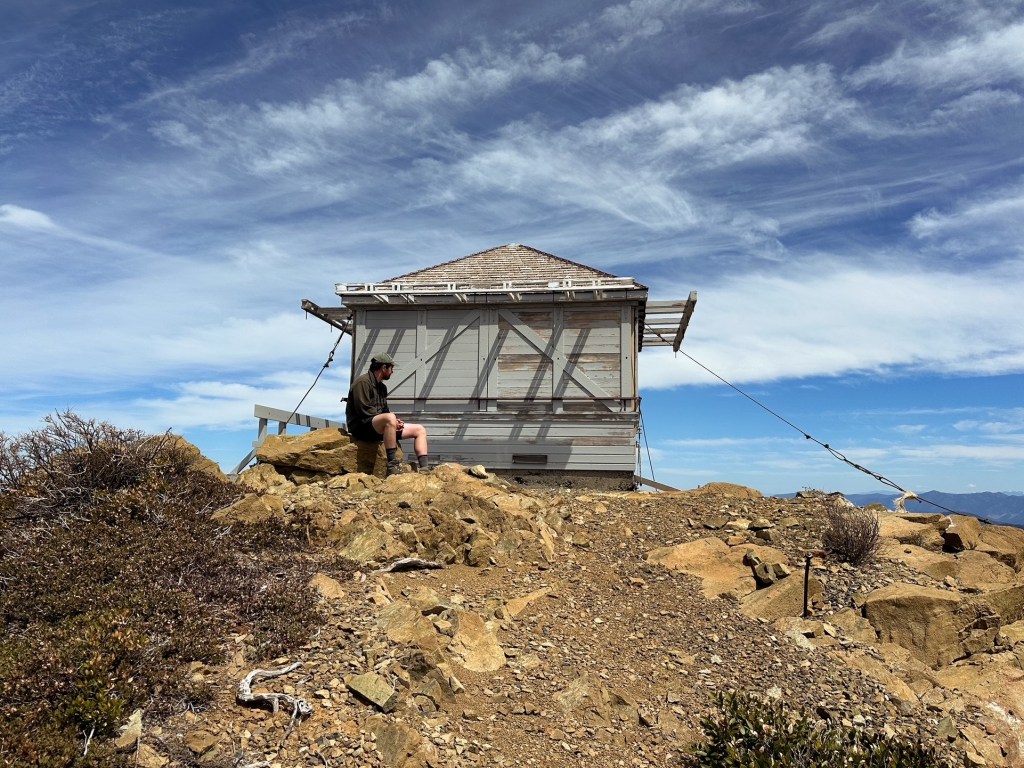
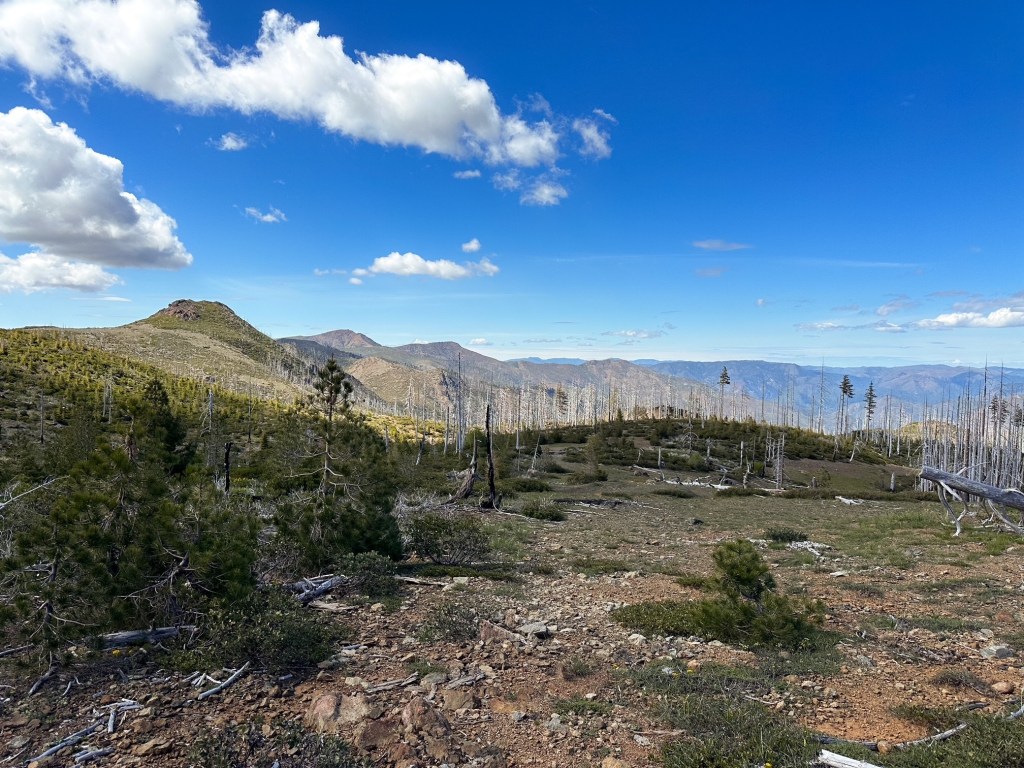
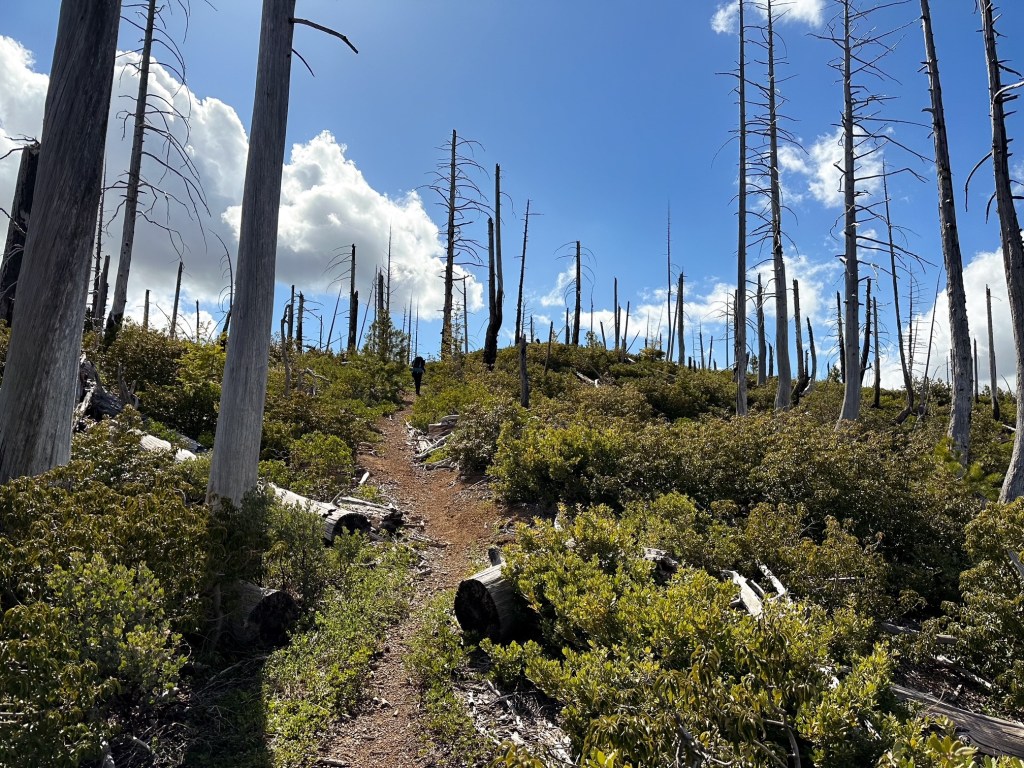
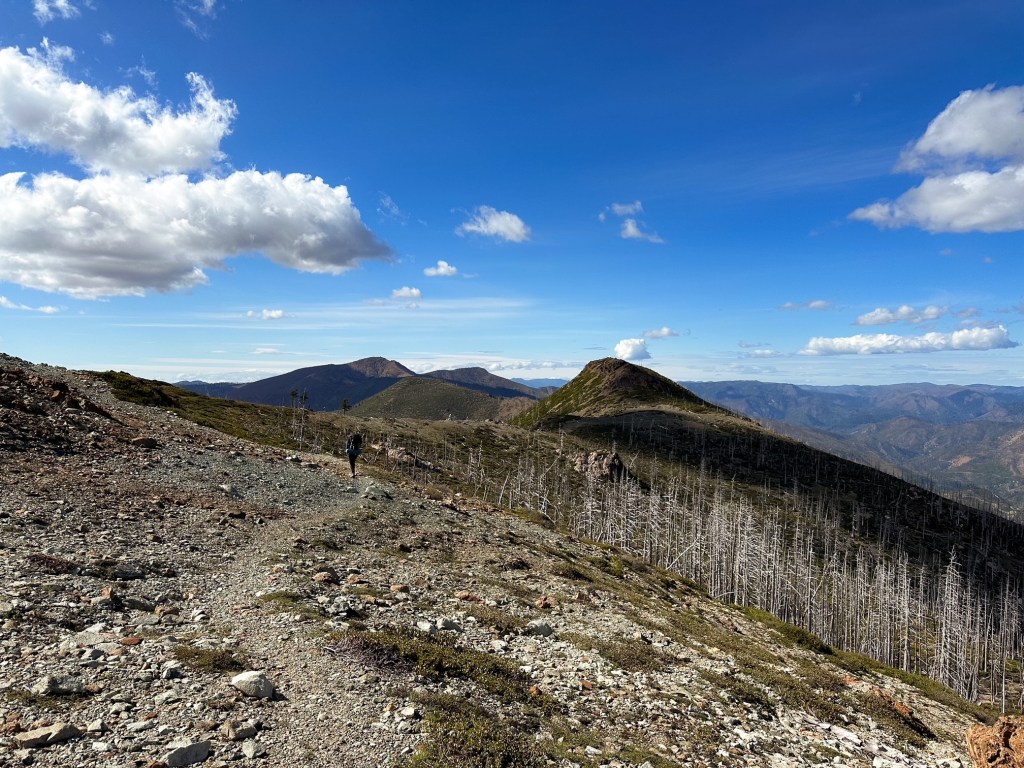
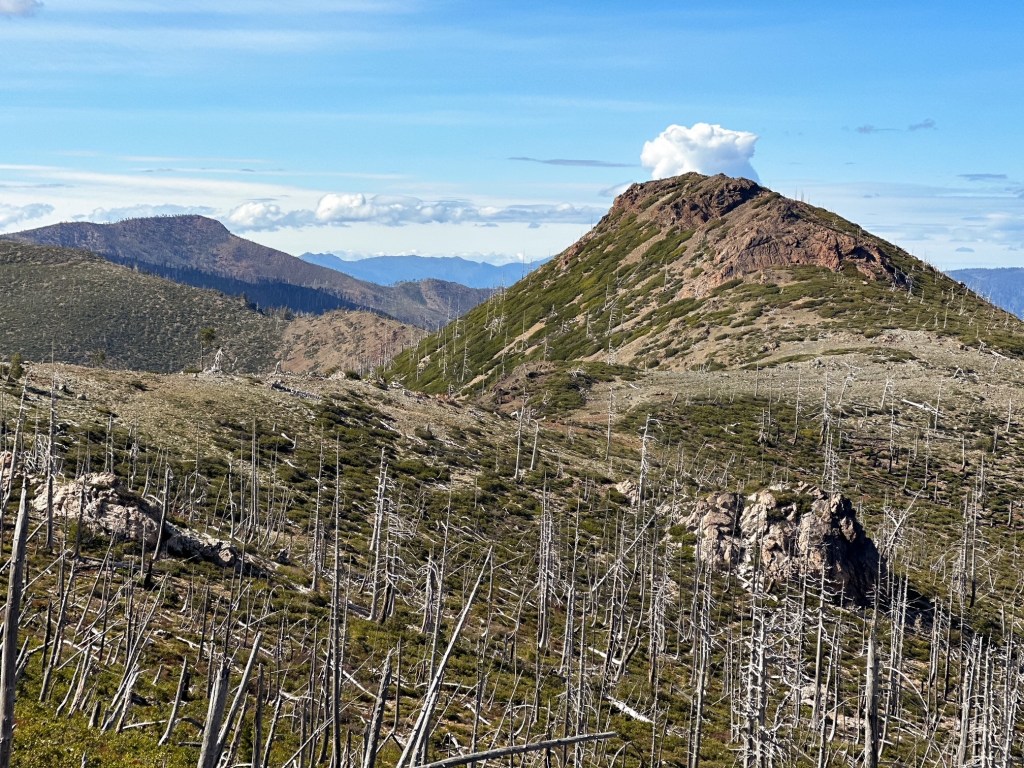
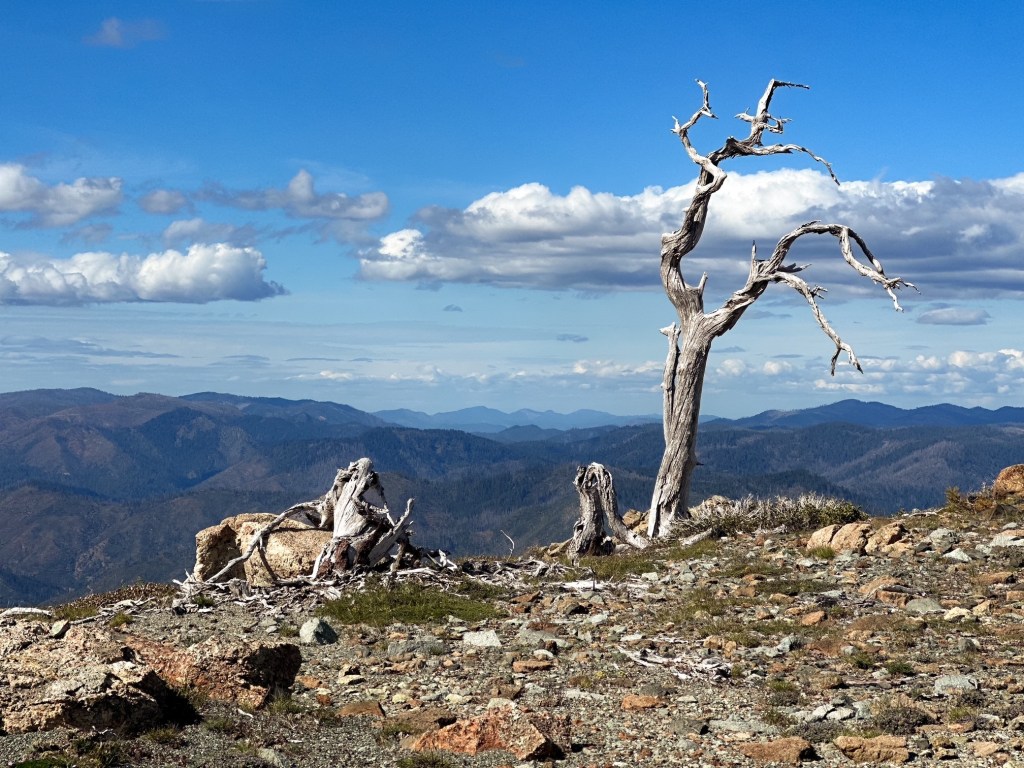
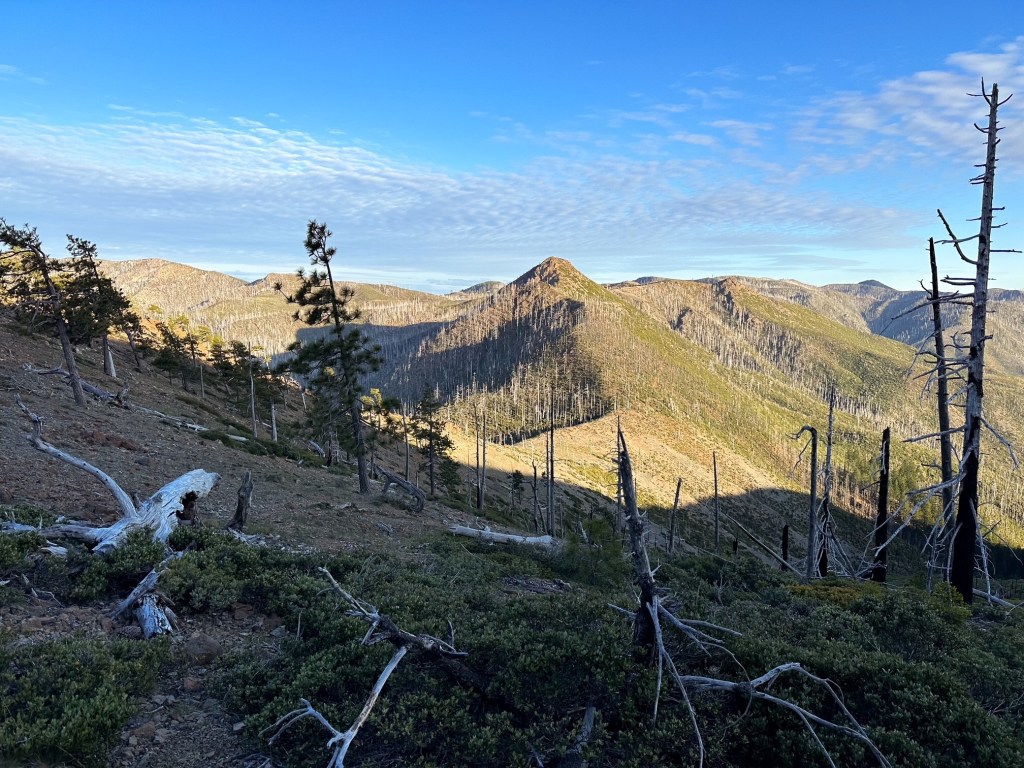
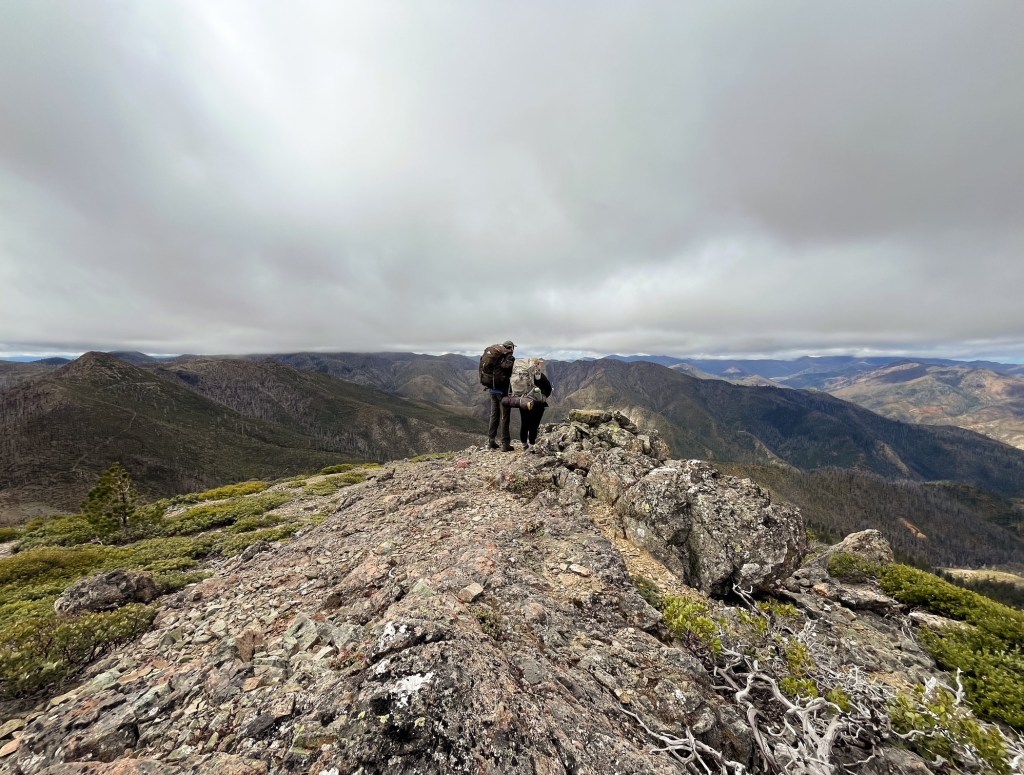
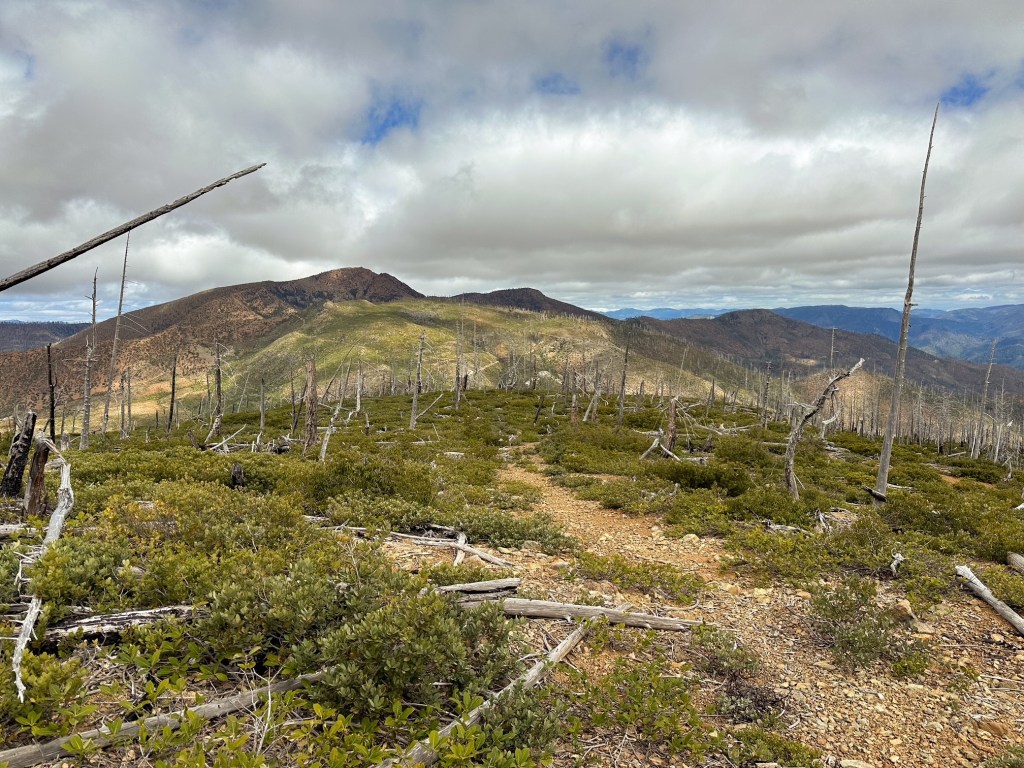
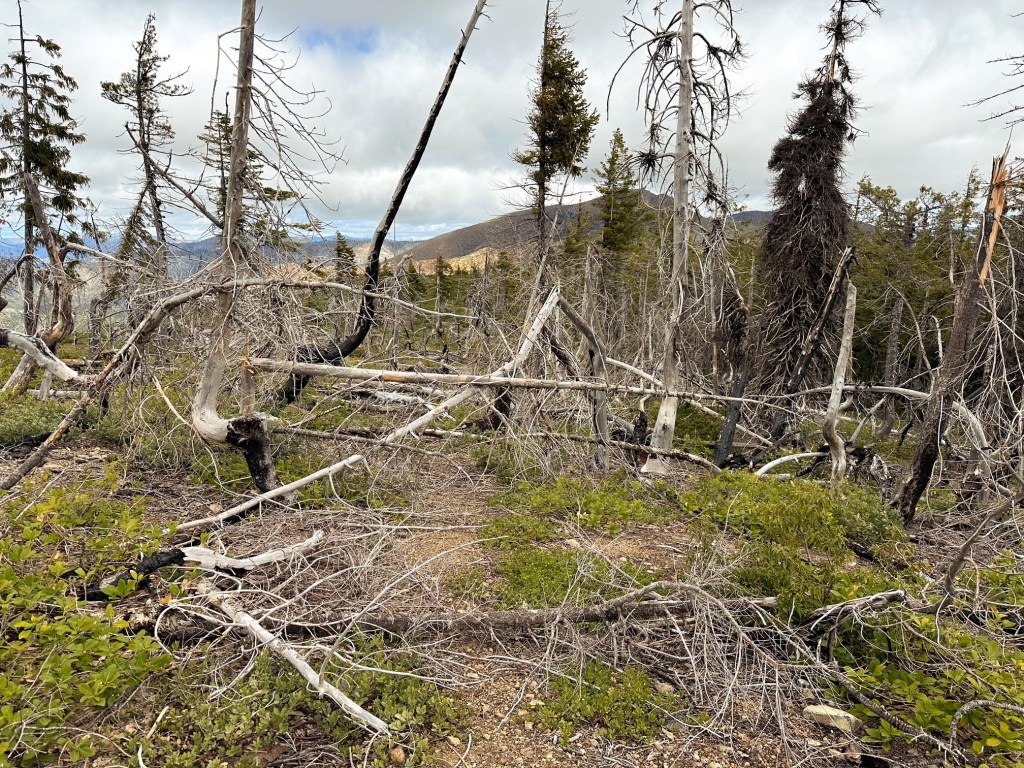
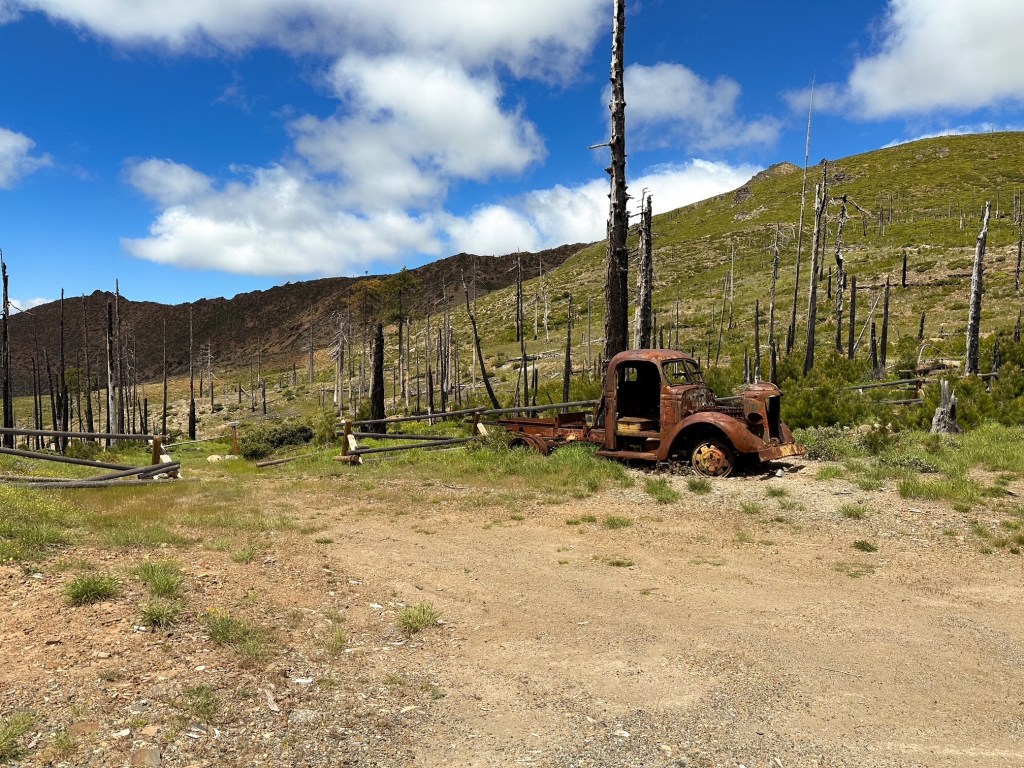
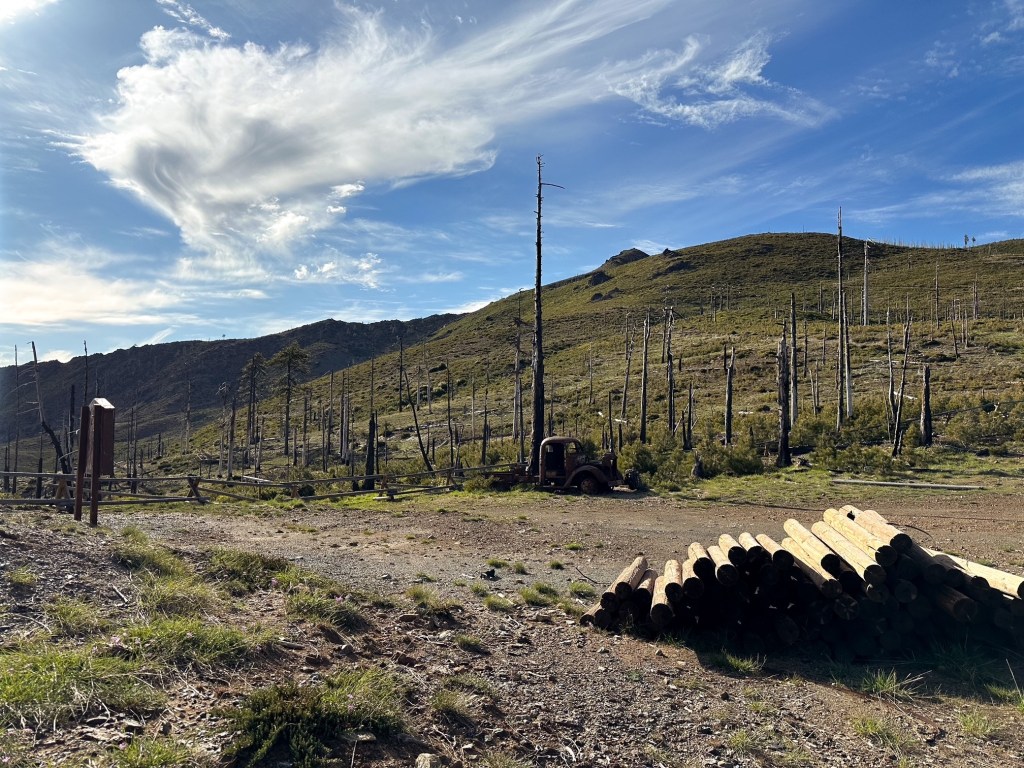
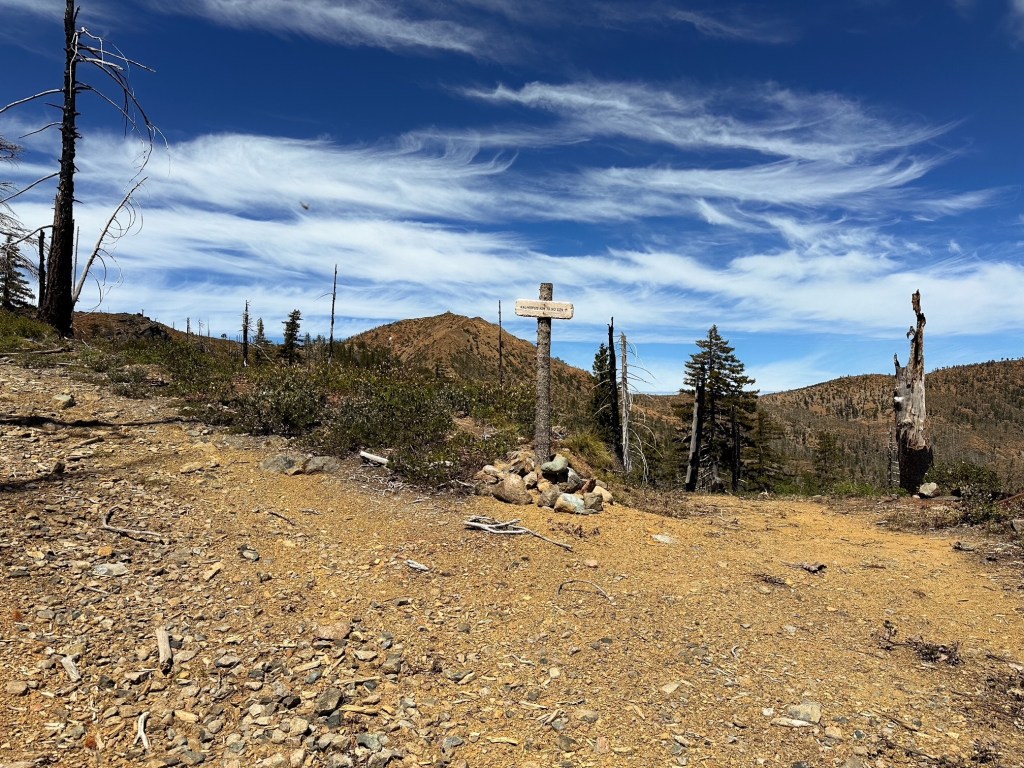
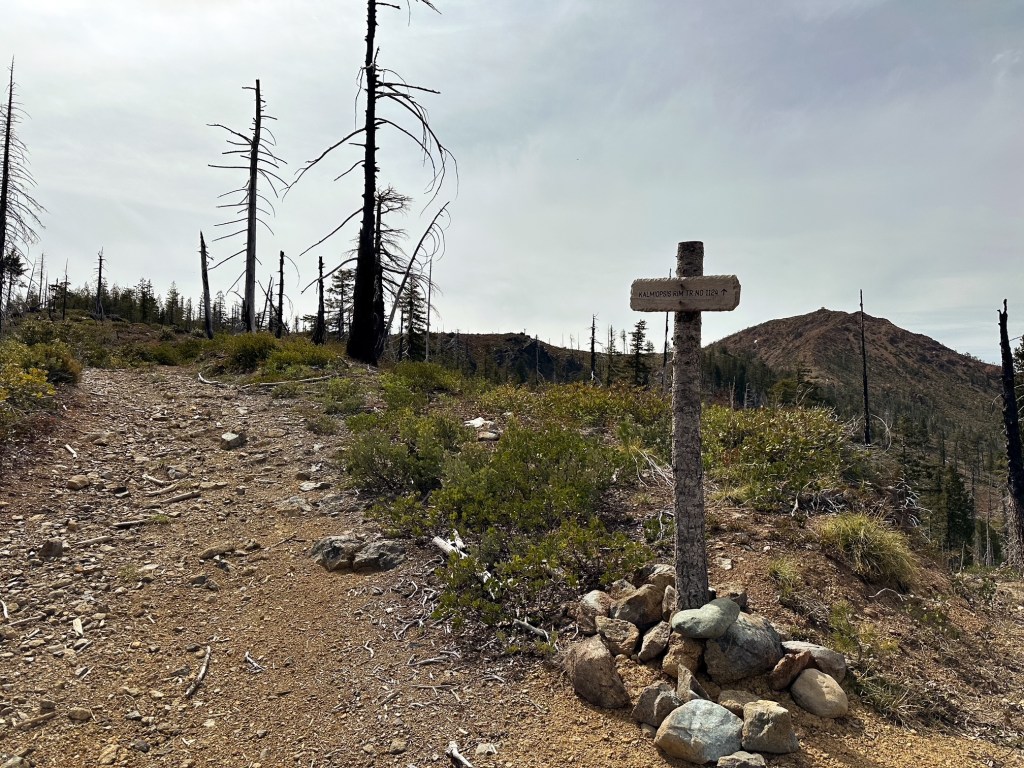
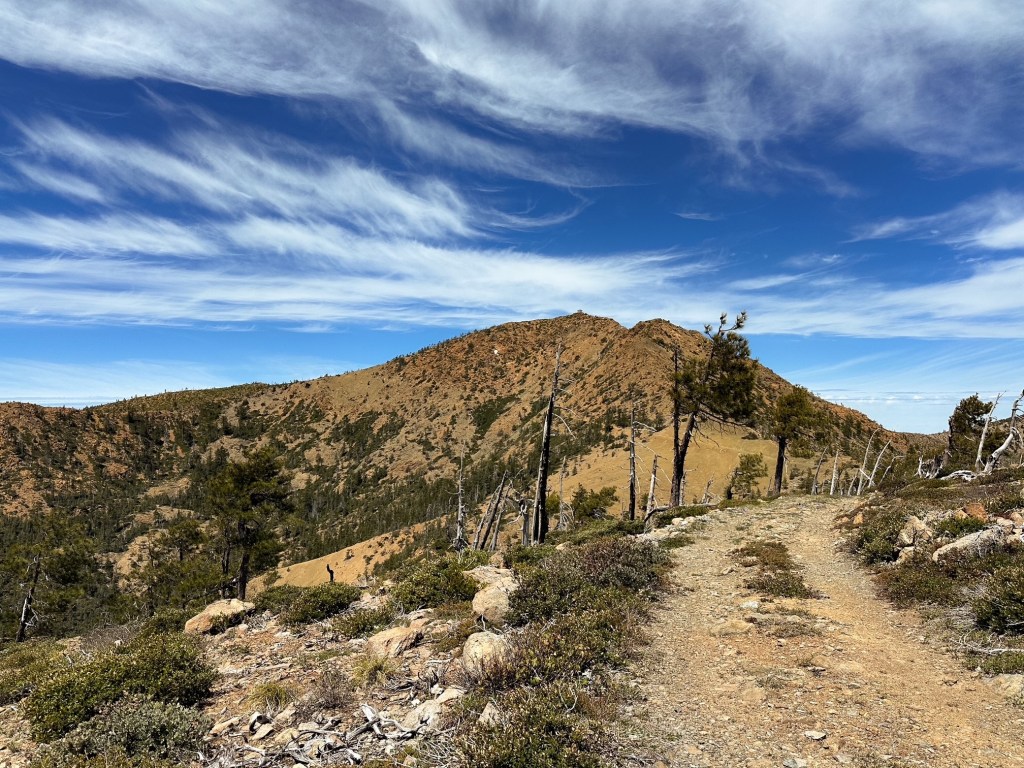
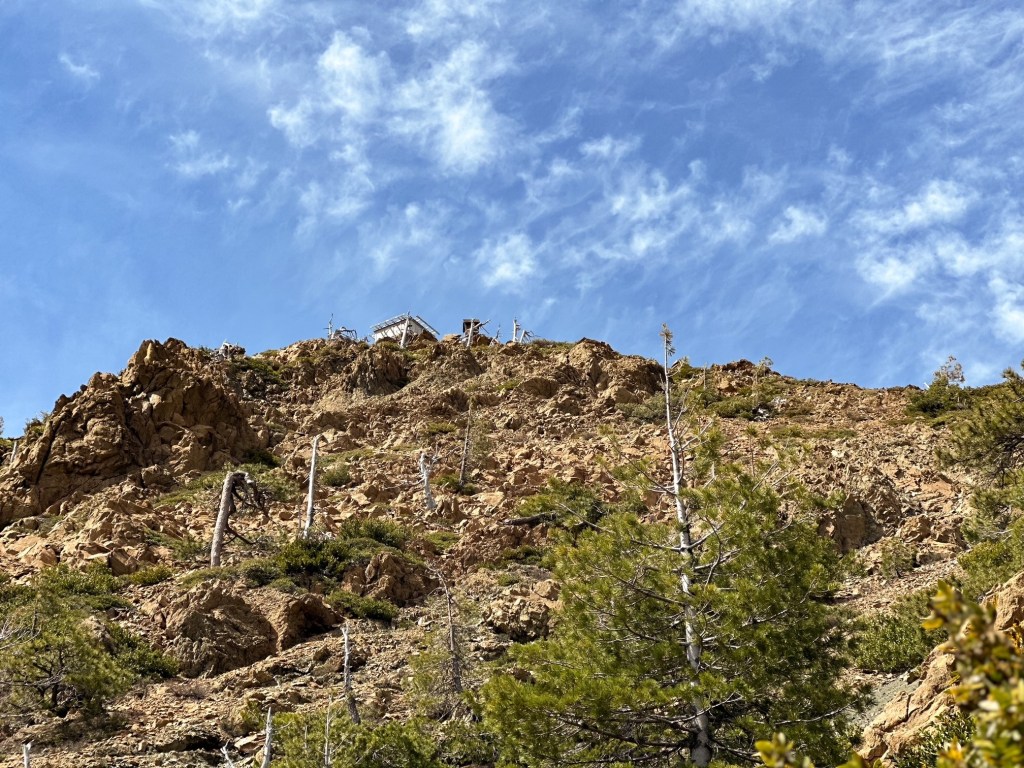
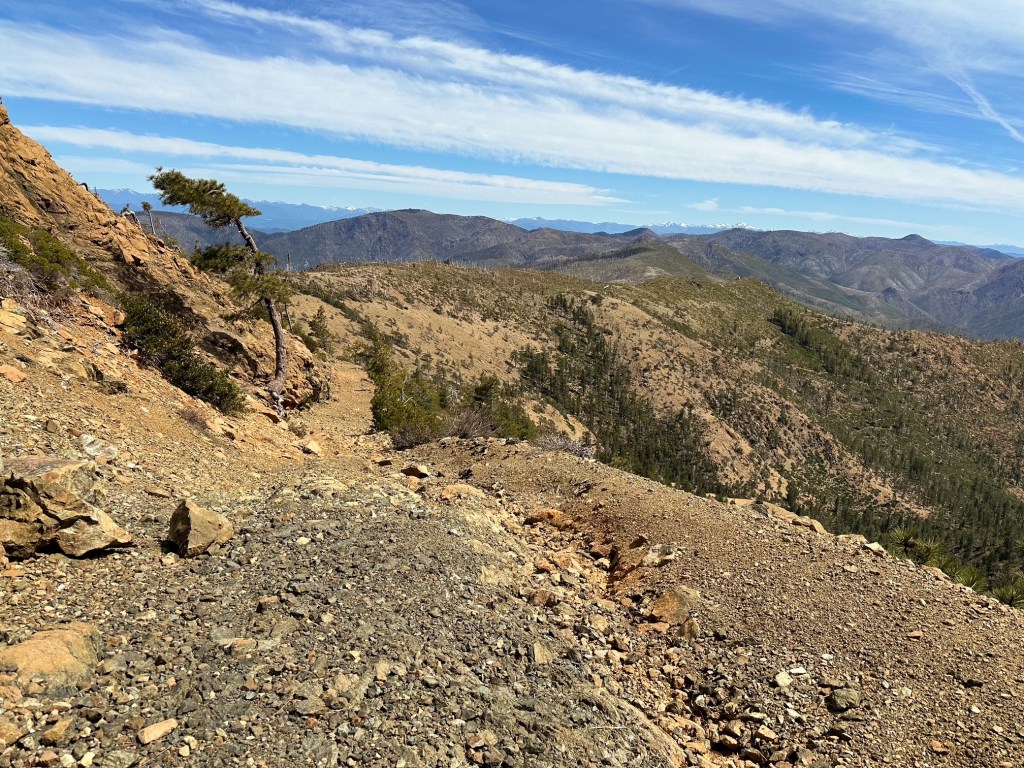
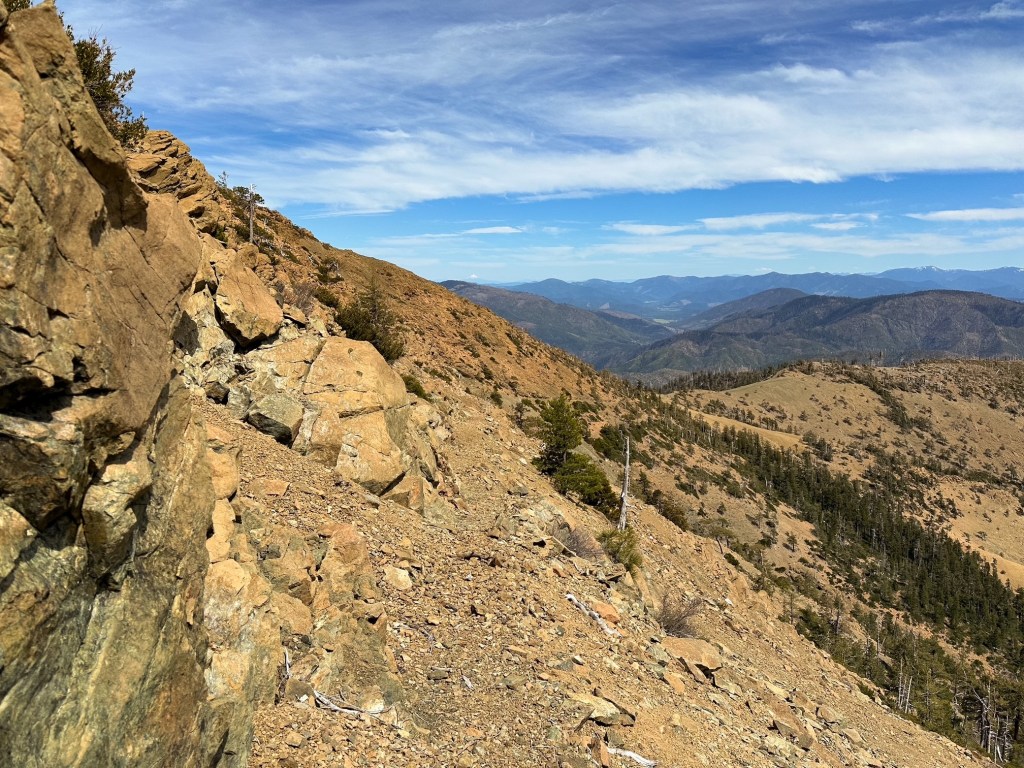
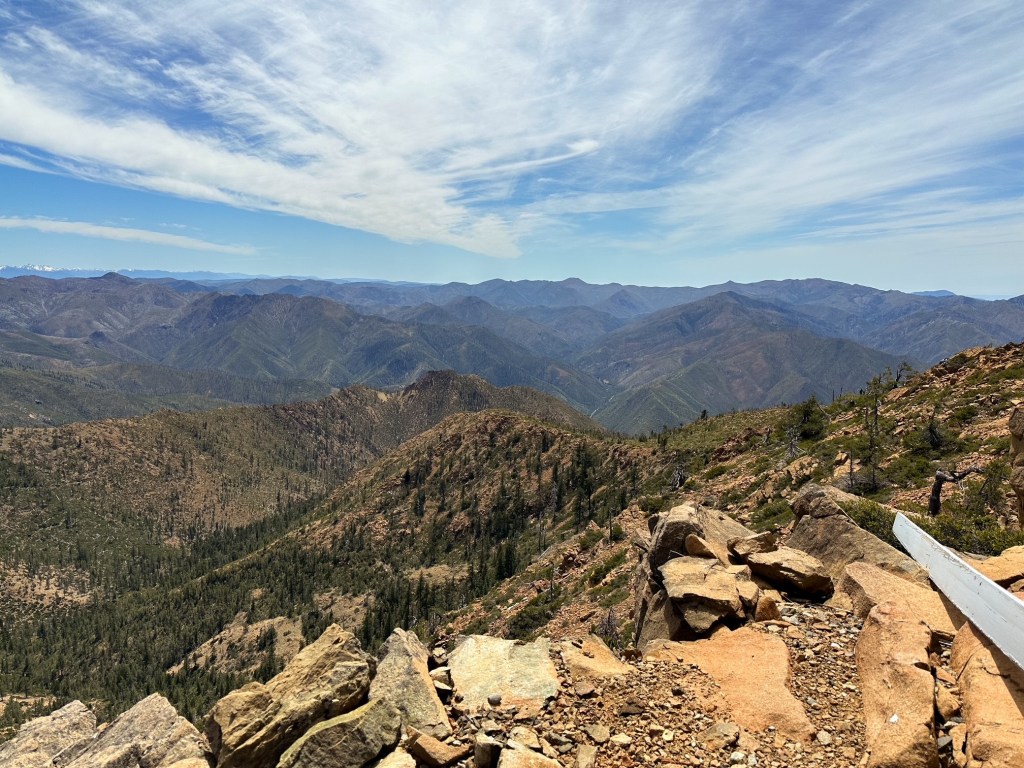
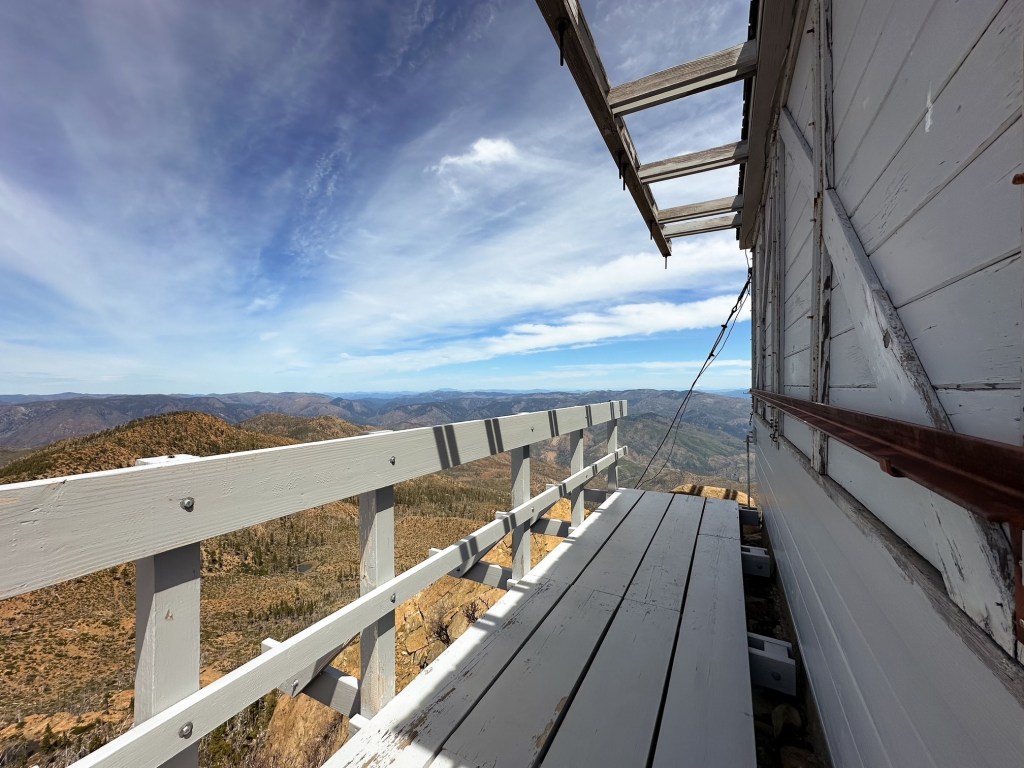
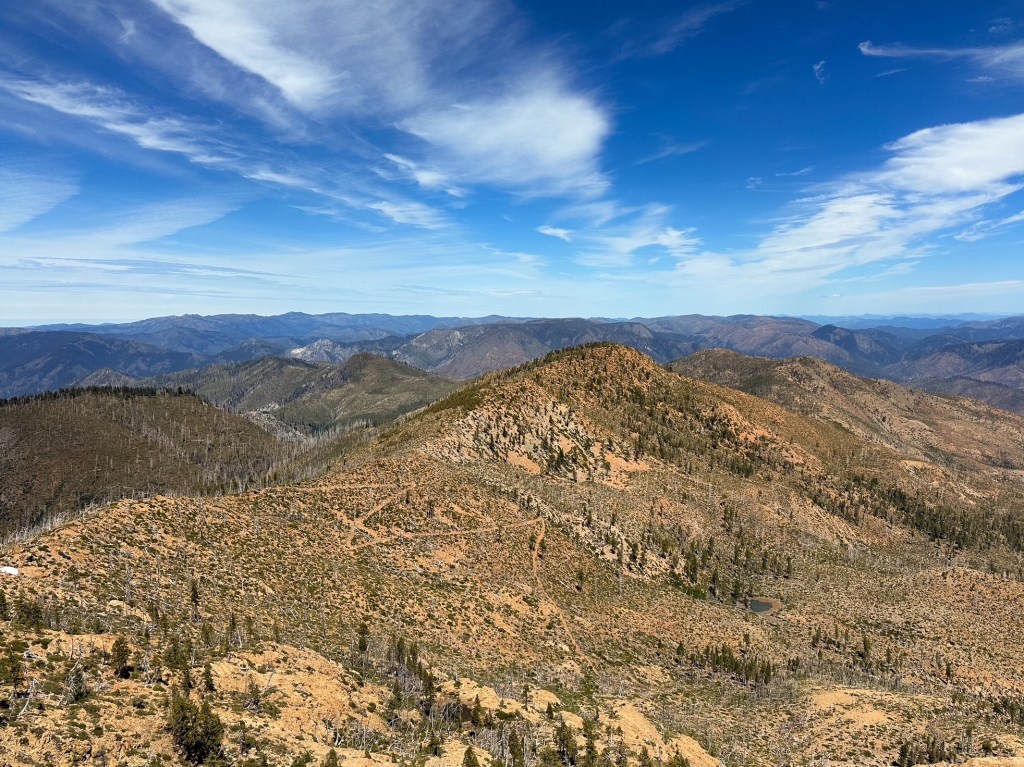
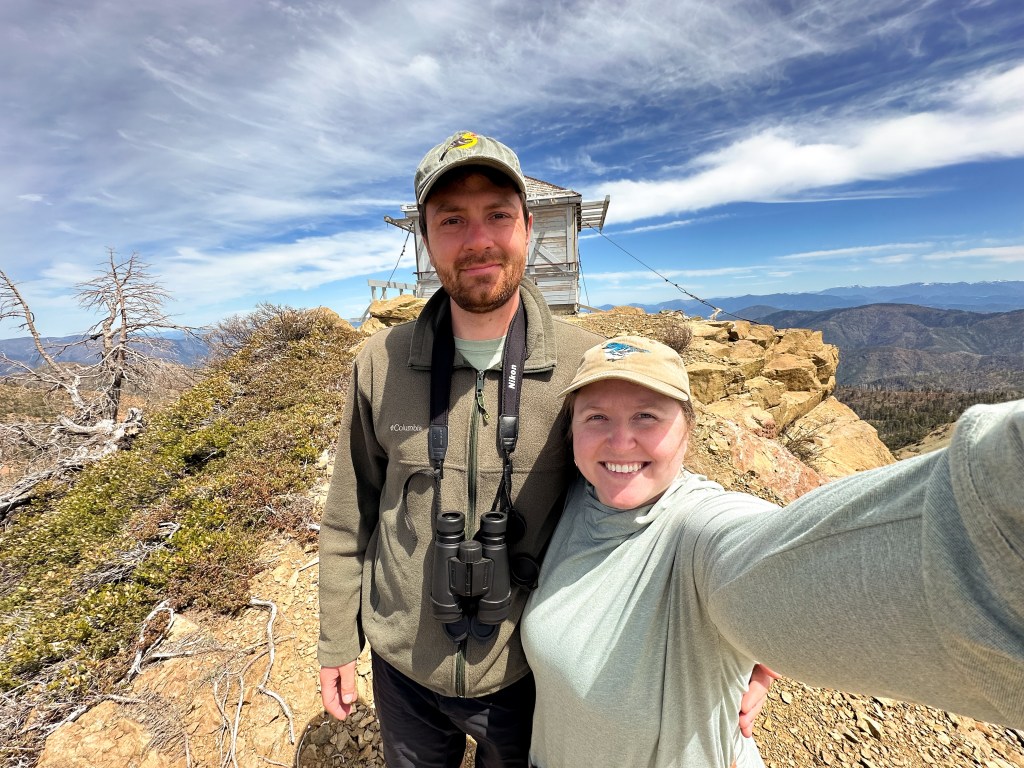
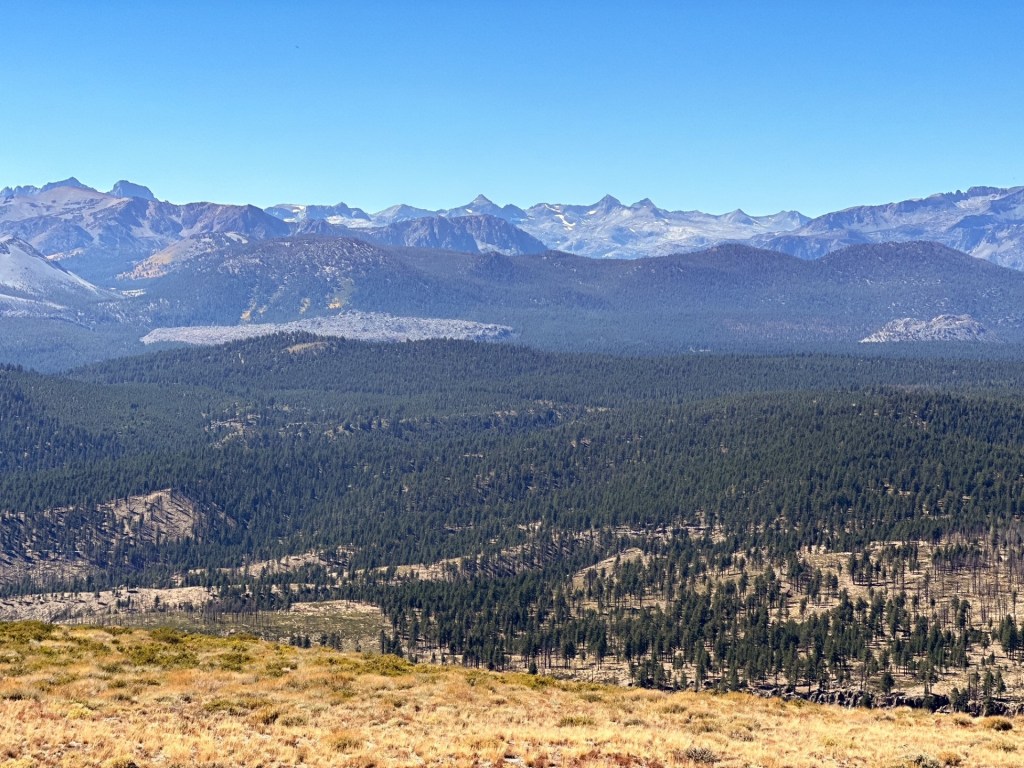
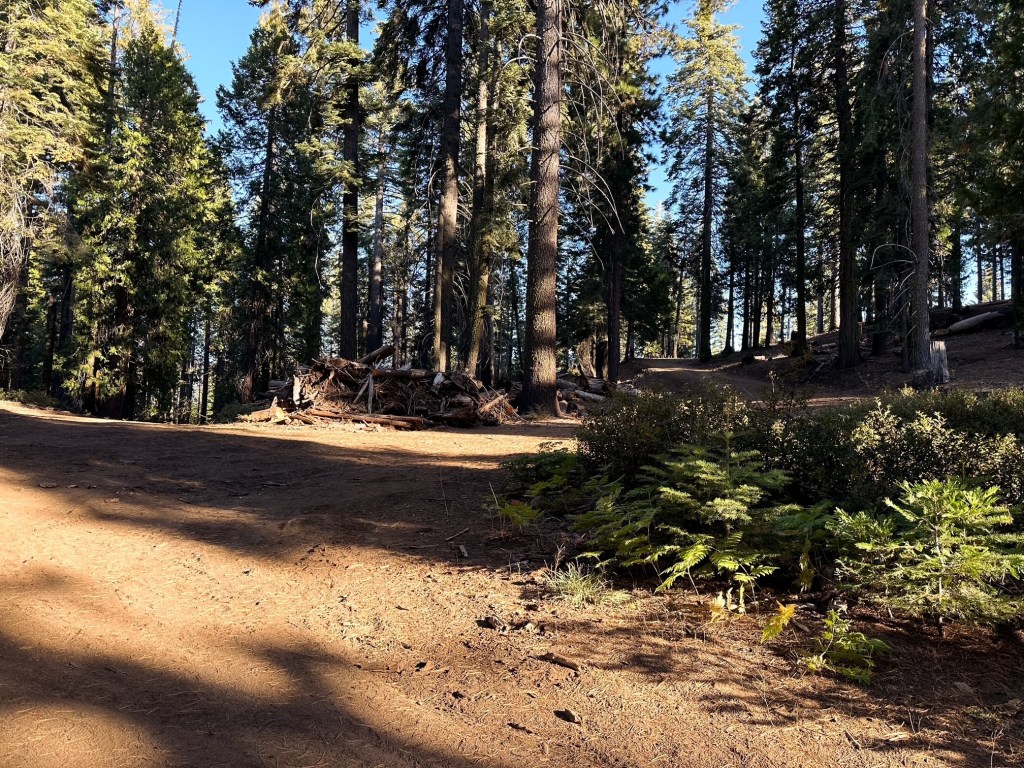
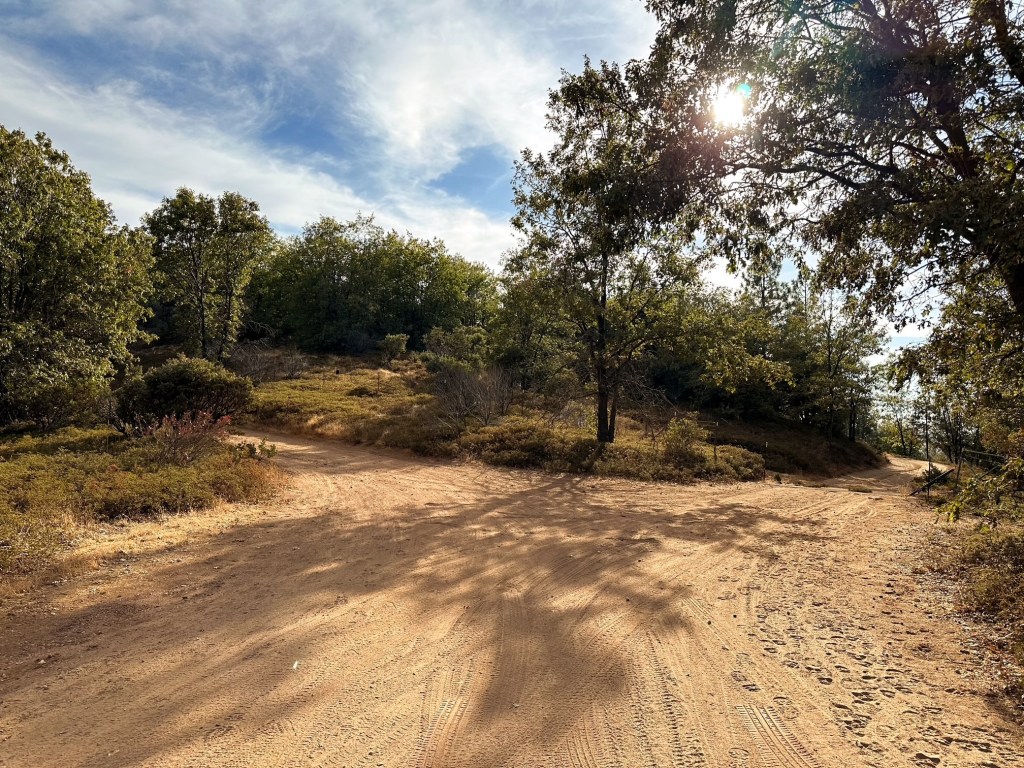
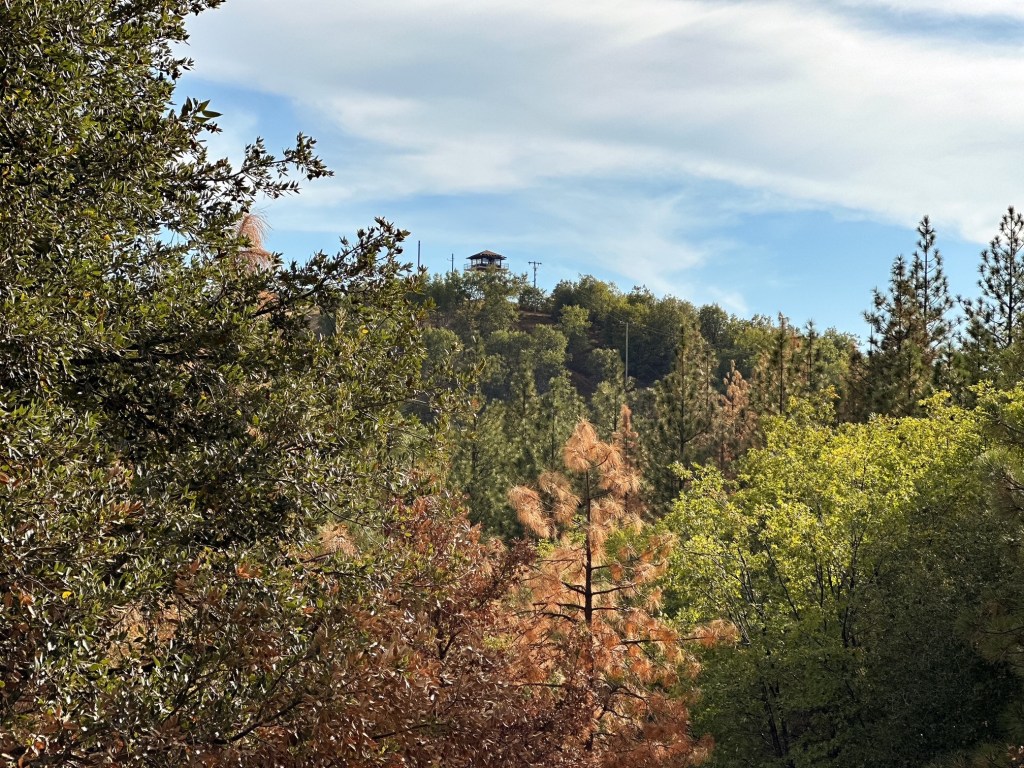
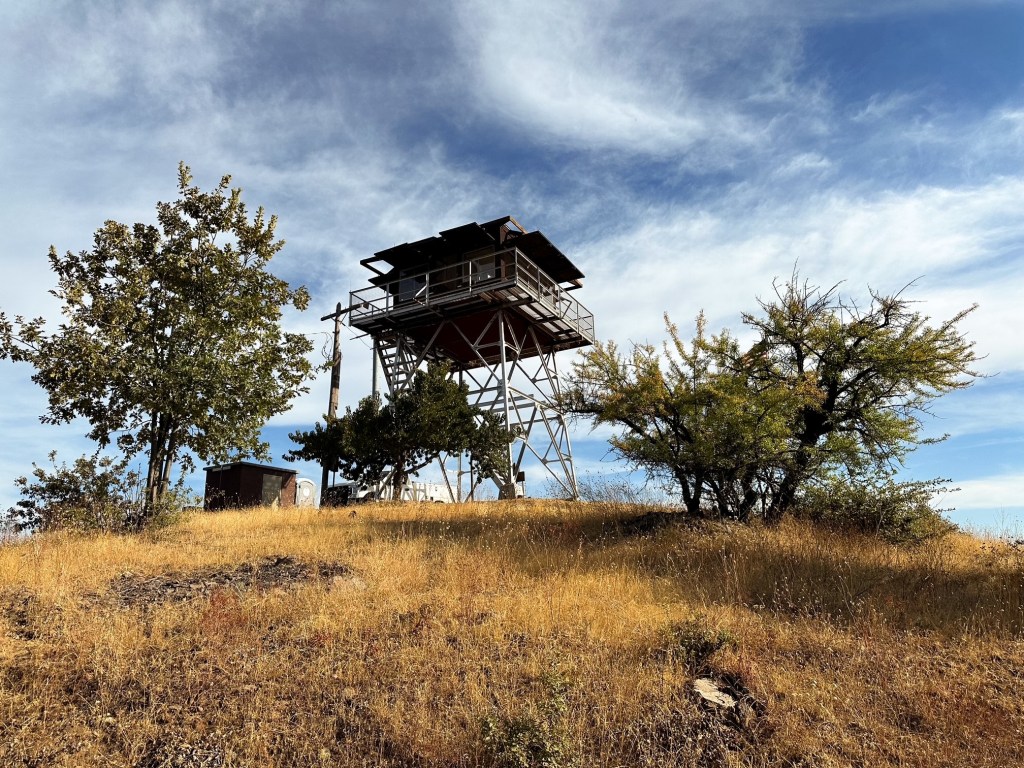
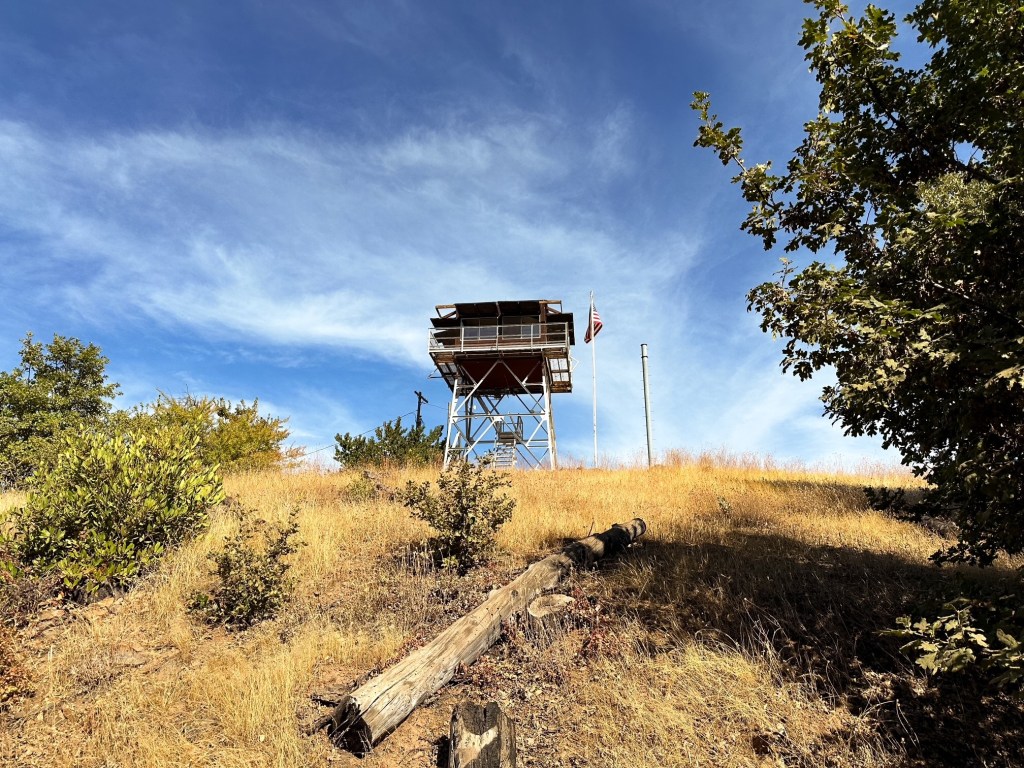
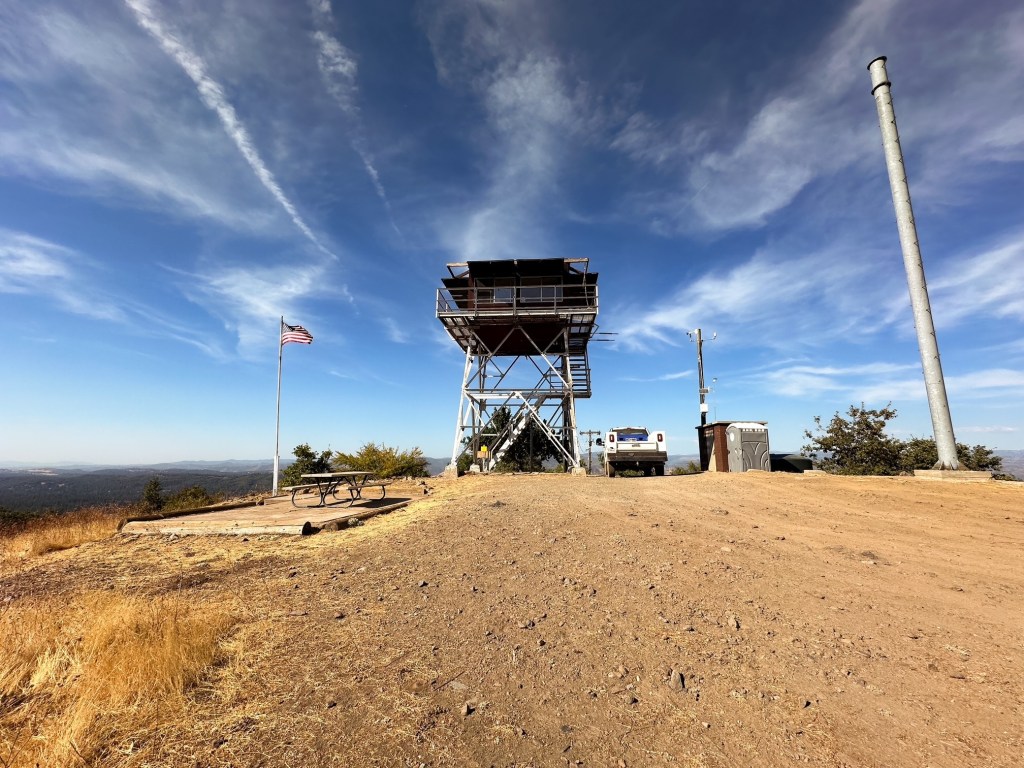
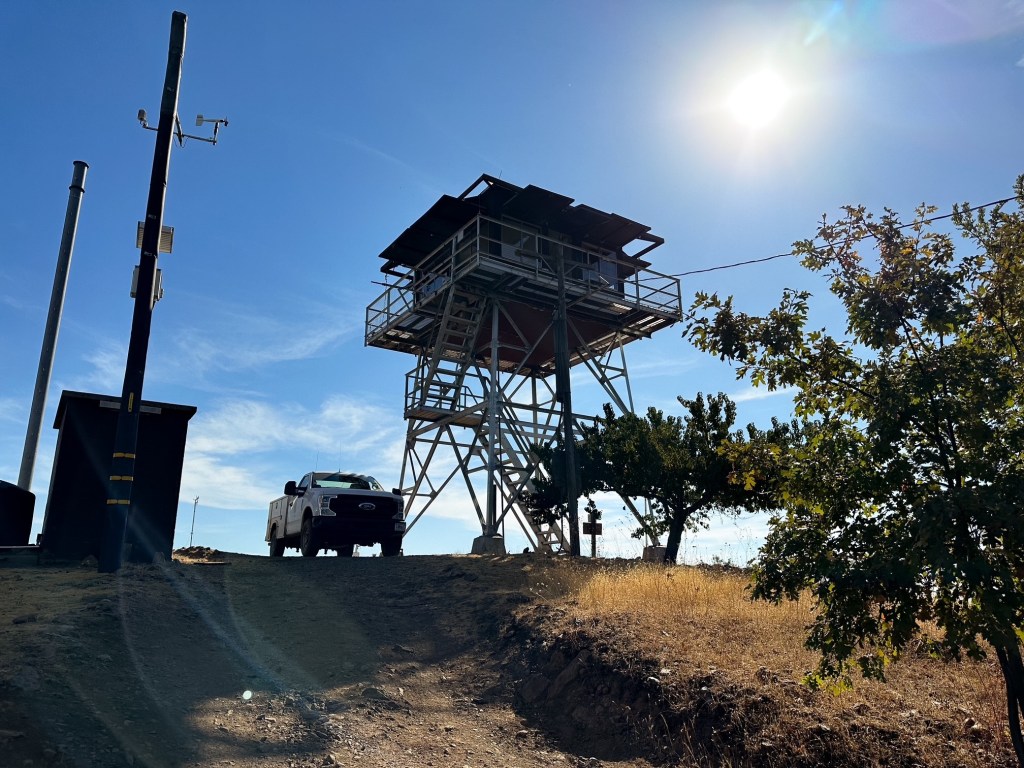
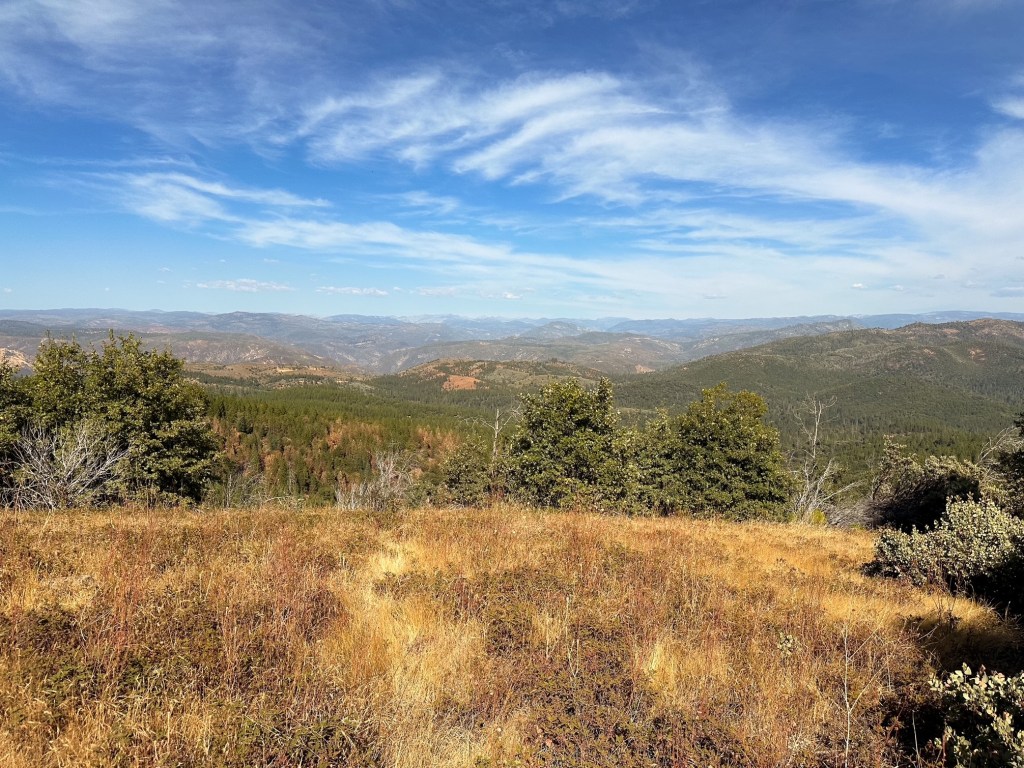
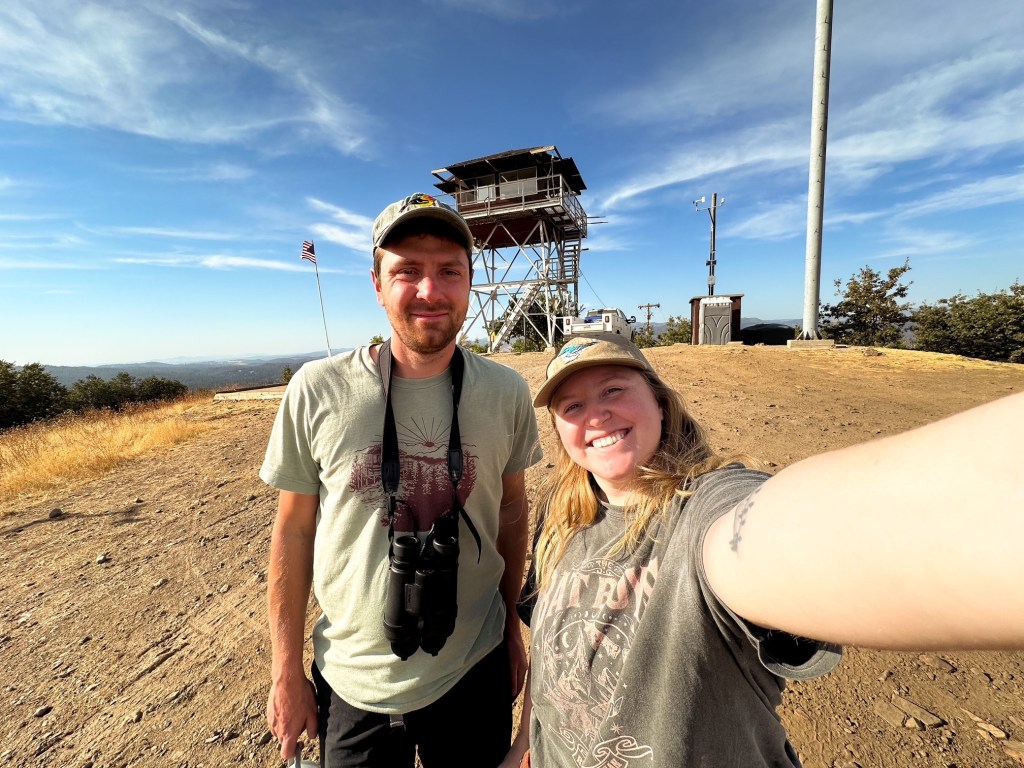
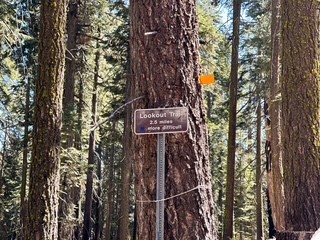
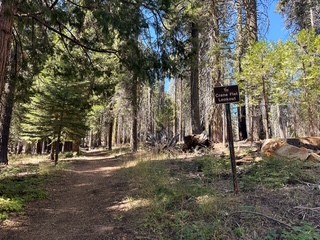
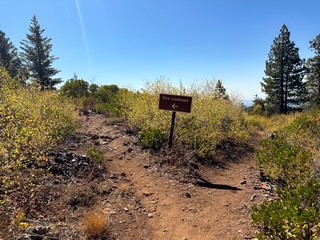
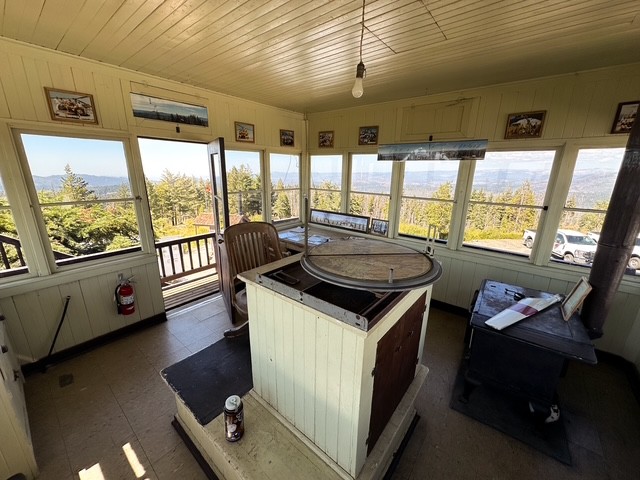
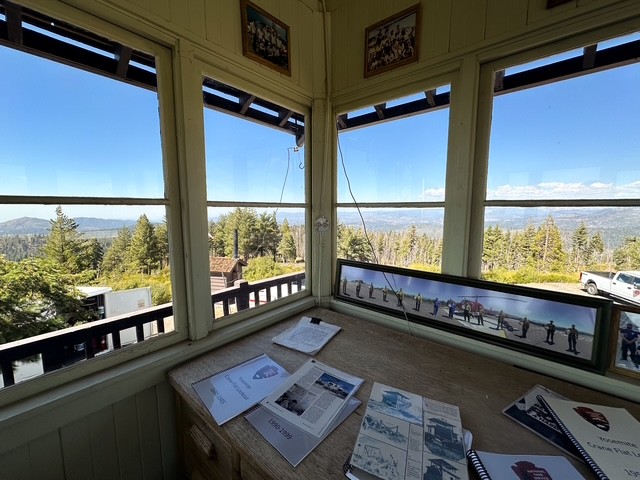
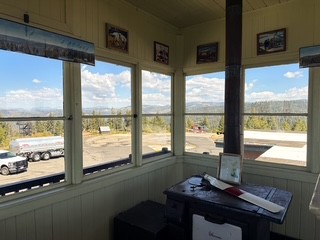
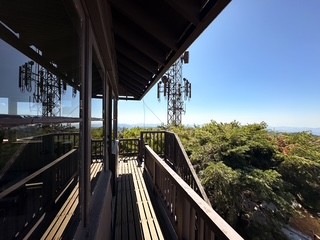
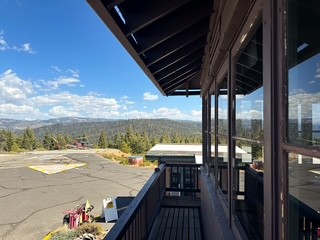
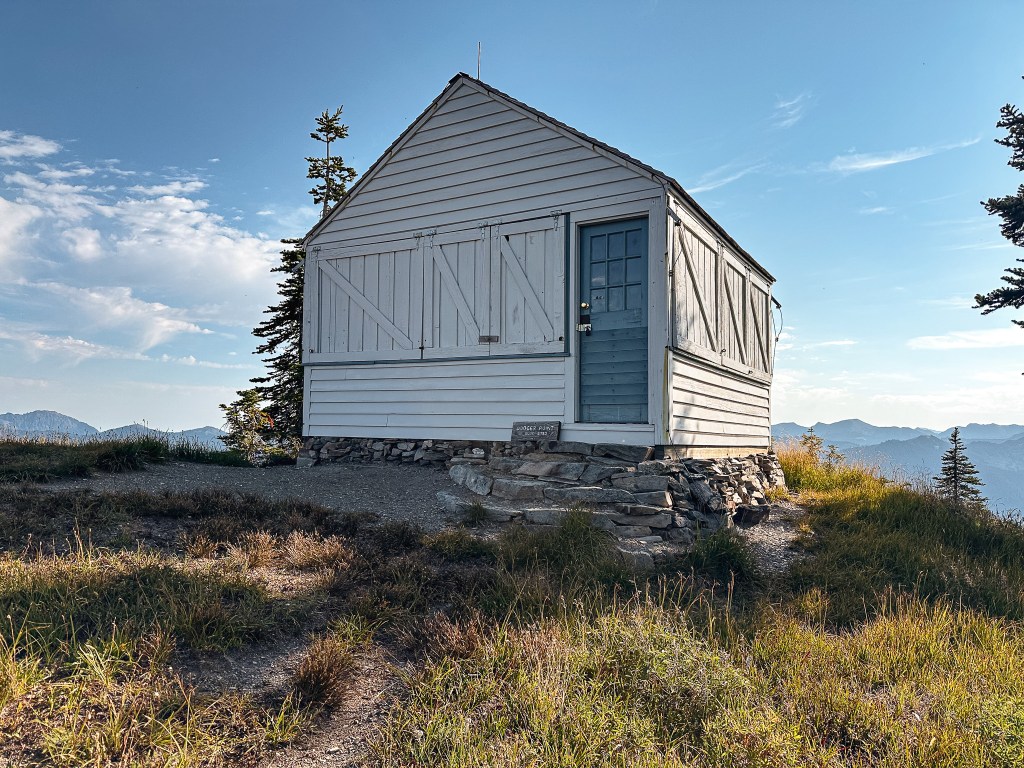
Once you have determined which route you want to take to reach Chetco Pass, the official hike to Pearsoll Peak begins. There are three trails that leave from Chetco Pass. The Kalmiopsis Rim Trail #1124 continues on both the left and right side of the pass, while the Slide Creek Trial #1102 continues straight (if you’re looking at it head on from the road). The hike to Pearsoll is accessed from the right hand side of the trailhead and follows the old road to the official lookout trail. This is the only area with the wood fence cut out – I’m not sure if that was intentionally done or if someone personally cut it to drive farther up the road. The old road continues for a mile before you reach a fork with your first view of Pearsoll Peak. The Kalmiopsis Rim Trail continues straight, but you will want to take the road heading left. This road continues for another mile before ending at the remains of the old Pearsoll Mine and narrowing into the official Pearsoll Peak Trail #1125. The Pearsoll Peak Trail climbs steeply to the back side of the ridge for half of a mile to reach the summit. The map shows that this trail can be accessed from the continuation of the Kalmiopsis Rim Trail on the other side as well, but we did not scope out that route (Aka if you continued straight at the aforementioned junction). The tread along the trail is in mostly good condition given that it is built into the rock, there is only one section that looks like it could erode over time near the main switchback given the looser conditions. We enjoyed our time on the summit with a leisurely lunch before heading back down. Breaking up the distance allowed for us to have more time to enjoy our surroundings.
Although we decided to turn this into a 4-day backpacking trip, you could easily modify it into a shorter trip or a day hike if you’re into hardier hikes. The first half of our trip was sunny conditions and warm temps, but the second half and hike out was in the rain. This lead us to a couple of discoveries. The first was that our tent is probably well overdue for a re-water proofing. The second was that the Chetco Pass road becomes very soft under wet conditions – I wouldn’t recommend trying to drive it if there is any rain in the forecast. Even our feet were sinking in the road in certain areas which only tells me that a car would do the same. Anyway, I’m sure this is way more information than what you need or even want but if you made it this far congrats.
Chetco Pass to Pearsoll Peak is ~ 5.4 miles RT, 1,400′ of elevation gain
Kalmiopsis Rim TH to Pearsoll Peak is ~ 14.4 miles RT, 2,900′ of elevation gain
McCaleb Ranch TH to Pearsoll Peak is ~ 15 miles RT, 4,050′ of elevation gain
History.
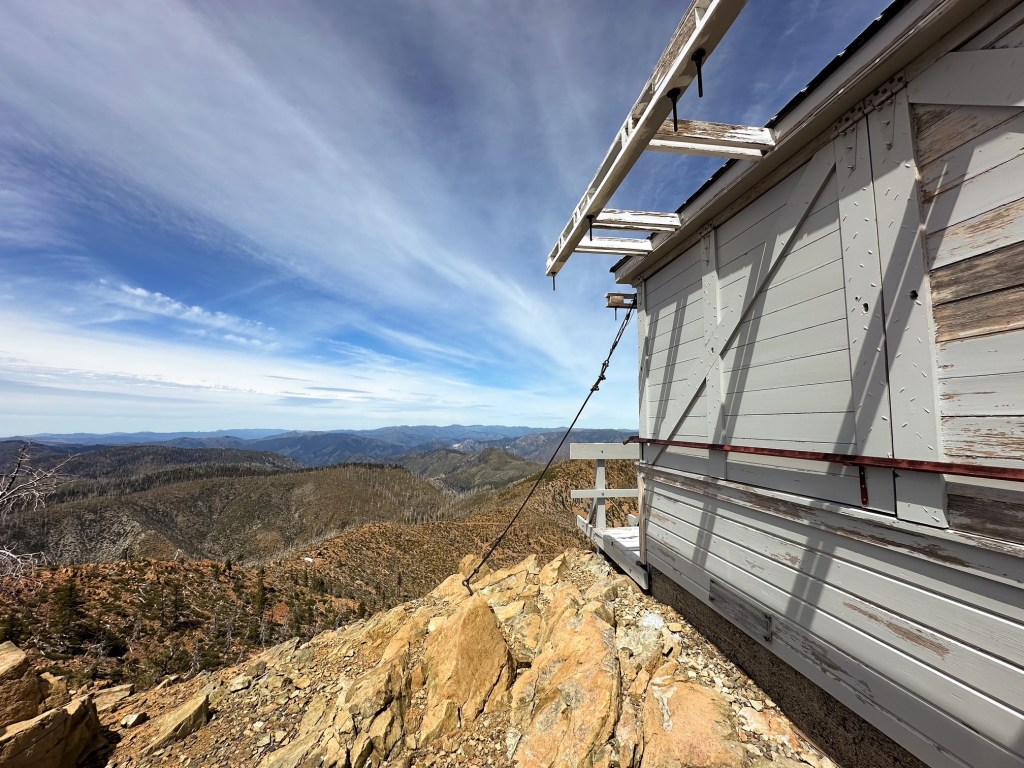
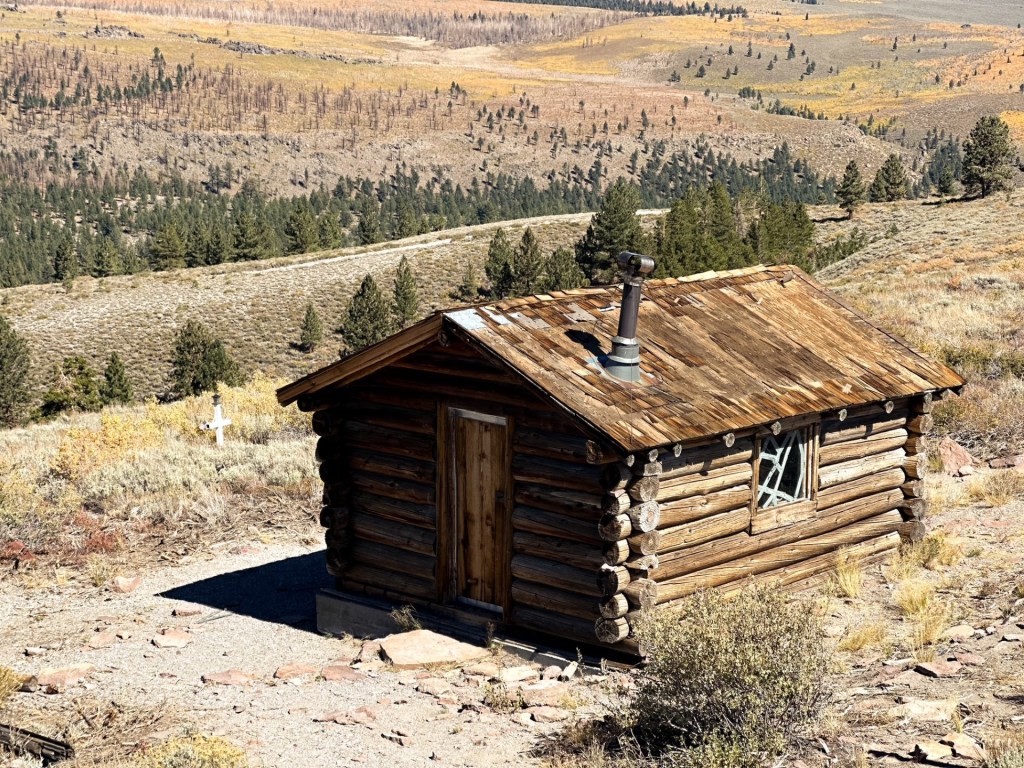
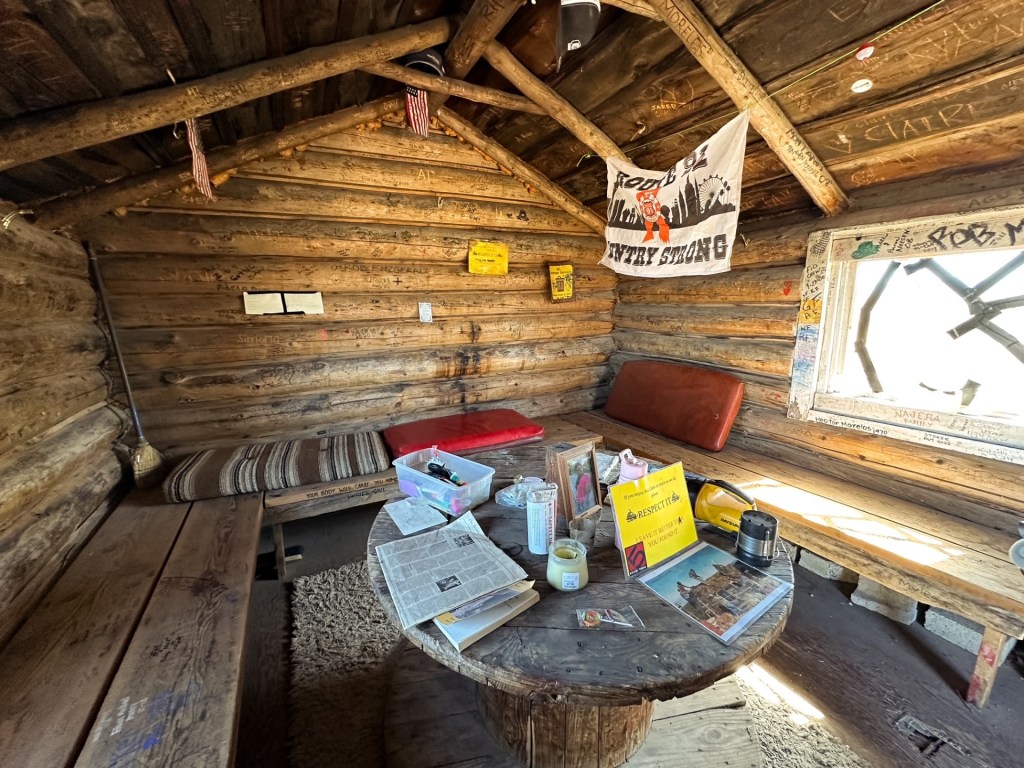
The first structure built on Pearsoll Peak was completed in 1920 as a D-6 Cupola style cabin. There is evidence to suggest this was utilized as a fire detection camp as early as 1914 when a telephone line was constructed. The lookout was replaced in 1954 by the current L-4 ground cabin. This was actively staffed into the early 1970s before being abandoned and falling into a state of disrepair. In the early 1990s, the Sand Mountain Society partnered with the Illinois Ranger District to help to restore the lookout. Thanks to their efforts it still stands today. It is unclear if the Sand Mountain Society still plays a part in maintaining this structure (their website has some glitches and is under construction last I checked). There is a new standing platform and signs of recent paint on some of the shutters. I think most of the maintenance and work is now captained by the Siskiyou Mountain Club. They play a major role in keeping the Kalmiopsis Wilderness accessible for hikers and backpackers through their stewardship programs.
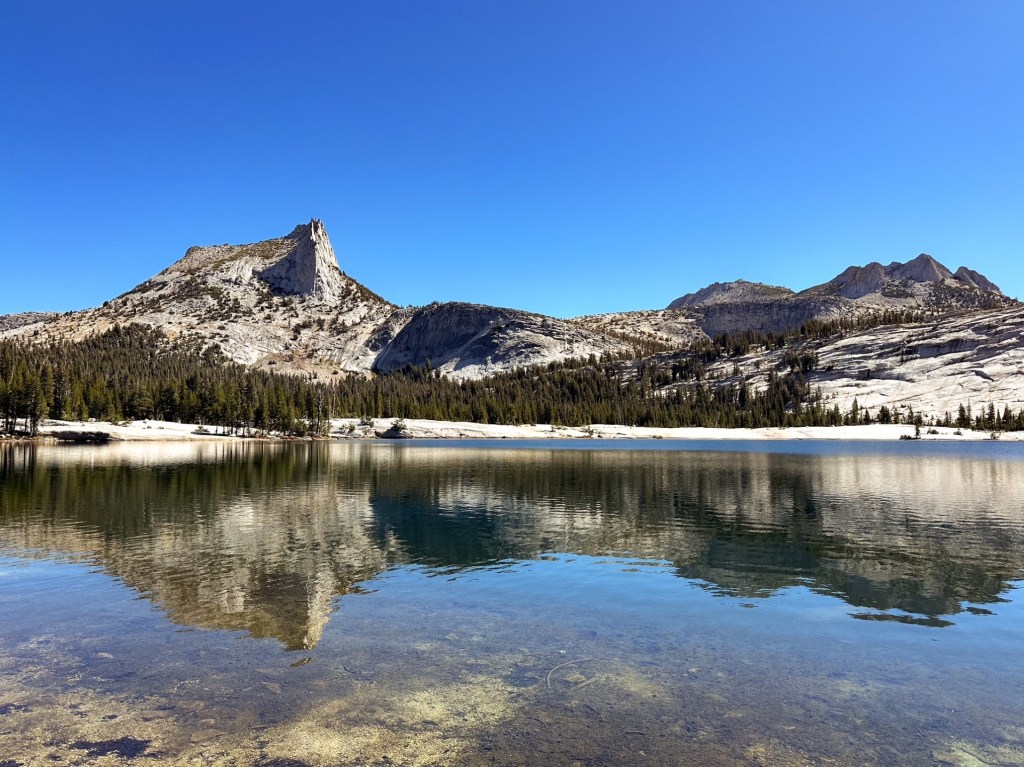
I felt we were able to get a good overview of Yosemite National Park by spreading out our hikes in each area. We spent our fifth day in the main valley collecting souvenirs and our sixth in Tuolumne Meadows hiking to Cathedral Lakes. We really only missed the most southern section with the Mariposa Grove. Though I hope the next time we get to visit the park will be via backpacking in their expansive backcountry. After our long travel day to the park at the start of our trip, I was happy we opted to take two nights to head back to Oregon. This broke up the drive and allotted us to make some exploratory stops along the way. I thought about trying to squeeze another short hike in before exiting Yosemite, but we both agreed we needed to make progress on our drive time. Especially since we opted to take the scenic route back via HWY-395.
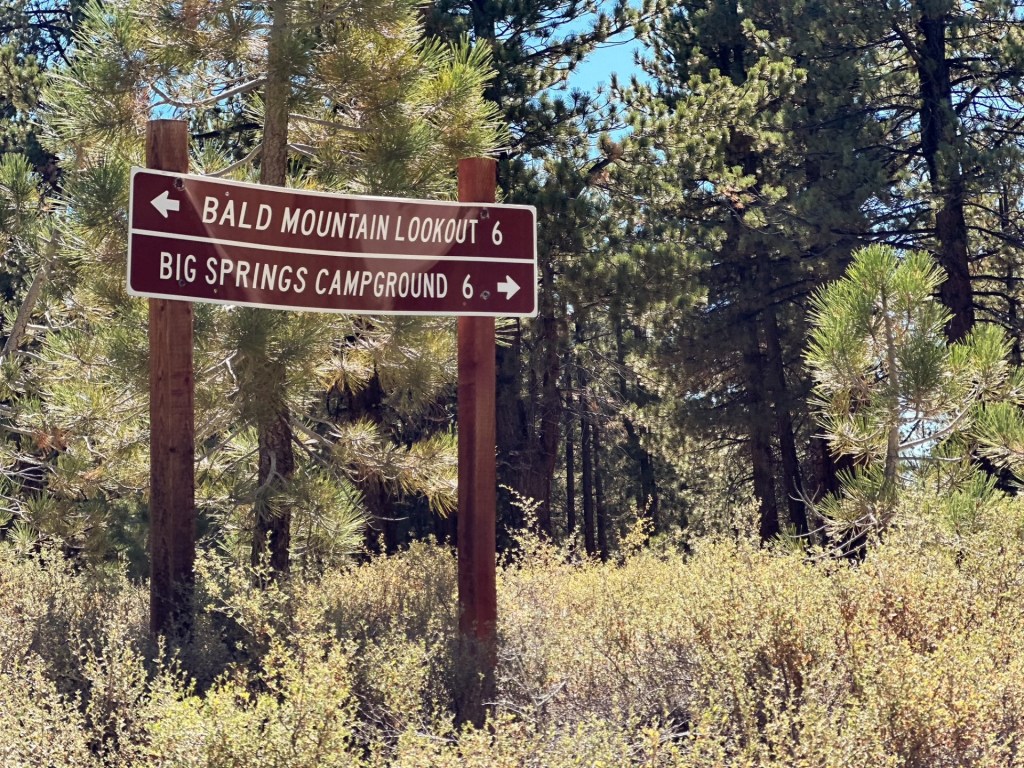
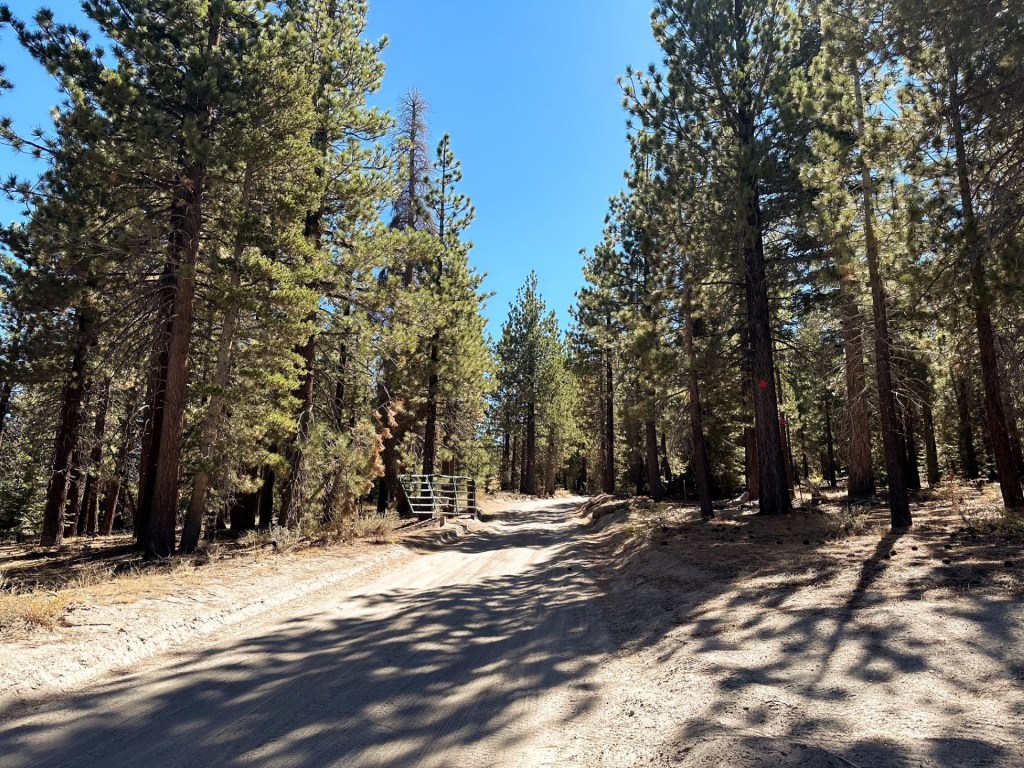
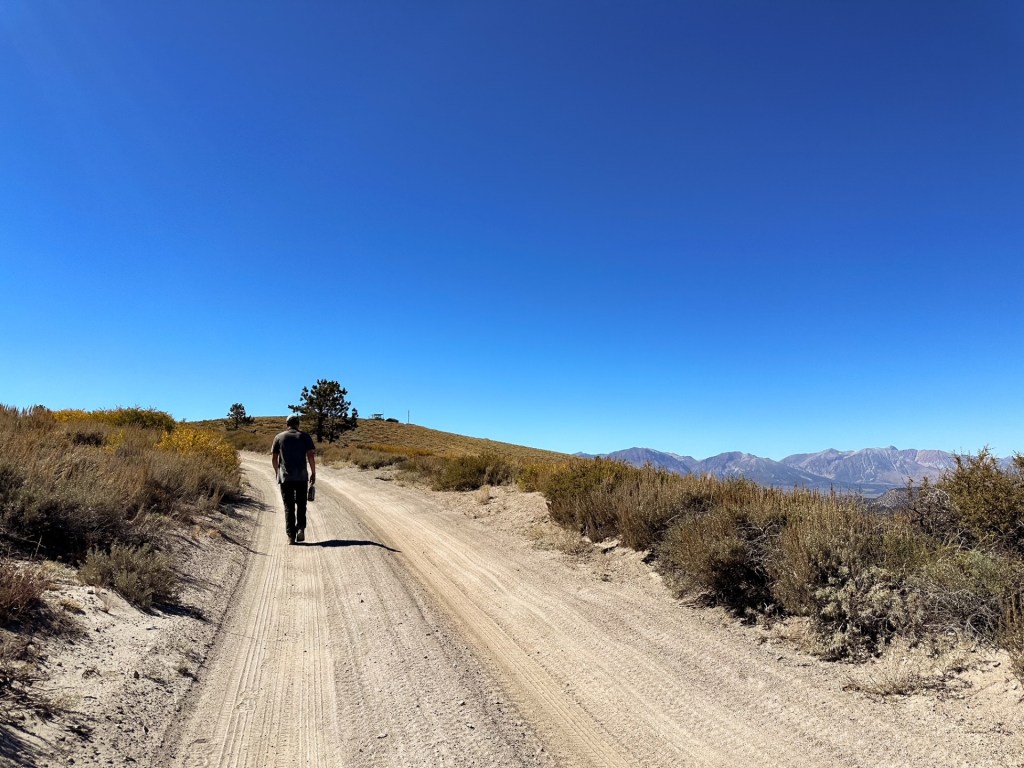
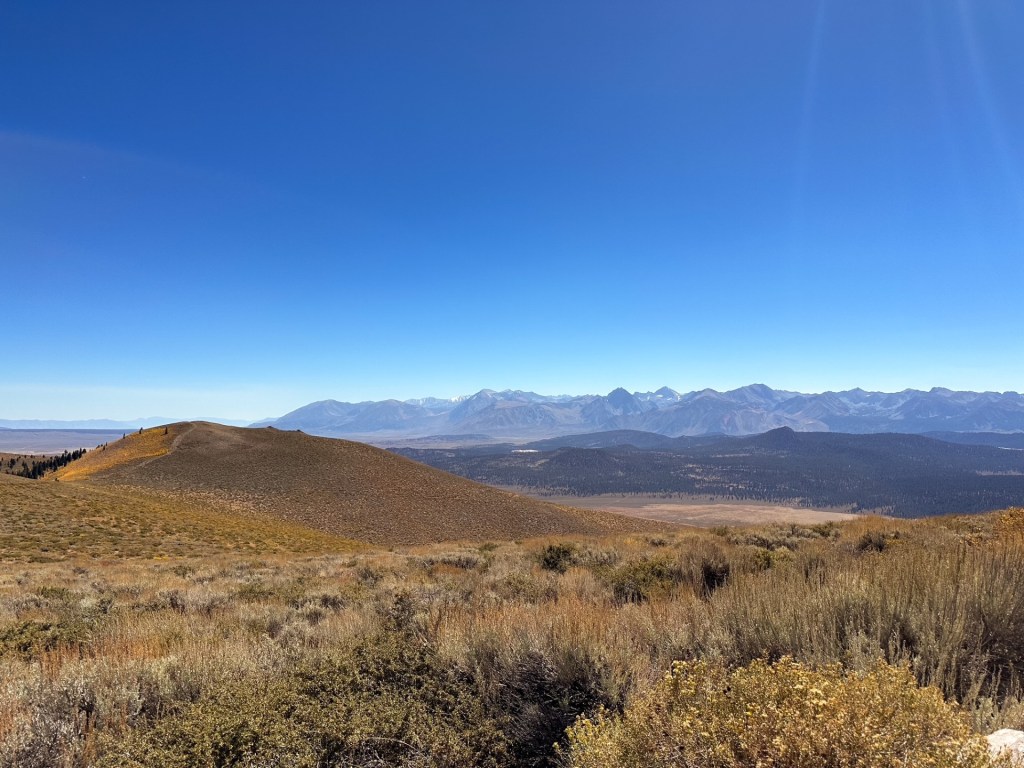
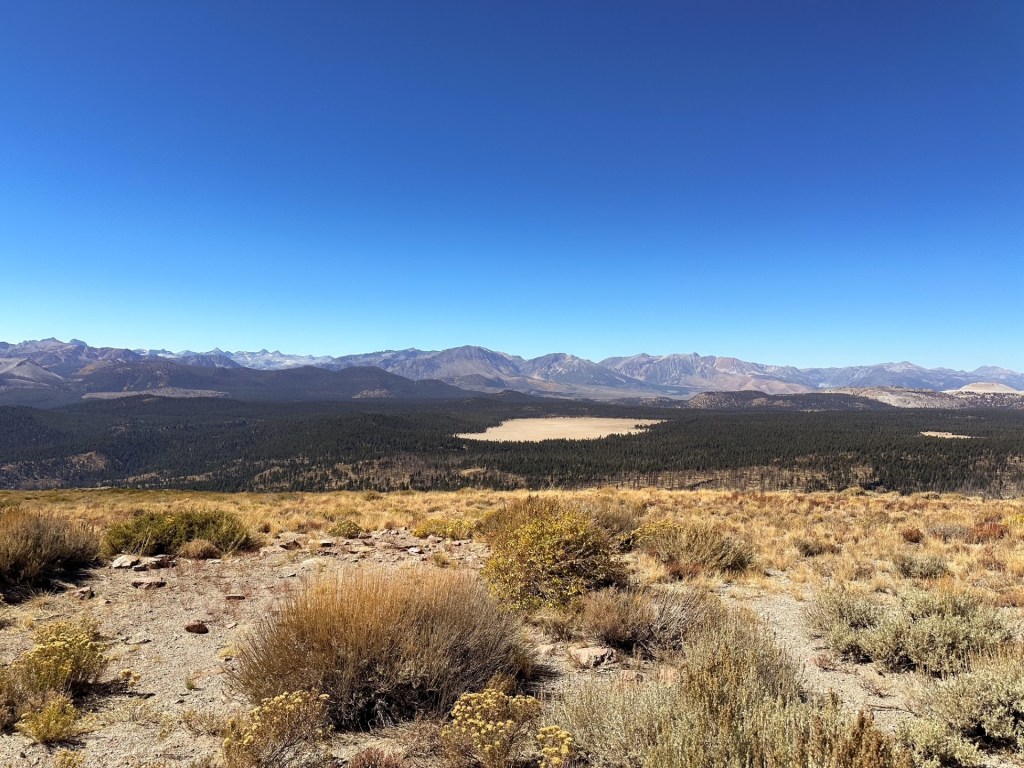
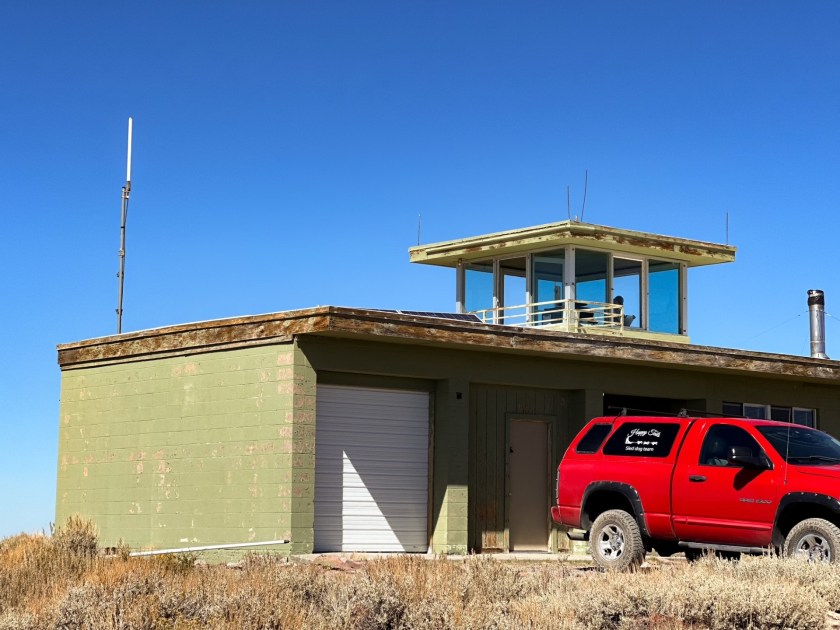
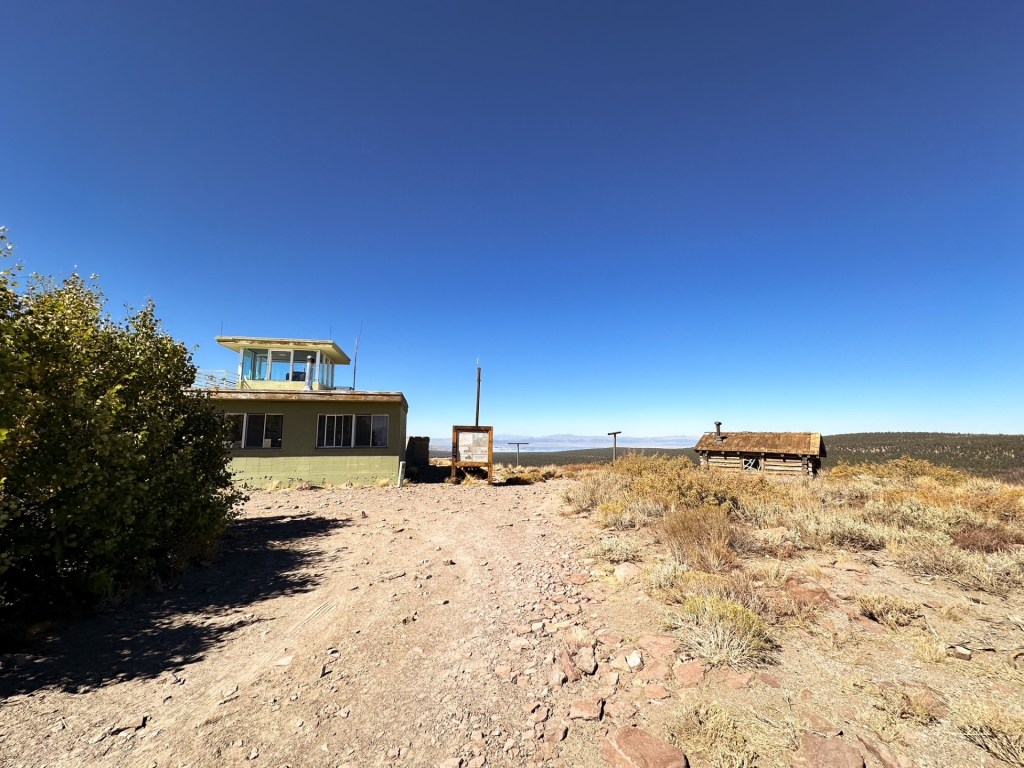
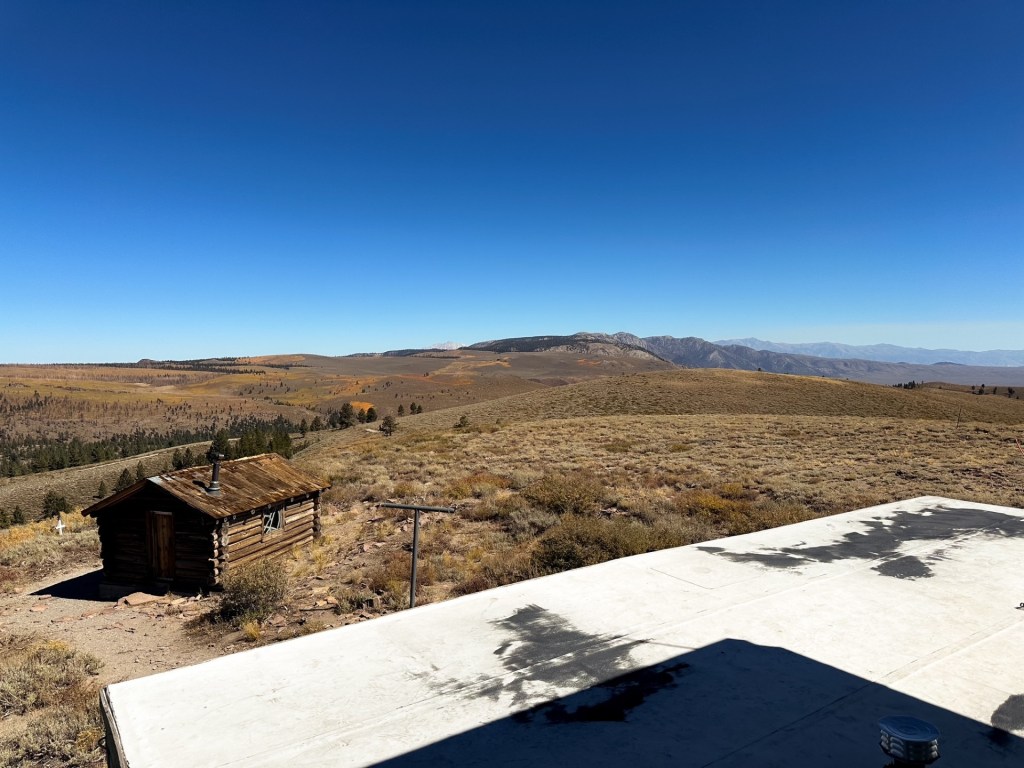
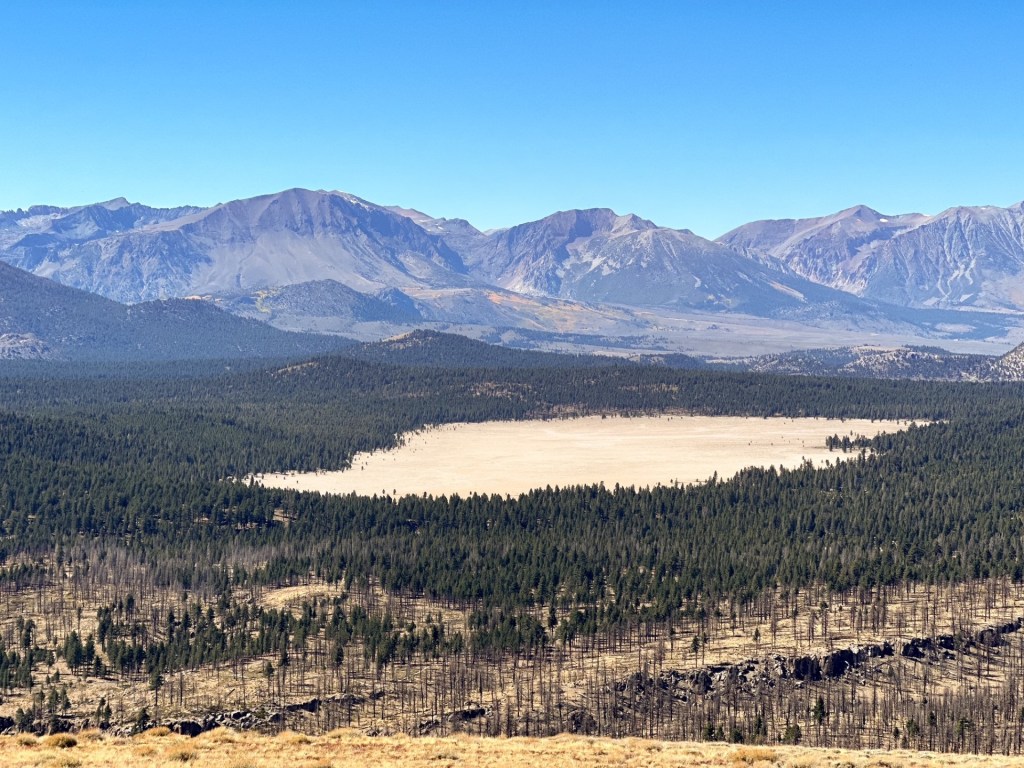
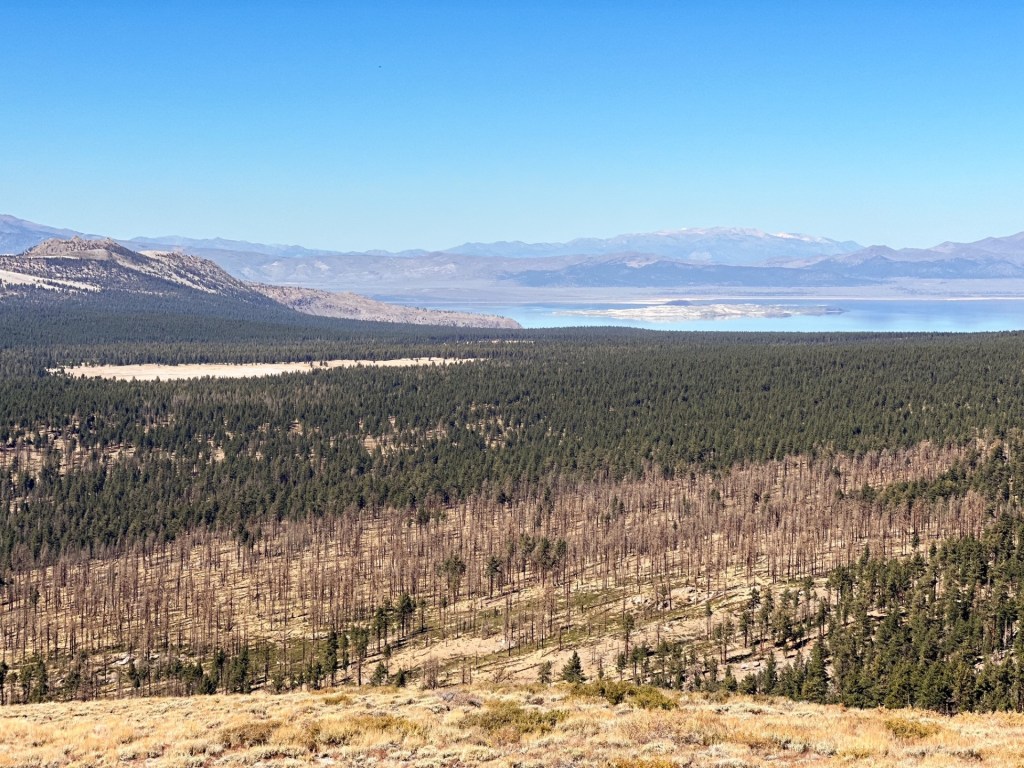
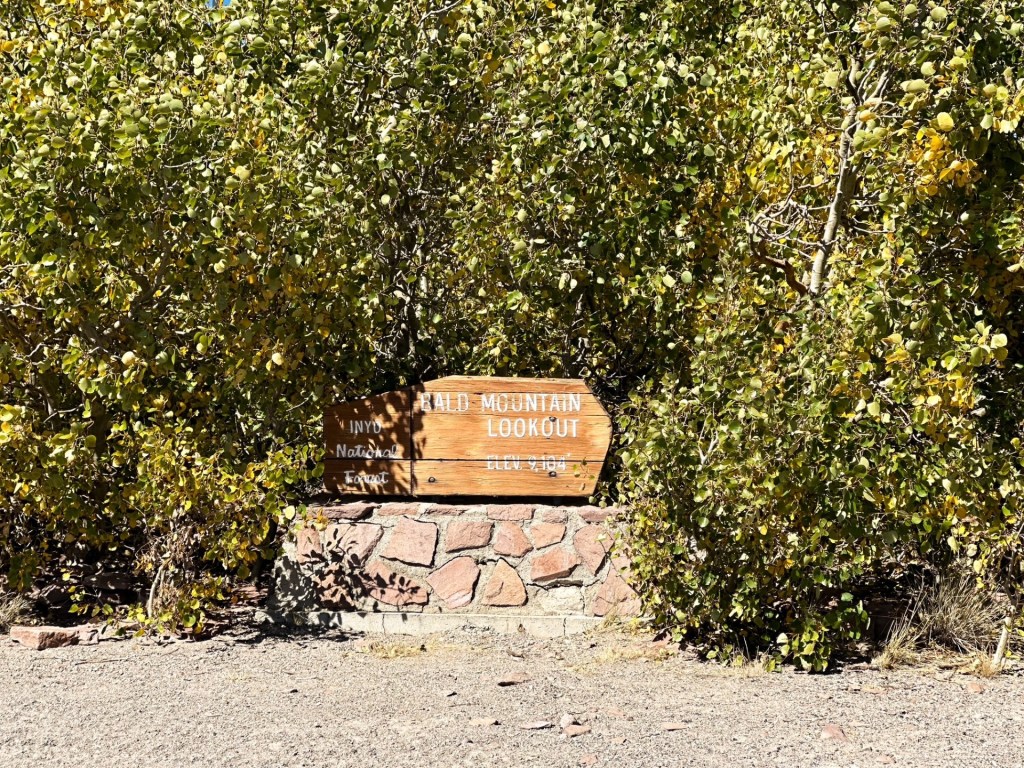
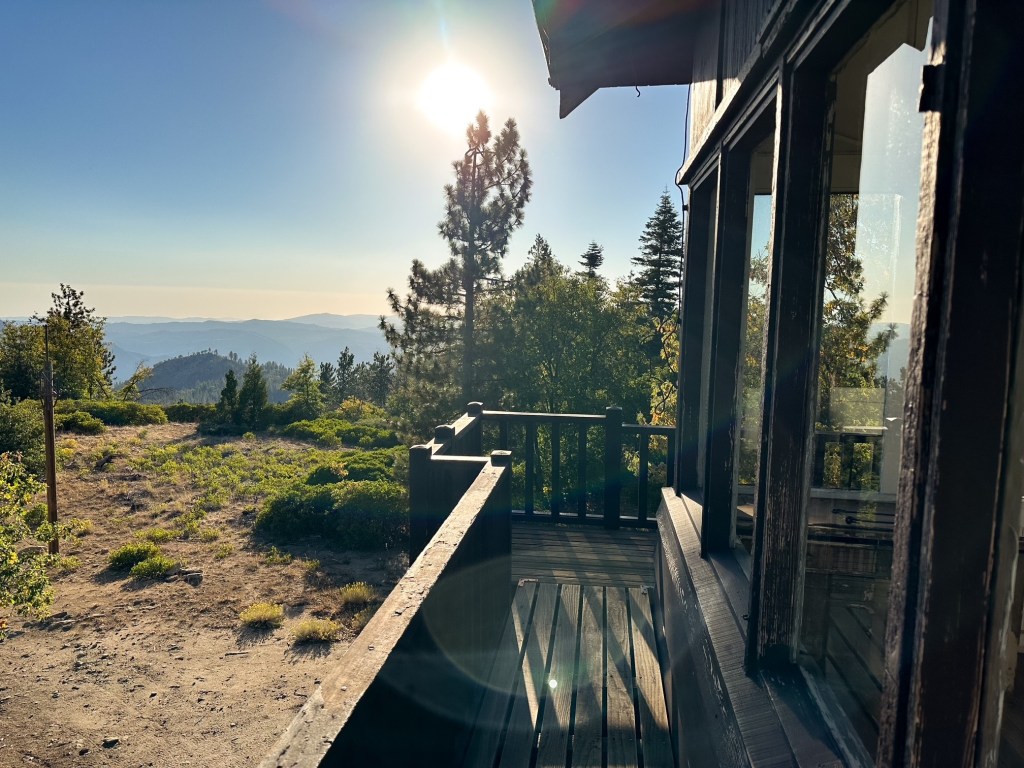
Bald Mountain lookout is just south of where HWY-120 meets HWY-395, or where the eastern exit to Yosemite National Park spits you out. This is a unique stand alone mountain that rises up out of the valley to offer 365 views of the surrounding area. Though we passed on any additional hikes, we figured it made sense to make a small detour here before heading north. Especially since we do not make it down to this area often and this fire lookout stands out by itself from others. Heading south on HWY-395, we kept an eye out for the left turn since we would have to cross traffic and were not sure if it’d be obvious. The road was labeled as 1S05 on the map, but was Bald Mountain Road from the highway and on GPS. There was thankfully a turn lane to avoid blocking any traffic and allowed us to wait for a safe crossing. From there the road turns to a mix of gravel and sand – I was a bit worried about how our car would handle the sand. We followed the main use road and any signs that pointed us towards Bald Mountain. It felt pretty straight forward to us but there are junctions were one could get turned around if not careful.
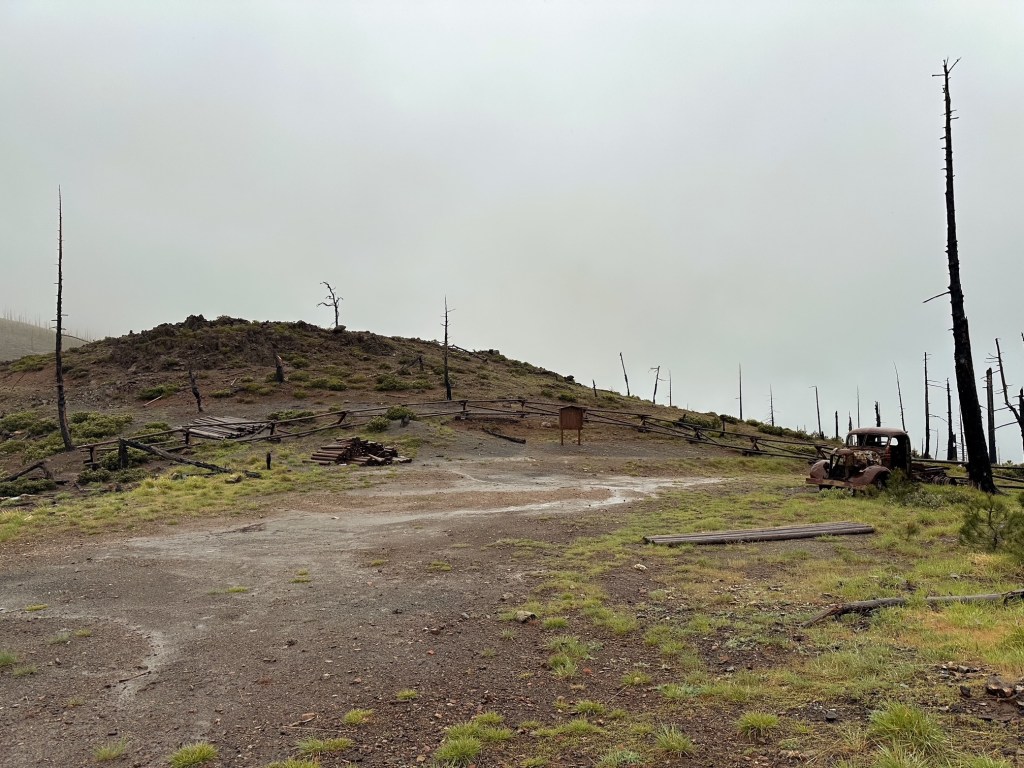
The scene of the crime
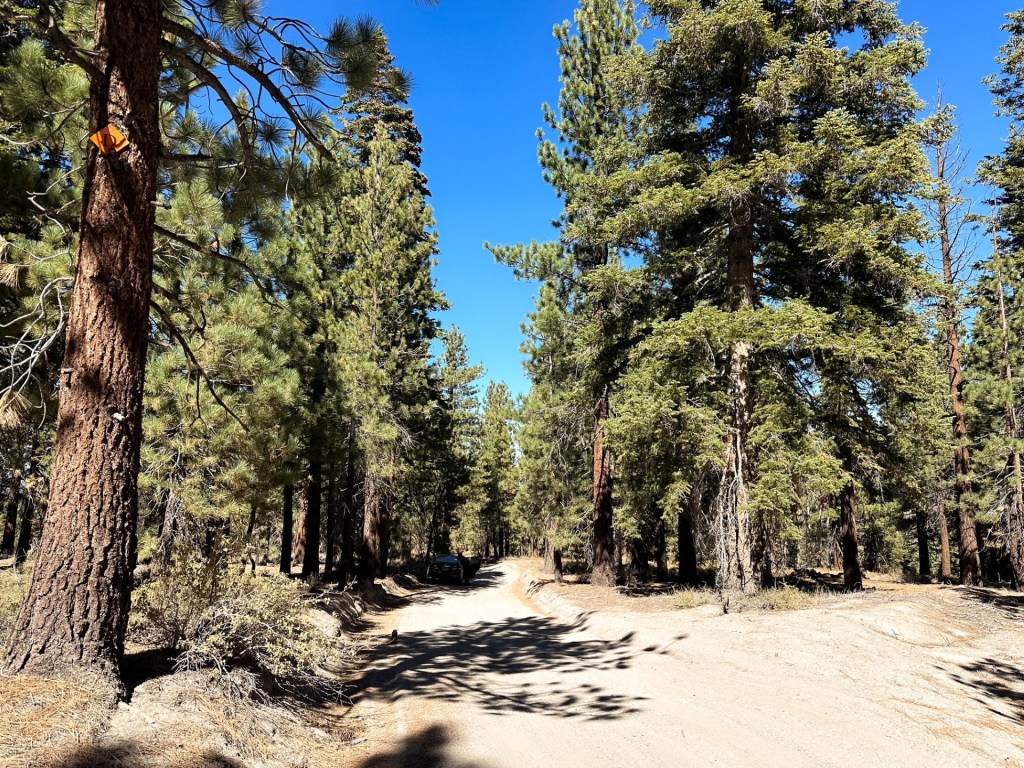
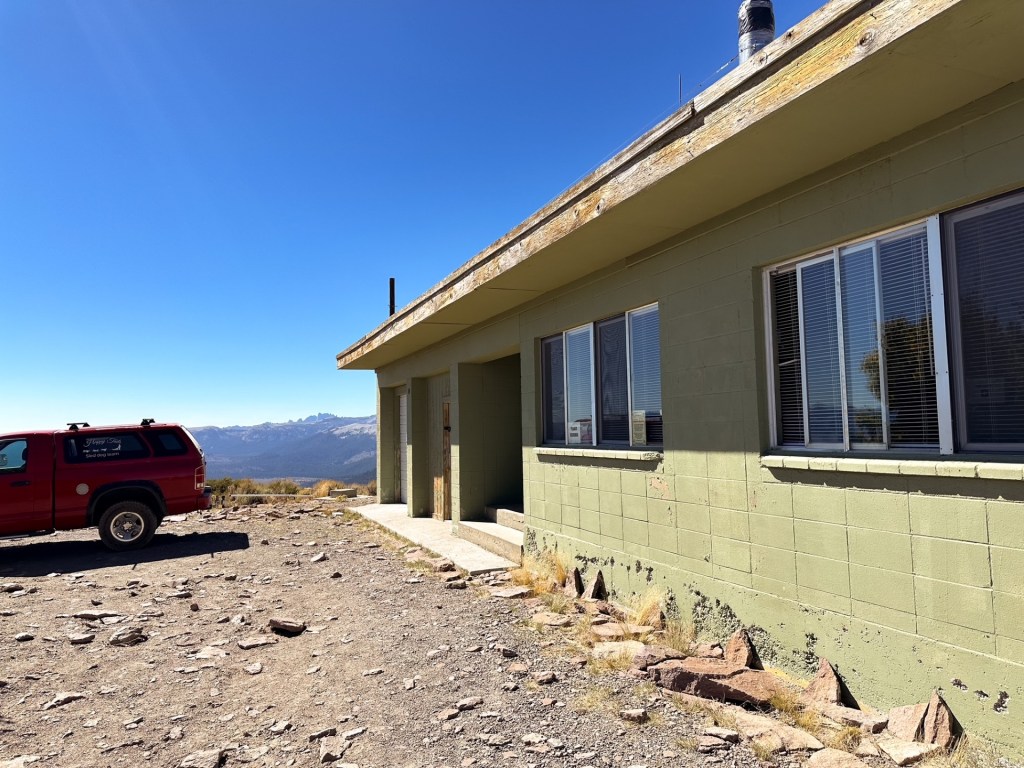
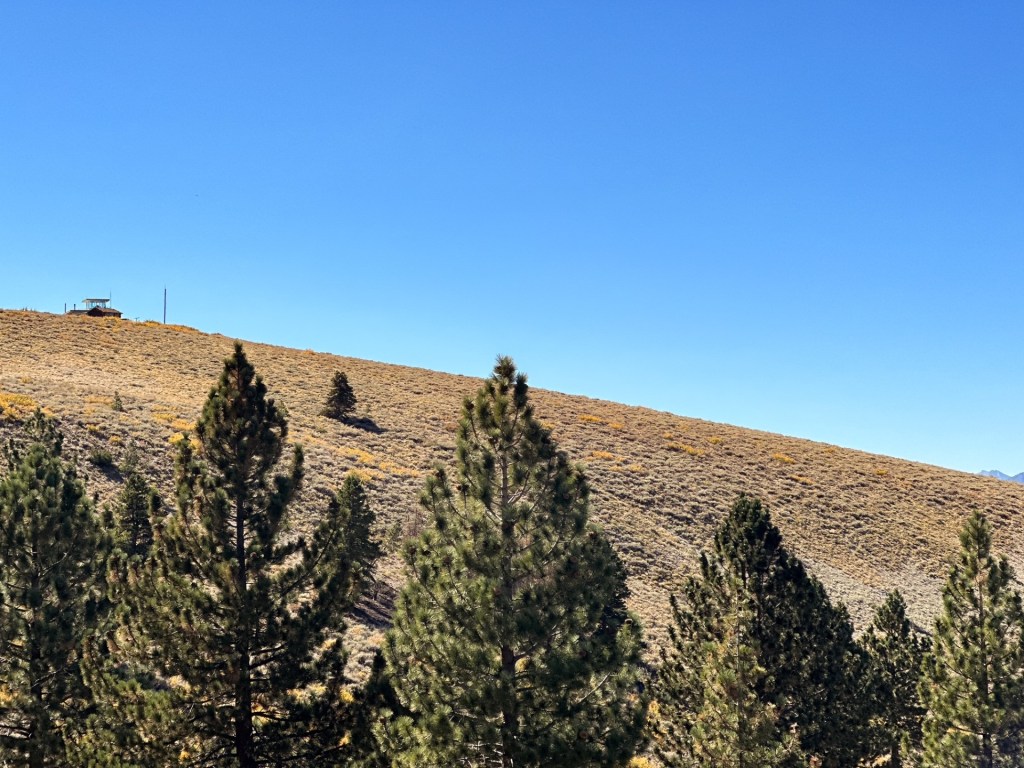
The road was passible to our car up until we reached the gate. There were some squirrely sections in the sand prior, but if you keep your momentum and don’t get too close to the soft shoulders you will be fine. I’d recommend parking and walking from the gate if you are in a low clearance vehicle. Garnet was driving this time and wanted to see if we could drive the remaining distance. This would end up being one of our bigger mistakes visiting a fire lookout. The road started out fine, but it is rocky and narrow. It does not offer room to pass if you meet another vehicle except in an area right before the summit. Unfortunately before we reached that larger pull out the road got worse and I wanted to bail out. We probably would have been fine if we had committed to making it at this point, but instead we tried to turn around to avoid backing all the way down. This area was rockier than the rest of our drive, but it was still a mix of soft sand. Given those conditions, I’m sure it’s no surprise to read that we got ourselves stuck. Not majorly but enough to be concerned about how we were going to get ourselves out. Our wheels were having a hard time finding purchase and we tried adding rocks under the tires to help build traction without digging ourselves deeper. There was potential for high-lining our car or at least cause significant damage to the undercarriage. Eventually someone was driving down from visiting the summit and they stopped to help. They were able to assist Garnet in giving us a good push from the back, while directing us in the front areas we couldn’t see by ourselves. We were extremely thankful and embarrassed at the same time. Once we were back on the road we had to back down all the way to the gate to let them pass. We parked in a pull out just before the gate and walked the rest of the road, as we should have from the start.
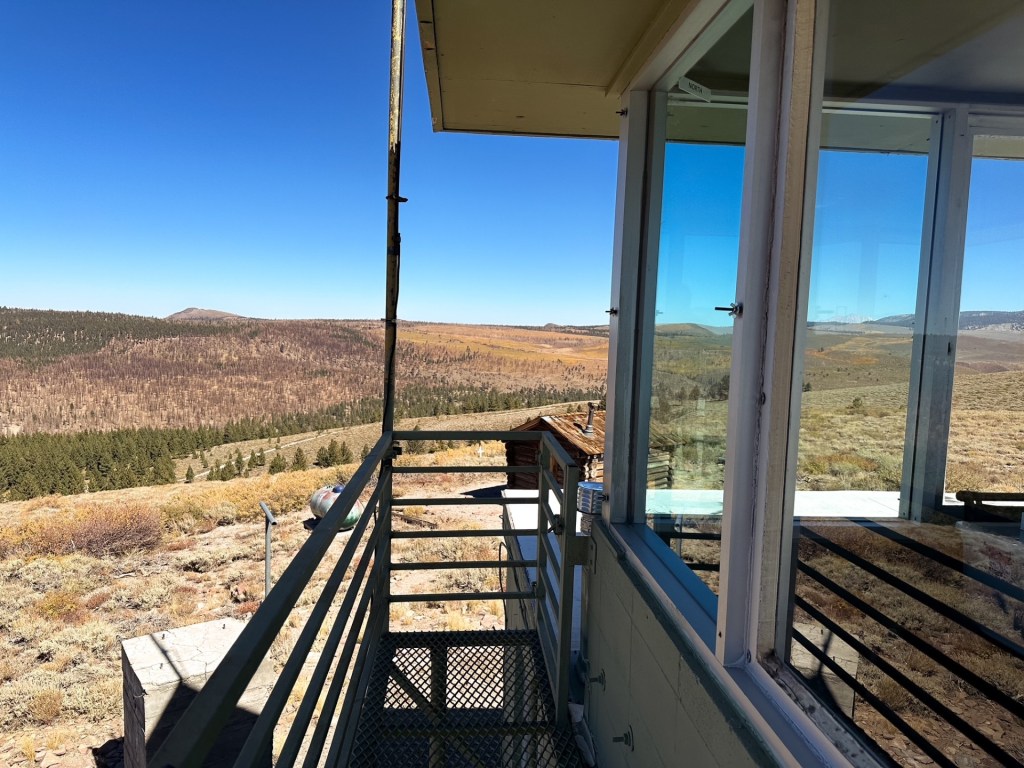
It was only a 0.8 mile walk from the gate to the summit with 382′ of elevation gain. Strava calculated the total round trip distance at 1.77 miles, but the additional was due to walking around the lookout. We were greeted by a friendly attendant named Karen that invited us up to take a look around. She told us she was a volunteer from the San Bernadino area and that this lookout was staffed on a rotating basis of volunteers. It was cool to see a new program in action from the efforts of the FFLA to help keep this lookout in service. Karen used to work on Keller Peak LO and was the first woman to repel down El Capitan (so cool!). She told us how we just missed some other visitors that were worried about meeting cars on the road during their drive down and that she had seen a car heading up at the same time but was unsure what happened. We were too embarrassed to tell her that was us, or that we got stuck, or that they had to help us. I felt even worse to hear that we became their worst fear. There was not much we could do about it now except look back and laugh.
History.
Bald Mountain is one of only two fire lookouts still standing in the south-eastern Sierra and the only one left in operation on the Inyo National Forest. The original structure was built in 1943 by the Civilian Public Service (an agency that followed the CCC and was staffed by conscientious objectors of WWII). There is still a log cabin onsite that is believed to be part of the original buildings from this era and is still used as a warming hut for skiers in the winter. In 1963, the current 16′ x 40′ concrete block lookout with 10′ x 10′ steel cab was built. This unique structure includes living quarters, two garages, and a storage room. It was actively staffed by the Forest Service into the 1980s. It was not until recently, in 2024, that it was brought back into service via a volunteer partnership between the FFLA and the Mono Lake Ranger District.
Our fourth day in the park was spent exploring off the Glacier Point road. We decided to do the hike from McGurk Meadows to Dewey Point in an attempt to avoid the crowds. This ended up being a great option as we arrived to an empty trailhead and only saw a handful of people on trail (most were on our way back to the car). It also offered lovely views through forest and meadows before opening up to the valley below. We spent a long lunch enjoying the view and even spotted one of the helicopters in action responding to a fire before hiking out (more than likely deployed from Crane Flat). Strava calculated this at 8.82 miles RT with 1,461′ of elevation gain. We still made the drive out to the end of the road afterwards to see the classic view points, but were quickly driven away by the crowds.
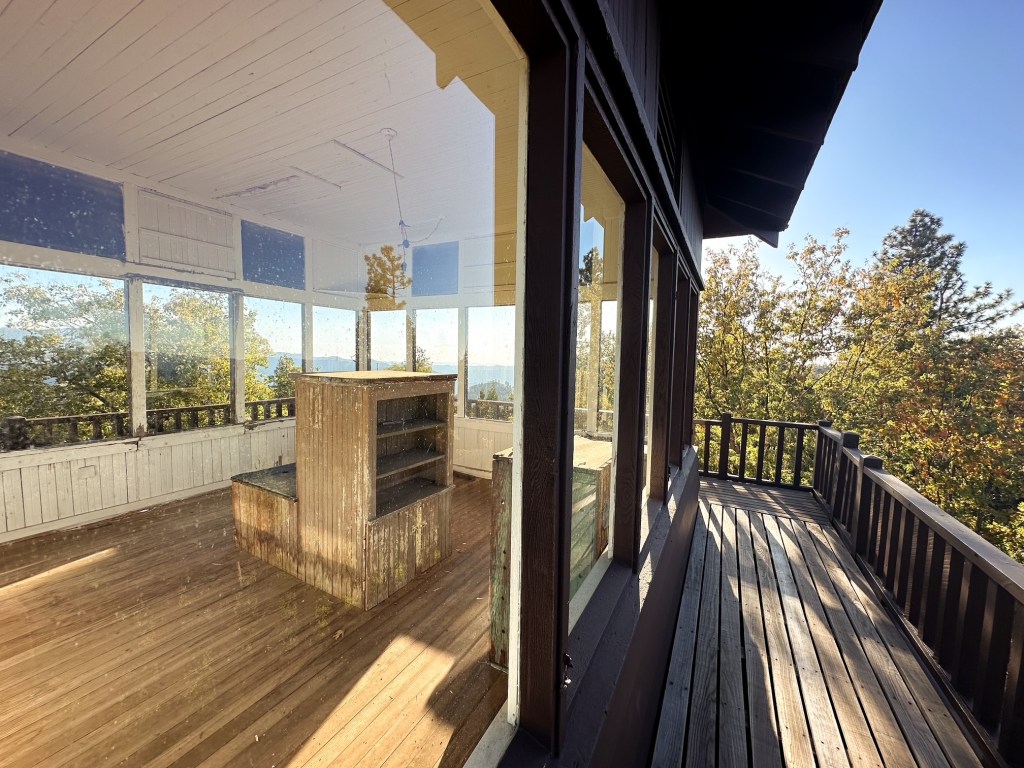
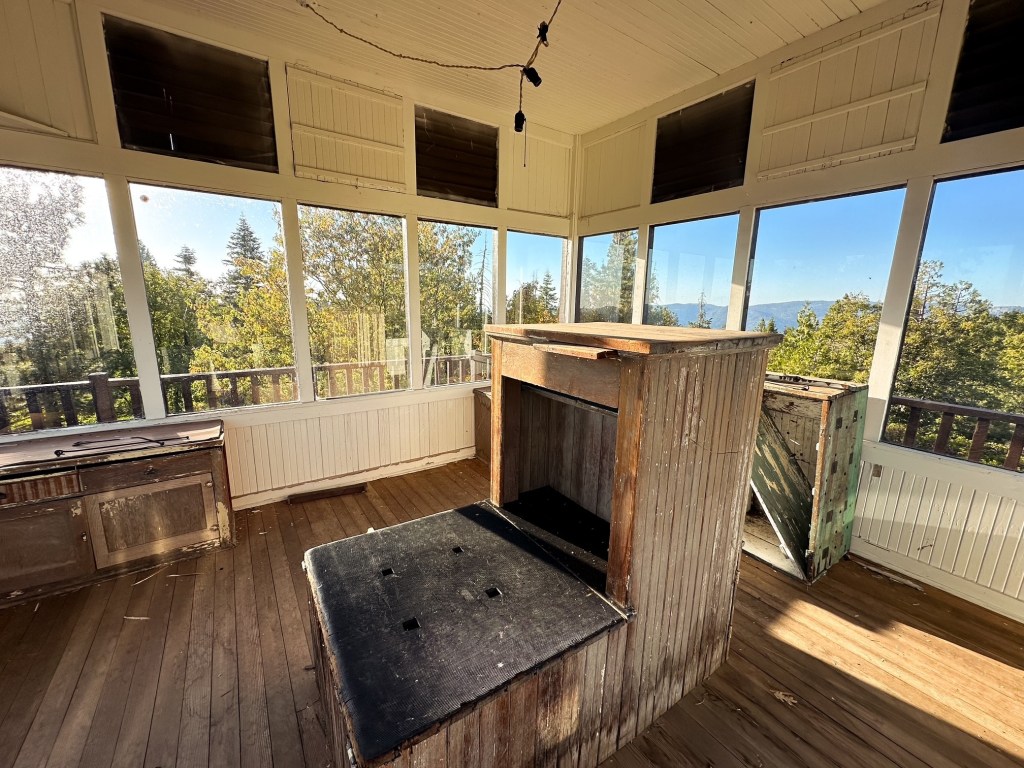
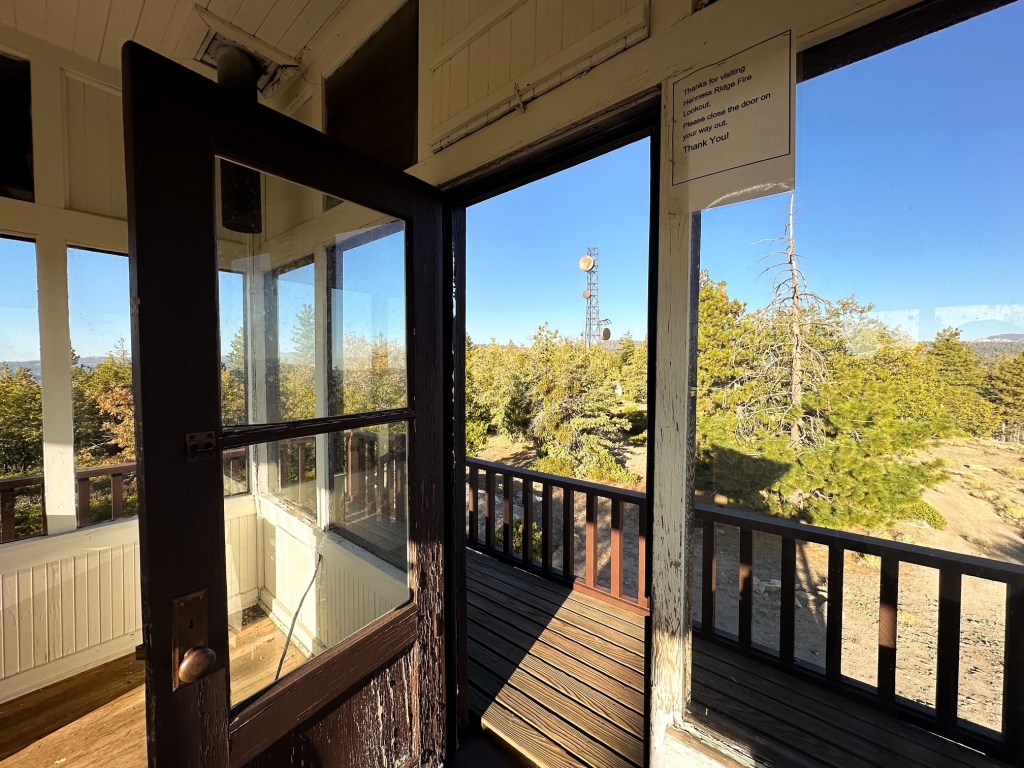
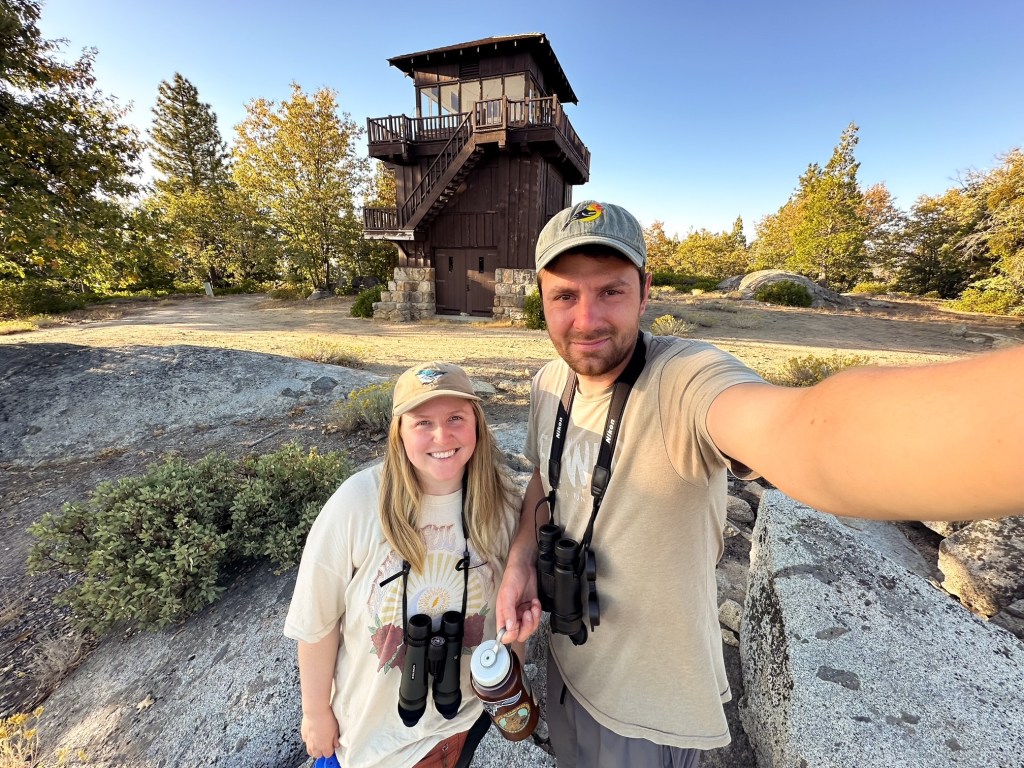
Our last stop of the day was Henness Ridge given its proximity to the Glacier Point road. Once we returned to Wawona Road we turned south instead of heading back the way we came from camp. The Henness Ridge road is the next turn off to the right after the Glacier Point road. This is a residential area now so be respectful of those that are here. Once on the Henness Ridge road you will follow it to the first fork where you will turn left onto Henness Ridge Circle. We made the mistake of bearing right at first and ended up deep in a neighborhood with no lookout in sight. Eventually we realized our mistake and back tracked to the correct road. From Henness Circle keep left at the T-junction and take another left until you reach the dead end of Azalea Lane. There is a gate at the end where the road turns to dirt. This is also a residential road, so make sure to park where you are not blocking a drive way or access to someones house. It felt like an after thought and that we should not be there, but the area behind the gate is technically a part of the park and the Henness Ridge lookout is technically a standing exhibit for those to visit.
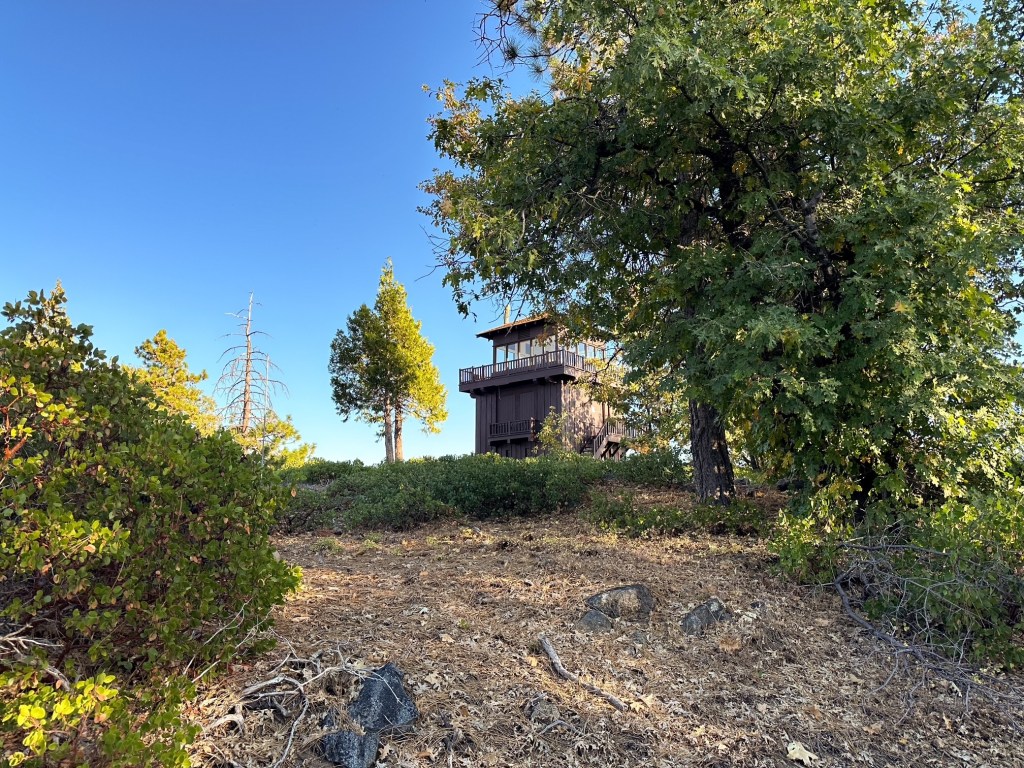
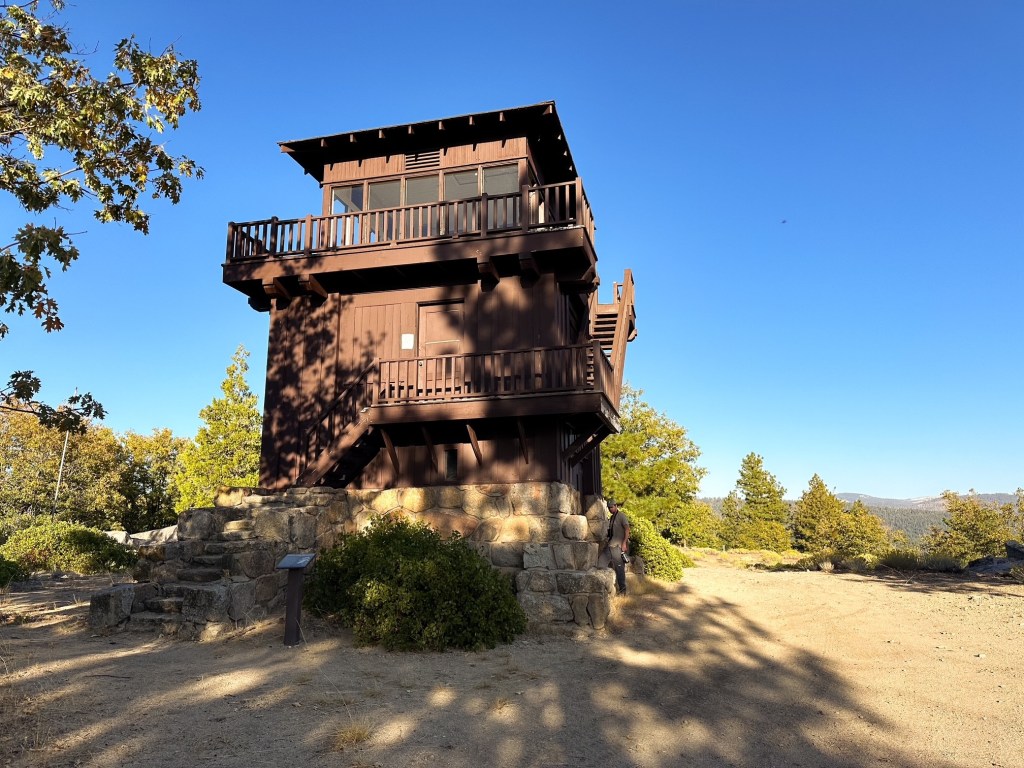
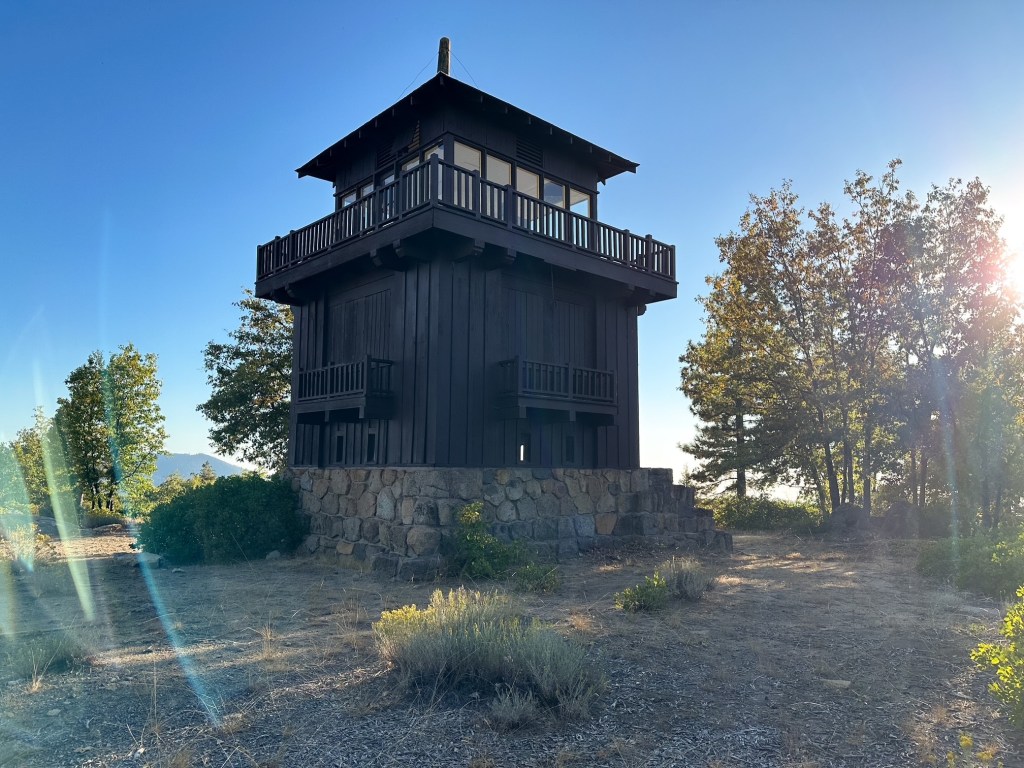
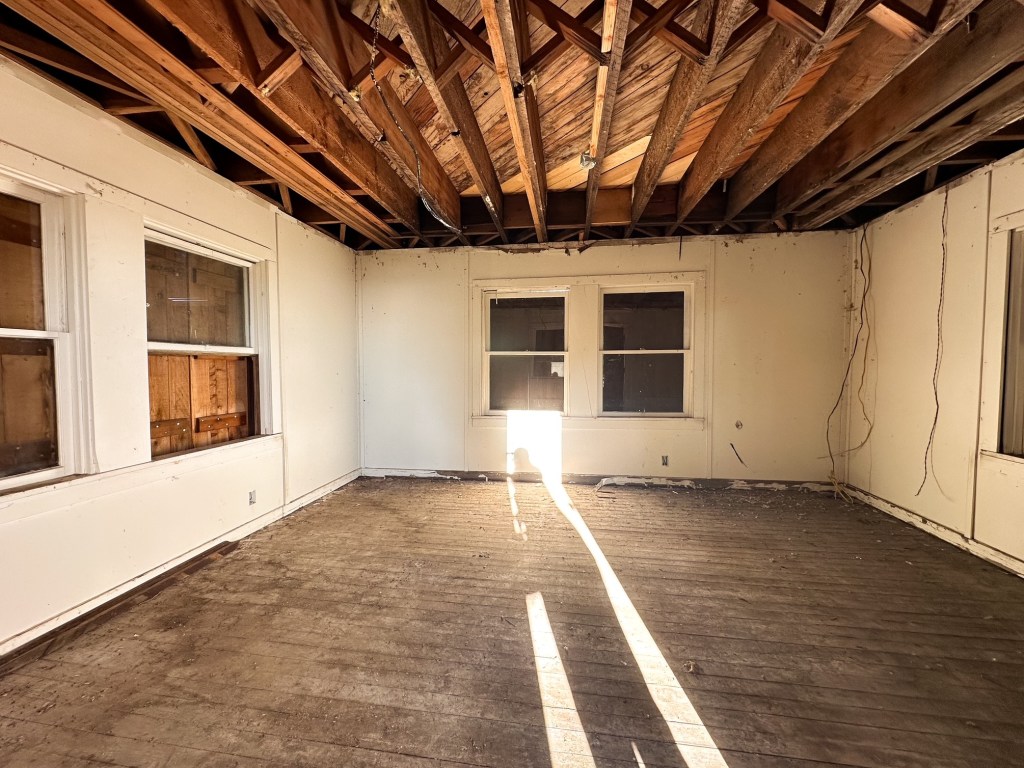
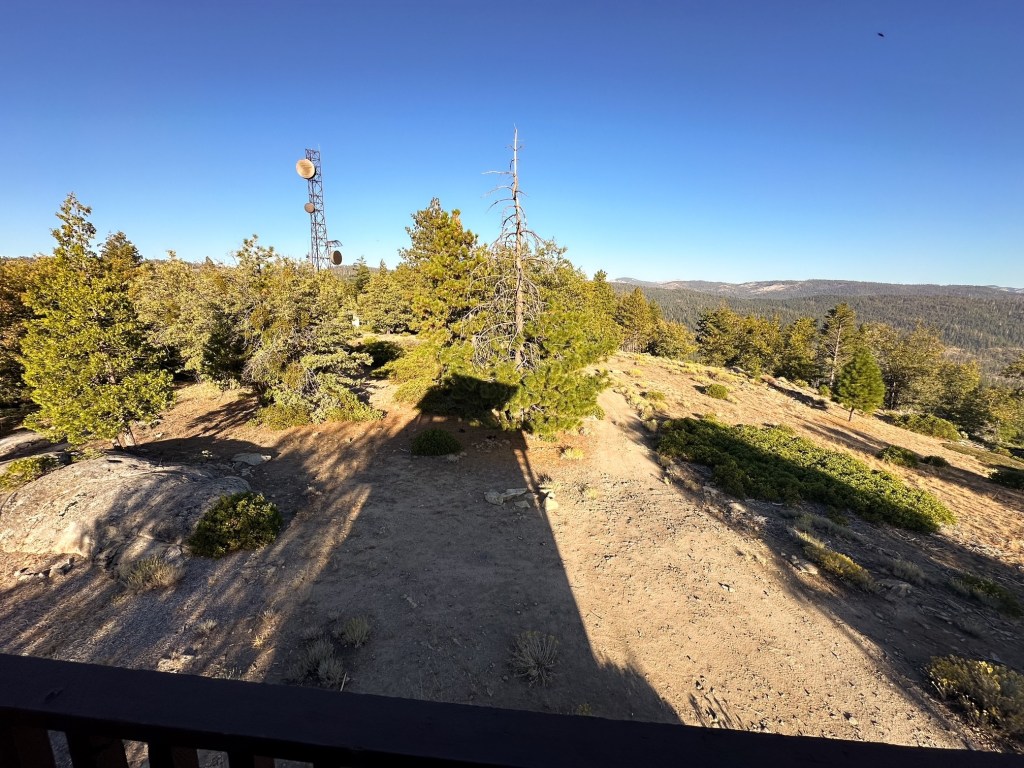
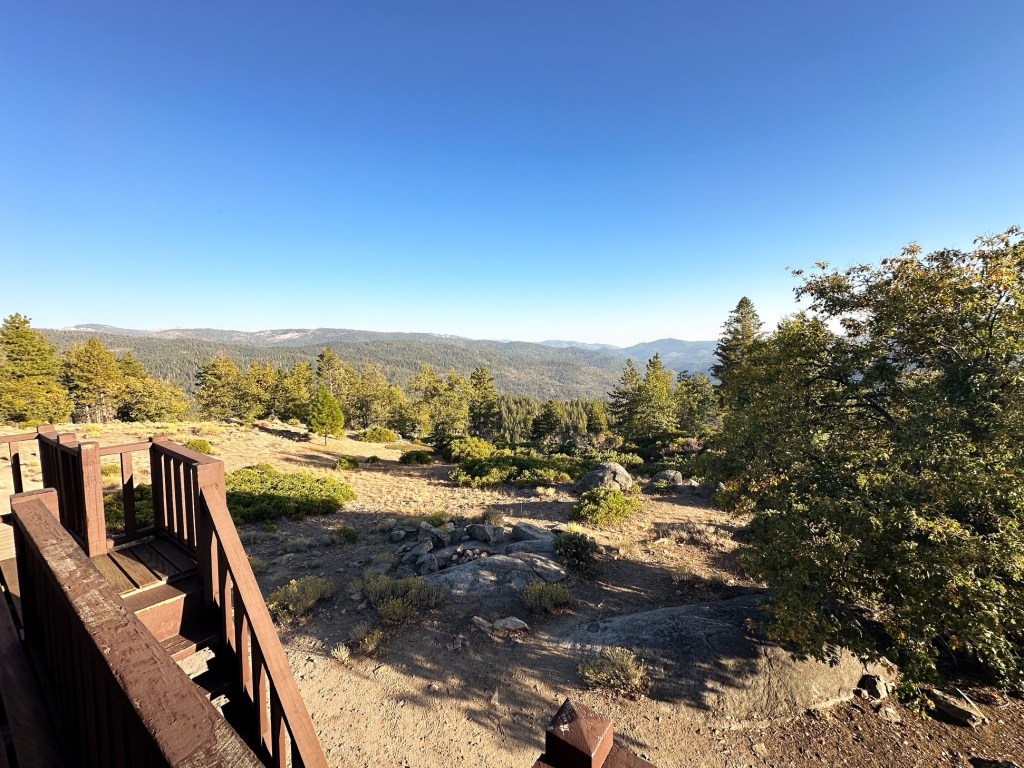
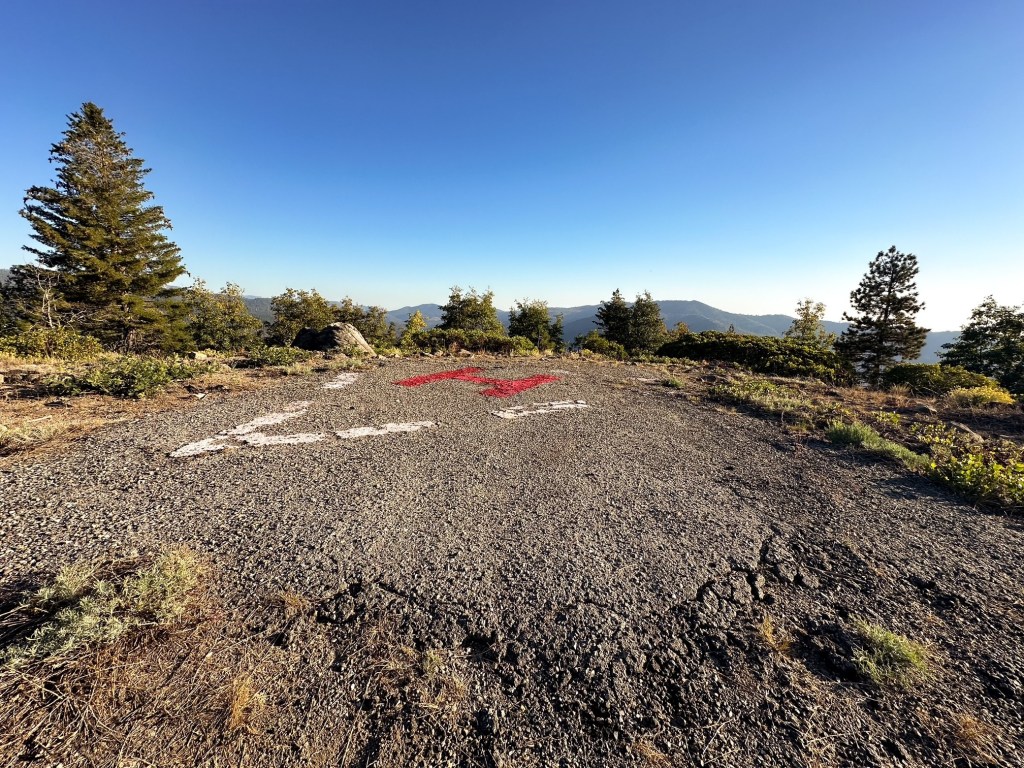
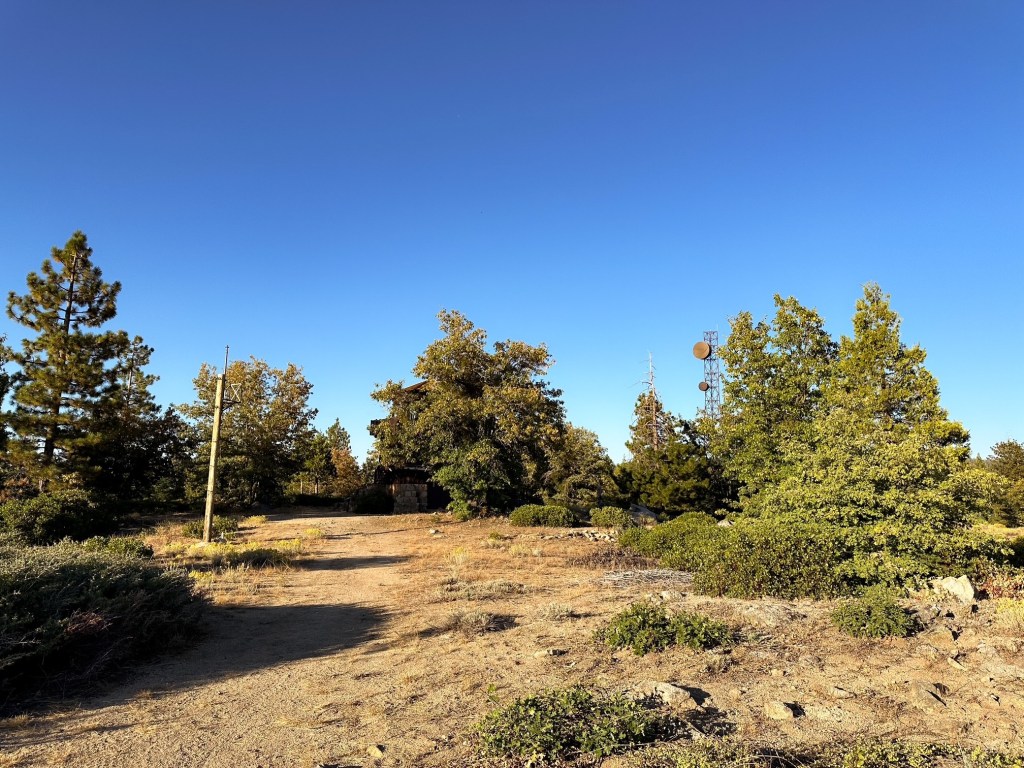
We started our hike from behind the gate and took the first dirt road leading right. It was not clear which road at the four way junction was correct, but when in doubt head for the road leading up. This road passed two large water tanks and skirted the edge behind the properties to climb the last bit of the ridge. It’s a fairly short walk and the summit opens up once you come around the last corner. The road continues farther to provide access to a communication tower. The ridge itself is wide and flat with limited views, but the lookout structure is interesting. You don’t typically see 3-story fire lookouts in National Parks. This pocket of the park felt very tucked away and forgotten. We didn’t stay long due to limited daylight and the additional drive time back to camp. Strava calculated this at 1.76 miles RT with 174′ of elevation gain.
History.
Henness Ridge was the second fire lookout built in Yosemite National Park by the CCC in 1934. It is a 3-story rustic National Park style lookout with a 13’x13′ cab and catwalk on top. The first level was used for garage and storage while the second level was the living quarters. The site was actively staffed into the 1980s. Some note it for possible emergency use by the park, but I believe it stands more as an exhibit to what once was here.
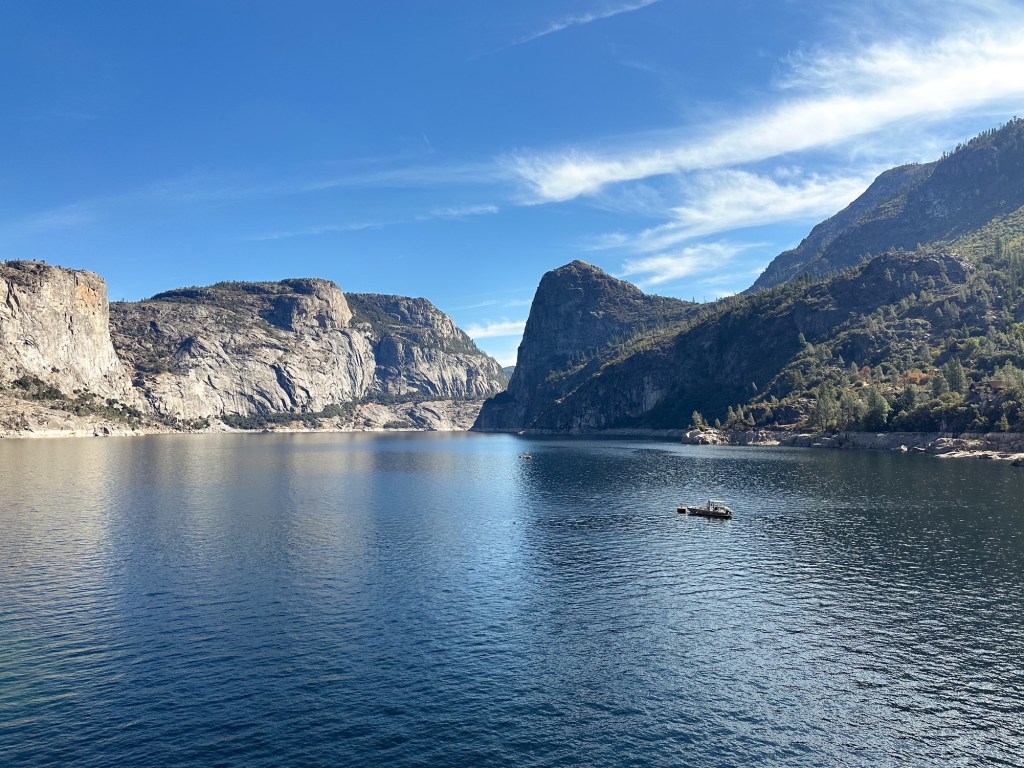
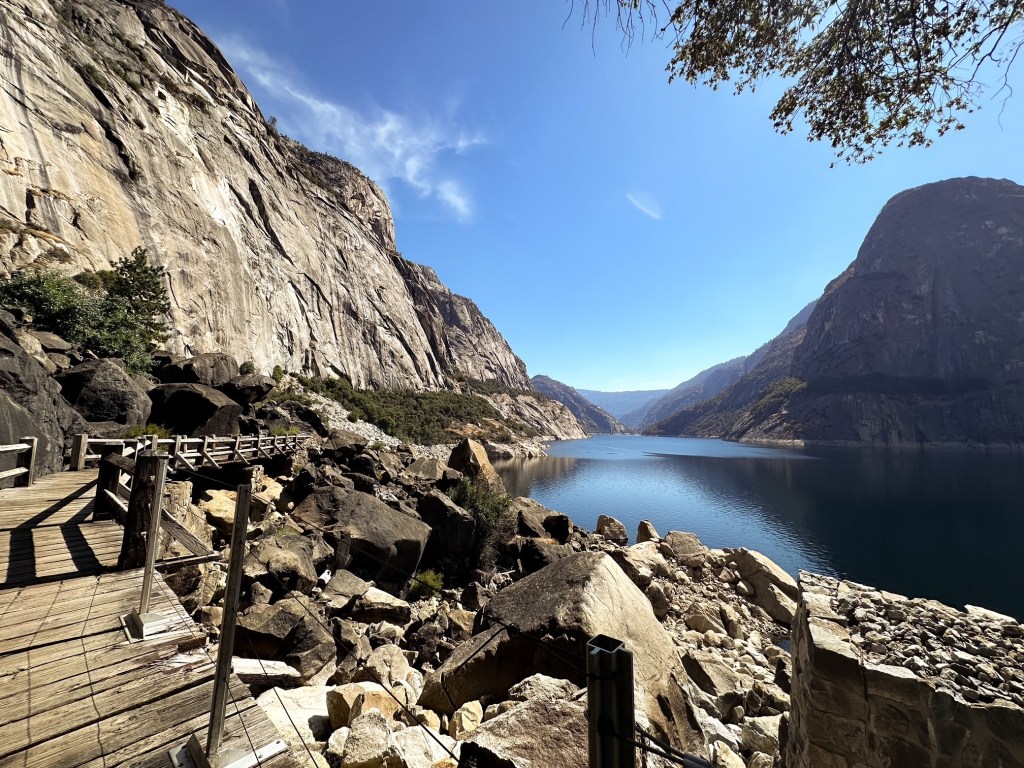
I had planned our trip to have a day to explore most sections of the national park to see as much as possible in our limited time. Our third day was designated to exploring the Hetch Hetchy reservoir. If we had time we would make a side trip to Smith Peak lookout on our drive back to camp. This area of the park is located in the north western corner. It required leaving and re-entering the park, so it set us up well to visiting a fire lookout just outside the boundaries. The access to the Hetch Hetchy area is off a steep and narrow road with limited trail options. It seemed like most trails were utilized for access to longer backpacking routes. I settled on sticking to the classic hike along the reservoir to Tueeulala and Wapama falls. The biggest downside to visiting Yosemite this late in the season was most of these waterfalls were dry. The trail follows an old railroad cut that is relatively flat, but offers little reprieve from the sun. Despite Strava only calculating this hike at 4.80 miles with 585′ of elevation gain the heat made it challenging. Our energy was tapped by the time we made it back to the car.
I wanted to head straight back to camp afterwards, but we decided to continue to the Groveland Ranger station to buy a map of the area. Garnet was interested in looking at the routes to other fire lookouts, but they were completely out of the map we wanted. After some debate, we decided to continue on to Smith Peak. The access road was located just behind the ranger station and we were already there. We followed the paved road to the Pines Campground and turned into it. The road turned to dirt and continues beyond the campground. We debated parking here and walking the road since it was close enough, but ended up continuing on for the same reason. If we found the road inaccessible we could always turn around. There were some minor hazards to avoid if you are driving a low clearance vehicle but it is passable. After driving for a mile and a half we reached a 5-way intersection. We parked in a pull out here since we figured the remaining distance to the summit was behind a gate. It was not immediately clear which road led to the summit from here. We took a guess and headed left based on which road looked the most used and angled towards the summit. It was confirmed we made the right selection when we reached the gate farther down the road. From where we parked to the summit was less than half of a mile. Strava calculated this at 0.95 RT with 174′ of elevation gain. If we had decided to park at the campground, the hike would have been closer to 4 miles RT with 680′ of gain.
Our biggest surprise after we reached the summit was meeting the lookout attendant onsite. We figured even if it was still staffed the person would have already been done for the season or have had left for the evening. He invited us up to chat, but not all the way on the catwalk. The view from the ground was about the same as it was from the stairs. Unfortunately neither of us can recall his name, but we chatted with him for awhile about lookouts and the surrounding area before heading back to camp for the night.
History.
In 1931, Smith Peak was selected as an administrative site to build a lookout tower. A wooden 2-story tower was built shortly after it’s selection. Old archive pictures show this structure was reminiscent of a national park style cab with slight variations. It is mentioned that the site has been utilized for fire detection as early as 1910 given it’s proximity to the ranger station. The wooden structure was replaced in 1952 by a metal lookout tower and garage. This burned down in 1987 during the Stanislaus Complex fire and was replaced by the existing structure in 1988. This site continues to be actively staffed every season and is one of only two remaining staffed in the Groveland Ranger District.
Did you know that Yosemite National Park has two standing fire lookouts within the park boundaries? This is something they don’t advertise on their brochure maps the way that other National Parks might. It seems you have to actively seek out the information online from sources other than the NPS. It’s possible they do this to dissuade visitors from bothering working crews or disturbing the surrounding neighborhoods since both areas do not have capacity for high visitation. I commandeered our plans for end of September to satisfy my desire to check Yosemite NP off my bucket list. I still wanted to work some fire lookouts into our route for good measure and was pleasantly surprised to find there were a couple within the park. We had originally planned to visit the park back in 2020 during a 2-week road trip, but chose to reroute due to wildfire park closures and terrible air quality. It’s been on my redemption list since then. Thankfully, it seems that some National Parks have taken to withholding a few camp spots within a 2-week period instead of the usual 6-month rolling period. This has particularly come in handy for me as I’ve shuffled things around this year or if you’re more of a last minute planner. It helped that we were also traveling slightly outside the peak season when most kids are back in school and the daily timed entries were only required on weekends. I found no issues claiming my preferred camp spot at 7AM on recreation.gov 2-weeks prior to our trip.
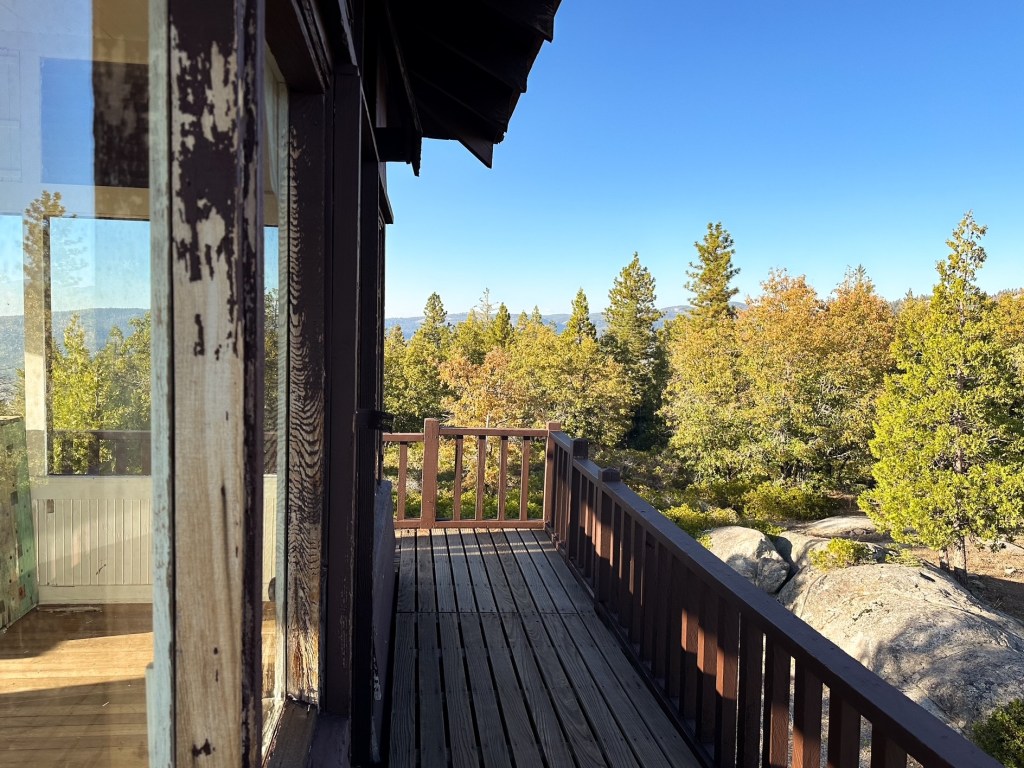
The first day of our trip was spent in the car, well past dark, to get to our reserved spot at the Crane Flat campground. It took us significantly longer than what was estimated and it was beyond my limit for the amount of time I wanted to spend in a car for the day. That being said, the second day was planned for as little driving as possible. This meant exploring the area closest to our campground at the Tuolumne Grove Trailhead. We started with the relatively short hike down to the grove and ate our lunch at one of the trailhead picnic tables afterwards. Our other destination for the day was the Crane Flat lookout which can be reached via road or trail. There is still a short trail to the lookout if you decide to go by road, but we decided to follow the longer route via the lower trail. This conveniently starts from the same trailhead as the Tuolumne Grove. To find the start of the lookout trail we headed away from the obvious trailhead area and toward the overflow parking behind the bathrooms. We followed the parking lot to it’s end where an old dirt road bed continues and a small sign on a tree indicated it was to the lookout. This will zig-zag up to meet with the paved road that people can drive. From there, we hiked the road to the official lookout trailhead and followed the short trail around. There are a few signs along these trails but it is not present at every junction. Be aware of your surroundings and note where you are heading so you can find your way back.
The summit is occupied by a mixed working crew of fire management and SAR. They are specially trained to manage fires and make backcountry rescues via helicopter. Due to the popularity of rock climbing in the park many rescues are vertical in nature. The trail that starts from the parking area helps to direct visitors around the helipad and keep them out of the way during emergencies. Please be respectful when visiting and do not disturb the crews onsite – they are there for your safety not your entertainment. While the majority of buildings onsite are off limits, the fire lookout structure is open to the public as a standing exhibit. There is a ton of information inside that offers the history of the lookout and the crews that occupy the area. We had the lookout to ourselves and didn’t see anyone on trail the majority of the hike up. We did help a couple in their car along the paved road that was trying to locate the Crane Flat campground. They somehow ended up on the road to the lookout instead – GPS can do that if you’re not careful. We spent a decent amount of time enjoying the surrounding view trying to pick out the other lookout towers just outside the park. This was an out and back hike so we followed the same route back to the car. My Strava app calculated this at 3.05 miles RT with 452′ of elevation gain. Please note that the road is gated at times and might not be accessible to drive. If you hike from the base of the gated road it is around 3 miles RT as well with similar elevation gain according to AllTrails.
History.
Crane Flat was the first fire lookout structure built within Yosemite National Park in 1931. This predates the time of the CCC and was built by the National Parks Service. The structure is a two-story rustic NPS style lookout with 13’x13′ wooden cab and catwalk. The first floor was used as a garage with storage and is built partially of stone. It was actively staffed into the 1980s but now stands as an educational site for visitors. Interestingly enough it seems the site is still utilized by fire crews within the park. There is a secondary structure onsite next to the fire lookout that houses Helitack, fire crews, and even SARs. The park still makes an effort to manage and maintain their wildfires but does so by helicopter now. The Helitack team is utilized to transport firefighters to the park’s remote areas, sling a Bambi Bucket to directly support fire suppression missions, and perform high-altitude SAR missions from vertical surfaces.
This was an easy on and off stop as we headed down for a week long trip to Yosemite NP and northern California. If you have read any of my other posts on Aermotor towers located on wildlife refuges you know how I feel about them. I will always appreciate an excuse to stop and look at some migrating birds though. We had already made multiple pit stops for gas and bathroom breaks on our way down the I-5 corridor and we didn’t really have time for another. We pulled off on exit 601 and made a left turn towards HWY-99W on CR-60 and then a right turn onto HWY-99W. We stayed on HWY-99W until we reached the refuge headquarters off to the left. There were no signs to point us in the right direction along this route, but it was easy enough to locate. If you take the next exit along I-5, there was a sign there for the refuge but you have to back track a little bit to reach it.
We pulled into the parking lot of the visitor center and could easily see the tower standing tall behind the buildings. The visitor center wasn’t open during our visit due to staffing shortages. The tower is located behind a gate on the grounds of the headquarters and is only accessible to authorized personnel. Though I am curious, if you were to ask nicely, if they would let you take a closer look. We turned on to the Wetlands Walking Trail from the visitor center to see if it offered any better views. We were able to get a bit closer, but there wasn’t much we could do about the restricted access. We weren’t too surprised since this seems to be fairly common with towers in wildlife refuge locations. Despite our time constraints, we decided to take the 6-mile auto tour through the refuge which added another hour of delay to our drive. It was a pleasant surprise to find hundreds of ducks, geese, and waterfowl stopped here along their migratory routes. You would never know it just by driving through on the interstate. We really enjoyed the design of their signs along the auto route as well. Each sign depicted different birds driving their car full of other bird friends. The lookout tower can be spotted along the auto route as well, but the best view is from the visitor center. It’s definitely worth the stop if you need a reason to stretch your legs.
History.
Built in 1937, this 100′ Aermotor steel tower with 7’x7′ observation cab was apart of the initial buildings when the Sacramento National Wildlife Refuge was first established. Similar to other wildlife refuge towers there does not seem to be any confirmation that these were ever used to detect wildfires. Most of these towers served to view wildlife in the surrounding area. In a 1986 Thorton Survey, the site is noted as the I-5 Lookout due to being just off the interstate.
We bounced around a few different ideas for our Labor Day trip this year ranging from the Sky Lakes to the Salmo-Priest Wilderness. We have been heavy handed on the backpacking this year and wanted to continue that trend. Our final decision wasn’t made until the Monday prior when I booked our permits. The wildfire season has been hot and fast this year, but had quieted down some in the mild August conditions. Though after regaining cell service this weekend we found the fire season had been extended. Lightning had caused some new fires over the weekend and predictions are calling for a hot September. It was quite the contrast from when we left the cell service range prior. Normally smoke and fire ends up dictating our plans for this high holiday weekend. It still played a minor role but it was nice to have what felt like more flexibility. Dodger Point has been thrown around a couple times in the past as a potential trip option, but we have been deterred by the cost of permits and the time needed to get there. It requires a bit more planning than your typical fire lookout. We ultimately decided to bite the bullet after agreeing that the permits are not going to get any cheaper or the distance any shorter or us any younger.
Things to note for a trip to Dodger Point L.O.:
America the Beautiful Pass – Annual $80 or 7-Day $30 for trailhead parking
Olympic National Park Wilderness Permits – $8 per adult per night + $6 reservation fee (2-adults for 4-nights was $70). Permits for this can be found under the Elwha starting area on Recreation.gov. Please note: Recreation.gov imposes a 15-mile limit between campsite permits. If you select another campsite first such as Humes Ranch, the Dodger Point campsite should appear as an option for the second night. If you plan to hike to the Dodger Point campsite on the first night the permit will have to be set up in person, via e-mail, or over the phone with the WIC.
Bear Canister – the back country campground below Dodger Point does not have a bear hang wire and a bear canister is required for storing your food properly. You can check these out from a WIC on a first-come first-serve basis with your permit if you do not own one.
Parking – the Olympic Hot Springs Road which had previously provided access to the Whiskey Bend trailhead has been washed out indefinitely since December 2017. The closest trailhead for parking is Madison Falls and the remaining distance along the road must be hiked or biked. This adds an additional 7 miles (one-way) of hiking along the road to access the necessary trailhead.
Camping – There are two backcountry campgrounds that hikers typically use on their route to Dodger Point. The first is Humes Ranch along the Elwha River at 9.5 miles from Madison Falls TH. There is a bear hang wire here and back country toilet. Though trip reports confirm the bear wire is in bad shape and is noted as more of a bear piñata. It was completely down during our visit but I’m not sure if that was intentional or not. The second is appropriately named Dodge Point as it sits just below the fire lookout off of the Long Ridge trail. This campground is located 20 miles from the Madison Falls TH. There is no bear hang wire, no toilet, and no campfires allowed. It seems that most break up this hike into a 2 or 3-night backpacking trip.
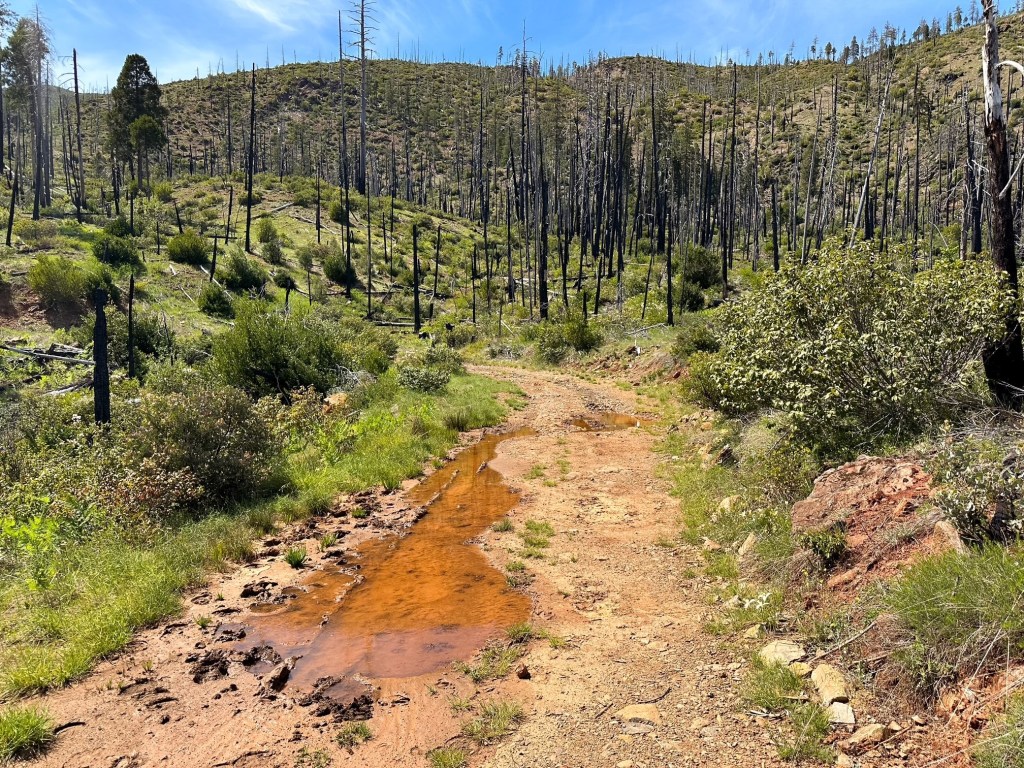
Water – the water source located at the Dodger Point camp is noted as unreliable especially late in the season. You will need to plan appropriately to carry enough water for your stay. There is a reliable spring 2-1/2 miles before you reach the camp that we found to be the best water source. We did notice a few sources closer to the camp still running but they were much smaller or stagnate.
Friday.
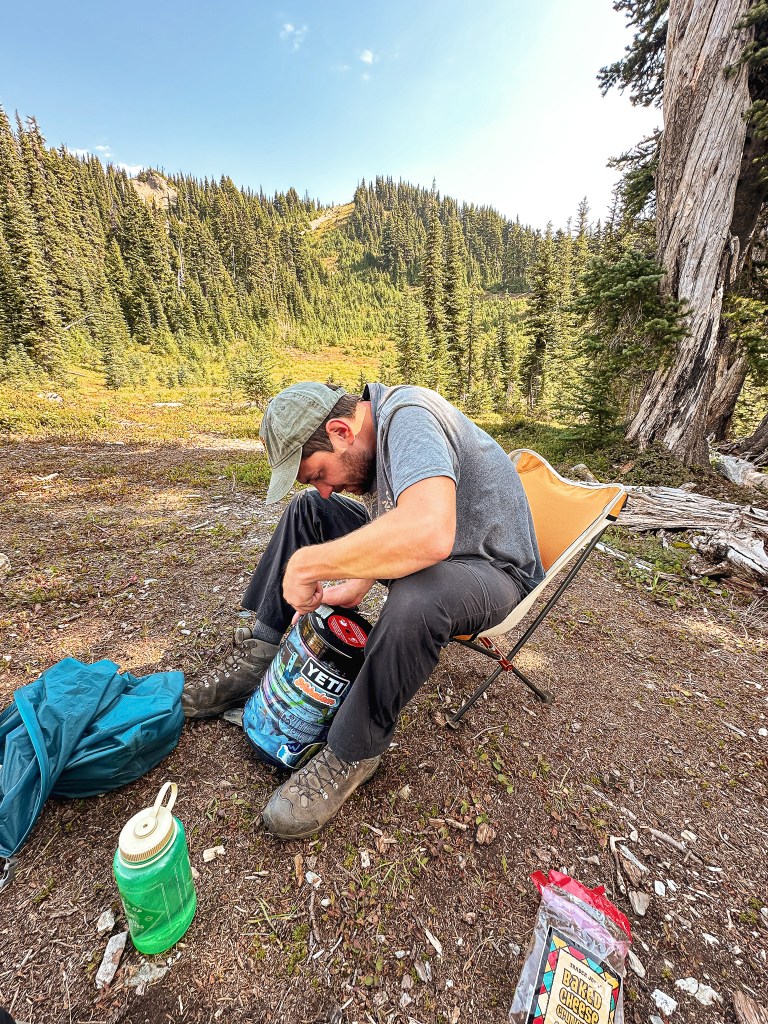
We decided to plan our route to Dodger Point as a 5-day/4-night trip since those were the days we had already requested off from work. This allowed us to camp below Dodger Point for two nights giving us a rest day between the longer hiking days. I already own a BV500 bear canister that I bought specifically to have on hand for back country trips like this to Washington. But given the length of our trip we quickly realized it would not fit all of our food. We decided to test our luck at the Port Angeles WIC to rent a second one for the weekend. Our hopes were slim to none since it was the Friday of Labor Day weekend, but it never hurts to ask. We didn’t leave Portland until 7:30AM since I needed to book a last minute camp spot for a planned girls trip, but they weren’t available on Recreation.gov until 7AM PST. We still managed to avoid most of the holiday traffic until we reached Port Angeles. The WIC located in town was busy but we were surprised to see they had rows of bear canisters ready for use over the long weekend. We were able to check out one with no issues and were headed to the trailhead shortly after noon. The Ranger that assisted us with the bear can mentioned we might be visiting the only quiet part of the park this weekend. Finding a less traveled trail in some of the busiest areas is our forte. The Madison Falls TH was only 15 minutes outside of Port Angeles off of the paved Olympic Hot Springs road. The main parking area was full, but we had no issues finding parking in the overflow area. We brought lunch to eat in the car before starting our trek out to Humes Ranch. Garnet didn’t want to leave any food in the car after our mouse experience from Jarbidge and was trying to finish off everything we brought before heading out. I was getting worried about time since I’m not a fast hiker especially when saddled with a backpack and decided to get a head start.
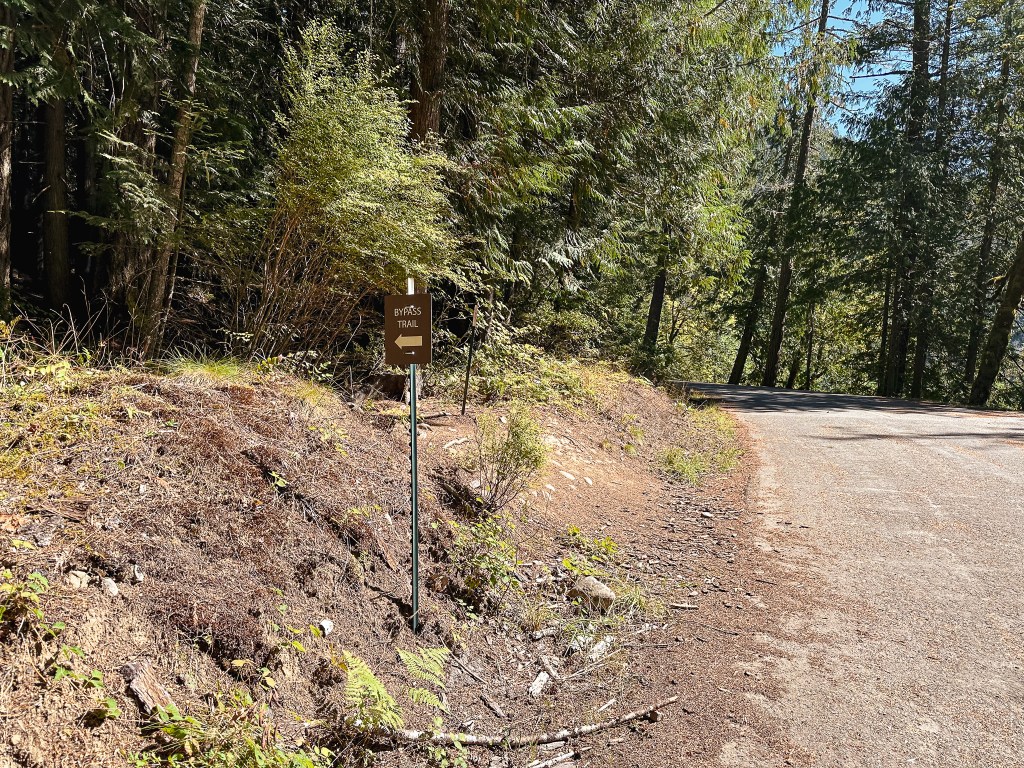
The “hike” starts beyond the gate along the Olympic Hot Springs road. This portion is on pavement until you reach the Bypass Trail that circumvents the road wash out. It was a surprisingly steep little trail as it directs you up and away from the road before dropping back down. This section can be challenging for those trying to bike the road. Once off the Bypass Trail it was back to pavement until I reached the old Elwha Ranger Station. The ranger station is located 2-1/2 miles from the trailhead and makes a good turn around point for day hikers. It is an interesting collection of buildings that are starting to show signs of neglect. It seems this area has been mostly abandoned by the parks service after the road washed out. I met where the road forks just beyond the station and continued left to turn onto the Whiskey Bend road. The paved Olympic Hot Springs road continues further to the right to access different areas within the park. The road walking turns to gravel from this junction to the trailhead. It was another 4-1/2 miles along this road. I had been hiking ahead of Garnet at this point, but I was slightly worried he might not notice the road turn off. There was a sign but it was mostly worn down and unreadable. I waited for a bit near the junction until I saw him heading up the road. From there, he caught up to me quickly. My legs were feeling good at this point and for once we were able to keep a similar pace. We stopped briefly to check out the remains of the Elwha Dam that had been removed in 2011-2012 to help restore the river. I’m pretty sure this is what eventually led to the road being washed out. The gravel road was mostly in good condition minus one or two parts that have sunk down. Something to note if they do manage to reconstruct the Olympic Hot Springs road in the future. There were some signs of construction along the bypass trail that suggested it might be in progress, but I haven’t done any additional research to confirm.
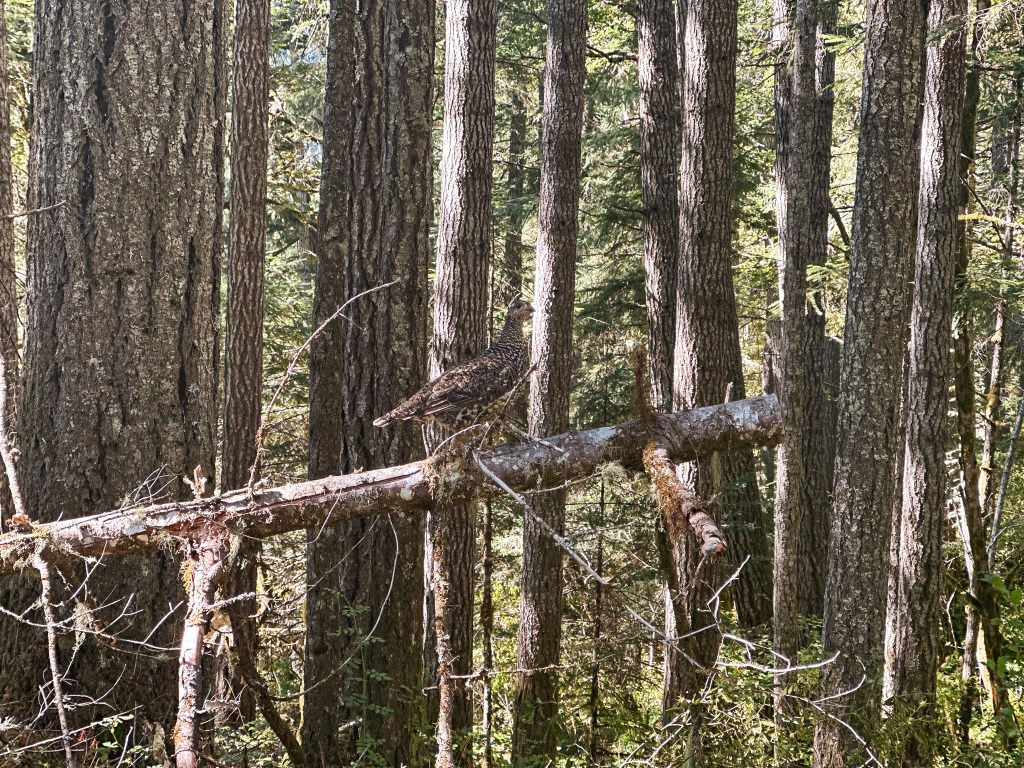
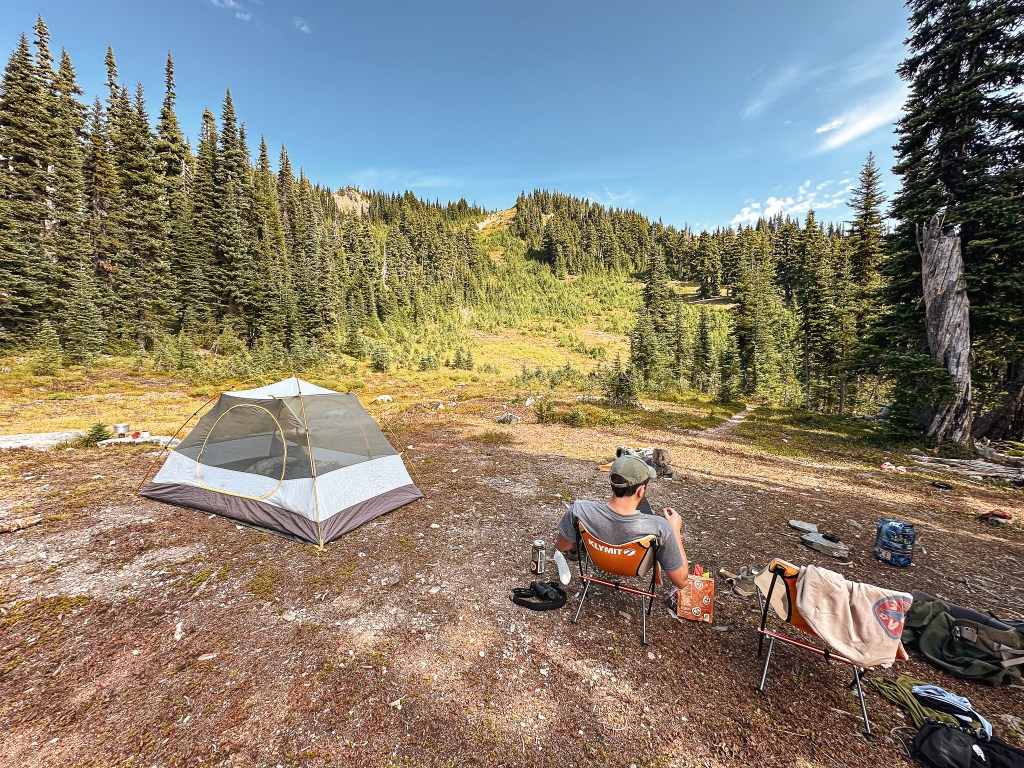
While hiking along the road we were met with a family of grouse, I believe they were Sooty Grouse, that seemed completely unbothered by us. It reminded me of the Spruce Grouse we encountered while in Minnesota’s Boundary Waters in 2022. They did not have the best fight or flight instincts and were willing to get within an arms reach. Garnet fell behind trying to identify them with the Merlin app as I continued ahead. I finally reached the trailhead, sweaty and tired, after 7 miles of road walking. I took off my pack and laid down on the picnic table until Garnet arrived. Road walking can be really hard on your feet. The remaining distance to Humes Ranch was 2-1/2 miles along the official Elwha River trail. There are a few different junctions heading off to the right to note along this trail. The first we came to was an over grown trail that had a sign for an overlook. The second was an obvious junction but was not signed. We debated whether this was our turn or not since the trails all seemed to interconnect on the map. We decided to stay on the Elwha River trail. Looking at a map after the fact, it appears this was the Rica Canyon trail. The third junction we came to was labelled with a sign for Krause Bottom. We figured this might be our junction and even started to head down the trail a bit, but decided to turn around after the tread started to grow faint. Once again looking at a map after the fact, it looks like this would have connected to Humes Ranch but it is not the main route. We continued on the Elwha River trail until we reached Michael’s Cabin. There is an obvious junction here signed for Humes Ranch and Dodger Point. The trail drops down from here to the edges of the Elwha River passing another trail fork for Dodger Point, a cabin from the Humes Ranch, and a junction that connects to Krause Bottom. There is a small camp spot where the trail first meets up with the Humes Meadow, but the main camping area is located across the meadow. We assumed we would see people while we were here since there were more than just our permits taken out for the night. We were surprised to find an empty campground and as the sun started to set we were surprised no one ended up joining us later in the evening. We hadn’t seen anyone else since we left the paved part of the road.
Our estimated mileage for the day was 9-1/2 miles with 1,800′ of elevation gain. These numbers are just an estimation since I didn’t use the tracker on my phone due to being worried about conserving my battery.
Saturday.
We didn’t set an alarm for the morning and didn’t attempt to wake up any earlier than we normally would while camping. This probably wasn’t our best call, but today was going to be an uphill marathon not a sprint. My joints were still stiff from the day prior and I hoped I’d be able to make it all the way. I decided to get a head start on Garnet since I had finished repacking my bag before he was ready. I headed back up the steep little trail we came down yesterday until I met up with the fork that was signed for Dodge Point. I turned right to continue on this trail. I could tell no one had been this way in the last day or two due to the amount of cobwebs that greeted my face. After hiking for a mile I came to another junction pointing back to Humes Ranch. I cursed myself for not looking closer for a cut off trail while in camp the day prior and made a note to take it on the way back. I had known all the trails around Humes Ranch interconnected, I just hadn’t known where it ended and began. I wasn’t completely sure how much mileage this would have cut off, but it would have definitely saved some back tracking and unnecessary elevation gain. I debated whether to wait at this junction for Garnet or not, but shortly became worried he might already be ahead of me if he found this junction from camp. I continued on since there were still many more miles to be seen for the day and Garnet would catch up soon enough. The trail had been mostly in good condition until it started to turn back towards the Elwha River where signs of erosion have crept in. One particular section of note was only a short distance but barely wider than my foot. In a more exposed rockier section you could tell where the land had slid and users had reworked their own trail over the moved debris. Both of these sections made me a bit uneasy knowing I was barely over a mile into our hike for the day; what other obstacles lie ahead? would the suspension bridge still be there? and why hadn’t Garnet caught up yet?
One of my questions were quickly answered as the trail headed steeply down to meet the suspension bridge to cross the Elwha. It’s an impressive bridge. The river crossing would not be possible without it, at least at this section of trail. I crossed the bridge after taking in the impressive flow and drop down to the river. The bounce of the suspension always gives me a bit of anxiety. I paused on the other side and decided to wait a bit for Garnet again. But the longer I waited, the more I felt the pressure of the miles ahead. I continued on with the reminder that today was a marathon not a sprint. The trail turned gently up from here and any signs of erosion where left behind the other side of the bridge. I started to lollygag after every downed tree or mild obstruction wondering “how Garnet hadn’t caught up yet?”. I probably should have just stayed focused on making it farther but my mind always ponders if something could have gone wrong. He caught up to me around 2-1/2 miles into the hike as we continued our way up, up, up. There was a brief section of flat trail as we met a shelf in the ridge. If you look at the topo lines on the map the real climb begins beyond this shelf as you switch back quickly up to the main ridge line. The trail straightens out after this initial climb to make a gradual ascent for the rest of the way. This section is aptly named the Long Ridge Trail as you follow the ridge for what feels like a very, very long time. We stopped to have our lunch around 3:30PM and roughly 6 miles into our hike along the main section of switchbacks. We had been holding out for a decent place to sit but had no luck and eventually just picked somewhere along the trail. At this point we thought we were over halfway to our camp for the night with only a few miles left. Oh how wrong we were. The information I had from online stated that it was only 10-1/2 miles from Humes Ranch to Dodger Point camp. Oh how wrong we were.
Dramatics aside, this piece of misinformation really added to how long the ridge felt. There comes a point in the trail where you can start to see out beyond the trees. This unfortunately didn’t help with our perceived length of the trail either as we thought our destination grew closer only to turn the corner and find more ridge. I knew this late in the season we would have to find a water source prior to camp and water carry for a least a couple of miles. I was unsure of the exact location of the recommended water source and thinking that we were closer than we actually were made me worried when we came upon the first water source. It was barely a drip of a spring with a mildly murky pool that didn’t replenish fast enough to fill all of our water containers. We took what we could and hoped for a better source along the way. Luckily, we found a few better sources roughly between 8.3 to 8.8 miles into the hike. We ended up dumping the murky water we had and replacing it once clearer sources were found. We were also able to fill the remainder of our containers with these sources. We each had two 32oz Nalgene bottles, along with my 3L water filter, and a plastic gallon jug. The goal was to bring enough water to support us for the next two nights until we could return to these sources on the way out. We cursed a bit for being too proactive as we came to the best and most reliable water source at 9.7 miles into the hike. This was the one I had seen recommended previously on someone else’s trip report. Their report mentioned it was around 2-1/2 miles from the camp which is accurate. Unfortunately, given that I thought we only had to hike 10-1/2 miles, the water sources back at the 8-1/5 mile made sense to me. We decided it didn’t hurt to replenish our water again and topped everything off for the last time. It was roughly 6:45PM now.
From here, I let Garnet hike ahead since he was carrying the gallon jug for us and I figured I wasn’t going to get there any faster at this point. I continued on with the reminder that today was a marathon not a sprint! The additional water weight stacked on top of the miles for the day started to slow me down and I had to start a mantra in my head to keep my feet moving. I had to keep telling myself that there was still a mile left to go because every corner and downed tree was starting to deceive me of ever reaching our destination. I was thankful that the days still had some length to them otherwise I would have been hiking in the dark. I still came very close as the sun set behind the ridge and I was still hiking at 8PM. I knew I was at least somewhat close to camp as I saw the tarns below that I recognized from many previous trip reports. I started to lose it a bit as I crested the hill beyond into a more open area with no sign of Garnet or an obvious camping area. Garnet eventually spotted me as I was hobbling along the trail and called out to me from behind the trees that obscured my view of the camp. Originally we had hoped to make it up to the lookout today, but any plans of that were thrown out along the Long Ridge trail. I was just happy to make it to camp as my feet screamed at me and the final bits of sunset dropped away. We set up camp and ate our dinner under the light of our headlamps. My body was equal parts stiff and restless as I tried to lay down for the night.
The total mileage for the day came out to 12.11 Miles and 4,845′ of elevation gain according to my Strava tracker. The final 4 miles included the additional water carry which could have been lessened if I had been more aware of where the reliable water source was located. Some mileage probably could have been cut if we had found that connector from camp at the beginning. One forgiving aspect of this trail was the gentle grade, it was a continuous up for most of it but never gruelingly steep.
Sunday.
The only agenda for the day was to make it the remaining distance to the fire lookout just above camp. We decided to make this our first task after breakfast to avoid the heat of the day. I got another head start on Garnet since he was still fussing around camp and I wanted to take my time getting there. My legs and feet were still very sore from our prior two days of hiking. I meandered my way up to the top of the ridge and reached the lookout around 9:30AM. I took some photos and sat on the steps to enjoy the view while I waited for Garnet to join me 30 minutes later. Dodger point has a spectacular view of the inner Olympics, the Strait of Juan de Fuca, and even some peaks of Canada in the back drop. We had a pretty clear view of Hurricane Ridge as well. It was an interesting contrast watching the endless cycle of cars and hikers while we were completely alone. Both locations are similar in elevation and views, but have drastically different means of reaching them. We hung out on the summit for a couple of hours before we decided to head back down for lunch. We figured we could always make our way back up for sunset if we felt the need.
We expected to laze about camp for the remainder of the day; reading, eating, and lounging. And although that was the gist of our day, we were met with an additional complication. The bear canister lid on my BV500 would not open. This was a problem because it contained half of our food for the trip. Garnet is a very strong individual and despite his multiple attempts was unable to get it to budge. I tried too but it is to be expected that I was unsuccessful as well. The solution ended with us sawing off the lid using my multi-tool and finding that it was all due to a well placed chip clip. The bright side was that due to the placement the outcome would have had to happen regardless of where we were located, so it wasn’t a wasted effort. The down side was that it could have been avoided if the chip clip had been placed in a different location before the lid was closed. I was also thankful that I left my multi-tool in my backpack. We normally rely on Garnet’s Leatherman, but it had been stored away in the bear canister as well. This would have left us in a much different predicament. Luckily, we usually overpack our food so there was no danger of us going hungry even if we had been unsuccessful.
Prior to leaving for the weekend, I hadn’t seen any other permits taken out for Dodger Point. We knew it was still a possibility that we might see someone, but it felt unlikely given that we hadn’t seen a soul since we left the paved road on Friday. That’s why it was a shock to see someone show up in camp without a pack on. It was just a girl and she was asking if there was a water source nearby to which we had to inform her of our water carry. The tarns below camp would be her best option if she didn’t want to hike back 2-1/2 miles to the spring. After talking with her for a bit, her hiking partner joined us in camp seeking the same answer. They both didn’t have packs on which we can only assume they dropped back on the trail to scope around for water. We asked them where they had come from and if they were camping here for the night. It seemed like the most logical assumption since they came up from Humes Ranch. When he responded he seemed unsure of where they planned to camp. Their “route” headed toward Ludden Peak and would hopefully loop back via the Olympic Hot Springs road. I was confused by this initially since there was no mapped trail in the direction he mentioned. We wished them luck on their trip as they headed out into the afternoon. Once back in cell service I was able to find the route he was describing known as the Bailey Range Traverse. Let’s just say they were on a much more extreme wilderness experience than I would prefer and I hope they made it through without issues. I’m not sure how the permitting works for those kind of routes either.
The exact distance from our camp to the fire lookout was only 0.81 miles with 482′ of elevation gain according to my Strava tracker. Round trip this made our total mileage for the day 1.62 miles (excluding any wandering done around camp). We didn’t end up hiking back for sunset, but we did get to see a full grown Black Bear grazing on the hill from camp.
Monday.
We didn’t manage to get an earlier start even though we knew it would take us a while to get back down to Humes Ranch. Though not nearly as long as it took for us to get up the ridge. We started our downward trek around 10:30AM. Sometimes this can be harder than the up on the joints. The route had quite a bit of downed trees, mostly small and easy to maneuver. We decided to count them as we headed down since I recalled reading a previous trip report stating there were 100 along the route the year prior. I was curious to find out if they had been right or were over exaggerating. We called out the count as we stepped over each tree to help keep track. And down, down, down we continued. We replenished our water once we reached the spring at the 2-1/2 mile mark even though we still had some left over from our original water carry. The gallon jug, 3 liters, and four 32oz nalgene bottles worth of water ended up being the perfect amount for us over two nights. The hike down was fairly uneventful since we knew what to expect. It was much easier to track our progress as we passed notable milestones. There were the false final springs where we filled up the water first. The sign stating we were at 3,500′ and no open fires/stoves beyond that point. The end of the long ridge into the switch backs. The random spot along the trail we decided to have lunch previously. We opted not to have lunch in the same location. We wanted to make it to what we deemed the “comfy spot” because it was located closer to camp and had a nice bed of moss to lay on. Garnet had stopped there on the way up while waiting for me along the switchbacks. When I had finally caught up with him he looked so peaceful and comfortable hence the name “comfy spot”. There were still a few times we passed switchbacks thinking we had made more progress than we actually had. From the “comfy spot” we had roughly 4-1/2 miles left to camp. And down, down, down we continued. Passing the small flat section of trail and eventually meeting up with the suspension bridge again. Garnet and I had hiked together most of the trail leap frogging each other every so often until he eventually ended up ahead. He waited for me once he reached the bridge and we crossed it together.
The small section heading up and away from the river felt much steeper than it did when we had hiked down it two days prior. My joints and feet were screaming at me during this final push. The eroded portion of trail felt insignificant now but I still stopped to take pictures. We turned on the connector trail we missed previously leaving camp and were dumped out at the other end of the campground. This trail was much shorter and flatter than the other one we had taken out. We made it to camp a little after 5PM. I had stopped counting the downed trees after I reached 100 but there were definitely more (somewhere in the 106-116 range). We encountered our first person of the day once we reached Humes Ranch. There was one other backpacker camped in the spot we had taken originally. There are a few other spots in the camp ground and we choose the next best one that offered the most amount of privacy. A group of three joined us a couple hours later. We spoke with them briefly about their route and they had hiked across the length of the Olympics from a southern starting point in the same amount of days. We didn’t get a chance to talk with the other backpacker and were unsure if they were starting or ending their journey. I’m always impressed at how much mileage people can cover with what seems like ease. Meanwhile, I feel like I am struggling to convince my joints to make it the 12 miles down hill.
I didn’t track the mileage for this day since I had tracked it on the way up and wanted to conserve battery for the final day. We can assume it was around 12 miles with mostly elevation loss. The connector trail probably cut off 1/2 of a mile total.
Tuesday.
This morning we made more of an effort to start early since we knew we had a 9-1/2 mile hike out, at least a 4-1/2 hour drive home, and minor stopovers to return the bear canister and see Garnet’s mom for her birthday. The other backpackers in camp were already up as well getting ready to move out. The solo backpacker was the first to depart with us shortly after. We managed to eat, pack up, and knock out the first 2-1/2 miles from Humes Ranch to the former trailhead by 10AM and thus began the long road walk back to the new trailhead. Once on the road Garnet ended up ahead of me. It wasn’t long before the group of three caught up and passed me as well. I didn’t manage to take any pictures on the hike back besides the one in front of the trailhead sign. I was only focused on keeping my body moving and getting back to the car. Garnet had been waiting for me near the old guard station, but I wasn’t able to keep up with him at this point and fell behind again. Back on the pavement we saw a lot more day hikers and other backpackers heading out. I tried to keep my composure so I didn’t look like I was in as much pain as I was, but Garnet told me later I had a very noticeable limp by the time I reached the car. Two people at the trailhead ended up asking if I had made it to the Hot Springs to which I told them no and that I had gone much deeper than that. They followed up with “was it pretty at least?” to which I responded with “it was gorgeous!”.
Strava tracked our final day at 9-1/2 miles with 941′ of elevation gain. We had no issues returning the bear canister or driving home. It made for a long travel day home, but it was worth the effort. This was definitely the most remote fire lookout we have visited to date. There are not many left this deep within the wilderness and it is a destination we will remember for a life time. Our total trip mileage estimation from start to finish is around 45 miles with at least 5,000′ of elevation gain (if not more).
History.
The fire lookout located on Dodger Point is a standard 14’x14′ L-4 ground cabin that was built in 1933. At the time this was built and managed by the U.S. Forest Service and considered a part of the Olympic National Forest. All of the lumber and windows were packed to the remote location via horse back. The point was named Dodger Point after Dodger Bender who had done trail, telephone maintenance, and construction work for the Forest Service. The Olympic National Forest wasn’t designated as a National Park until 1938. It was utilized as an Aircraft Warning System in early 1940s like many other fire lookouts within the area during WWII. It was most recently restored in 2017 by a group of volunteers with grant funding from the National Park Fund and REI Foundation. This is one of two remaining fire lookouts standing within the Olympic National Park boundaries today. I could not locate information on when the fire lookout was last staffed, but it appears it is still listed for emergency use. The cabin is locked and not open to public use.
After visiting Notch Butte (post), we continued our route west towards Oregon along I-84. Our next stop before leaving Idaho was going to be Big Tower lookout on the Deer Flat National Wildlife Refuge. This is another one that I will preface by saying there does not seem to be any confirmed information that this was ever used to detect wildfires. I will still count this towards our total, but I believe these kind of towers on wildlife refuges were only used to spot wildlife. Though they are the same style and build of many fire lookouts and were most likely manufactured by the same company.
We exited I-84 near the town of Nampa onto Karcher road and followed this until we reached Midway road off to the left. We stayed on Midway road until we reached the junction with Lake and Iowa avenue. We turned right onto Lake avenue to head into the wildlife refuge. Once on Lake avenue you should be able to spot the tower off to the left. It is located on the grounds behind the headquarters, but the area is closed to visitors. A peakbagger report from 2022 states you can follow a dirt road between the headquarters and private land, but it all looked closed off and inaccessible to us. Even if you were to get a closer look the tower is surrounded by a barbed wire fence and cannot be climbed. We parked in the pullout by the gate for the headquarters to get our view. On the map it looks like there is a trail on the other side that could potentially offer a closer look. We did not attempt to hike there though and figured most of the area is closed due to wildlife. It is marked as the Gotts Point trail on google maps if you want to try and get a closer look.
We didn’t stay long since we still had hours left in our drive home. Unfortunately, the Deer Flat National Wildlife Refuge was a bit disappointing and didn’t provide much interest in terms of wildlife beyond visiting the fire lookout. It seemed more like a popular recreation site for motor boaters and yahoos. The refuge is encompassed mostly by Lake Lowell and surrounded by a golf course and suburban sprawl. I would think this could provide a great potential for a bird oasis under the right circumstances, but when you allow high speed boating and recreation on the water it becomes less of a refuge and more of a hazard to the wildlife. I usually associate no wake lakes with refuges, but maybe this is more common than I think. Anyway, not the most exciting for our first two in Idaho but hopefully we can visit some high elevation ones in the near future.
History.
The lookout tower is listed on both Rex Kamstra’s and Ron Kemnow’s websites, but is not included on the NHLR. It is listed as a 100′ steel Aermotor tower. I could not find any additional information on when it was built or confirm what it was used for.
Well surprise, surprise! It’s me, still behind on writing about our most recent adventures or not so recent adventures anymore. Garnet and I just got back from a 7-day backpacking trip through the remote and rugged Jarbidge Wilderness in Nevada. It was equal parts challenging, beautiful, and rewarding. Unfortunately, it ended on a slightly sour note when we realized a mouse moved into my car while we were away. It had taken a bite out of all the food we had stashed in the trunk for our drive home and even decided to take a few holes out of Garnet’s newer shirt. This is how we found ourselves at the Sleep Inn in Jerome for our final night of the trip. Our original plan was to car camp in one of the many free BLM campgrounds along the Jarbidge River like we had on our first night of the trip. But once we stopped we could hear it in our console still and were unable to get it out when I opened my air filter. We hoped by taking everything out of the car into the hotel that it would vacate and save ourselves any additional damage to our gear. We even set some traps in the car for the night, but ultimately didn’t catch anything. This is my wordier way of saying we were closer to civilization after our trip and it set us up nicely to visit some fire lookouts. We had briefly talked about stopping at one of these fire lookouts on the way out during our drive down. Though I think if we were still camping along the river the last night we probably wouldn’t have had enough time to do both plus drive the 10 hours back home.
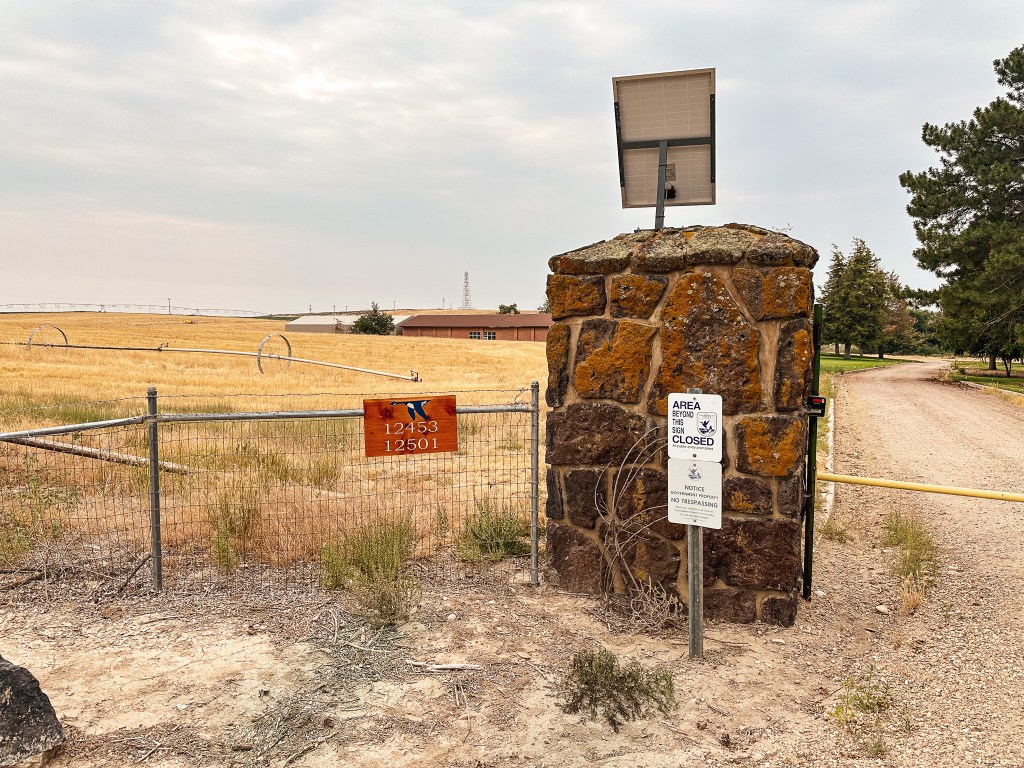
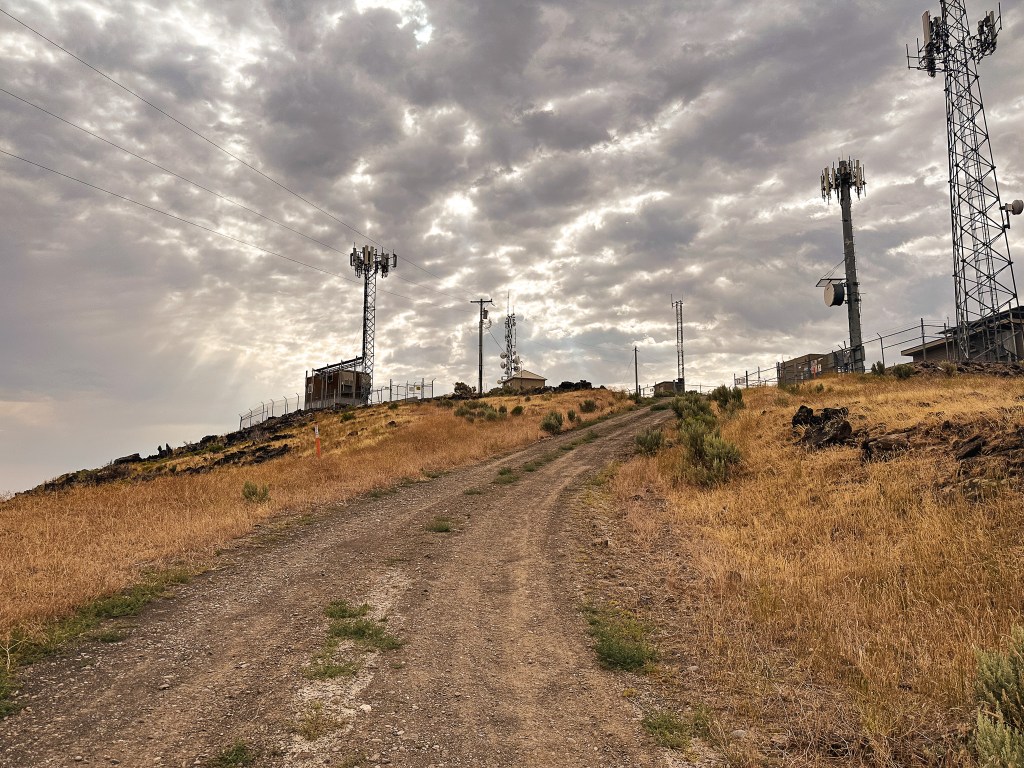
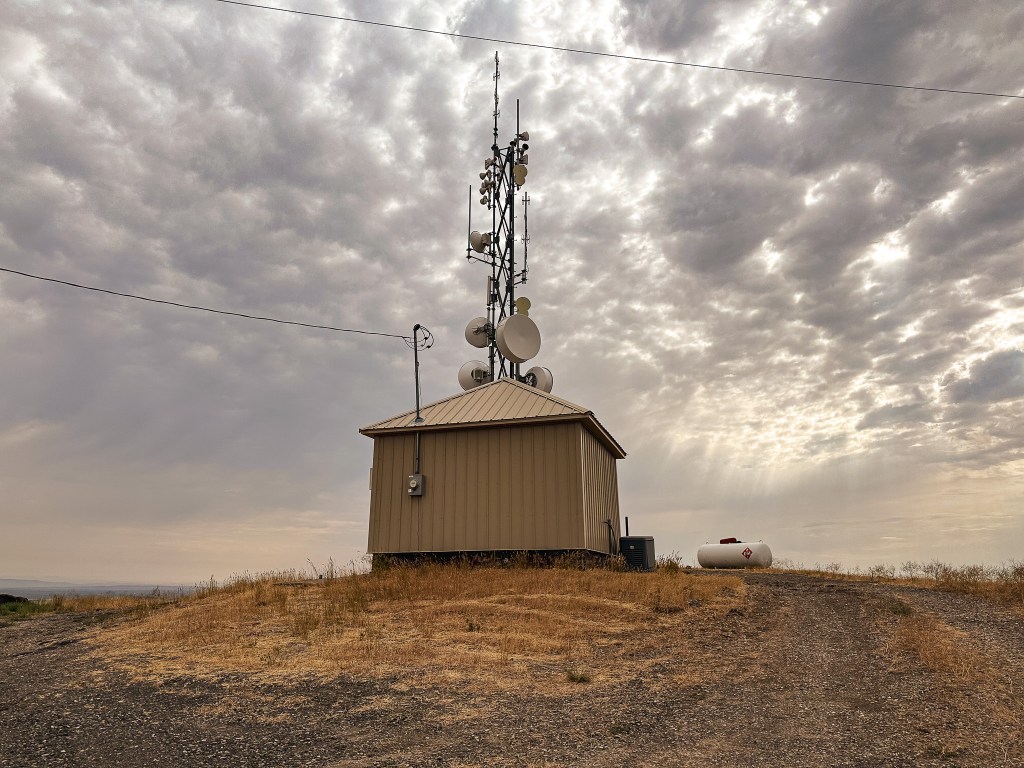
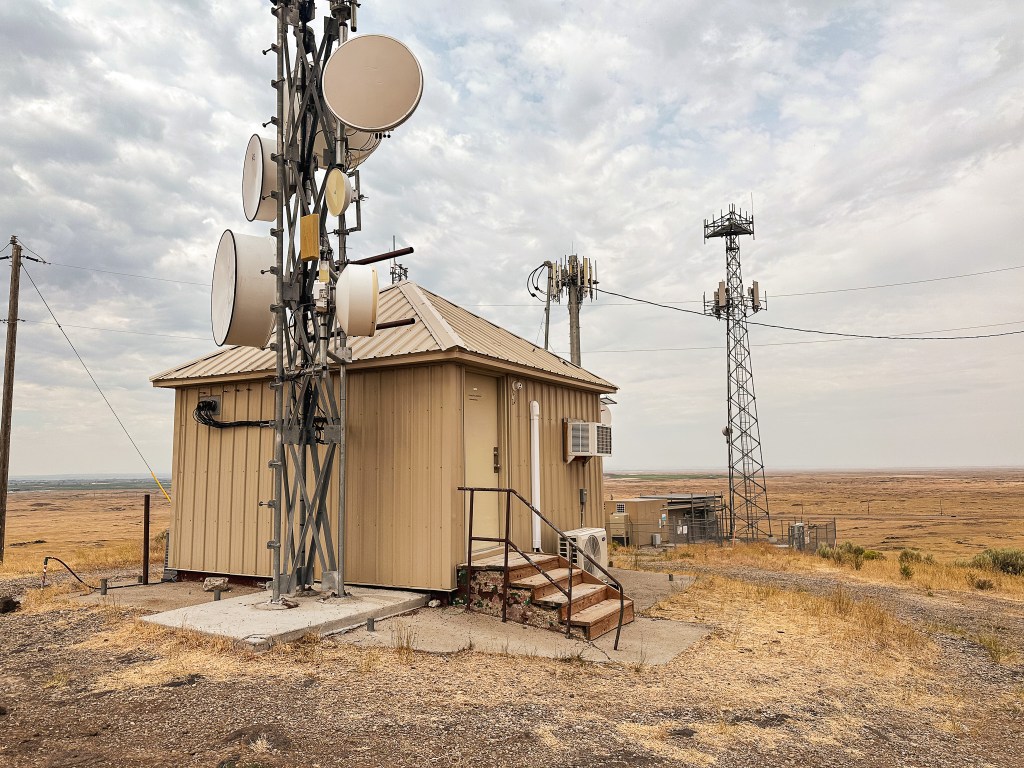
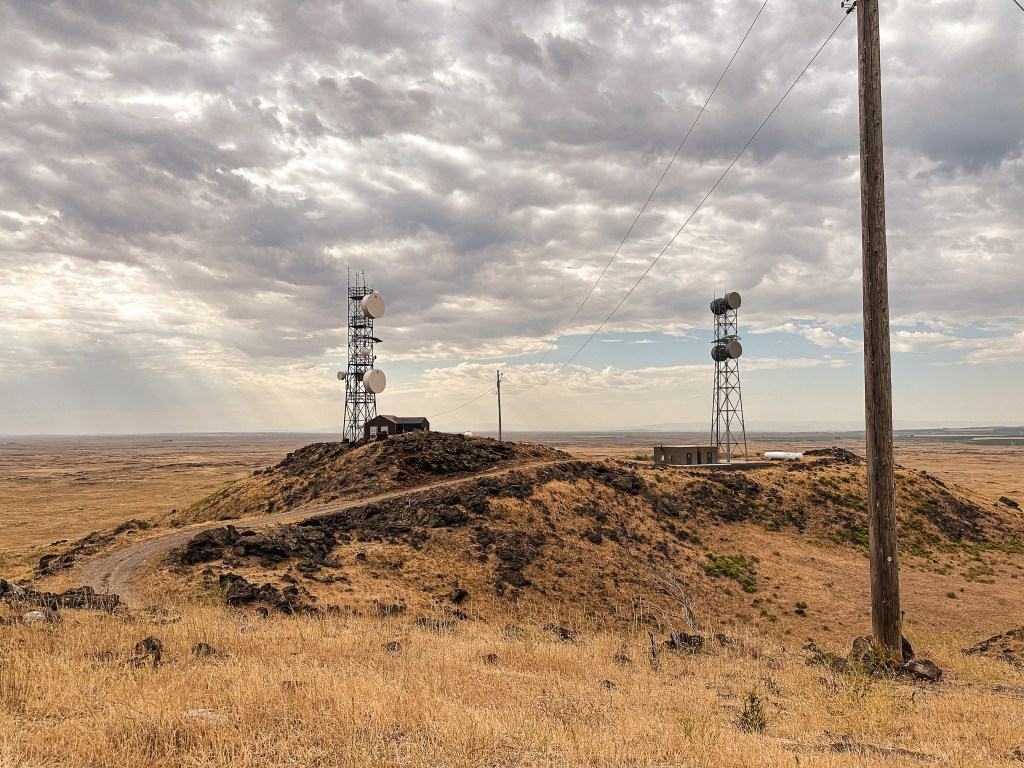
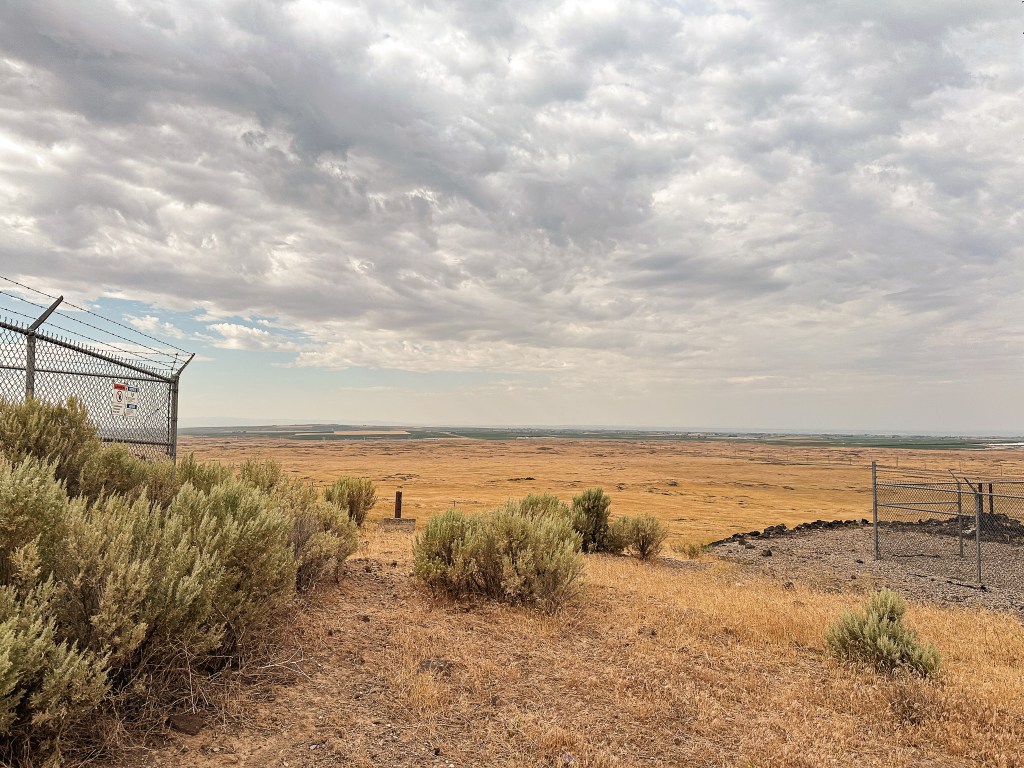
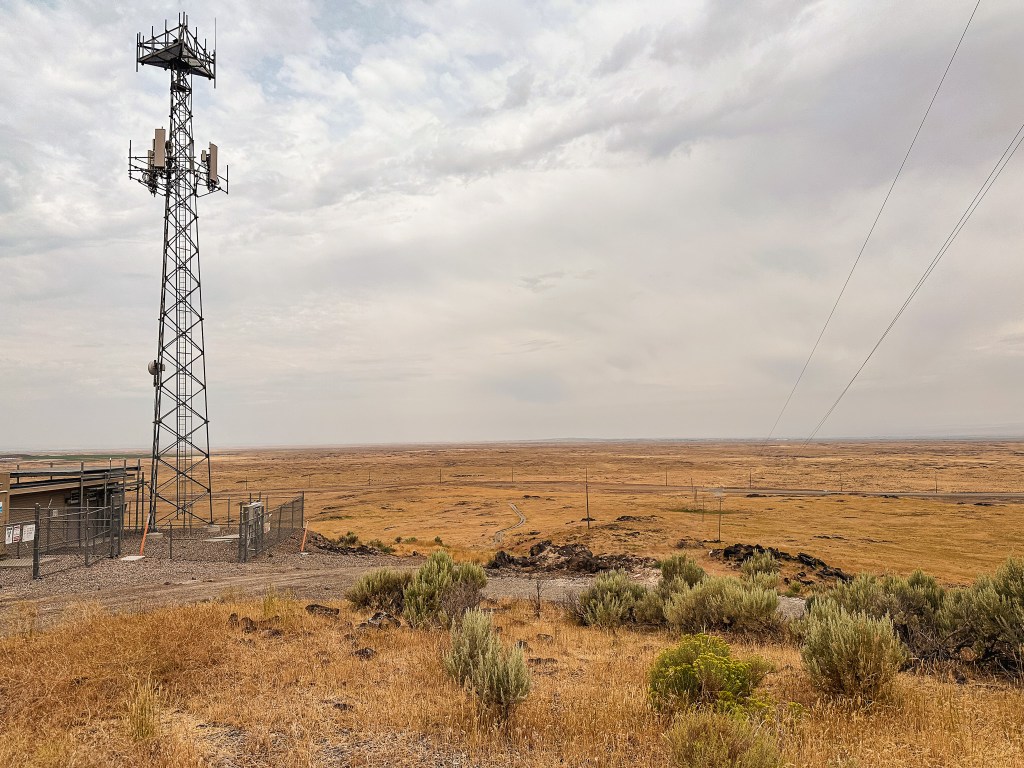
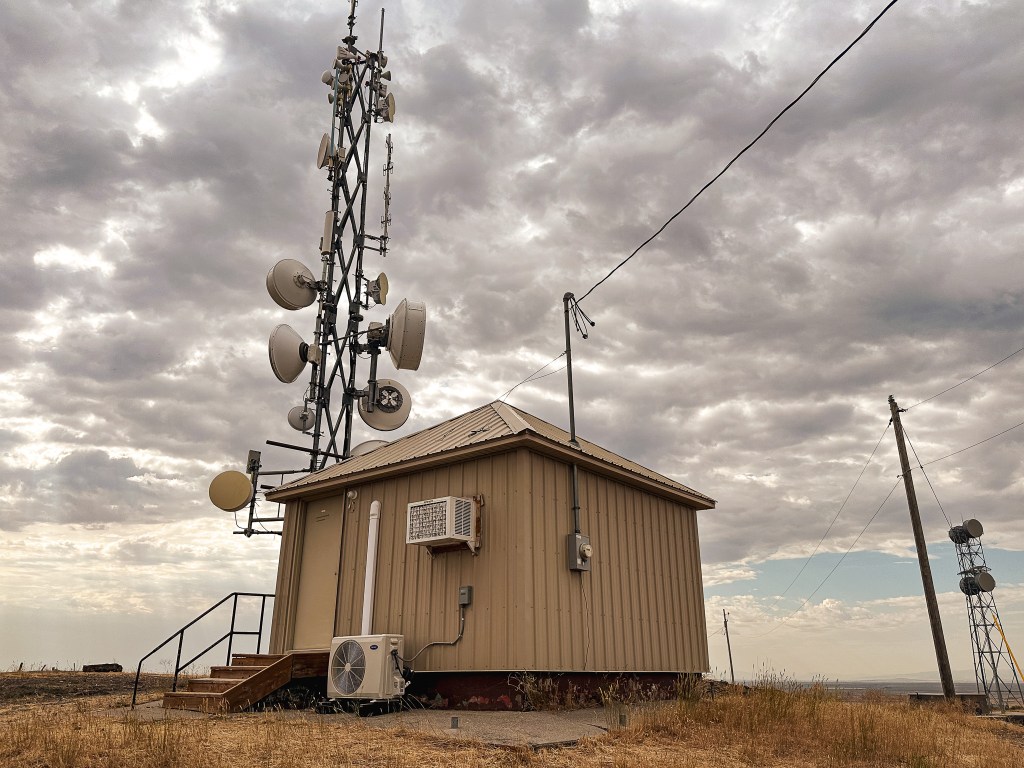
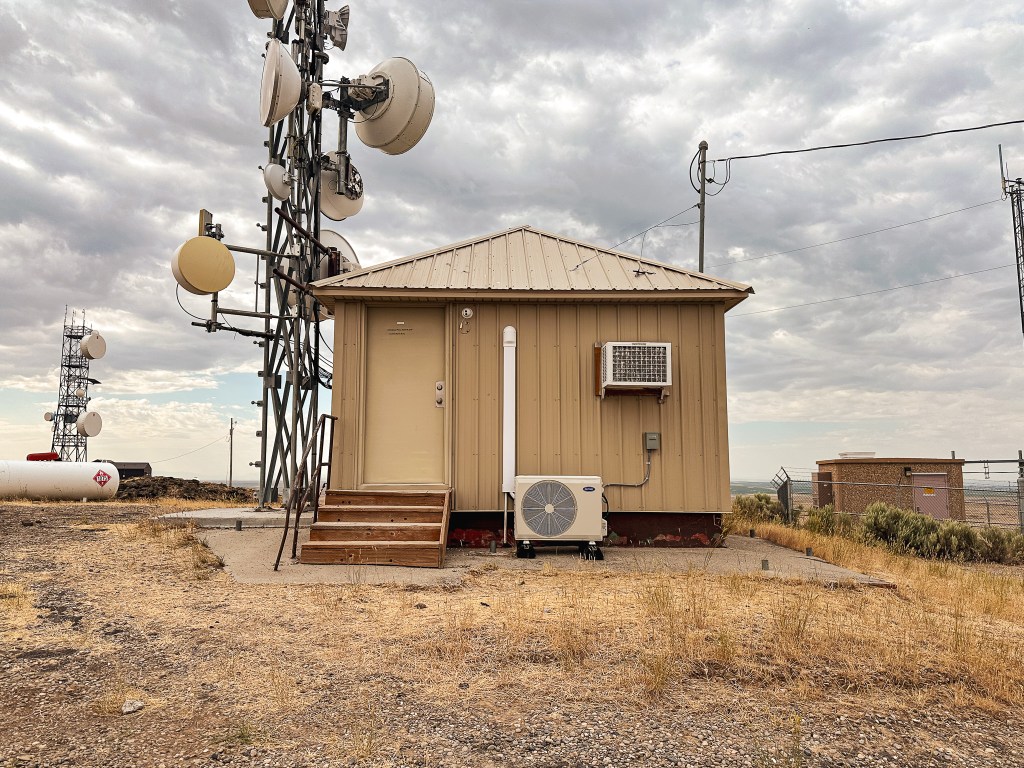
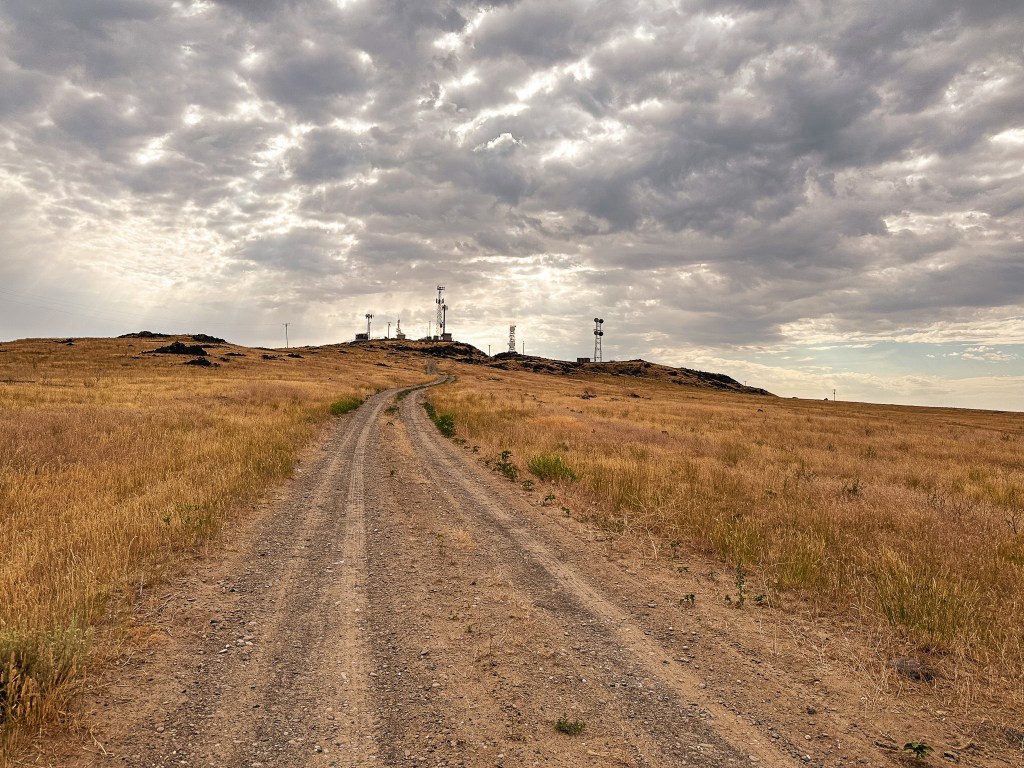
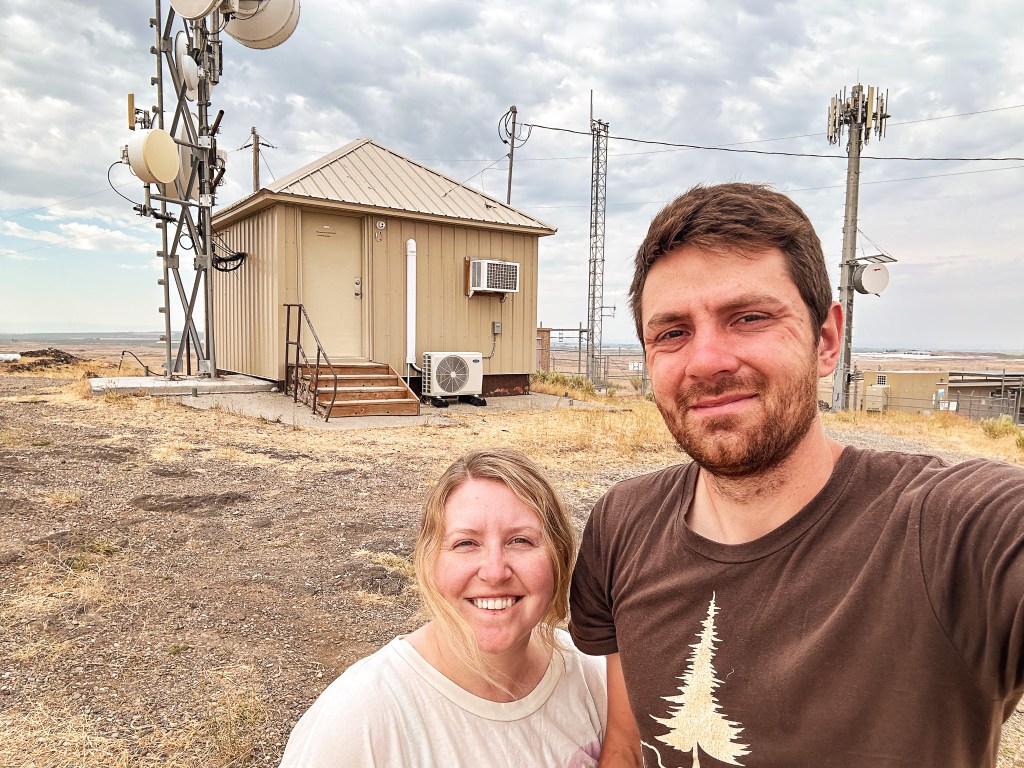
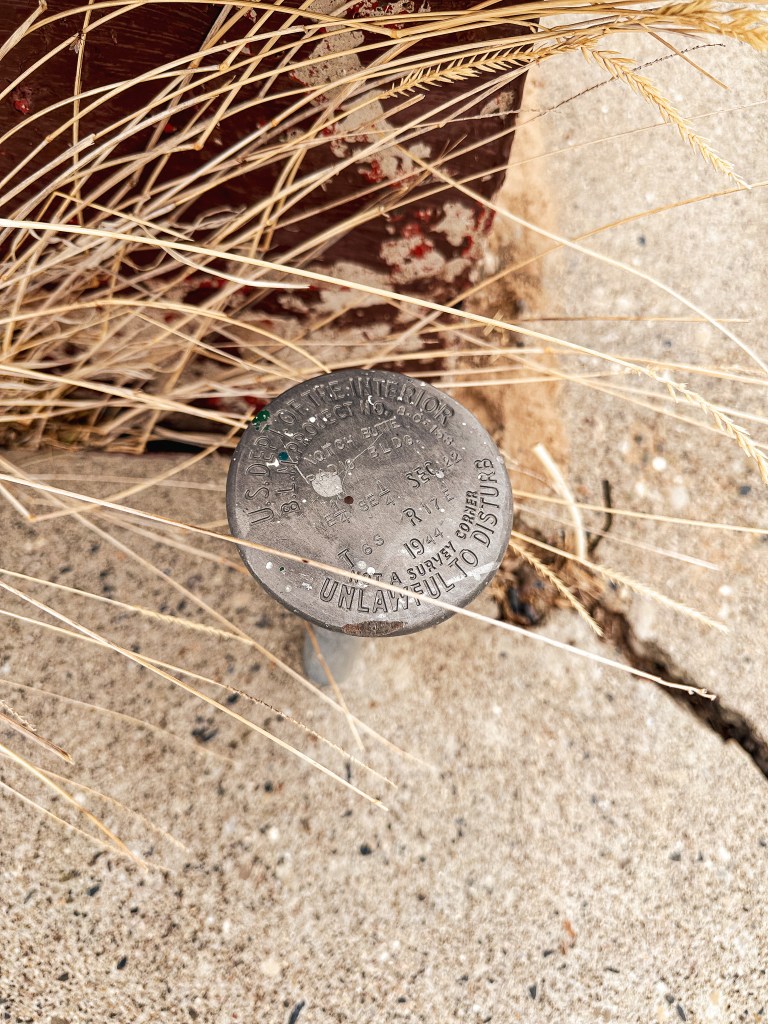
Notch Butte is located roughly 15 miles outside of Jerome and 4 miles South of Shoshone just off of HWY-93. This area of Idaho is made up of flat farm land and the butte is easy to spot from the highway. The road is noted as Notch Butte road on Google maps, but it was unsigned during our visit. Heading North from Jerome towards Shoshone, it was our first turn off to the right after milepost 70. The road is gravel with some minor ruts in it, but any car should be able to drive to the summit. I personally decided to park and walk since it was such a short distance. The road is a little over half of a mile from the highway to the summit. After making the turn from the highway you will pass over a cattle guard and veer left at the unmarked junction to reach the summit. Not to say it should be obvious, but it should be obvious. The surrounding field seemed to have a lot of vole activity and we even saw an antelope crossing the road while we parked. There’s not much else to note except it was muggy and hot. This is the first fire lookout we have had the chance to visit in Idaho and it won’t be our last. This is a state we’ve both talked about exploring more of often but have not yet carved out the time to do so. It has been slowly creeping closer to the top of our priority list.
History.
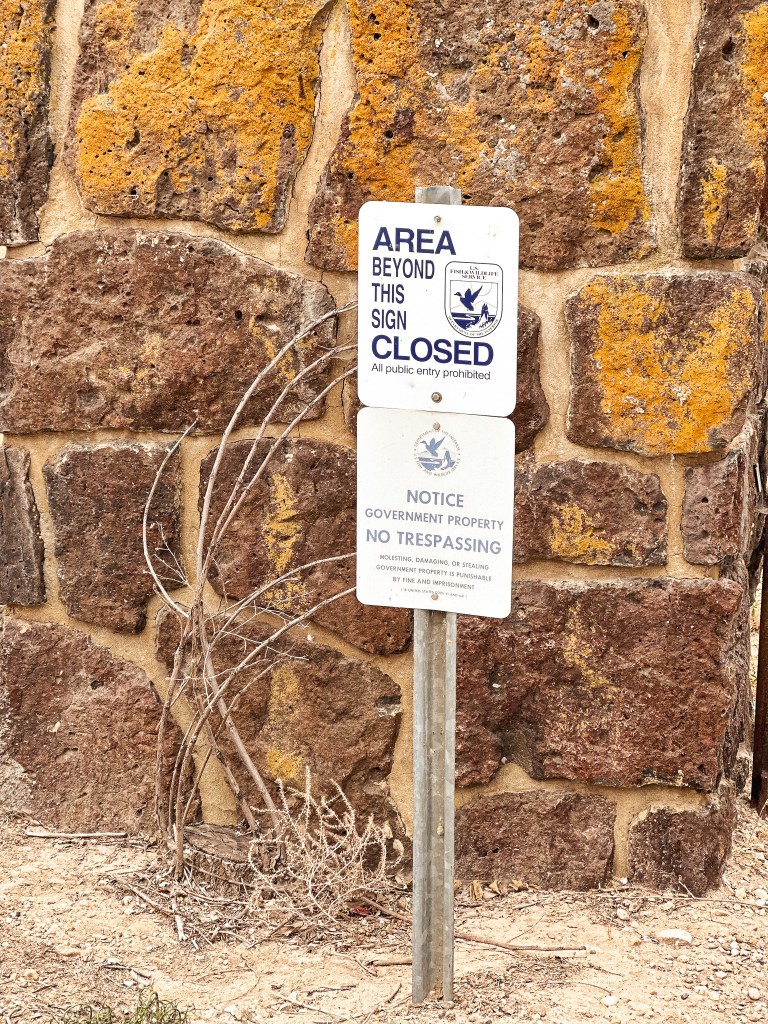
Built in 1941, the lookout on Notch Butte was a 14’x14′ USFS Region 1 ground cabin. It is noted as being used for emergencies into the 2000s, but has since been converted into a communication building. I wish there was more information on why they chose to build a fire lookout here. It seems it was mostly used to spot fires on range land surrounding the Union Pacific railroad.