Location.
Mount Rainier National Park
Status.
Maintained; Currently standing
Estimated drive time from Portland, OR.
3 hours
Date visited.
October 7, 2023
Elevation.
5,485′
National Historic Lookout Register.
US 478; WA 51
Trip Report.
Gobbler’s Knob has been long standing in my back pocket for a decent late season hike or backpack. It has eluded us the last couple of years due to early season snow or bad weather during the weekends we had previously allotted for it. This was the last fire lookout I needed to visit to complete my set for Mount Rainier’s fire lookouts within the National Park. There are lists that include others, but they are technically not located within the park boundaries. Garnet still has Tolmie Peak (post) and Mount Fremont (post) to visit since I did both prior to meeting him. These are ones I look forward to revisiting when the time comes. Especially, Mount Fremont (post) since that was the first fire lookout I ever had the pleasure of visiting. We had just returned from our week away in Glacier National Park and there was definitely house projects and work to catch up on at home. September has been busy (the outdoorsy fun kind of busy) and progress has been slow. But, when we noticed the weekend forecast called for sunny skies and warm temperatures, decisions were made. The other late season backpackers must not have checked the forecast yet because there were still all the wilderness permits available online when this idea took shape Monday and was executed by Tuesday. At the time you did not need a permit to hike to this fire lookout as a day hike, just a National Parks Pass for access and parking. Though it sounds like Mount Rainier is going to be adopting the limited entry/day use permits in 2024 for high use areas of the park. Make sure to do your own due diligence when visiting the park. Our plan was to stay the night at Lake George for the evening to help break up the distance. For this, a backcountry permit is required and can be booked ahead of time via Recreation.gov. You will need to pick up the permit in person from your choice of Wilderness Information Centers. These are only held until noon the day your hike is scheduled to begin and can be picked up as early as one day prior. If you know you will be picking up your permit later than noon, you will need to notify the Rangers ahead of time to schedule a later pick up. Otherwise your permit reservation is cancelled and re-designated as a first-come, first-serve. You also have the option to try and snag a walk up permit but there are usually only two designated for walk up in this area and it’s never a guarantee. There are limited permits available and this can be a popular destination during the summer months, so additional planning may be required. The closest WIC to Gobbler’s Knob is located in Longmire, or the Longmire Museum if it’s during the off season. Always double check the operating hours before selecting your pick up location.
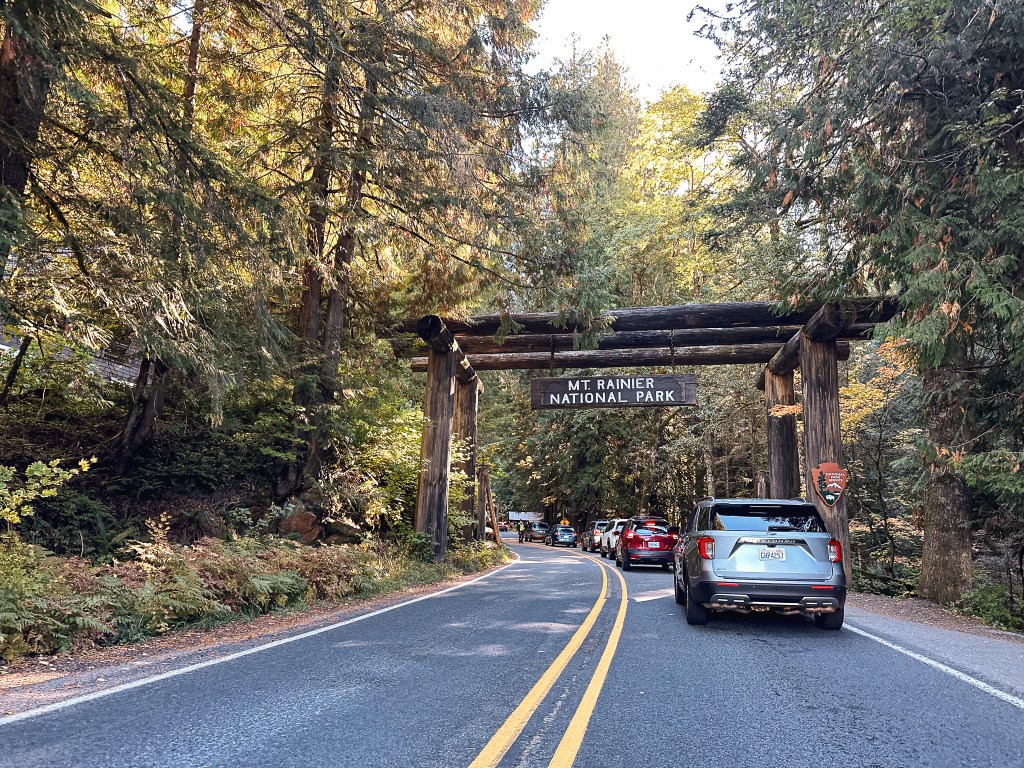
We planned to pick up our permit from the Longmire WIC since it wasn’t closing for the season until October 10th. This is just shy of a 3 hour drive from Portland depending on traffic. We knew this meant we would need to get an early start and set our alarms for 5:45AM. Our wheels didn’t hit the pavement until 7:30AM though, since we wanted to make a hearty breakfast and needed to button up things around the house. We set out via I-205 to I-5 to connect to HWY-12 and cut up via HWY-7 to eventually get to HWY-706 that would take us to our needed entrance of the park. By the time we reached Ashford, we realized everyone had a similar idea to us. October is supposed to be a time of the year when hiking trails settle down and get less use, but the unseasonably warm weekend brought everyone out for one last hoorah (ourselves included). The forecast called for clear skies and temperatures somewhere in the 70-80 degree range depending on what elevation you were situated. We joined the assembly line of vehicles and waited for our turn at the kiosk. I know Mount Rainier is a popular National Park, but after seeing the entrance back up at 10AM in October I can’t even fathom how the summer lines compare. As the line crept on at a snails pace with no entrance in sight, we started to get worried we wouldn’t make it through before our noon deadline. We debated calling the ranger station, but had spotty service near the entrance. Luckily we did end up making it through just fine after a 30-40 minute wait, but it’s definitely something one should factor in to their travel time. Once in the park you will still need to drive a little ways past the entrance to get to Longmire. We even passed the turn to access the trailhead and had to back track after picking up our permit. The WIC was easy to find and was one of the farthest buildings to the left of the lodge. Something else to note is this backcountry campsite requires you to use their bear hang or a bear canister. We were aware of this but didn’t bring our bear canister with us since it said online the bear pole was usually up until there is snow on the ground. The ranger informed us due to how late in the season it was the pole had already been removed for winter and offered to let us check out one of their bear canisters for the night. The National Park offers these for free to check out as long as their supplies last. You only need to provide a drivers license to obtain this. Once again something to keep in mind if you’re visiting in the off season. Now with permit and bear canister in hand, we headed for the trailhead.


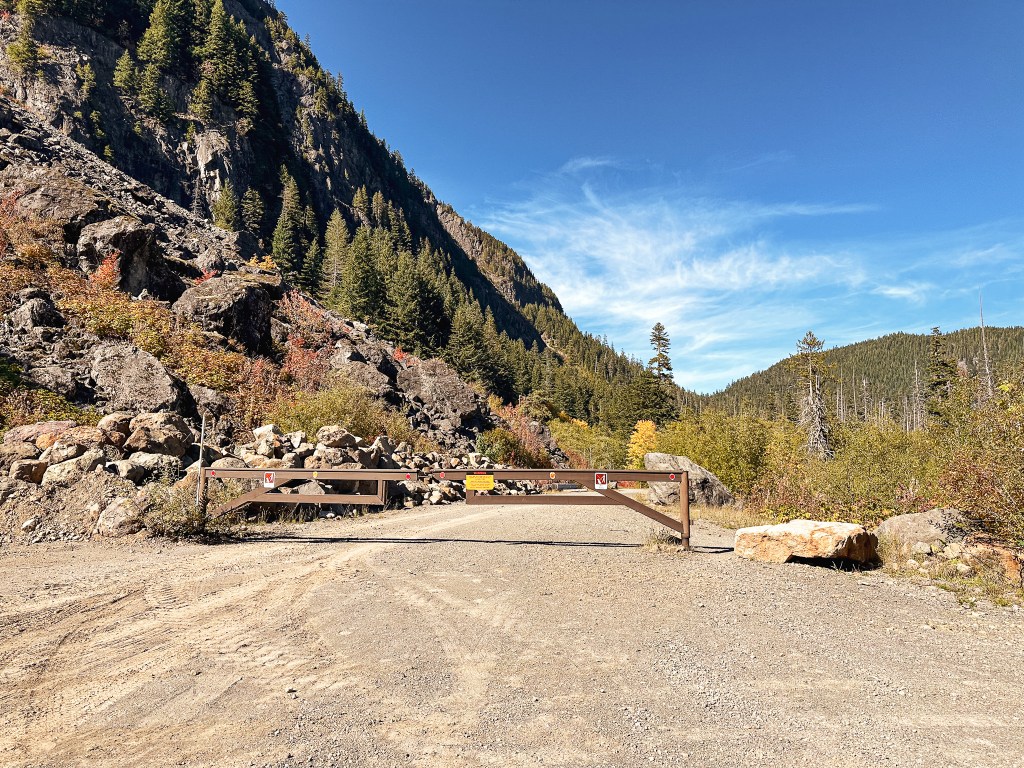

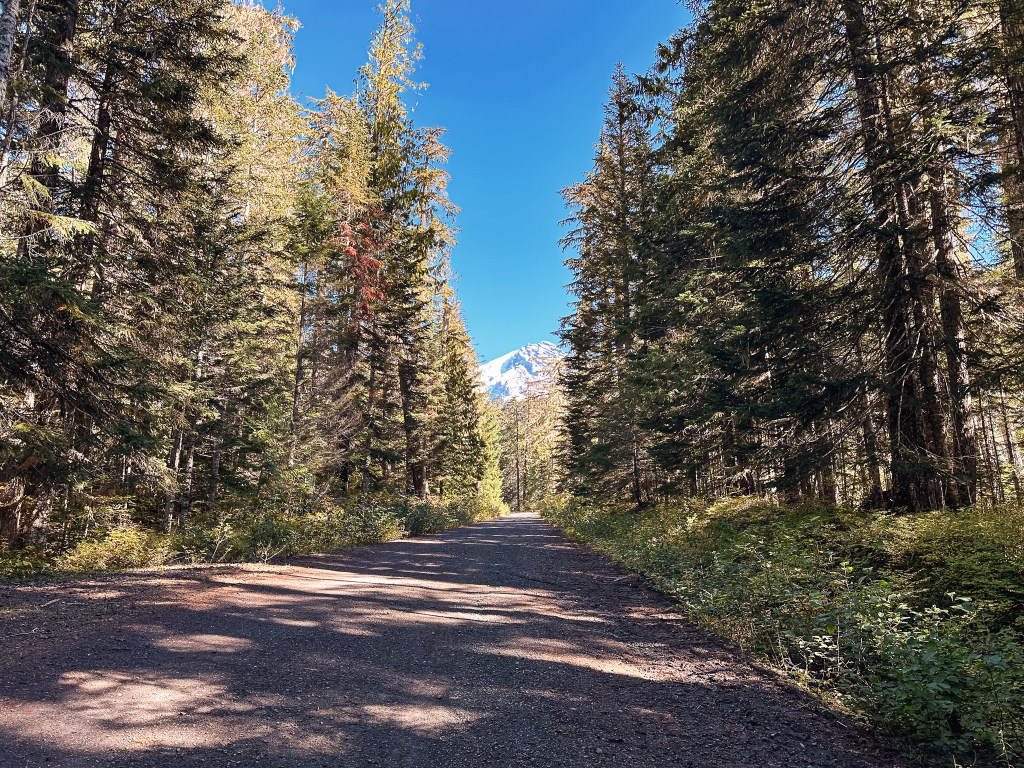
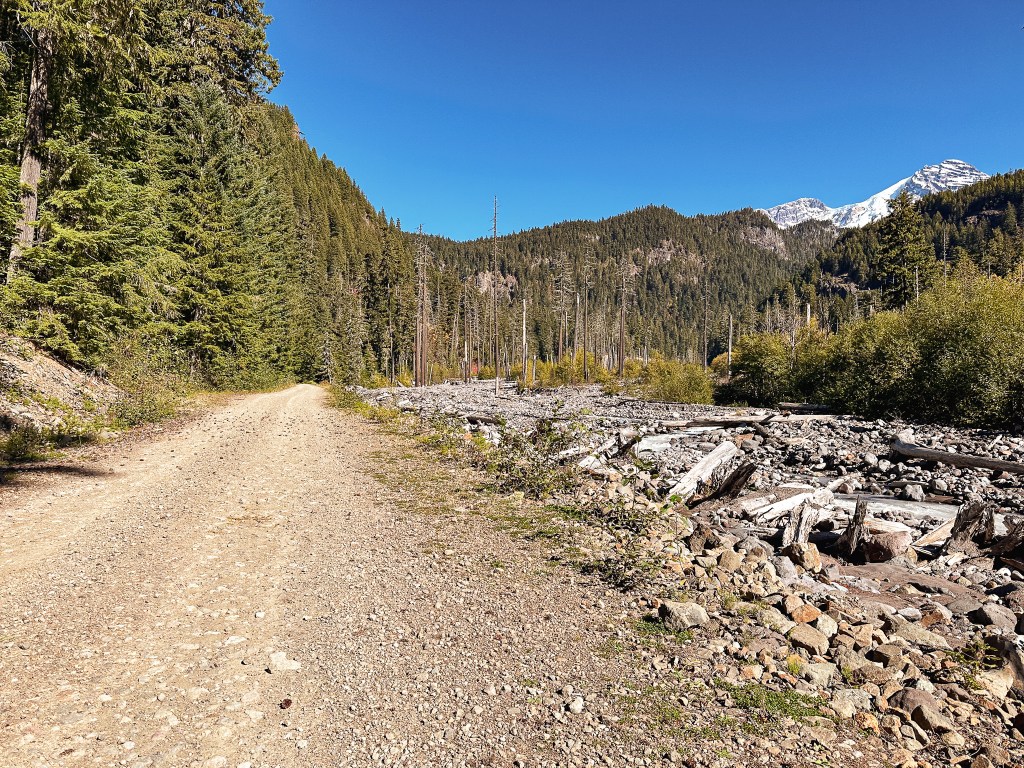
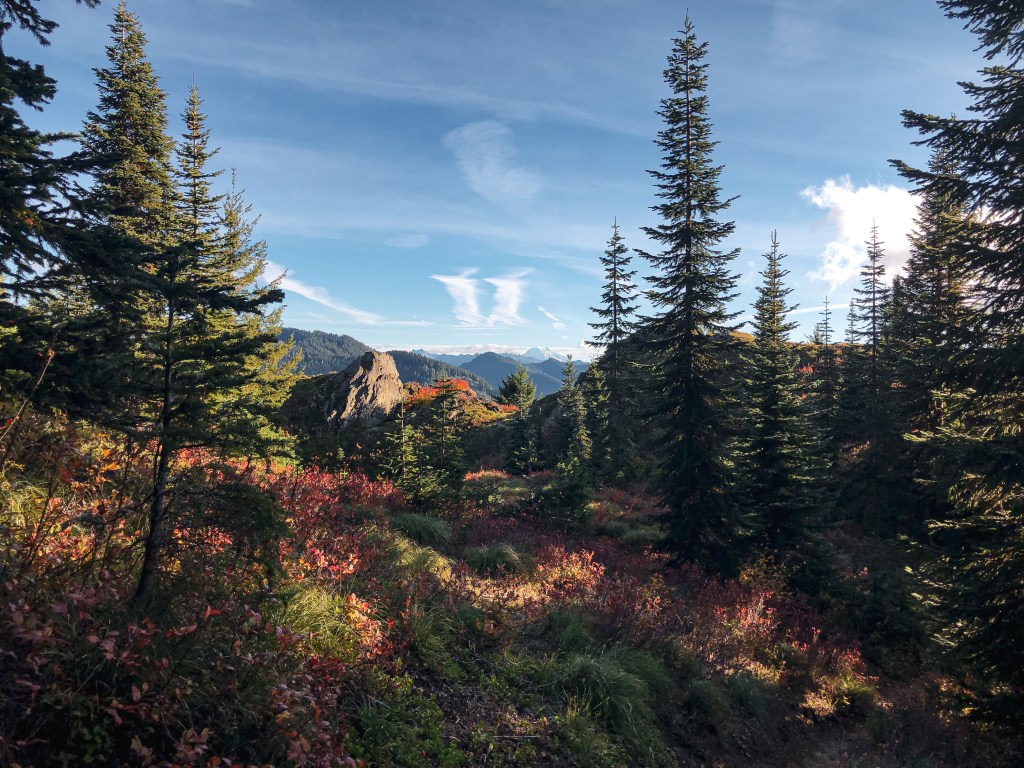
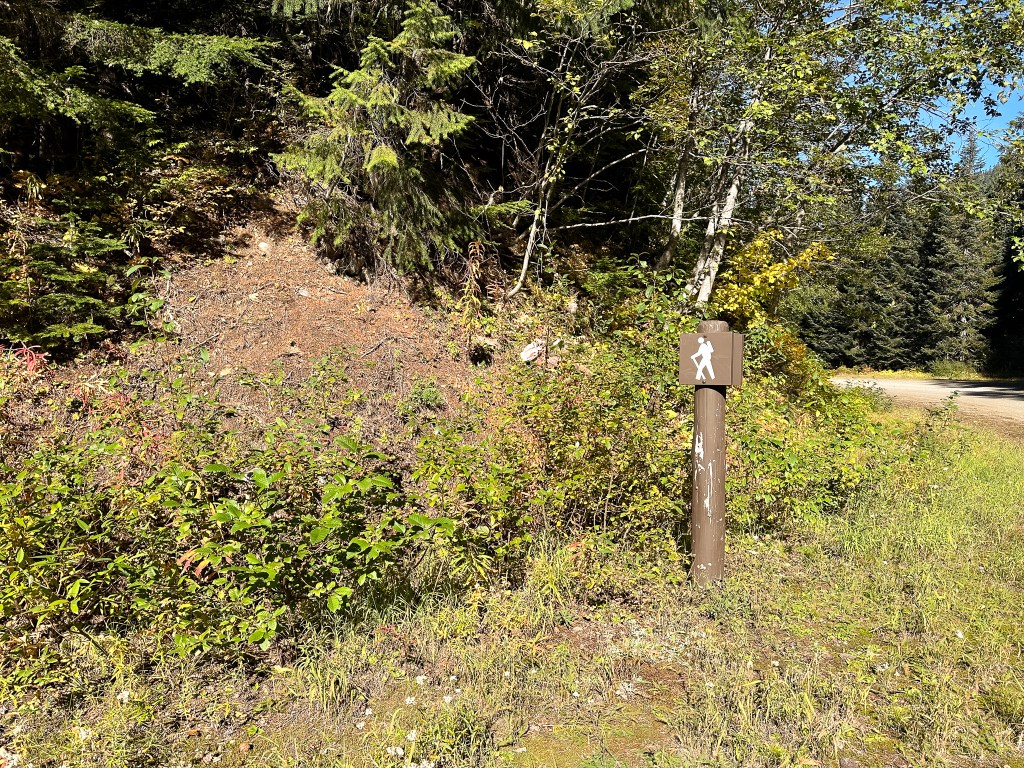
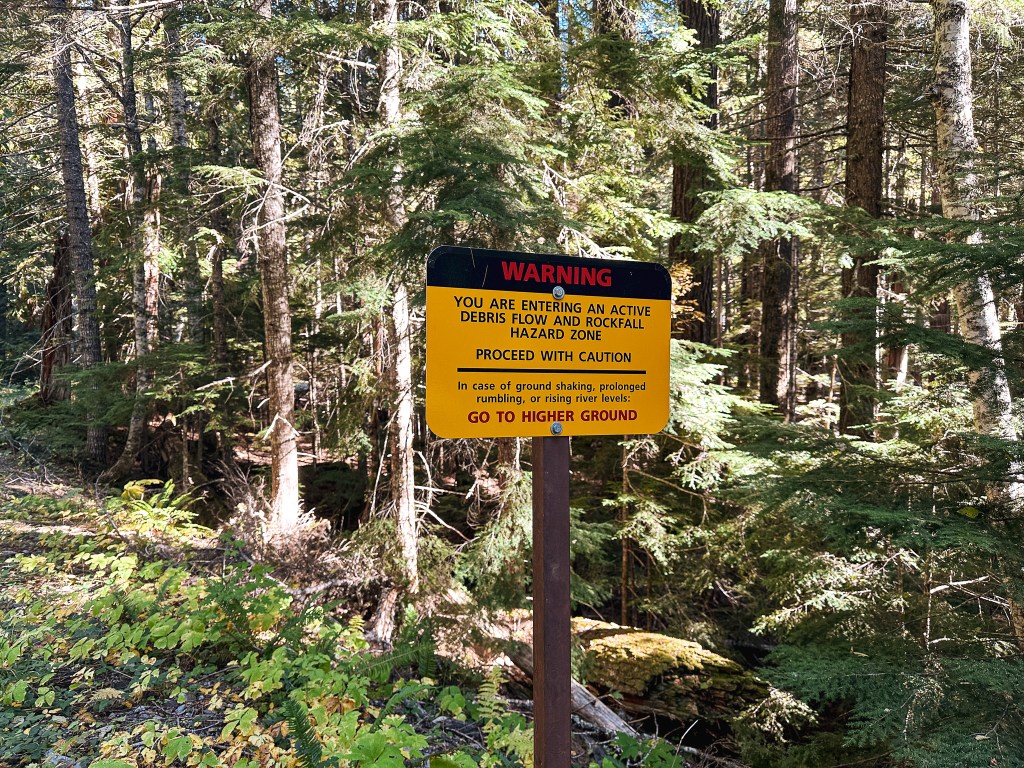
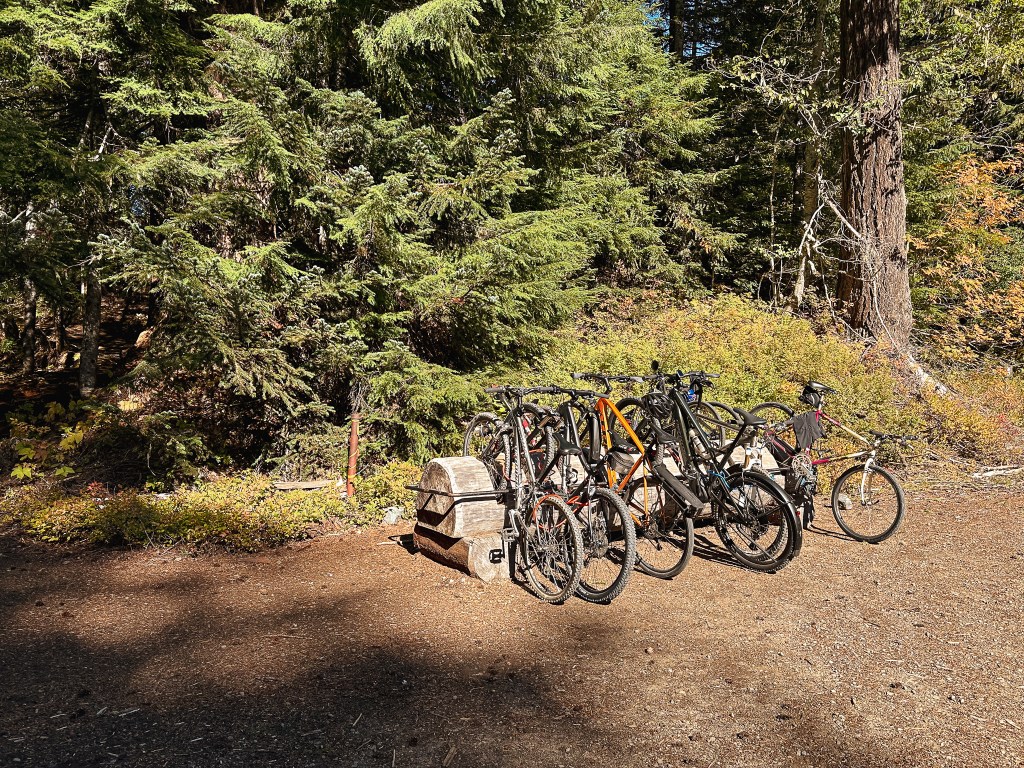
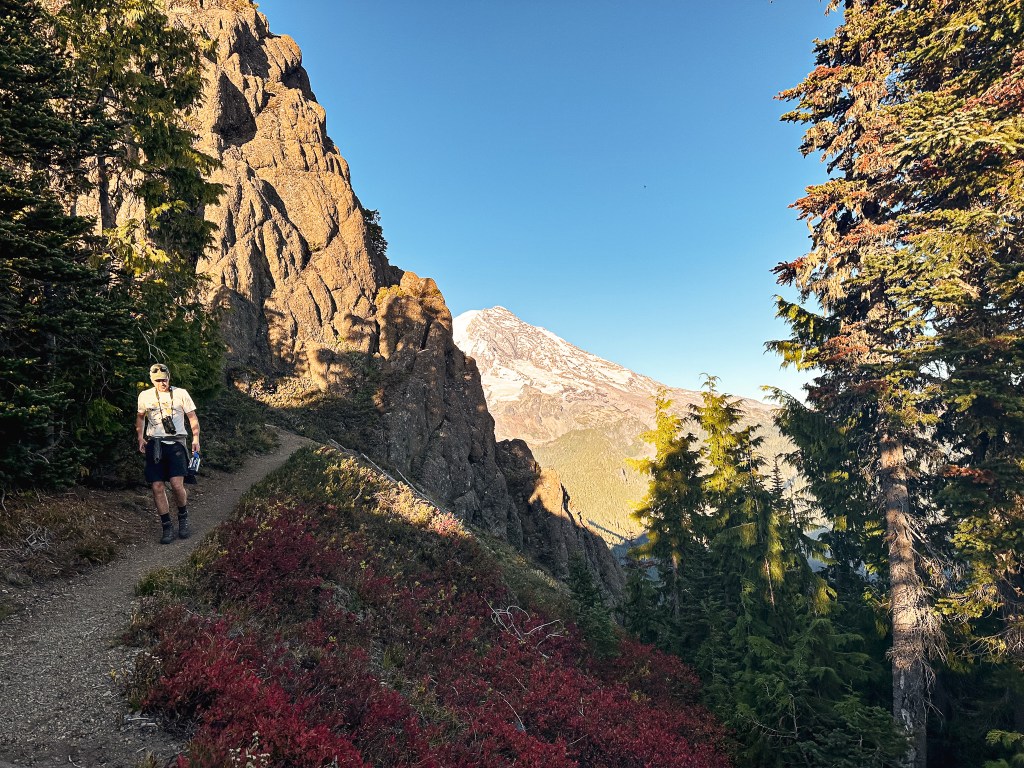
To access the trailhead, we turned on to the Westside road and followed it until the road closure. The road is off to the left if you’re heading in from the entrance of the park, but off to the right if you’re heading back from Longmire. There was ample parking for 15-20 vehicles where the road was closed (possibly more). It should be noted the Westside road is made up of gravel, but in decent condition with only minor potholes and rocks to avoid. Any standard low clearance vehicle should be able to make it without issue, but you can always ask the Ranger for current conditions. Once parked, we readied our packs and started up the road. At the time, I didn’t connect that this road continued on past the Lake George trailhead to access other areas within the park. I thought every car parked here was either at Lake George, the fire lookout, or on their way there as we hiked the road. With a mostly full parking lot this left us speculating for the next four miles on how busy it was going to be there, if there might be people there trying to backpack without a permit, or if last nights backpackers hadn’t left their camp spots yet. The hike along the road is fairly uneventful and mostly shaded by the surrounding trees. Don’t get me wrong though, it’s a nice walk in the woods. You will start out by passing around a large locked gate that marks the beginning of your road walk. Shortly after you will cross a bridge over Fish Creek. Once over the bridge there will be signs of washouts until it eventually opens up to a view of the mountain top and a ragging creek. This section parallels what I believe to be Tahoma Creek. There are plenty of signs of how this creek has pushed, overflowed, and manipulated the landscape around it which I can only assume is part of the reason why the road is kept closed. You will wind your way along the road for roughly 4 miles until you see a hiker sign off to your left. There is a distinguishable bike rack made from a tree trunk to mark the trailhead as well. It was full of bikes when we reached the trailhead despite not seeing many people along the road. The official hiking trail starts to the left of the bike rack. From here, it is 0.9 miles to reach Lake George and 2.5 miles if you are headed for the fire lookout. The tread becomes steeper once you leave the road and the real climb to the fire lookout begins.

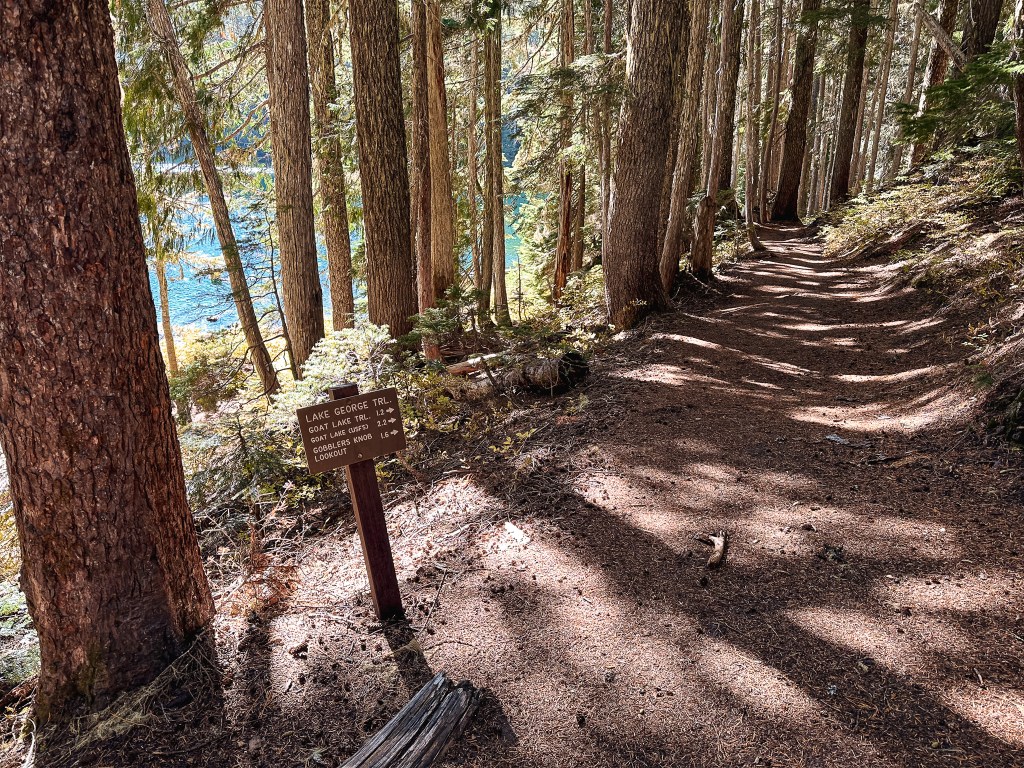


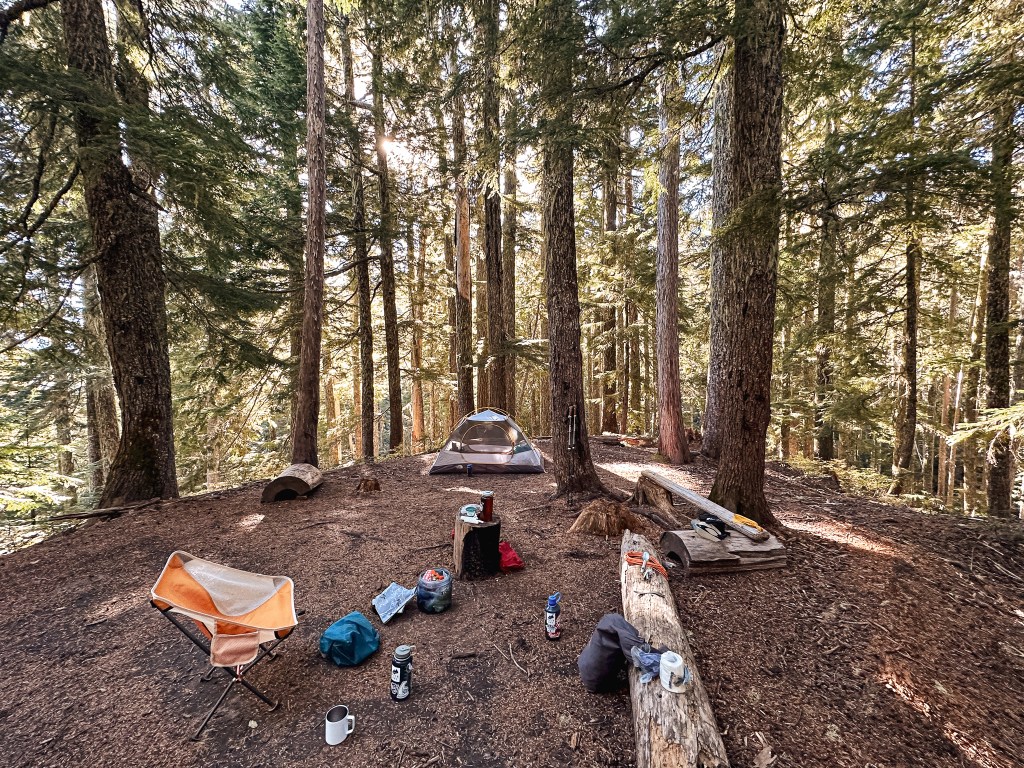


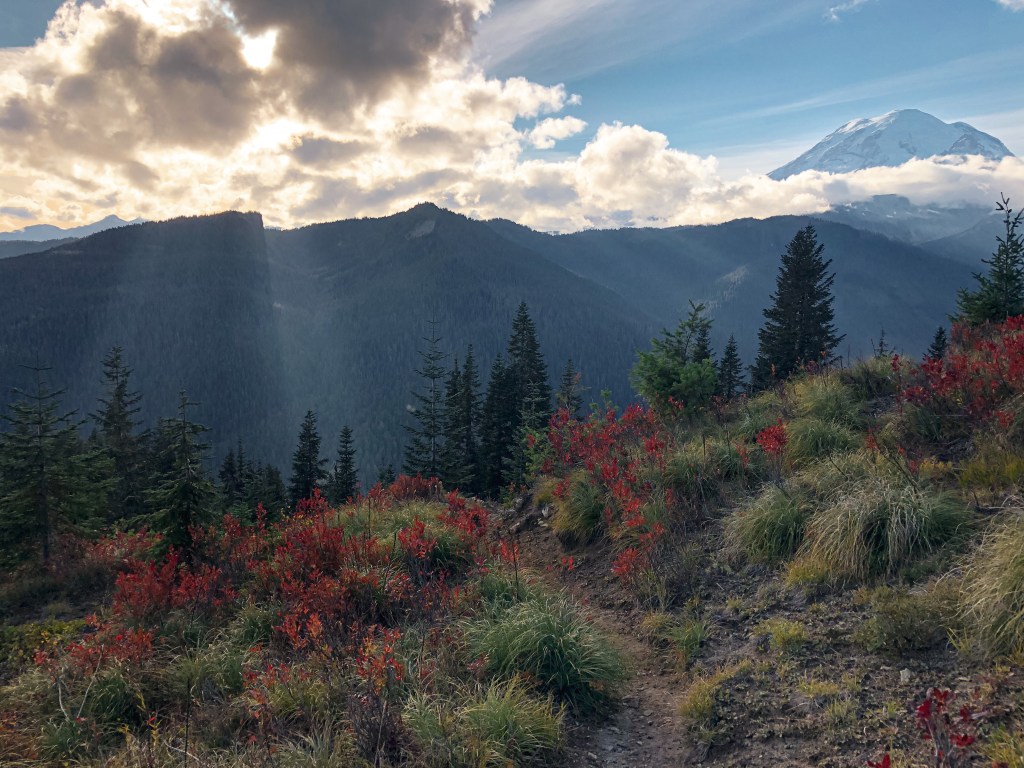
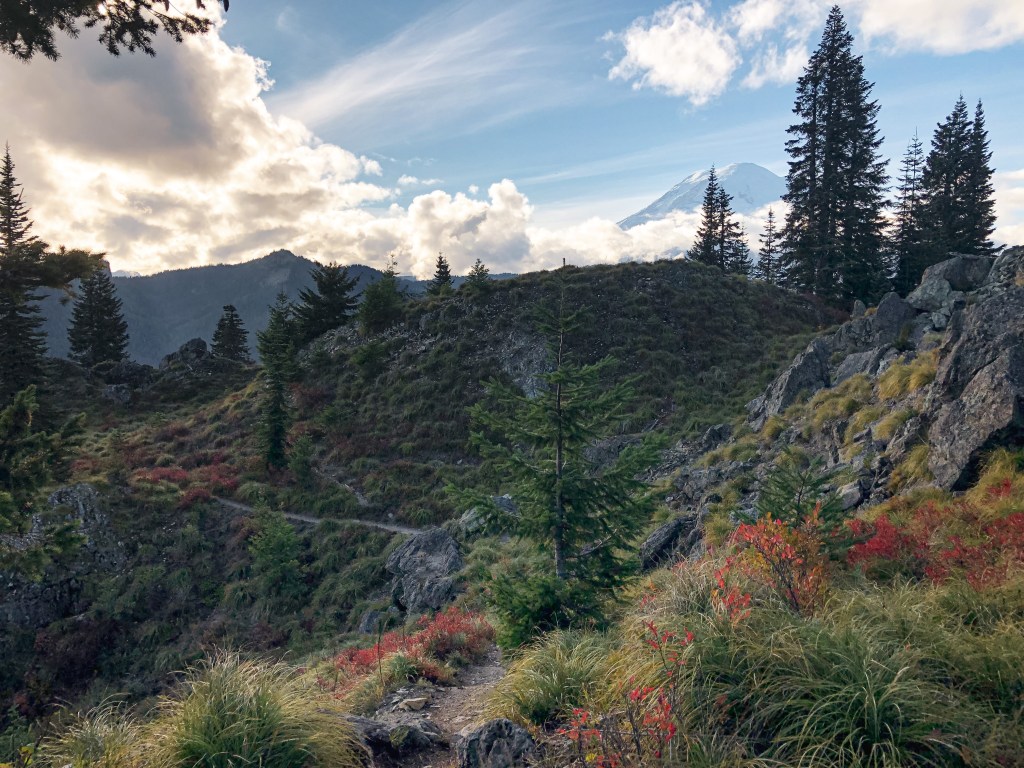
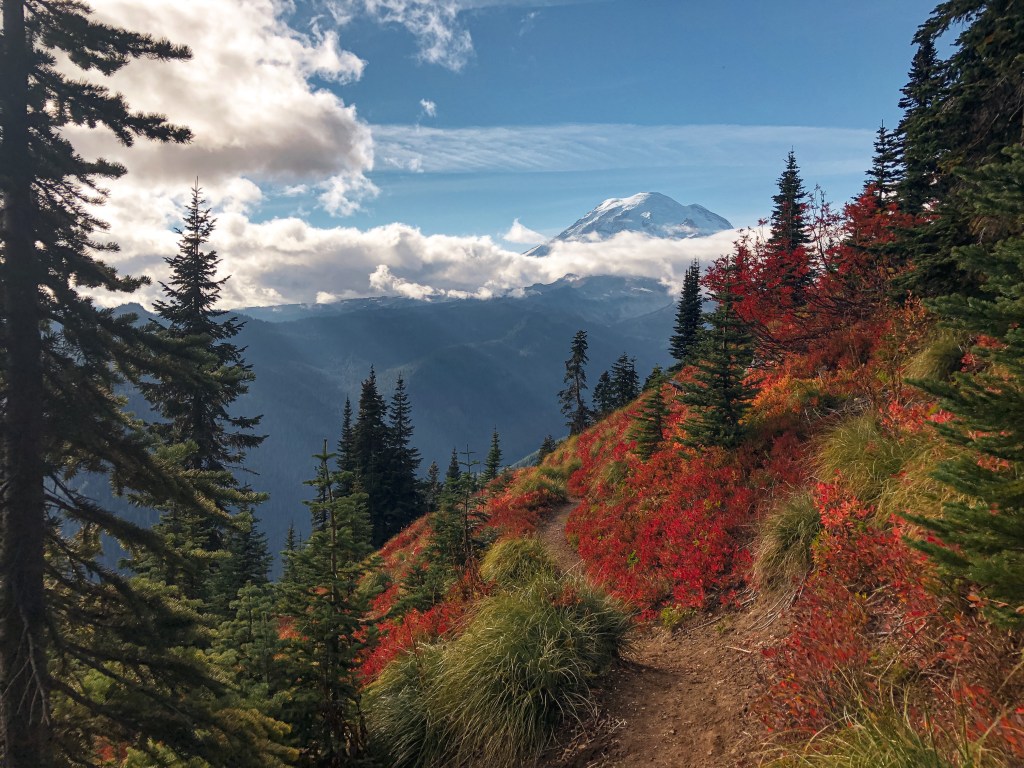
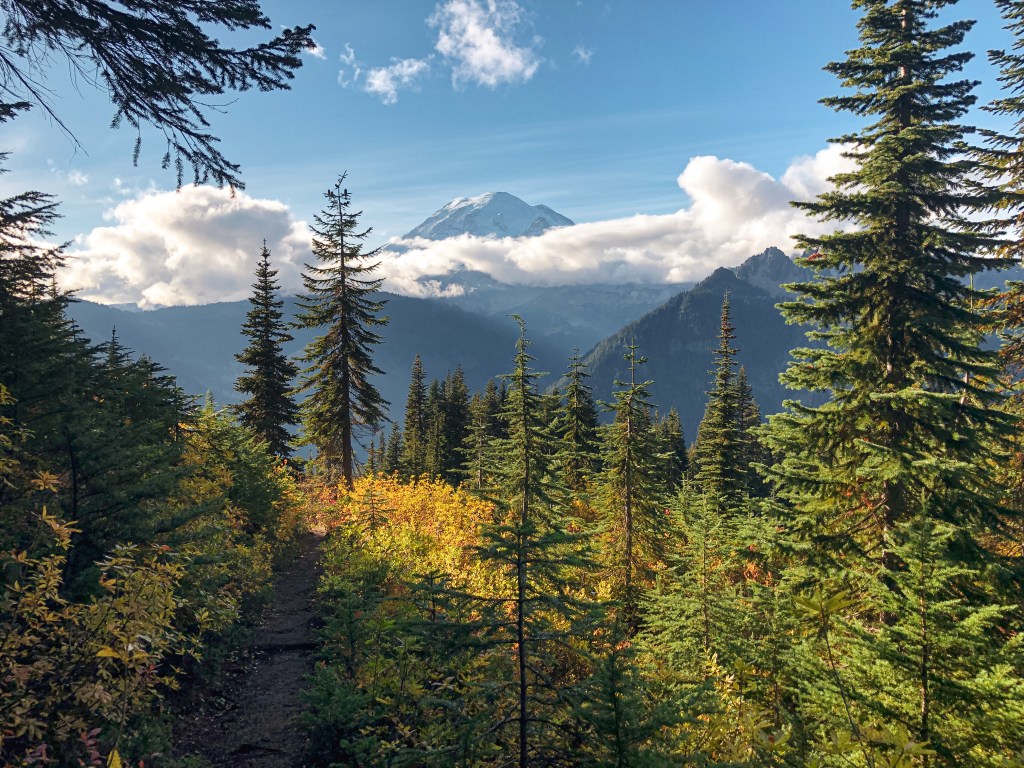
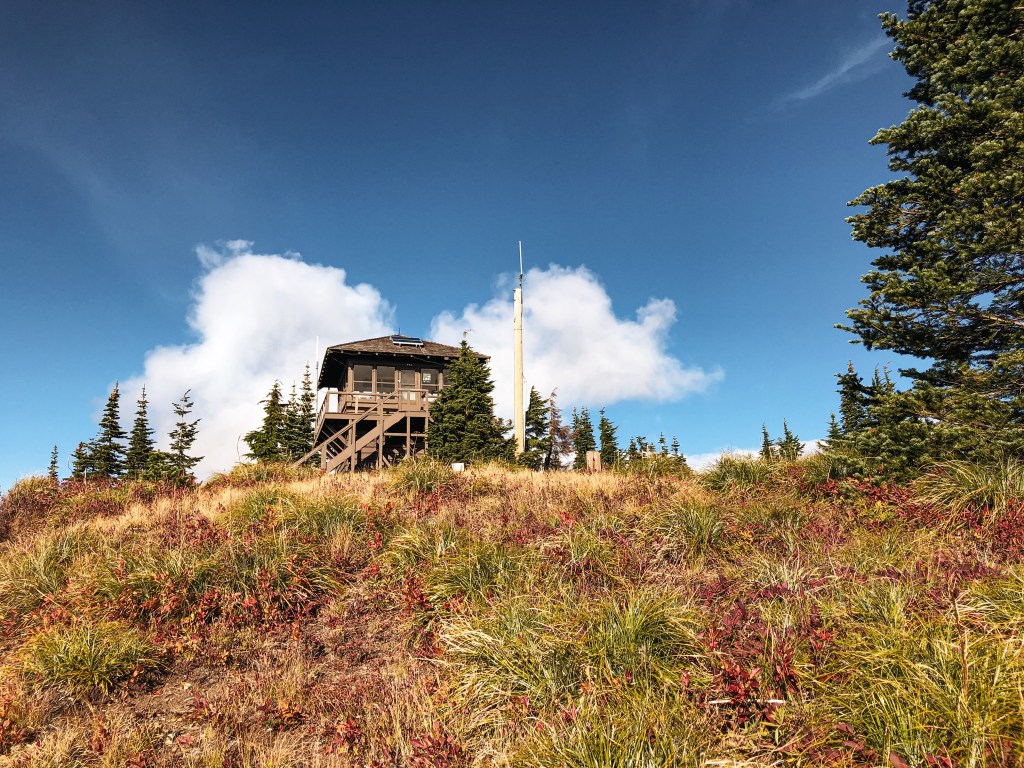
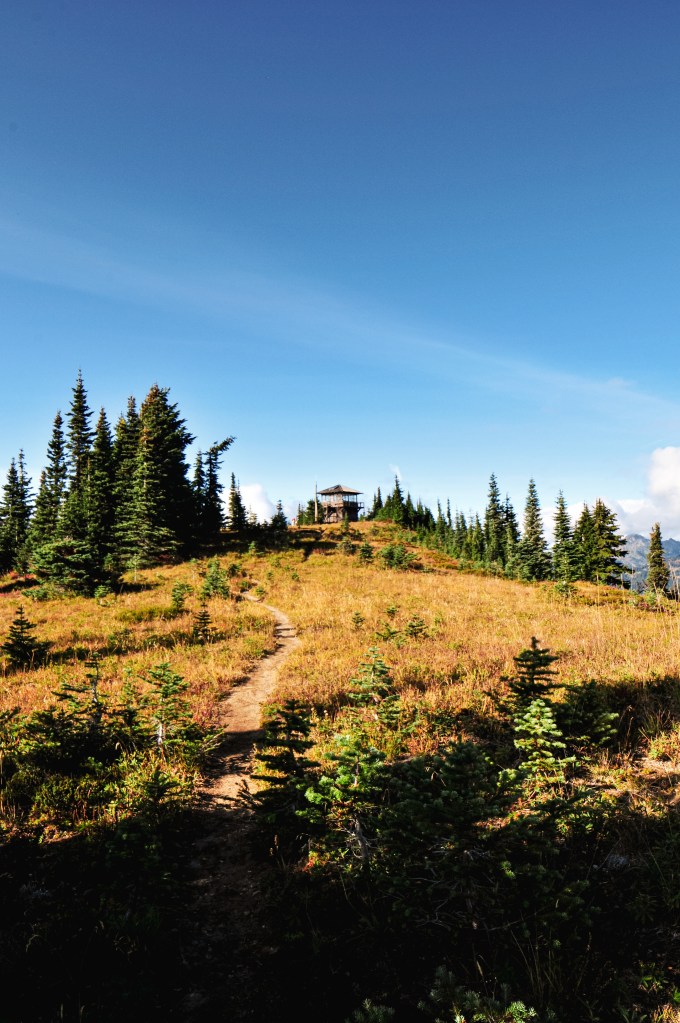
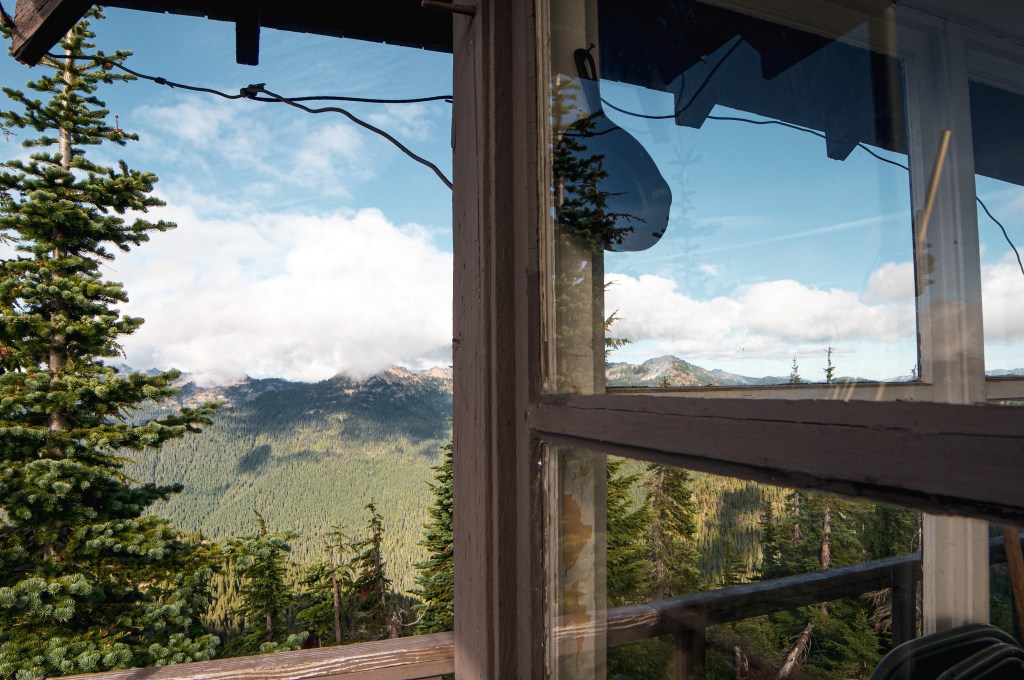
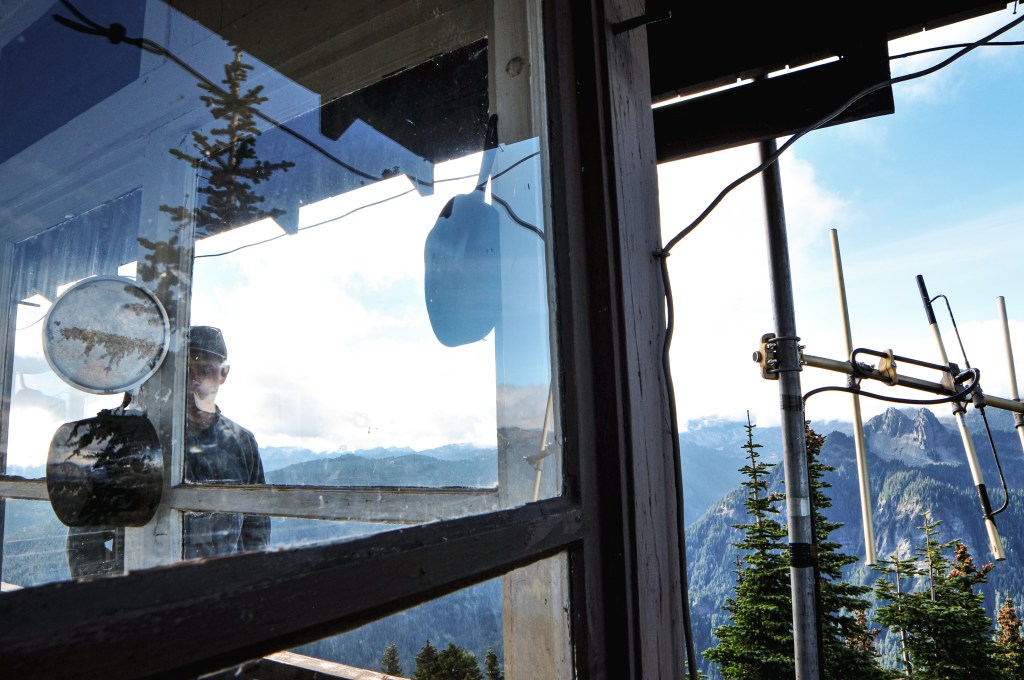
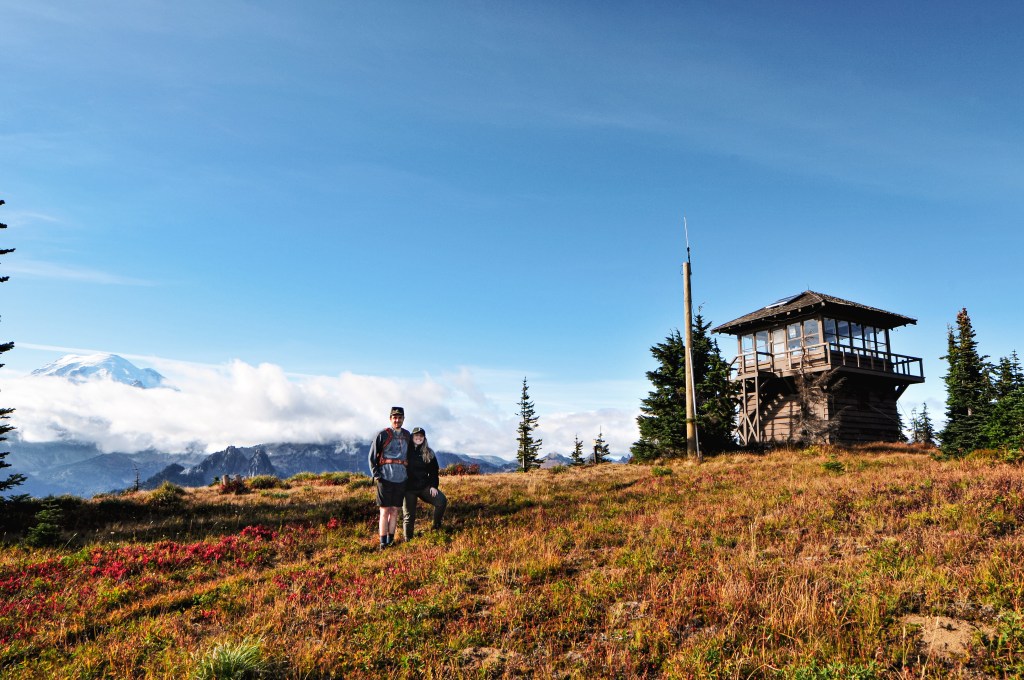
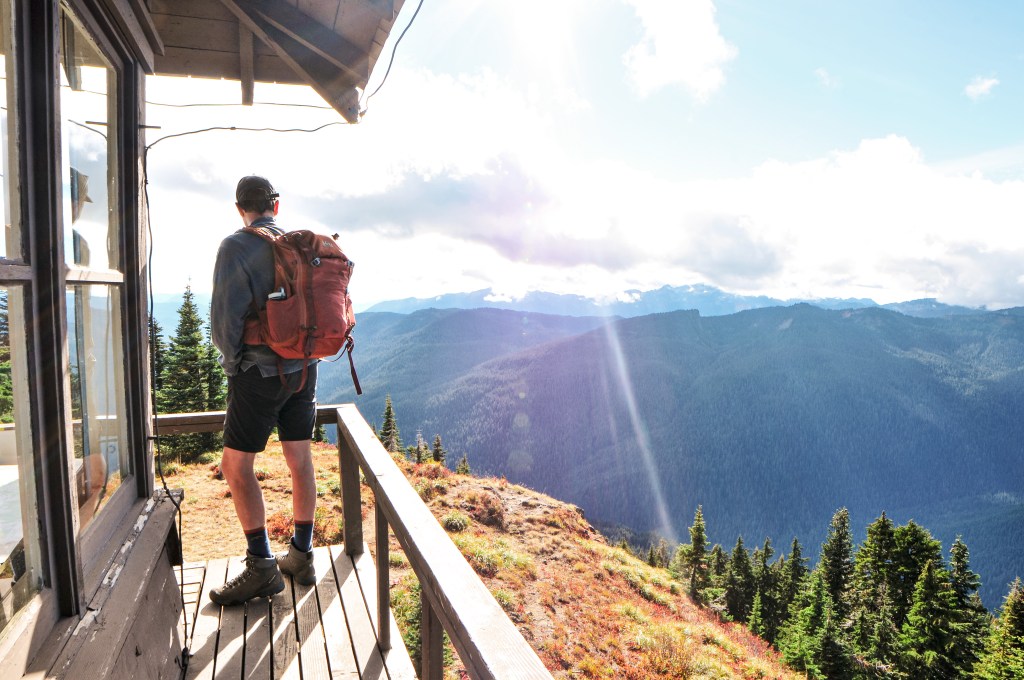
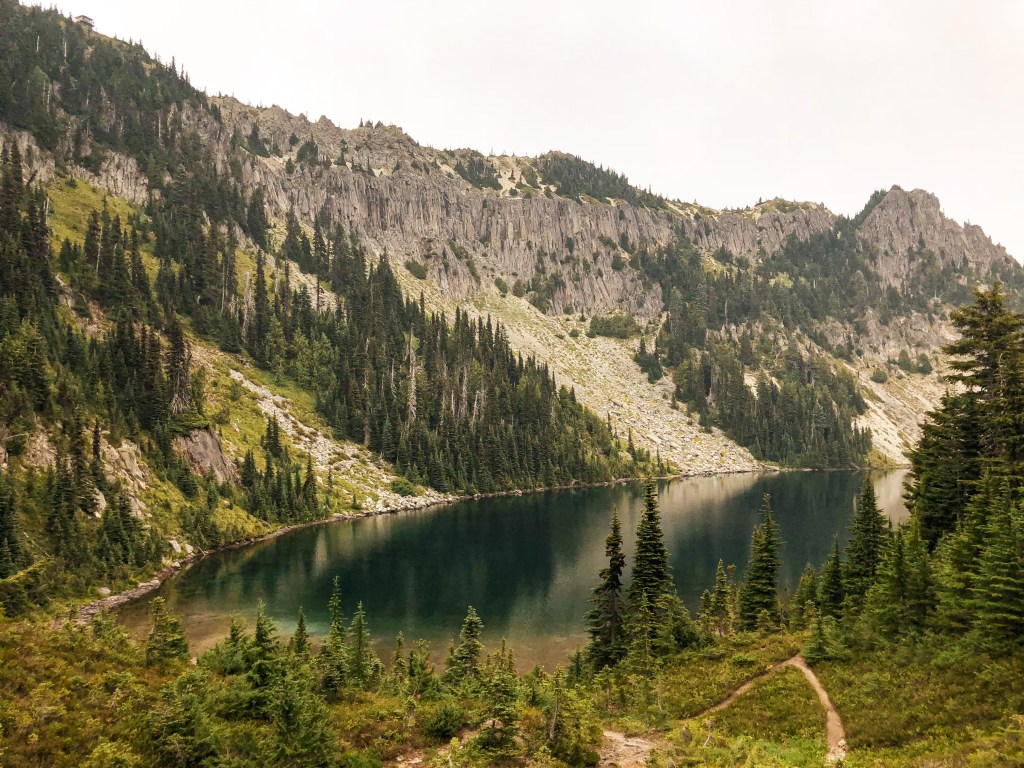
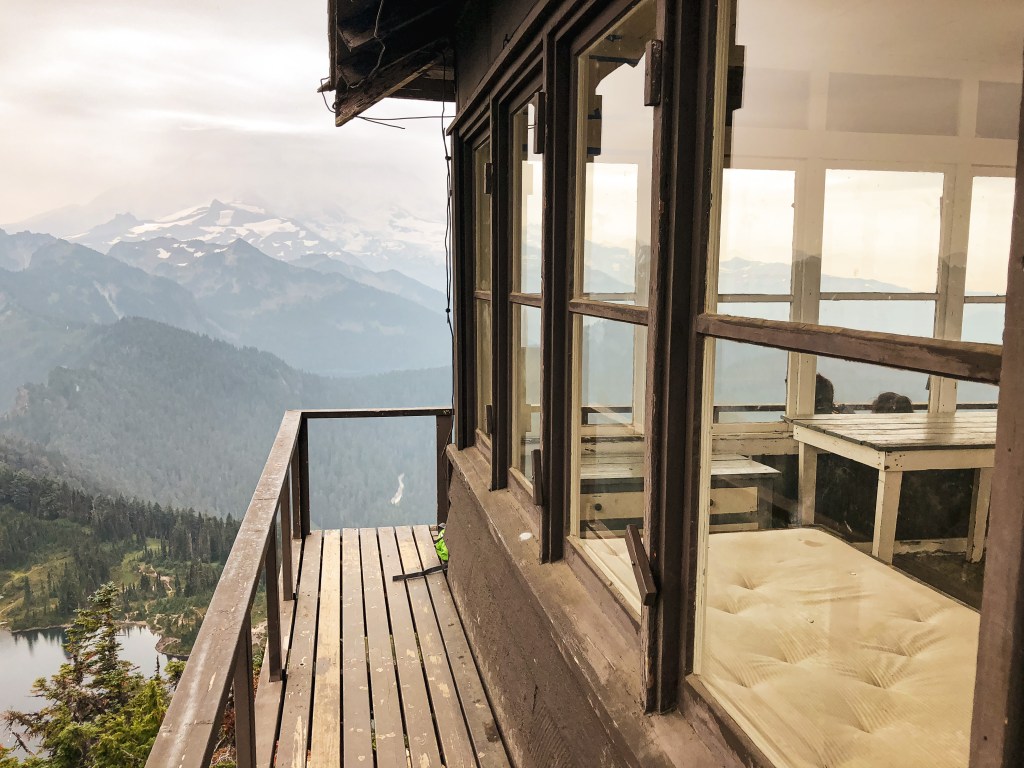
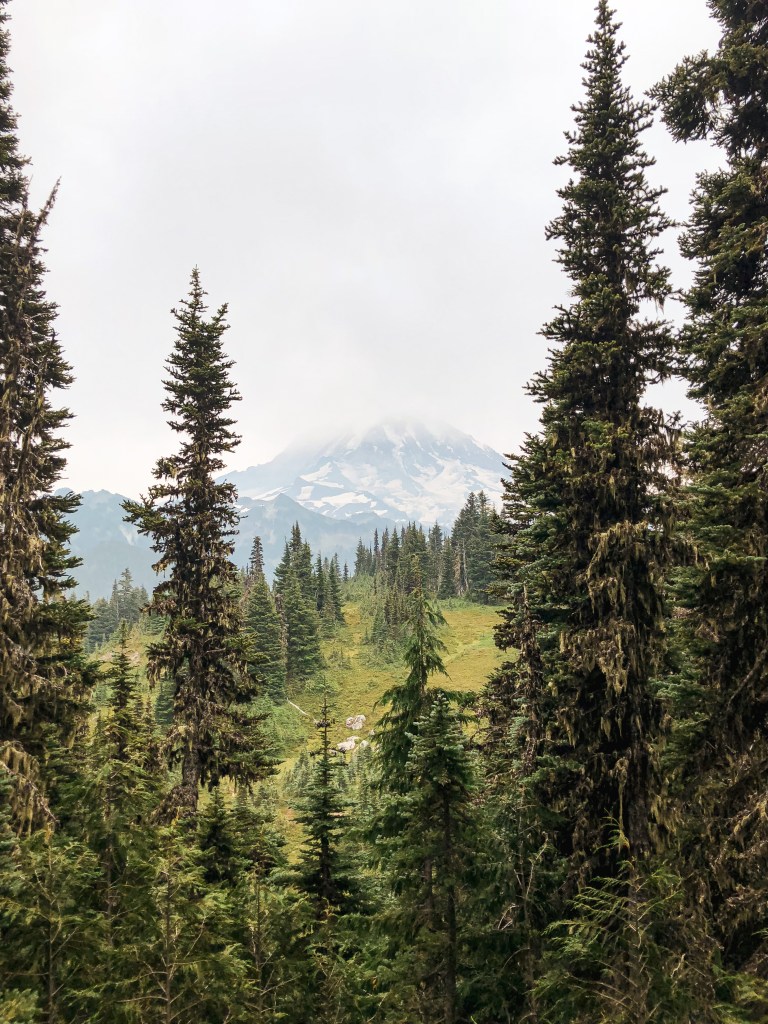
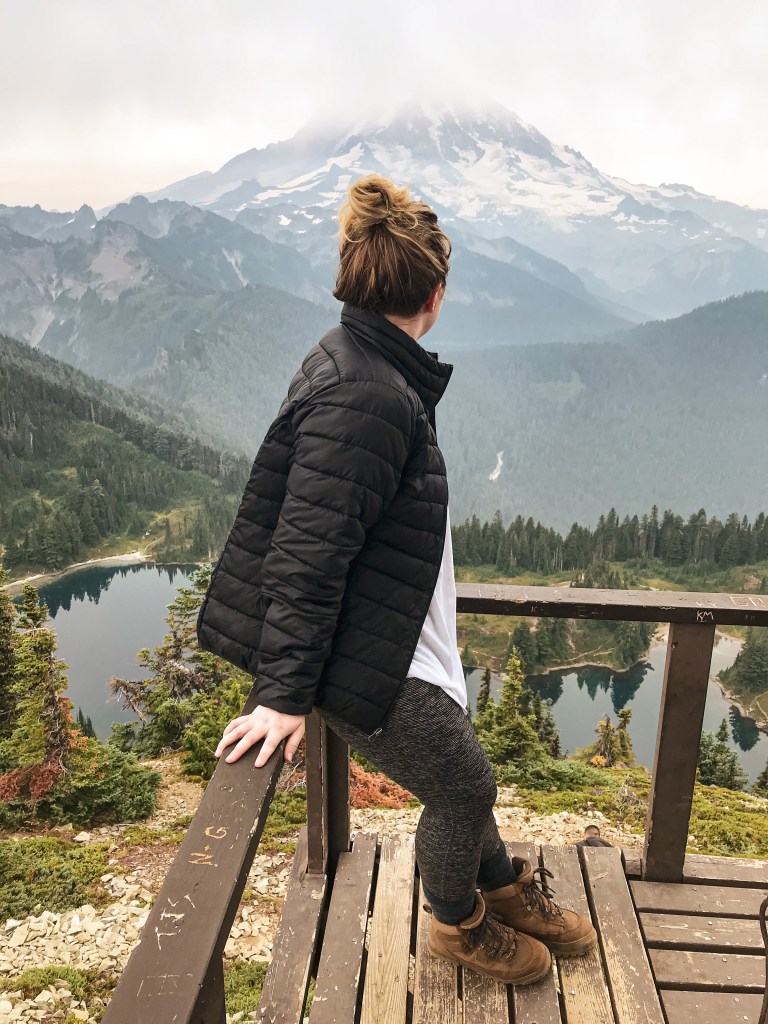
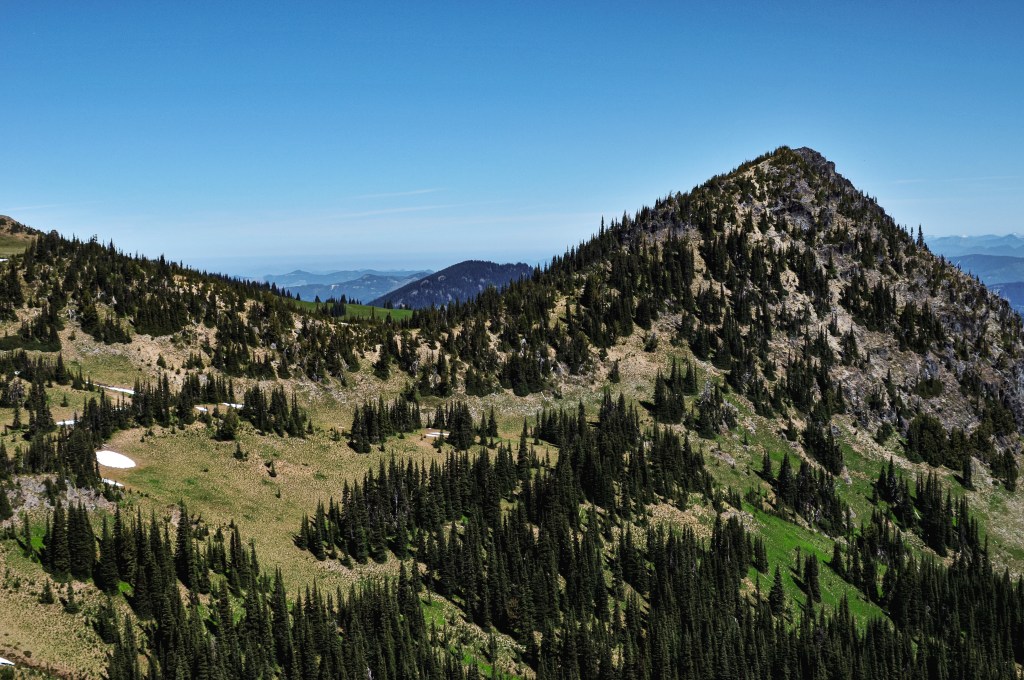
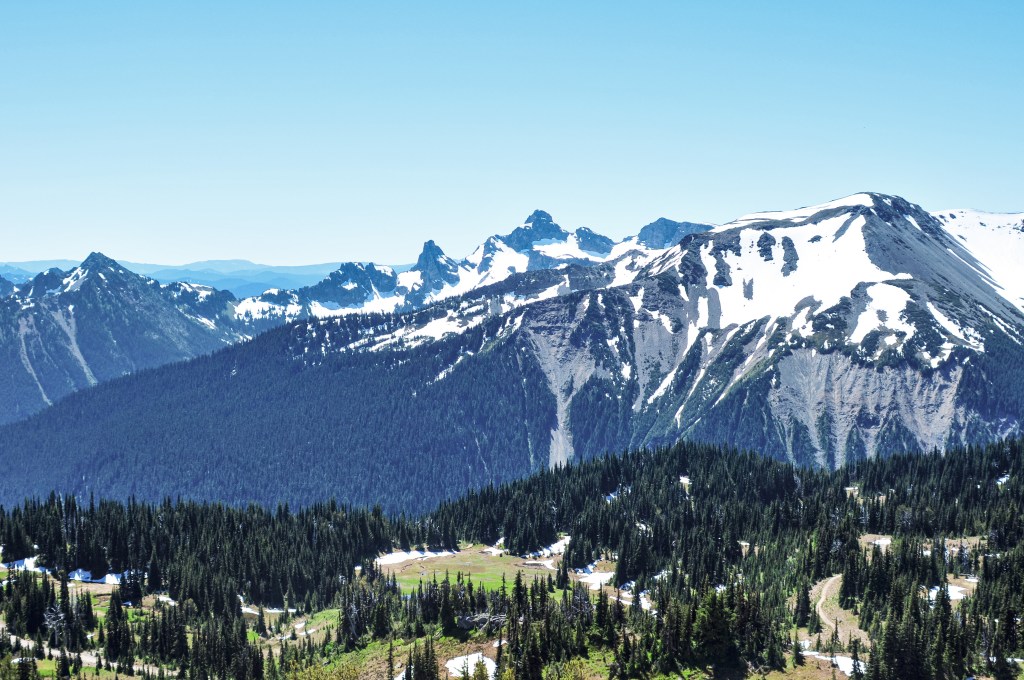
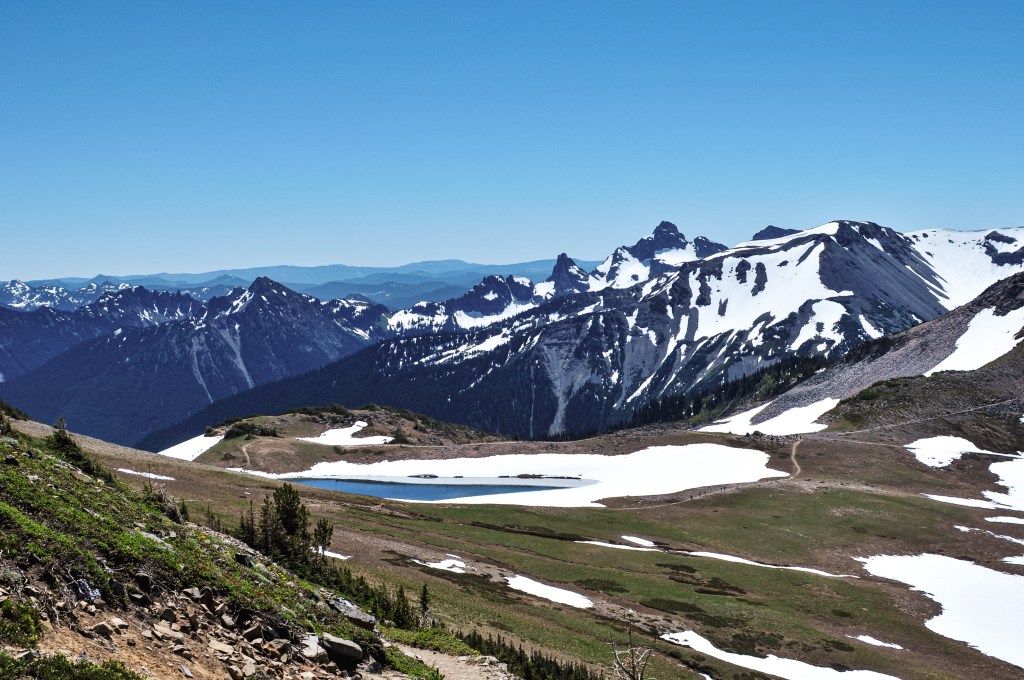
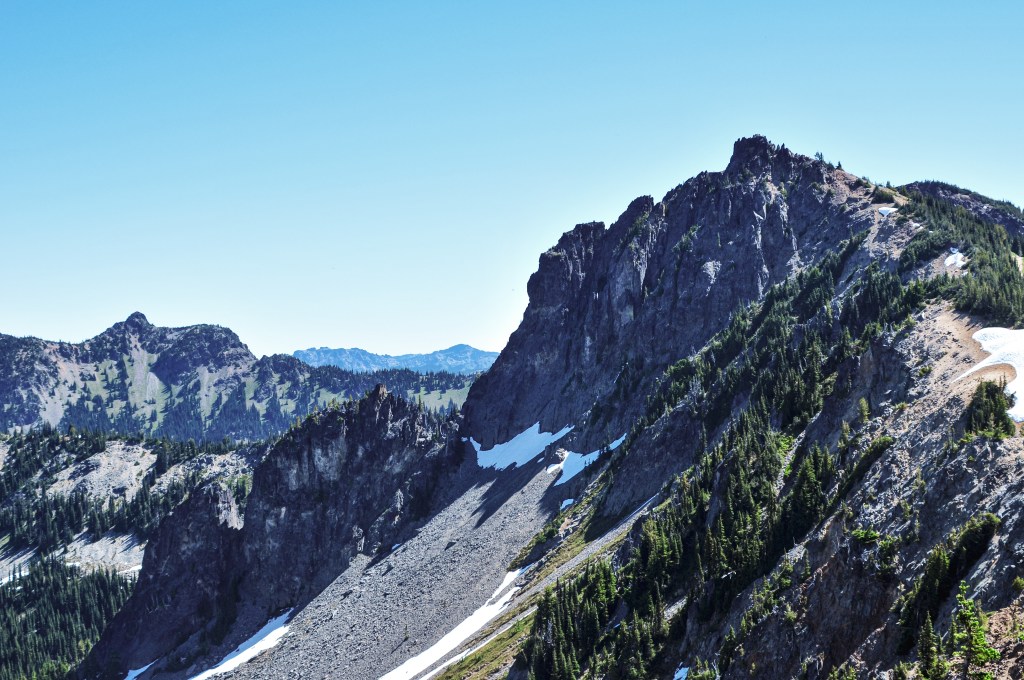
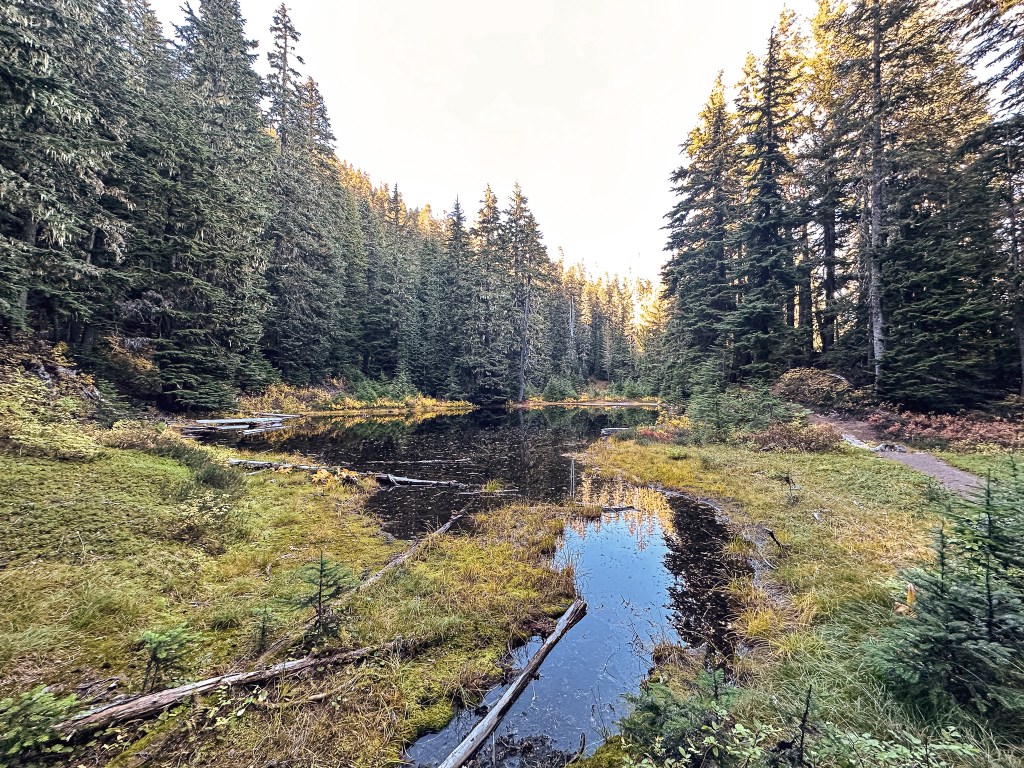
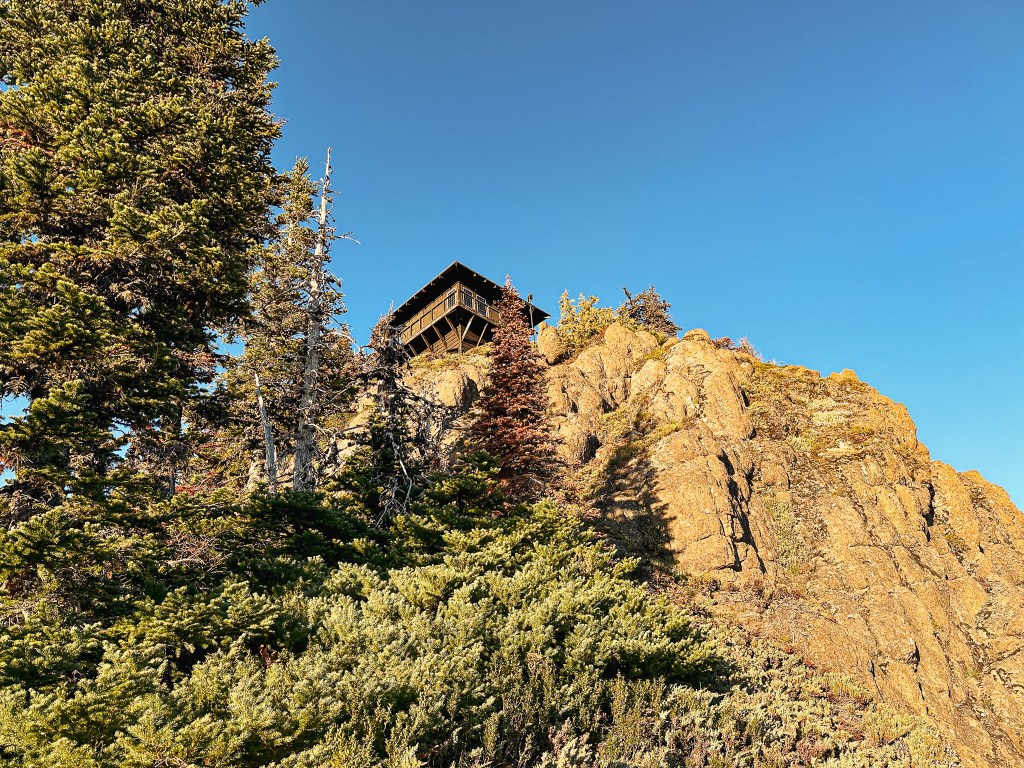
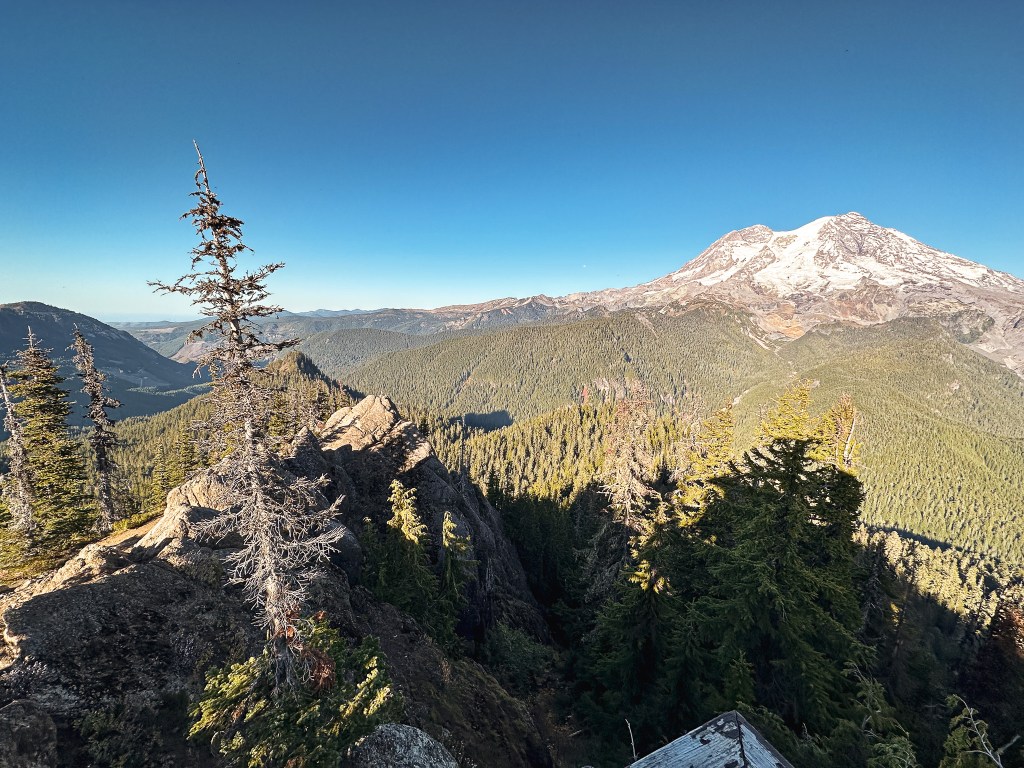
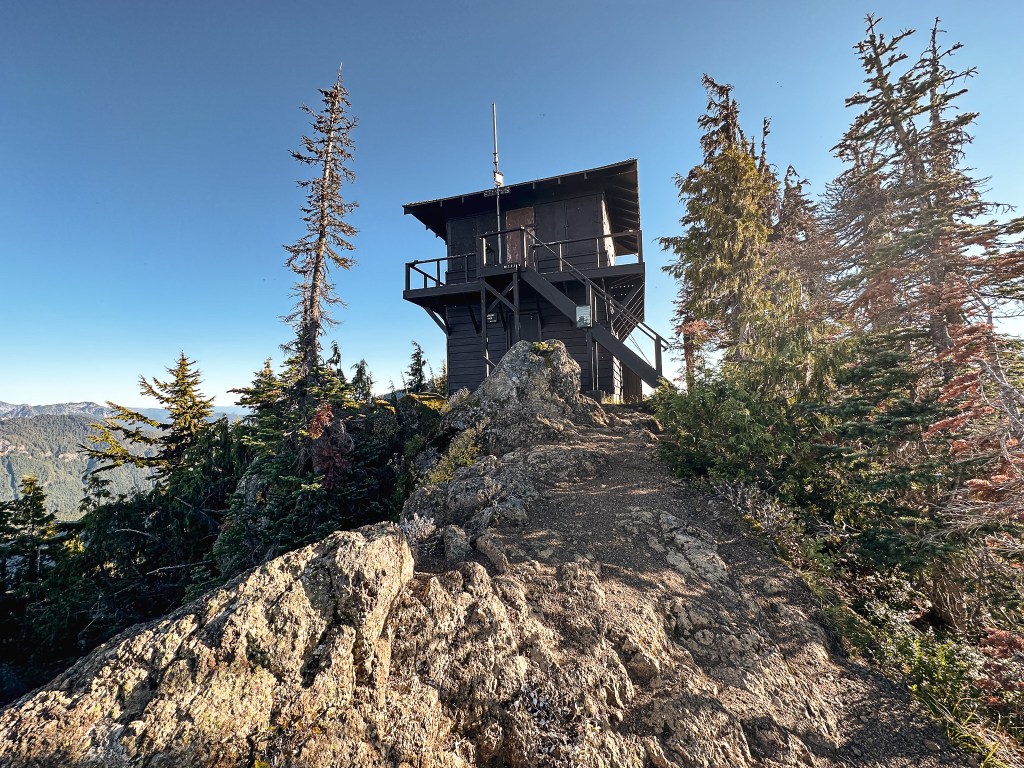
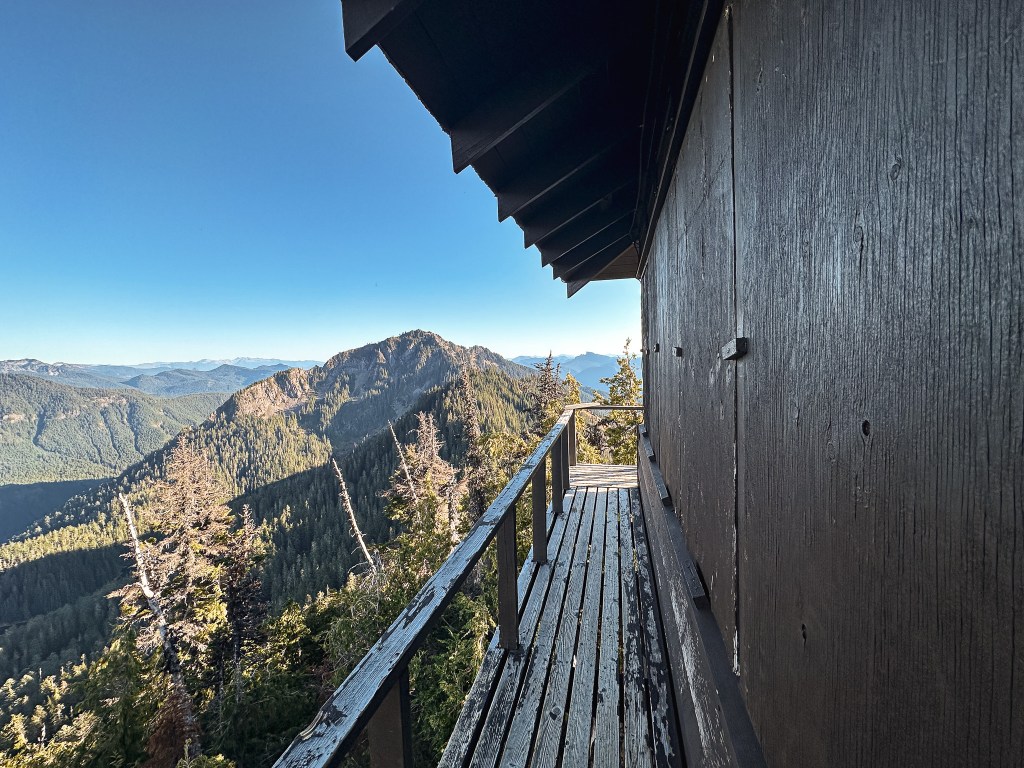
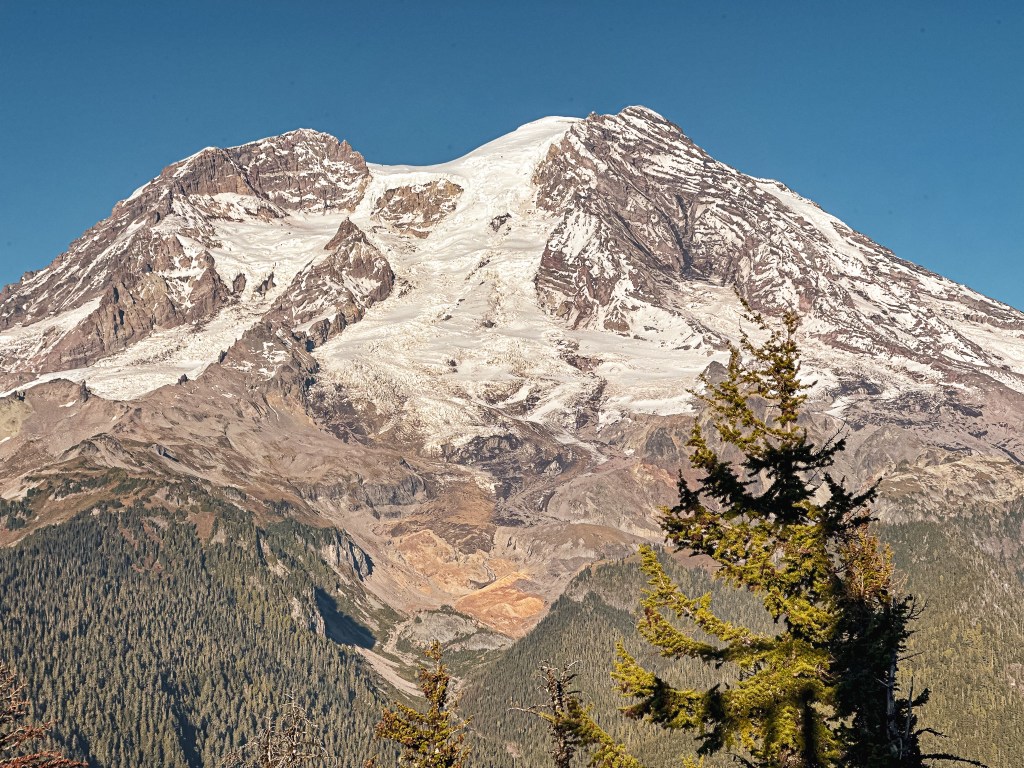
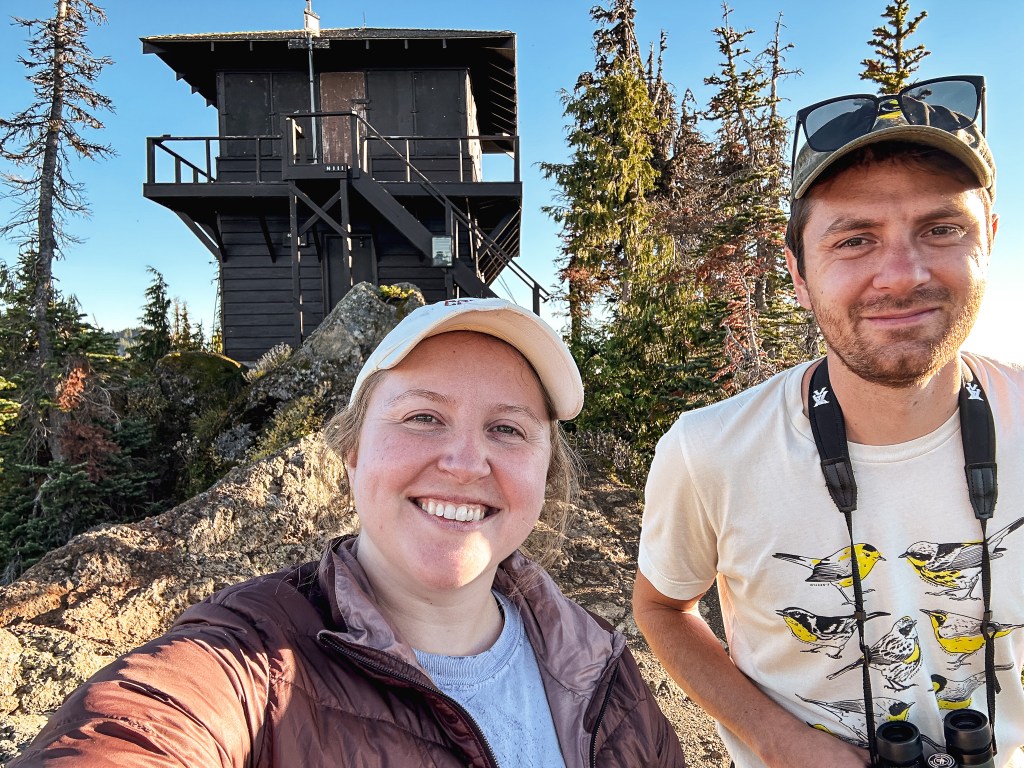
We were surprised to find all the camp spots were empty when we reached Lake George and had our pick of the five. We only passed one group of four day hikers hiking out and were left wondering where the heck everyone was? Were they all at the fire lookout? Did they hike farther into the Goat Lake Wilderness? At this point, I knew the road continued to other trails which explained the amount of cars but why were there so many bikes at the trailhead and so few people on this trail? We decided to set our speculations aside for awhile to pick our camp spot for the night. We both agreed on number 4 since it was the farthest spot to the back and offered the most amount of privacy from the other camps. This was strategic since we knew we’d be joined by at least two other groups later in the day (potentially more if people snagged the walk up permits as well). After our stake was claimed and lunch was devoured, we felt re-energized to continue our ascent to the fire lookout. You gain most of the elevation during this hike within this last 1.6 miles from Lake Georg to Gobblers Knob. We kept our loads light by leaving most of our gear in camp for the remainder of the hike. I only brought my valuables (i.e. car keys, wallet, phone) in a fanny pack, a warm puffy layer, headlamp, a 32oz Nalgene, and my trekking poles. We passed a couple of day hikers coming back from their visit to the fire lookout and asked them if anyone else was currently up there. They said they had it to themselves and were wondering where everyone else was as well (they too mentioned a full bike rack). So, the mystery continues. We were excited at the potential of having the summit to ourselves though. This section was slow going since my body was still feeling the fatigue of hiking in Glacier NP. There are not too many views to expect from the trail since it is mostly treed until you get closer to the summit. But eventually your slog ends, you round that corner, and the views open up. And what a spectacular view it is.


Per usual, the hike back down felt like a breeze in comparison to the hike up. We didn’t see anyone else while on the summit or on the hike down, but the other two groups of backpackers had finally showed up in camp. It was almost dark by the time we reached our camp again, started filtering water, and making dinner. This was partially due to us lingering on the summit longer than normal and partially due to the days getting shorter. This was our official end to the 2023 season and we felt it. We slept in a bit the next morning holding on to the last glimpses of summer. We were the last group to leave camp. Our hike out was spent forecasting where we wanted to go in 2024 and what our favorite trips were from 2023. We never did figure out the mystery of where everyone else was either because the bikes were no longer at the trailhead when we left and most of the cars were gone from the parking lot. The hike from the trailhead to the summit came out at 6.7 miles with 2,744′ in elevation gain on the Strava app. In total, it was 13.34 miles and 2,792′ in elevation. Depending on what kind of adventure you are looking for this can make for a hardy day hike or a fair backpack.


History.
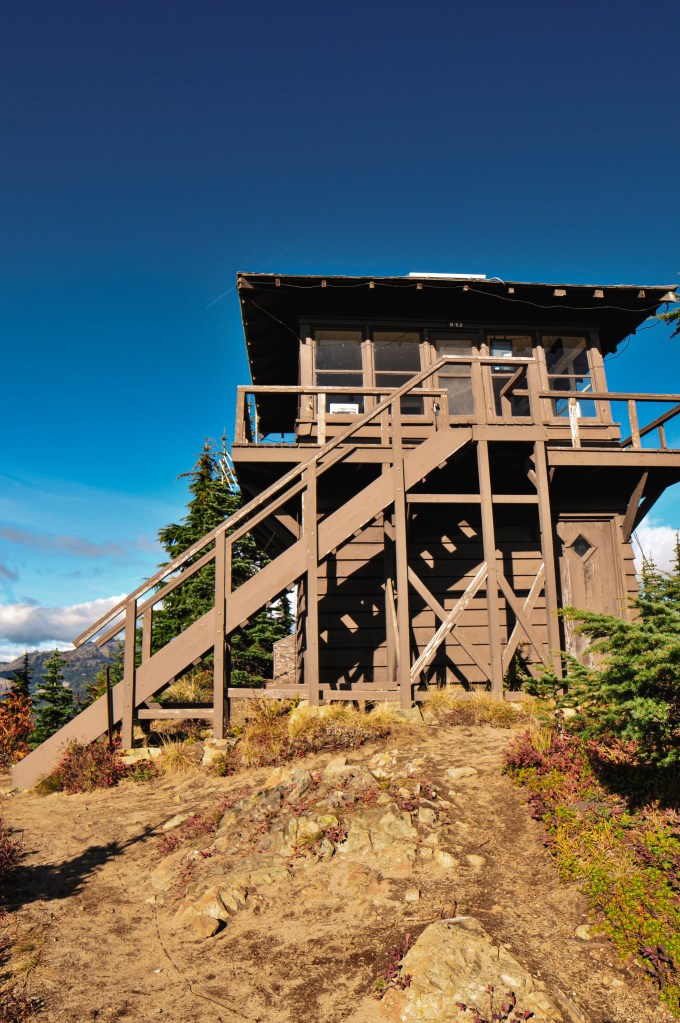
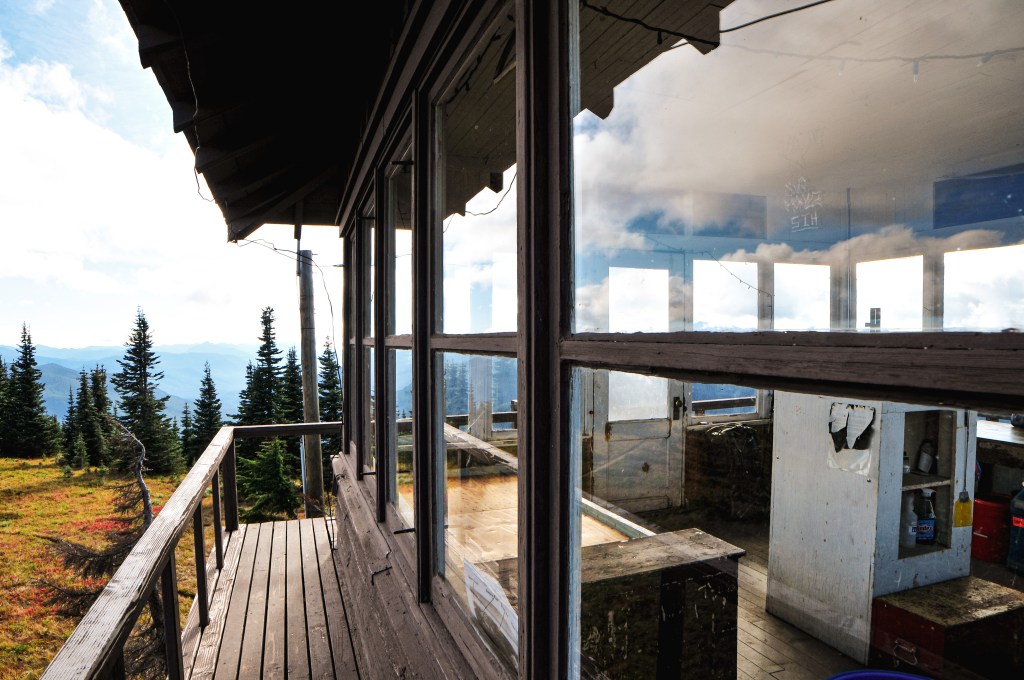
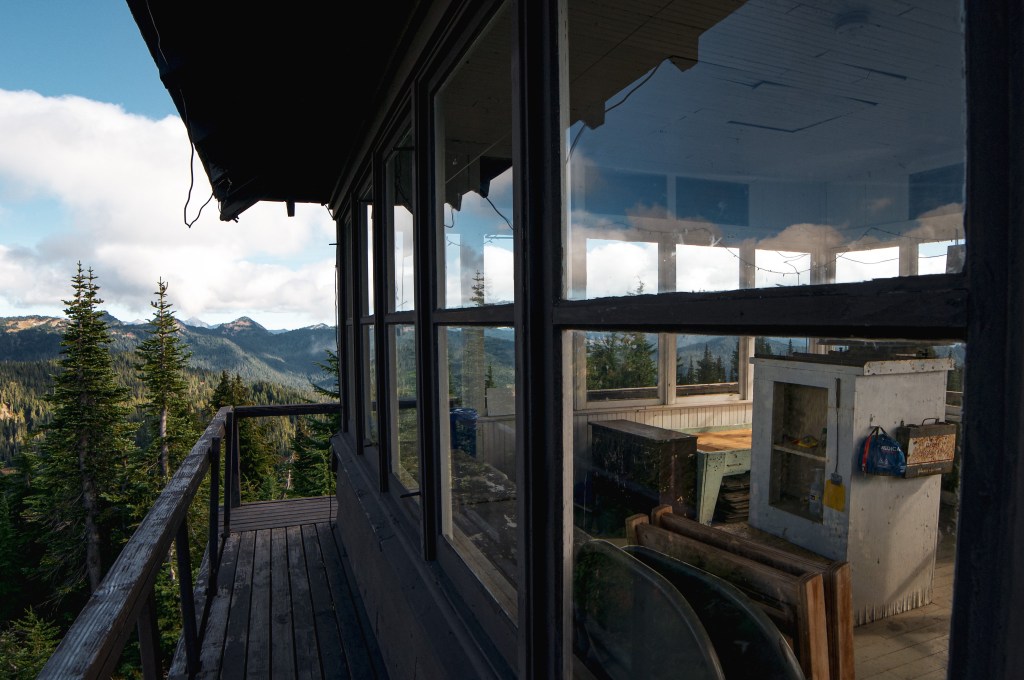
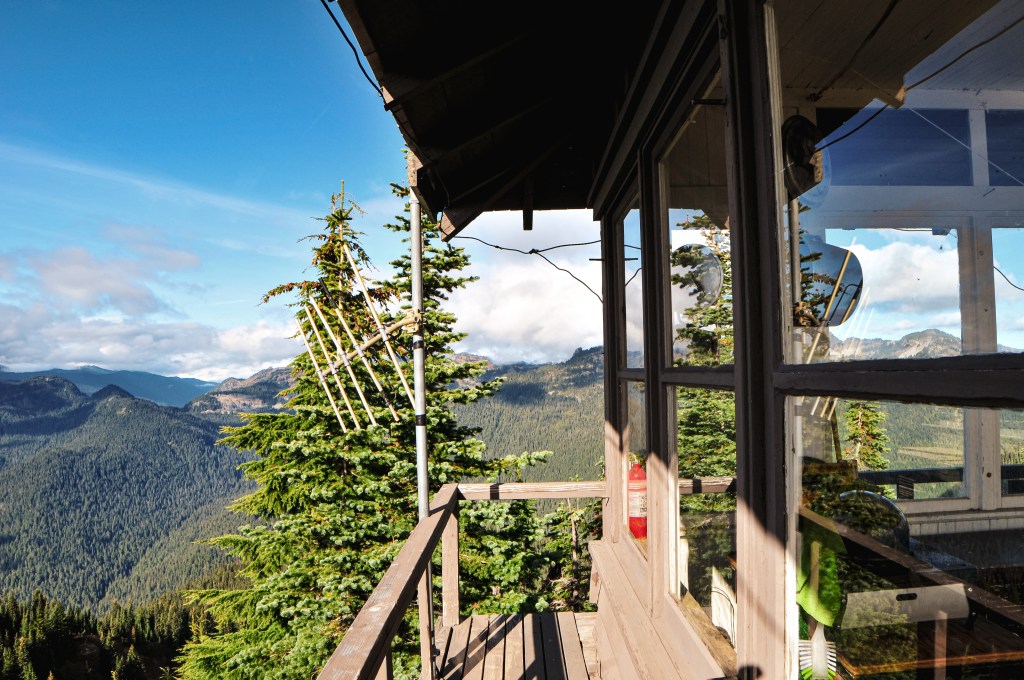
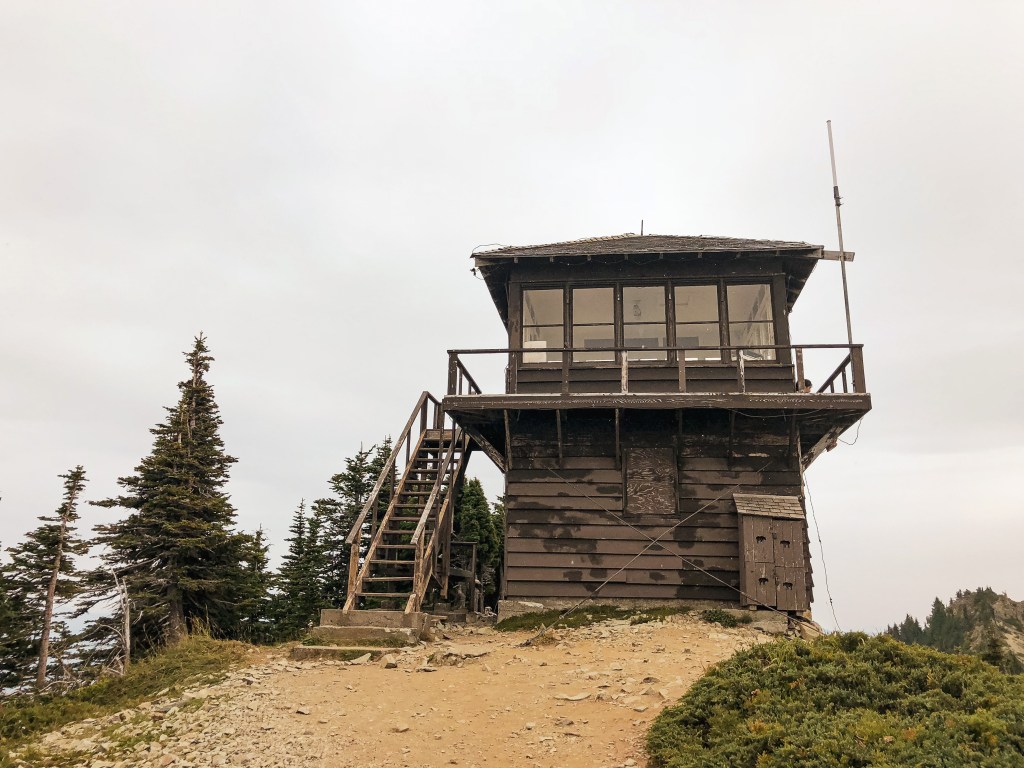
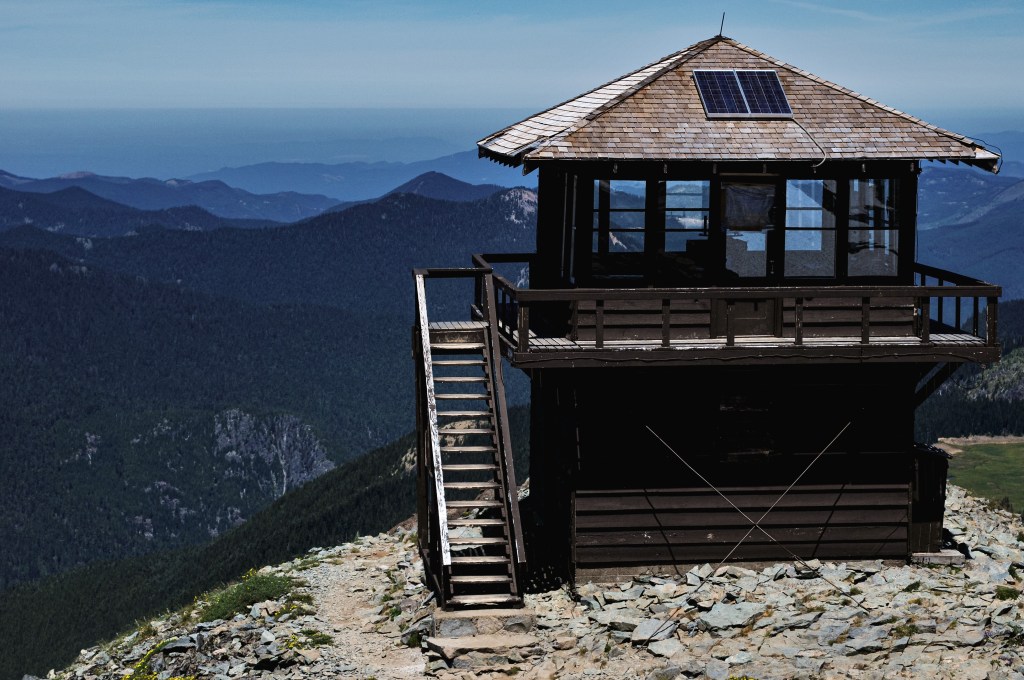
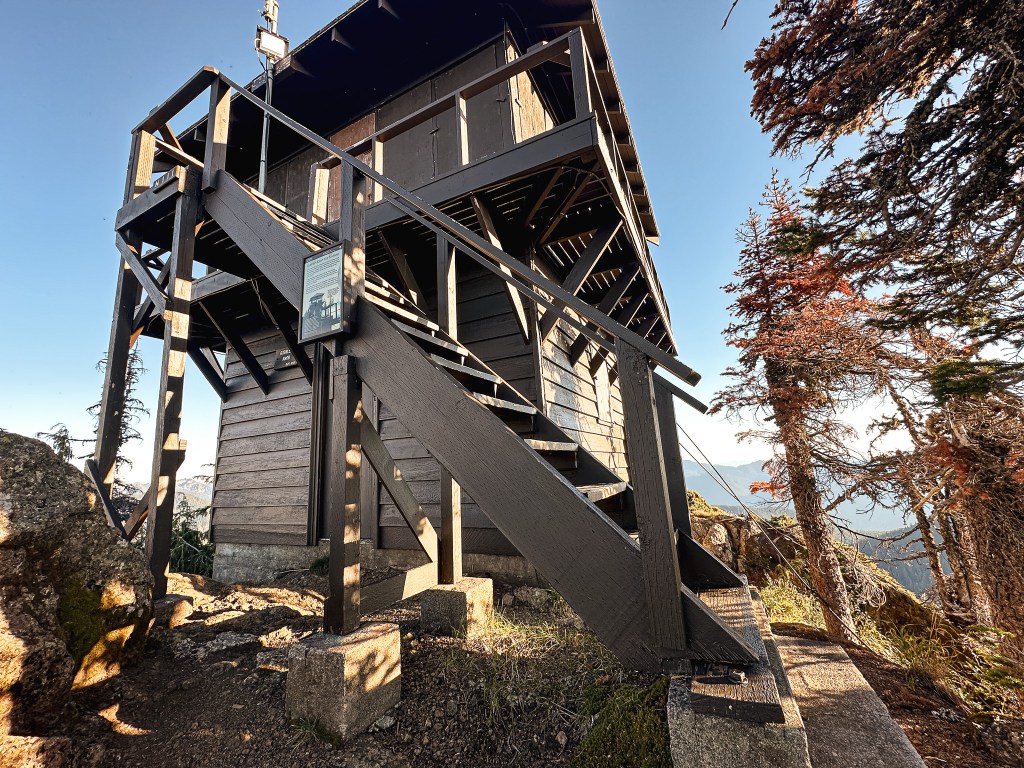
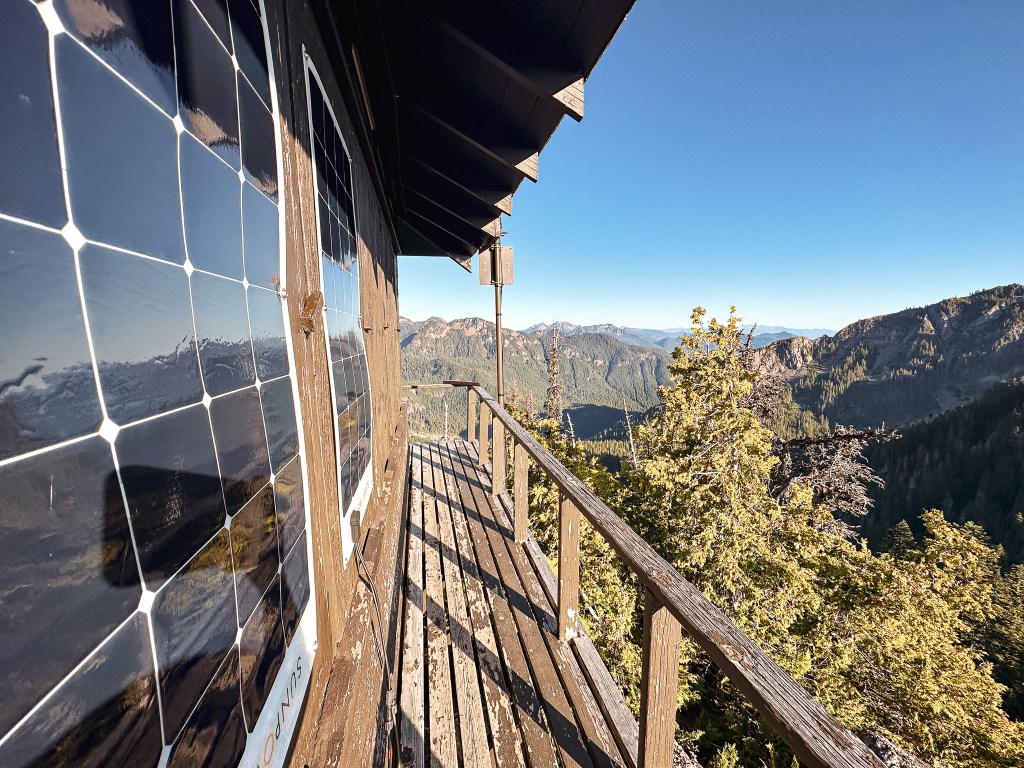
This is one of the four remaining Fire Lookouts within the Mount Rainier NP and the closest to the peak. This lookout was built in 1933 and is the same standard 2-story frame cab design that you will find within the park. It was staffed into the 1980’s but stands now as an educational site. It is also occasionally used as a standby detection or recreation site for backcountry rangers.


More Information.